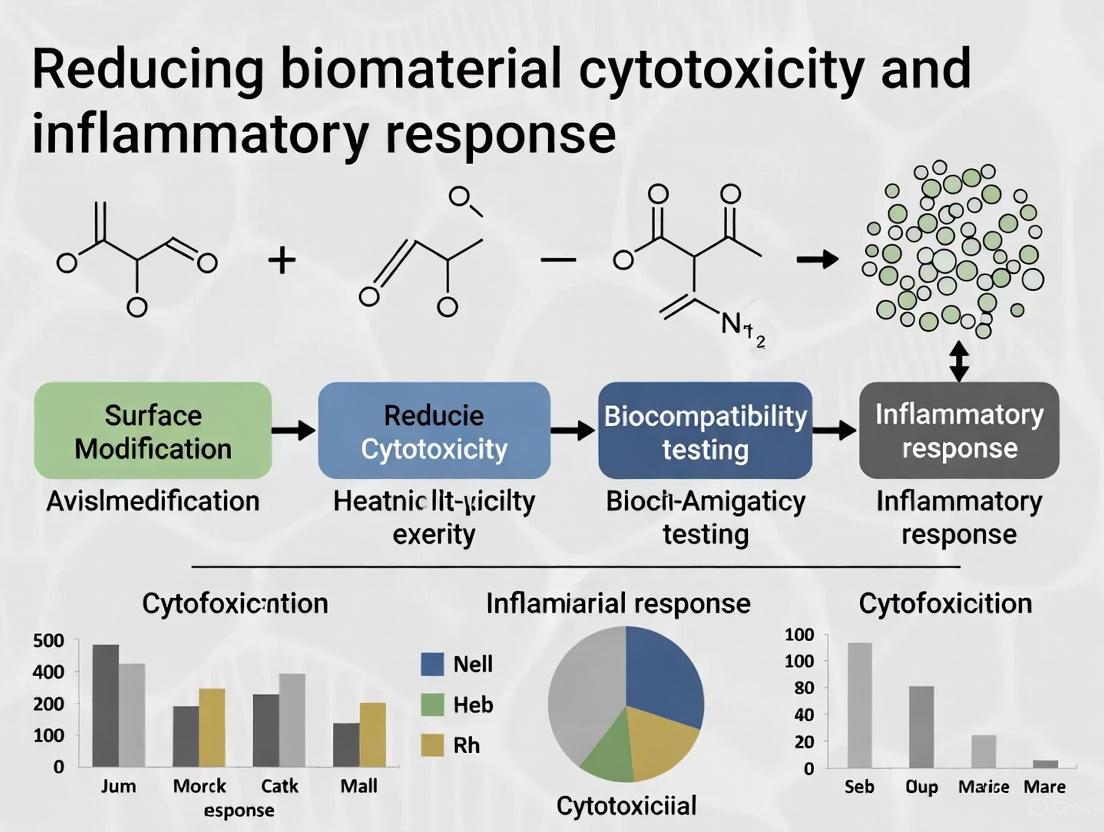
Strategic Approaches for Reducing Biomaterial Cytotoxicity and Controlling Inflammatory Response
This comprehensive review addresses the critical challenge of enhancing biomaterial biocompatibility by systematically reducing cytotoxicity and modulating inflammatory responses.
Strategic Approaches for Reducing Biomaterial Cytotoxicity and Controlling Inflammatory Response
Abstract
This comprehensive review addresses the critical challenge of enhancing biomaterial biocompatibility by systematically reducing cytotoxicity and modulating inflammatory responses. Targeting researchers, scientists, and drug development professionals, the article explores fundamental mechanisms of biomaterial-immune system interactions, standardized methodological approaches for cytotoxicity assessment, strategic optimization of material properties, and comparative validation of novel biomaterials. By integrating current research findings and established ISO standards, this resource provides a multidisciplinary framework for developing safer, more effective biomaterials that promote successful integration and minimize adverse immune reactions across medical applications.
Understanding Biomaterial-Immune System Interactions: Mechanisms of Cytotoxicity and Inflammation
FAQs: Understanding the Foreign Body Response
What is the Foreign Body Response (FBR) and why is it a critical consideration for biomaterial implants? The Foreign Body Response (FBR) is a well-described immune-mediated reaction to implanted materials, culminating in fibrosis that isolates the implant from the host tissue. This process begins with an acute inflammatory phase and transitions to a chronic fibrotic stage, which can severely compromise the function, durability, and biocompatibility of medical devices, prostheses, and tissue-engineered constructs [1] [2] [3]. For implants that require interface with surrounding tissue, such as nerve neuroprosthetics or drug-delivery devices, the resulting fibrotic capsule can disrupt signal fidelity and impede therapeutic function, often leading to device failure [4] [3].
What are the key cellular players in the progression from acute inflammation to chronic rejection? The FBR involves a coordinated sequence of cellular events:
- Neutrophils are the first responders, dominating the site within hours and attempting to phagocytose the material while releasing reactive oxygen species (ROS) and proteolytic enzymes [5] [3] [6].
- Macrophages subsequently become the predominant cell type. They attempt "frustrated phagocytosis" on large implants, releasing pro-inflammatory cytokines (e.g., TNF-α, IL-1β, IL-6) and driving the inflammatory response [5] [1] [6]. The persistent presence of the implant can lead to the fusion of macrophages into Foreign Body Giant Cells (FBGCs), a hallmark of chronic inflammation [1] [2].
- Fibroblasts are recruited and activated, leading to the deposition of a dense, collagenous fibrous capsule that walls off the implant [5] [2] [3].
How do biomaterial surface properties influence the FBR? The physicochemical properties of a biomaterial, including its surface chemistry, energy, topography, and roughness, are critical determinants of the FBR [5] [1]. Immediately upon implantation, host proteins adsorb to the material's surface, forming a provisional matrix. The composition and conformation of these adsorbed proteins are directed by the underlying surface properties and directly influence subsequent immune cell recognition, adhesion, and activation [5] [1] [3]. Smooth surfaces may result in a thin macrophage layer, while rough or textured surfaces can promote macrophage fusion into FBGCs and enhanced fibrosis [2].
Troubleshooting Guides: Common Experimental Challenges in FBR Research
Problem: Excessive Fibrous Capsule Formation Around Implant
Potential Causes and Solutions:
| Cause | Supporting Evidence | Proposed Solution |
|---|---|---|
| Macrophage adhesion and activation via integrin binding to adsorbed proteins (e.g., fibrinogen). | Macrophage adhesion through αMβ2 integrin (Mac-1) is crucial for FBR initiation. Blocking RGD ligands reduced capsule thickness by 45% in a study [4]. | Utilize surface modifications with anti-fouling polymers (e.g., PEG) or RGD-mimetic peptides to disrupt specific integrin-mediated adhesion [7]. |
| Prolonged pro-inflammatory (M1) macrophage polarization. | Classically activated M1 macrophages secrete pro-inflammatory cytokines (TNF-α, IL-1β, IL-6) that sustain inflammation and promote fibrosis [5] [6]. | Design immunomodulatory biomaterials that promote a switch to pro-healing (M2) macrophage phenotypes [5] [6]. This can be achieved through controlled release of IL-4 or IL-13. |
| Material surface triggering strong protein adsorption (e.g., of fibrinogen). | Fibrinogen is a prominent adsorbed protein that promotes inflammation after surface deposition [4]. The composition of the initial protein layer dictates the subsequent immune response [1] [3]. | Engineer low-fouling surfaces using hydrophilic coatings, zwitterionic polymers, or surfactant-based layers to minimize non-specific protein adsorption [4] [7]. |
Problem: Uncontrolled Acute Inflammation Leading to Rapid Implant Failure
Potential Causes and Solutions:
| Cause | Supporting Evidence | Proposed Solution |
|---|---|---|
| Activation of the complement system on the biomaterial surface. | Complement proteins activated upon contact with biomaterials support platelet adhesion and recruit immune cells, intensifying the initial inflammatory response [5] [1]. | Select or coat materials with known low complement-activation potential. Surface grafting of heparin or other natural regulators of complement activation can be effective [1]. |
| Neutrophil activation and release of degradative agents. | Neutrophils attempt to degrade biomaterials through phagocytosis, proteolytic enzymes, and ROS, which can cause surface cracking and erosion of susceptible materials [5] [3]. | Modulate the early inflammatory response by incorporating anti-inflammatory agents (e.g., dexamethasone) into the biomaterial for localized, controlled release post-implantation [4]. |
| Release of damage-associated molecular patterns (DAMPs) from injured tissue. | DAMPs are recognized by pattern recognition receptors (PRRs) on macrophages and dendritic cells, initiating and propagating sterile inflammation [5]. | Minimize surgical trauma during implantation. Consider biomaterials with self-healing properties to mitigate ongoing damage at the tissue interface [7]. |
Key Experimental Protocols for Evaluating FBR
Protocol 1: Histological Evaluation of the Fibrotic Capsule
Objective: To quantify the extent and characterize the nature of the fibrotic capsule formation around an implanted biomaterial.
Methodology:
- Implantation: Surgically implant the biomaterial of interest (e.g., a polymer disc) into the subcutaneous space of a rodent model, with a sham surgery or a well-characterized material (e.g., PDMS) as a control [8].
- Explanation: After a predetermined period (e.g., 2 weeks for acute inflammation, 4 weeks for chronic FBR), explant the biomaterial with the surrounding tissue [1] [8].
- Fixation and Sectioning: Fix the explanted tissue in 4% paraformaldehyde, process, and embed in paraffin. Section the tissue into 5-10 µm thick slices.
- Staining: Perform histological staining on the sections:
- Immunohistochemistry (IHC): Use antibody staining to identify specific cell types and activation states:
Protocol 2: Flow Cytometric Analysis of Peri-Implant Immune Cells
Objective: To quantitatively analyze the composition and phenotype of immune cells infiltrating the tissue surrounding the implant.
Methodology:
- Tissue Harvest: At the study endpoint, carefully dissect the tissue surrounding the implant.
- Single-Cell Suspension: Digest the tissue using a combination of collagenase and DNAse to create a single-cell suspension. Pass the suspension through a cell strainer to remove debris.
- Cell Staining: Incubate the cells with fluorescently labeled antibodies against surface and intracellular markers:
- Lineage Markers: CD45 (leukocytes), CD11b (myeloid cells), Ly6G (neutrophils), Ly6C (monocytes), F4/80 (macrophages), CD3 (T-cells), CD19 (B-cells).
- Phenotype Markers: CD86 (M1 macrophage), CD206 (M2 macrophage), MHC-II (antigen presentation).
- Data Acquisition and Analysis: Acquire data on a flow cytometer. Use fluorescence-minus-one (FMO) controls for gating. Analyze the data to determine the percentages and absolute numbers of different immune cell populations and their activation states in the test group versus controls [4].
Protocol 3: In Vivo Evaluation of a Novel Anti-Fibrotic Elastomer
Objective: To assess the long-term FBR resistance of a novel elastomer in a pre-clinical model.
Methodology (based on [8]):
- Material Preparation: Fabricate discs of the test elastomer (e.g., EVADE polymer H90) and a control material (e.g., PDMS) with matched stiffness, size, and surface topology.
- Animal Implantation: Implant all test and control samples subcutaneously in the same animal (e.g., C57BL/6 mouse) to minimize inter-animal variability.
- Long-Term Monitoring: Explain the implants at extended time points (e.g., 1 month, 1 year) to assess chronic FBR.
- Analysis:
- Histology: Measure capsule thickness via Masson's Trichrome and H&E staining.
- Protein Analysis: Use proteome profiler antibody arrays on tissue lysates from the implant site to quantify a wide panel of inflammation-related cytokines and chemokines (e.g., S100A8/A9, TNF-α, IL-6) [8].
- Functional Test: For applicable devices (e.g., insulin catheters), compare the in vivo performance and longevity of devices made from the test material versus commercial controls.
Signaling Pathways in the Foreign Body Response
Pathway to Foreign Body Response and Potential Modulation Points This diagram illustrates the primary signaling pathways driving the Foreign Body Response (FBR) from acute inflammation to chronic fibrosis, alongside key immunomodulatory strategies. The core pathway (solid arrows) begins with protein adsorption, leading to neutrophil and monocyte recruitment, M1 macrophage polarization, foreign body giant cell (FBGC) formation, fibroblast activation, and最终ly, fibrous encapsulation [5] [4] [6]. Critical signaling events (dashed lines) include Pattern Recognition Receptor (PRR) and integrin activation, and the action of cytokines like TNF-α and TGF-β [5] [6]. The pathway highlights potential intervention points (green), such as promoting a switch to M2 macrophages via IL-4/IL-13 to foster tissue integration instead of fibrosis [5] [6], and targeting specific mediators like S100A8/A9 alarmins to attenuate fibrosis [8].
The Scientist's Toolkit: Research Reagent Solutions
Table: Essential Reagents for Investigating the Foreign Body Response
| Research Reagent | Function / Application in FBR Research | Key Considerations |
|---|---|---|
| Clodronate Liposomes | Selective depletion of phagocytic cells (macrophages) in vivo. Used to establish the causal role of macrophages in FBR [4]. | Validated studies show macrophage depletion prevents FBGC formation, neovascularization, and fibrosis [4]. |
| Recombinant Cytokines (IL-4, IL-13) | To polarize macrophages towards an M2 (pro-healing) phenotype in vitro or when released from biomaterials in vivo [5] [6]. | IL-4 and IL-13 released from mast cells are significant in the development of the FBR [1]. |
| Anti-Integrin Antibodies (e.g., anti-αMβ2) | To block macrophage adhesion to adsorbed proteins (e.g., fibrinogen, fibronectin) on biomaterial surfaces [4] [3]. | Studies in knock-out mice show that blocking αMβ2 integrin or its RGD ligands leads to a significant reduction in fibrotic capsule thickness [4]. |
| S100A8/A9 Inhibitors | To investigate the role of these alarmins in the fibrotic cascade. Useful for mechanistic studies and as a potential therapeutic target [8]. | Recent research indicates that EVADE elastomers significantly reduce S100A8/A9 expression, and its inhibition/knockout attenuates fibrosis in mice [8]. |
| TGF-β Neutralizing Antibodies | To inhibit the pro-fibrotic effects of Transforming Growth Factor-beta (TGF-β), a key cytokine in fibroblast activation and ECM production [4] [6]. | TGF-β enhances the transformation of fibroblasts to myofibroblasts and promotes extracellular matrix formation [4]. |
| Fluorescently Labeled Antibodies for Flow Cytometry | For quantitative analysis of immune cell populations (e.g., M1 vs M2 macrophages, neutrophils, T-cells, B-cells) from explanted tissues. | Panels typically include CD45, CD11b, F4/80, Ly6G/C, CD86, CD206, CD3, and CD19 [4] [6]. |
FAQs and Troubleshooting Guide
Q1: My in vitro macrophage polarization is inconsistent. What are the key factors to check?
A: Inconsistent polarization often stems from the purity of differentiation agents and the developmental origin of your cells. Ensure your differentiation protocol uses high-purity reagents. Monocyte-derived macrophages (from bone marrow) are typically more inflammatory-prone, while embryonically derived tissue-resident macrophages are often more reparative. Check your stimulating cytokines: use IFN-γ and LPS for M1, and IL-4 or IL-13 for M2a polarization. Always validate polarization success by checking multiple surface markers (e.g., CD80/86 for M1; CD206/163 for M2) rather than a single one, as macrophages exist on a spectrum [9] [10] [11].
Q2: My biomaterial cytotoxicity tests show conflicting results between different viability assays. How should I proceed?
A: Discrepancies are common, as different assays measure different aspects of cell health. For particulate biomaterials (e.g., bioactive glasses), avoid assays prone to interference. Fluorescence microscopy (FM) can be affected by material autofluorescence and sampling bias, while flow cytometry (FCM) provides higher throughput and better distinction of death mechanisms (apoptosis vs. necrosis). A recent study showed a strong correlation (r=0.94) between FM and FCM for Bioglass 45S5 cytotoxicity, but FCM offered superior precision under high cytotoxic stress, identifying early and late apoptotic populations. We recommend using FCM for quantitative, high-resolution data, especially for particulate systems [12].
Q3: How can I determine if a biomaterial is inducing a pro-inflammatory (M1) response in vivo?
A: You can assess the M1/M2 balance through several methods. Immunohistochemistry/flow cytometry of tissue surrounding the implant can quantify specific cell surface markers. Look for elevated levels of M1 markers (CD80, CD86, iNOS) versus M2 markers (CD206, CD163, Arg1). Furthermore, analyze the local cytokine milieu; high levels of TNF-α, IL-6, and IL-12 indicate an M1-skewed response. For a systemic readout, serum C-reactive protein (CRP) is a classic, clinically used marker of systemic inflammation [9] [13] [10].
Q4: My animal model shows persistent inflammation at the implant site. What is a likely cellular mechanism?
A: Persistent inflammation often indicates a failure in the resolution phase, frequently driven by an imbalance in macrophage polarization. In a healthy response, pro-inflammatory M1 macrophages that initially infiltrate the site transition to anti-inflammatory, pro-healing M2 phenotypes. Chronic inflammation occurs when M1 macrophages persist and/or the transition to M2 macrophages is disrupted. This can be caused by continuous pro-inflammatory signaling from the biomaterial itself (e.g., excessive ion release, surface properties) or the ongoing presence of necrotic cells, which release DAMPs that perpetuate M1 activation [14] [9].
Key Signaling Pathways in Macrophage Polarization
The following diagram summarizes the core signaling pathways that regulate macrophage polarization, a central process in the inflammatory response to biomaterials.
Diagram 1: Key inflammatory signaling pathways driving macrophage polarization. M1 polarization is predominantly activated by LPS and IFN-γ, engaging NF-κB, MAPK, JAK-STAT1, and inflammasome pathways. M2 polarization is primarily induced by IL-4/IL-13 via JAK-STAT6 and PI3K/AKT signaling [10] [11].
Quantitative Data on Macrophage Markers and Cytotoxicity
Table 1: Key Surface Markers and Secreted Factors for Macrophage Polarization States
| Polarization State | Inducing Signals | Key Surface Markers | Characteristic Secreted Factors |
|---|---|---|---|
| M1 (Pro-inflammatory) | LPS, IFN-γ, TNF-α [9] [10] | CD80, CD86, TLR-4, MHC-II [9] [10] | TNF-α, IL-6, IL-12, IL-1β, iNOS, ROS [9] [10] [11] |
| M2a (Wound Healing) | IL-4, IL-13 [9] [10] | CD206, CD209, MHC-II, Arg1 [9] [10] | IL-10, TGF-β, IGF, CCL17, CCL22 [9] [10] |
| M2b (Immunoregulatory) | Immune complexes, LPS, IL-1β [9] | CD86, MHC-II [9] [10] | IL-10, IL-1, IL-6, TNF-α, CCL1 [9] |
| M2c (Acquisition) | IL-10, TGF-β1, Glucocorticoids [9] [10] | CD163, CCR2, TLR1/8 [9] | IL-10, TGF-β, MMPs, CCL18 [9] [10] |
| M2d (Pro-angiogenic) | TLR ligands, IL-10, Adenosine [9] [10] | (Expresses VEGF, IL-10) [10] | VEGF, IL-10 [9] [10] |
Table 2: Comparison of Cell Viability Assessment Methods for Biomaterial Cytotoxicity
| Method | Principle | Key Advantages | Key Limitations | Example: Viability with <38μm BG [12] |
|---|---|---|---|---|
| Flow Cytometry (FCM) | Multi-parametric staining and laser-based detection of single cells in suspension [12]. | High-throughput, quantitative, distinguishes viability states (viable, apoptotic, necrotic) [12]. | Requires cell detachment; access to specialized instrument [12]. | 0.2% at 3h; 0.7% at 72h |
| Fluorescence Microscopy (FM) | FDA/PI staining and visual counting of live/dead cells [12]. | Direct imaging of cells, accessible equipment [12]. | Lower throughput, prone to material autofluorescence, subjective counting [12]. | 9% at 3h; 10% at 72h |
| MTT Assay | Mitochondrial dehydrogenase converts yellow MTT to purple formazan [15]. | User-friendly, rapid, cost-effective, good for screening [15]. | Insoluble formazan requires solvent; does not distinguish apoptosis/necrosis [15]. | N/A in provided study |
| ATP Assay (Luminometric) | Measures ATP levels via luciferase reaction; ATP = indicator of viability [15]. | Highly sensitive, fast, stable signal [15]. | Requires specific reagent; cost per sample [15]. | N/A in provided study |
Detailed Experimental Protocols
Protocol 1: Assessing Biomaterial Cytotoxicity Using Flow Cytometry
This protocol is optimized for evaluating the cytotoxicity of particulate biomaterials, such as bioactive glasses, on adherent cell lines.
- Cell Seeding and Treatment: Seed osteoblast-like cells (e.g., SAOS-2) in standard culture plates and allow them to adhere overnight. Treat cells with your biomaterial (e.g., BG particles) at varying concentrations (e.g., 25, 50, 100 mg/mL) and particle sizes for defined periods (e.g., 3h and 72h) [12].
- Cell Harvesting and Staining: After incubation, harvest cells using a gentle method like enzymatic (trypsin) or non-enzymatic dissociation to create a single-cell suspension. Wash cells with PBS.
- Multiparametric Staining: Resuspend the cell pellet in a staining solution containing a cocktail of fluorescent probes. A recommended combination includes:
- Hoechst: Labels all nucleated cells.
- DiIC1: Labels viable cells based on mitochondrial membrane potential.
- Annexin V-FITC: Binds to phosphatidylserine (PS) exposed on the surface of apoptotic cells.
- Propidium Iodide (PI): Enters cells with compromised membranes, labeling necrotic cells.
- Incubate according to manufacturer's instructions, then wash and resuspend in buffer [12].
- Flow Cytometry Acquisition: Analyze the stained cell suspension on a flow cytometer. Collect a statistically significant number of events (e.g., >10,000 cells per sample). Use unstained and single-stained controls to set up compensation and gating strategies.
- Data Analysis: Identify the cell population based on forward and side scatter. Use the fluorescence channels to distinguish subpopulations:
- Viable cells: Hoechst⁺, DiIC1⁺, Annexin V⁻, PI⁻
- Early Apoptotic: Hoechst⁺, Annexin V⁺, PI⁻
- Late Apoptotic/Necrotic: Hoechst⁺, Annexin V⁺, PI⁺
- Necrotic: Hoechst⁺, Annexin V⁻, PI⁺ Calculate the percentage of viable cells for each condition [12].
Protocol 2: In Vitro Macrophage Polarization and Phenotype Validation
This protocol describes how to generate and validate human M1 and M2 macrophages from monocytic precursors.
- Monocyte Isolation and Macrophage Differentiation: Isolate human peripheral blood mononuclear cells (PBMCs) from fresh blood or buffy coats by density gradient centrifugation. Isolate CD14⁺ monocytes using magnetic-activated cell sorting (MACS). Differentiate monocytes into macrophages (M0) by culturing in RPMI-1640 medium supplemented with 10% FBS and 50 ng/mL Macrophage Colony-Stimulating Factor (M-CSF) for 5-7 days [10].
- Polarization Induction: After differentiation, polarize the M0 macrophages.
- Phenotype Validation:
- Flow Cytometry: Harvest polarized macrophages and stain with fluorescently conjugated antibodies against M1 markers (e.g., CD80, CD86) and M2 markers (e.g., CD206, CD163). Analyze via flow cytometry to confirm a shift in surface marker expression [10].
- Gene Expression Analysis (qRT-PCR): Isolate RNA and perform qRT-PCR to measure the expression of M1-associated genes (e.g., TNF, IL6, IL12B, NOS2) and M2-associated genes (e.g., CD206, ARG1, IL10, TGFB) [9].
- Cytokine Secretion (ELISA): Collect cell culture supernatants and measure the secretion of signature cytokines, such as TNF-α and IL-12 for M1, and IL-10 and TGF-β for M2, using enzyme-linked immunosorbent assays (ELISA) [10].
The Scientist's Toolkit: Essential Research Reagents
Table 3: Key Reagents for Studying Macrophage Polarization and Cytotoxicity
| Reagent / Material | Function in Research | Brief Explanation / Application |
|---|---|---|
| Lipopolysaccharide (LPS) | Induces classical M1 macrophage polarization [9] [10]. | A component of gram-negative bacterial cell walls that activates TLR4, triggering NF-κB and MAPK signaling pathways [11]. |
| Recombinant IL-4 | Induces alternative M2a macrophage polarization [9] [10]. | Binds to the IL-4 receptor, activating the JAK-STAT6 signaling pathway, leading to an anti-inflammatory, pro-fibrotic phenotype [10] [11]. |
| M-CSF | Differentiates monocytes into baseline M0 macrophages [10]. | A growth factor essential for the survival, proliferation, and differentiation of mononuclear phagocyte lineages [10]. |
| Antibodies (CD80, CD86, CD206, CD163) | Validation of macrophage polarization states via flow cytometry [9] [10]. | Fluorochrome-conjugated antibodies against specific surface markers allow for the identification and quantification of M1 (CD80/86) and M2 (CD206/163) populations [9]. |
| Annexin V / PI Staining Kit | Distinguishes viable, apoptotic, and necrotic cell populations [12]. | A cornerstone of flow cytometry-based viability assays. Annexin V binds to PS on apoptotic cells, while PI stains DNA in necrotic cells with leaky membranes [12]. |
| Bioactive Glass 45S5 | Model particulate biomaterial for cytotoxicity studies [12]. | A biodegradable glass that releases ions, increasing local pH, used to generate a controlled gradient of cytotoxic stress for method validation [12]. |
FAQs and Troubleshooting Guide
FAQ 1: Why does my biomaterial induce high levels of IL-1β in macrophage cultures, and how can I mitigate this?
A high IL-1β release is a classic sign of NLRP3 inflammasome activation. This complex is assembled in response to various "danger" signals, leading to the cleavage and activation of caspase-1, which then processes pro-IL-1β into its mature, secreted form [16]. This process is often coupled with pyroptosis, an inflammatory form of cell death [16].
Troubleshooting Steps:
- Characterize the Priming Signal: Ensure your experimental model includes the necessary "priming" signal (e.g., LPS from TLR4 activation) to induce the expression of pro-IL-1β and NLRP3 itself via the NF-κB pathway [16].
- Identify the Activator: Analyze your biomaterial's properties. Crystalline structures, particulate matter, or the release of DAMPs like ATP from damaged cells are common activators of the NLRP3 inflammasome [16].
- Confirm with Inhibitors: Use a specific caspase-1 inhibitor (e.g., VX-765) or an NLRP3 inhibitor (e.g., MCC950) in your assays. A significant reduction in IL-1β levels confirms the involvement of this pathway.
FAQ 2: My assay shows increased ROS in cells exposed to the biomaterial. Is this the cause of the inflammatory response?
Yes, oxidative stress is a potent activator of both the priming and activation stages of inflammation [17] [18] [19]. ROS can activate the NF-κB pathway, increasing pro-inflammatory cytokine transcription [19]. Furthermore, ROS, particularly mitochondrial ROS (mtROS), are a well-established trigger for NLRP3 inflammasome assembly [17].
Troubleshooting Steps:
- Measure Specific ROS: Use fluorescent probes like MitoSOX Red to specifically detect mtROS, which is more directly linked to NLRP3 activation.
- Modulate ROS Levels: Treat cells with broad-spectrum antioxidants (e.g., N-acetylcysteine, NAC) or mitochondrial-targeted antioxidants (e.g., MitoTEMPO). If inflammation is reduced, it confirms a redox-mediated mechanism.
- Check the Nrf2 Pathway: Assess the activation of the Nrf2 antioxidant response. A dysfunctional Nrf2 pathway can exacerbate oxidative stress and inflammation. You can use Nrf2 inducers (e.g., sulforaphane) to see if it dampens the inflammatory response [18] [19].
FAQ 3: How can I determine if the observed cytotoxicity is due to apoptosis or pyroptosis?
Apoptosis is generally non-inflammatory, while pyroptosis is highly inflammatory and releases IL-1β. Distinguishing between them is critical.
Troubleshooting Steps:
- Analyze Cell Morphology: Pyroptosis features cell swelling and membrane rupture, while apoptosis involves cell shrinkage and the formation of apoptotic bodies.
- Detect Gasdermin D (GSDMD) Cleavage: Pyroptosis is executed by caspase-1-mediated cleavage of GSDMD. Its N-terminal fragments form pores in the plasma membrane. Detect cleaved GSDMD via western blot as a specific marker for pyroptosis [16].
- Measure LDH Release: Both apoptosis (in later stages) and pyroptosis result in loss of membrane integrity. However, a rapid and massive LDH release is more characteristic of pyroptosis. Correlate LDH release with IL-1β secretion.
FAQ 4: The anti-inflammatory performance of my HA-based hydrogel is inconsistent. What could be the reason?
The bioactivity of Hyaluronic Acid (HA) is highly dependent on its molecular weight [20]. High Molecular Weight HA (HMW-HA) is anti-inflammatory and immunosuppressive, while Low Molecular Weight HA (LMW-HA) fragments are pro-inflammatory and can activate TLRs and the NLRP3 inflammasome [20].
Troubleshooting Steps:
- Characterize HA Molecular Weight: Use techniques like size-exclusion chromatography to verify the molecular weight distribution of your HA material. Inconsistencies may stem from batch-to-b variation or degradation during processing.
- Monitor for Degradation: The inflammatory microenvironment is rich in ROS and hyaluronidases, which can degrade HMW-HA into LMW-HA, potentially turning your anti-inflammatory scaffold into a pro-inflammatory one over time [20].
Experimental Protocols for Key Assays
Protocol 1: Assessing NLRP3 Inflammasome Activation in Macrophages
Objective: To determine if a biomaterial activates the NLRP3 inflammasome, leading to caspase-1-dependent IL-1β secretion and pyroptosis.
Materials:
- Primary bone marrow-derived macrophages (BMDMs) or cell line (e.g., J774A.1, THP-1 differentiated with PMA).
- Test biomaterial.
- LPS (for priming).
- NLRP3 inhibitor (e.g., MCC950, 10 μM) and caspase-1 inhibitor (e.g, VX-765, 20 μM).
- ATP (5 mM, as a positive control for NLRP3 activation).
- ELISA kits for IL-1β and IL-18.
- Antibodies for cleaved caspase-1 (p20) and cleaved GSDMD.
- LDH cytotoxicity assay kit.
- Propidium Iodide (PI) for flow cytometry.
Method:
- Priming: Seed macrophages and pre-treat with LPS (e.g., 100 ng/mL) for 3-4 hours to induce pro-IL-1β and NLRP3 expression.
- Activation: Replace medium and stimulate cells with:
- Negative control: Medium only.
- Positive control: ATP (for 30-60 minutes).
- Experimental: Co-incubate with the test biomaterial for 6-24 hours.
- Inhibition groups: Pre-treat with MCC950 or VX-765 for 1 hour before biomaterial addition.
- Sample Collection: Collect cell culture supernatants and cell lysates.
- Analysis:
- Cytokines: Measure mature IL-1β and IL-18 in supernatant by ELISA.
- Cell Death: Quantify LDH release and perform PI staining followed by flow cytometry.
- Western Blot: Analyze supernatants (for secreted proteins) and lysates for cleaved caspase-1 (p20) and cleaved GSDMD.
Protocol 2: Evaluating Intracellular ROS and mtROS
Objective: To quantify general oxidative stress and specifically mitochondrial ROS production induced by a biomaterial.
Materials:
- Macrophages or other relevant cell types.
- Test biomaterial.
- H₂DCFDA (general ROS probe).
- MitoSOX Red (mtROS-specific probe).
- Flow cytometer or fluorescence microplate reader.
- Antioxidants (e.g., NAC 5 mM, MitoTEMPO 100 μM).
Method:
- Cell Seeding and Treatment: Seed cells and treat with the biomaterial in the presence or absence of antioxidants.
- Staining:
- General ROS: Load cells with H₂DCFDA (10 μM) for 30 minutes at 37°C. Replace with fresh medium and read fluorescence (Ex/Em: 488/525 nm).
- mtROS: Load cells with MitoSOX Red (5 μM) for 30 minutes at 37°C. Protect from light. Wash and analyze fluorescence (Ex/Em: 510/580 nm).
- Analysis: Use flow cytometry for quantitative population analysis or a fluorescence plate reader for kinetic or endpoint measurements. Report results as fold change relative to the untreated control.
Table 1: Key Inflammasome Components and Their Roles
| Component | Function | Experimental Detection Method |
|---|---|---|
| NLRP3 | Senses DAMPs/PAMPs and nucleates inflammasome assembly. | Western Blot (lysate), Immunofluorescence |
| ASC | Adaptor protein linking sensor to caspase-1. | Western Blot (speck formation), Immunofluorescence |
| Caspase-1 | Effector protease; cleaves pro-IL-1β, pro-IL-18, and GSDMD. | Western Blot (cleaved p20), Activity Assay (FLICA) |
| IL-1β | Potent pro-inflammatory cytokine. | ELISA (mature form in supernatant) |
| GSDMD | Pore-forming protein; executor of pyroptosis. | Western Blot (N-terminal fragment) |
Table 2: Redox System Components and Modulators
| Component | Function | Modulators (Examples) |
|---|---|---|
| NRF2 | Master regulator of antioxidant response. | Inducers: Sulforaphane, CDDO-Me [18] [19] |
| NOX2 | Phagocytic NADPH oxidase; produces superoxide. | Inhibitor: Apocynin [17] |
| SOD | Converts superoxide to hydrogen peroxide. | Mimetics: Tempol [18] |
| mtROS | Mitochondrial ROS; key NLRP3 activator. | Scavenger: MitoTEMPO [17] |
| Keap1 | Represses Nrf2 in the cytoplasm. | Inhibitor: Brusatol (increases Nrf2 degradation) [19] |
Signaling Pathway Diagrams
NLRP3 Inflammasome Activation
Oxidative Stress & Inflammation Crosstalk
The Scientist's Toolkit: Research Reagent Solutions
Table 3: Essential Reagents for Investigating Cytokine Signaling & Oxidative Stress
| Reagent / Tool | Function / Target | Key Application in Biomaterial Research |
|---|---|---|
| LPS (Lipopolysaccharide) | TLR4 agonist; priming signal. | Used to pre-stimulate macrophages to induce expression of inflammasome components and pro-cytokines before biomaterial exposure [16]. |
| MCC950 | Potent, selective NLRP3 inhibitor. | Confirms the specific role of the NLRP3 inflammasome in biomaterial-induced IL-1β release [16]. |
| VX-765 | Caspase-1 inhibitor. | Broadly inhibits inflammasome-mediated cytokine processing and pyroptosis downstream of various sensors [16]. |
| N-Acetylcysteine (NAC) | Broad-spectrum antioxidant; precursor to glutathione. | Scavenges ROS to determine the contribution of general oxidative stress to biomaterial-induced inflammation and cytotoxicity [19]. |
| MitoTEMPO | Mitochondria-targeted antioxidant. | Specifically scavenges mtROS to investigate its critical role in NLRP3 inflammasome activation by biomaterials [17]. |
| Sulforaphane | Nrf2 pathway activator. | Boosts the endogenous antioxidant response to counteract biomaterial-induced oxidative stress [18] [19]. |
| H₂DCFDA | Cell-permeable dye for general ROS. | Quantifies overall intracellular ROS levels in response to biomaterial exposure [17]. |
| MitoSOX Red | Mitochondria-targeted dye for superoxide. | Specifically detects and quantifies mitochondrial superoxide production, a key inflammasome trigger [17]. |
Technical Support Center
Troubleshooting Guides
FAQ 1: How can I prevent non-specific protein loss and maintain accurate concentration measurements in my experiments?
Problem: Uncontrolled protein adhesion to labware surfaces is skewing my protein concentration readings and depleting my samples.
Solution:
- Monitor Protein Adhesion: Use highly sensitive techniques like Microfluidic Diffusional Sizing (MDS) to quantify protein loss at different experimental stages. This method uses a latent fluorogenic dye that fluoresces upon reacting with primary amines of proteins, allowing direct concentration measurement without a standard curve [21].
- Modify Surface Properties: For hydrophilic surfaces like glass, attach polyethylene glycols (PEGs) to decrease hydrophilicity. For hydrophobic plastics, add a small amount of mild detergent like Triton X-100 to reduce adsorption [21].
- Alternative Passivation: Use carrier proteins like Bovine Serum Albumin (BSA) or salts to block non-specific binding sites on surfaces [21].
- Material Selection: Choose labware materials with surface properties that minimize interaction with your specific protein sample [21].
FAQ 2: What strategies can I use to control competitive protein exchange on biomaterial surfaces (the Vroman effect) to improve implant outcomes?
Problem: The composition of the protein layer on my biomaterial surface evolves unpredictably over time, leading to variable inflammatory responses.
Solution:
- Understand Exchange Mechanisms: Recognize that protein exchange may occur via:
- Surface Characterization: Systematically analyze how surface chemistry and topography influence the binding and exchange of key proteins like fibrinogen and albumin [22] [23].
- Strategic Pre-adsorption: Pre-coat surfaces with proteins that resist displacement to create a more stable, bioinert interface [22].
FAQ 3: How can I modulate protein adsorption on biomolecular condensates to prevent aggregation-related cytotoxicity?
Problem: Amyloidogenic proteins like α-Synuclein are adsorbing to condensate interfaces, leading to accelerated aggregation and potential cytotoxicity.
Solution:
- Alter Condensate ζ-Potential: Add biomolecules like nucleoside triphosphates (NTPs) or RNA to change the surface charge of condensates, reducing electrostatic-driven adsorption of proteins like α-Synuclein [24].
- Competitive Adsorption: Introduce proteins that target the condensate interface, such as G3BP1, DDX4, Hsp70, or Hsc70, to compete with and displace amyloidogenic proteins [24].
- Sequestration Strategy: Exploit preferential adsorption of target proteins to other surfaces, such as lipid membranes, to draw them away from condensate interfaces [24].
FAQ 4: What experimental controls are essential for validating specific protein-protein interactions in pull-down assays?
Problem: My co-immunoprecipitation and pull-down assays are producing inconsistent results and potential false positives.
Solution:
- Essential Controls:
- Negative Control: Use non-treated affinity support (minus bait protein, plus prey) to identify non-specific binding to the support matrix.
- Bait Control: Use immobilized bait protein (plus bait, minus prey) to check for non-specific binding to the bait tag [25].
- Antibody Validation:
- For co-IP, confirm co-precipitated protein is obtained only with antibody against the target.
- Use monoclonal antibodies when possible. For polyclonal antibodies, pre-adsorb to samples devoid of the primary target to eliminate clones that might bind prey proteins directly [25].
- Interaction Verification: Use antibodies against different epitopes on the target protein or independently derived antibodies to verify interaction specificity [25].
FAQ 5: How can I distinguish direct from indirect protein interactions in my binding studies?
Solution:
- Crosslinking Approaches: Use membrane-permeable crosslinkers like DSS for intracellular interactions or membrane-impermeable crosslinkers like BS3 for cell surface interactions to "freeze" transient interactions [25].
- Critical Considerations: Avoid amine-containing buffers (e.g., Tris, glycine) that compete with amine-reactive crosslinkers. Ensure proper pH and use fresh crosslinker solutions [25].
- Advanced Option: Use heterobifunctional crosslinkers with thermoreactive and photo-reactive groups for temporal control over crosslinking [25].
- Comprehensive Analysis: Combine crosslinking with mass spectrometry to identify all components of protein complexes [25].
- Supplementary Methods: Perform co-localization studies and site-directed mutagenesis to confirm physiological relevance of interactions [25].
Table 1: Strategies to Control α-Synuclein Adsorption to Biomolecular Condensates
| Strategy | Mechanism of Action | Key Reagents/Proteins | Observed Effect |
|---|---|---|---|
| Modify ζ-Potential | Alters electrostatic surface charge of condensates | NTPs, RNA | Reduces α-Synuclein accumulation at interface [24] |
| Competitive Adsorption | Proteins compete for binding sites at condensate interface | G3BP1, DDX4-YFP, EGFP-NPM1, Hsp70, Hsc70 | Displaces α-Synuclein from interface [24] |
| Preferential Sequestration | Redirects protein to alternative surfaces | Lipid membranes | Draws α-Synuclein away from condensates [24] |
Table 2: Classification of ROS-Scavenging Biomaterials for Inflammation Control
| Biomaterial Class | Mechanism of Action | Example Formulations | Therapeutic Effects |
|---|---|---|---|
| Natural Enzyme-Based | Catalyzes ROS decomposition using natural enzymes | CeO2@PP nanorods (SOD/CAT-like) | Promotes M1 to M2 macrophage polarization; reduces ROS [26] |
| Regulating Natural Enzymes | Enhances expression/activity of endogenous antioxidant enzymes | Se-MBG (selenium with bioactive glass) | Upregulates GPX-4; scavenges cellular ROS [26] |
| Nanozymes | Nanoparticles mimicking enzyme catalytic activity | Ce-MBGN (cerium), MnO₂@PDA-BGs/Gel | Eliminates intracellular ROS; accelerates wound healing [26] |
Detailed Experimental Protocols
Protocol 1: Measuring and Modulating Protein Adsorption on Biomolecular Condensates
Objective: Quantify protein adsorption at condensate interfaces and test interventional strategies to modulate this process.
Materials:
- Model Condensate System: Poly-d,l-lysine (pLys) and poly-d,l-glutamate (pGlu) [24]
- Detection Method: Alexa Fluor 647-labeled S9C α-Synuclein (Alexa-647-αSyn) [24]
- ζ-Potential Measurement: Microelectrophoresis setup [24]
- Intervention Reagents: NTPs, RNA, or competitor proteins (G3BP1, DDX4, Hsp70) [24]
Procedure:
- Condensate Formation: Prepare pLys/pGlu condensates at different mixing ratios (e.g., 1:2, 1:1.4, 1.6:1) to achieve varying ζ-potentials [24].
- Baseline Characterization: Measure initial condensate ζ-potential using microelectrophoresis [24].
- Protein Incubation: Incubate condensates with α-Synuclein across a concentration range (e.g., nanomolar to micromolar).
- Adsorption Quantification:
- Measure partitioning using fluorescence of Alexa-647-αSyn.
- Calculate partition coefficient (Kₚ) at different total α-Synuclein concentrations.
- Fit adsorption data to Freundlich isotherm model to characterize binding heterogeneity and capacity [24].
- Intervention Testing:
- Pre-treat condensates with NTPs/RNA before α-Synuclein addition.
- Co-incubate α-Synuclein with competitor proteins.
- Measure changes in α-Synuclein localization and condensate ζ-potential after interventions [24].
- Aggregation Monitoring: Use Thioflavin T assay or similar to correlate α-Synuclein removal from interface with aggregation kinetics [24].
Protocol 2: Crosslinking Strategy to Capture Transient Protein Interactions
Objective: Stabilize transient protein complexes for detection and analysis.
Materials:
- Crosslinkers: DSS (membrane-permeable) for intracellular interactions; BS3 (membrane-impermeable) for cell surface interactions [25]
- Buffer: Non-amine buffer (e.g., HEPES, PBS); avoid Tris or glycine [25]
- Quenching Solution: Tris buffer or glycine (post-crosslinking) [25]
- Detection System: Antibodies for immunoblotting or mass spectrometry for complex identification [25]
Procedure:
- Sample Preparation: Prepare protein mixture or cells in appropriate non-amine buffer.
- Crosslinker Addition:
- Prepare fresh crosslinker solution in DMSO or buffer.
- Add to sample at optimized concentration (typically 0.1-5 mM).
- For intracellular crosslinking, use membrane-permeable DSS [25].
- Incubation:
- Incubate at room temperature or 4°C for 5-30 minutes.
- For photo-reactive crosslinkers, expose to UV light (300-370 nm) after incubation [25].
- Reaction Quenching:
- Add quenching solution (Tris or glycine) to final concentration of 50-100 mM.
- Incubate for 15 minutes to stop reaction [25].
- Analysis:
- Proceed with co-IP or pull-down assays under denaturing conditions if needed.
- Analyze by SDS-PAGE and immunoblotting.
- For unknown interactors, use mass spectrometry for identification [25].
Troubleshooting Notes:
- Low crosslinking efficiency may indicate problematic buffer components or outdated crosslinker.
- Excessive crosslinking can cause non-specific aggregation; optimize concentration and time [25].
The Scientist's Toolkit
Table 3: Essential Research Reagent Solutions for Protein Adsorption Studies
| Reagent/Category | Specific Examples | Primary Function | Application Context |
|---|---|---|---|
| Crosslinkers | DSS, BS3, photo-reactive variants | Stabilize transient protein interactions | Co-IP, pull-down assays; capturing dynamic complexes [25] |
| Surface Passivators | Polyethylene Glycol (PEG), Triton X-100, BSA | Reduce non-specific protein adhesion | Labware pretreatment; improving assay accuracy [21] |
| Competitor Proteins | G3BP1, DDX4, Hsp70, Hsc70 | Competitively displace target proteins from interfaces | Modifying protein adsorption on condensates [24] |
| ζ-Potential Modifiers | NTPs, RNA | Alter surface charge of interfaces | Controlling electrostatic-driven protein adsorption [24] |
| Detection Systems | Alexa Fluor dyes, fluorogenic amine-reactive dyes | Label and quantify proteins | Monitoring concentration, adsorption, and size changes [24] [21] |
| Model Condensates | pLys/pGlu systems | Tunable biomolecular condensate platform | Studying interface-specific protein behavior [24] |
Experimental Workflows and Signaling Pathways
Diagram 1: Competitive Protein Exchange on Biomaterial Surfaces
Diagram 2: Strategies to Control Interfacial Protein Adsorption
Diagram 3: Experimental Workflow for Adsorption Analysis
Physical and Chemical Material Properties That Trigger Immune Recognition
Frequently Asked Questions (FAQs)
1. How do a biomaterial's physical characteristics, like size and shape, influence its recognition by immune cells? The physical characteristics of a biomaterial are primary determinants of how the immune system detects and responds to it. Key properties include:
- Size: Particle size directly influences which immune cells engage with the material and how it is processed. For example, nanoparticles smaller than 500 nm are often efficiently internalized by dendritic cells, which can initiate an adaptive immune response. Larger particles, particularly those in the micron range, are more likely to be engulfed by macrophages, potentially leading to a foreign body reaction [27]. Size also affects biodistribution, with smaller particles generally exhibiting wider tissue dissemination [27].
- Shape: The geometry of a material impacts phagocytosis, a critical immune clearance mechanism. Studies show that compared to spherical particles, elongated materials like nanorods are more difficult for macrophages to phagocytose, which can reduce immediate inflammatory responses and alter the material's persistence in the body [28] [27].
- Surface Topography and Roughness: Nanoscale and microscale surface features (e.g., pits, pillars, grooves) can mimic natural tissue structures and modulate immune cell adhesion and activation. Microrough surfaces on titanium implants, for instance, have been shown to downregulate pro-inflammatory cytokines and promote an anti-inflammatory environment conducive to tissue integration, unlike smoother surfaces [29].
- Stiffness/Elasticity: The mechanical properties of a biomaterial should match the target tissue to minimize immune activation. Softer materials that mimic brain tissue, for example, have been shown to reduce inflammatory reactions compared to stiffer implants [30].
2. Which chemical properties are critical in determining a biomaterial's immunogenicity? Surface chemistry dictates the initial molecular interactions between a biomaterial and the biological environment, thereby steering the immune response.
- Surface Charge (Electrostatic Potential): Positively charged (cationic) surfaces typically exhibit stronger interactions with negatively charged cell membranes, which can enhance cellular uptake but also increase cytotoxicity and pro-inflammatory responses. In contrast, neutral or negatively charged surfaces often demonstrate reduced immune cell activation and better biocompatibility [27] [31] [32].
- Hydrophobicity: Hydrophobic surfaces tend to adsorb a higher density and different composition of proteins from biological fluids (forming a "protein corona") compared to hydrophilic surfaces. This adsorbed protein layer can trigger complement activation, promote neutrophil and macrophage adhesion, and initiate a pro-inflammatory cascade [27] [29].
- Surface Chemistry and Bioactive Functionalization: Deliberately modifying a surface with specific chemical groups or bioactive molecules can help steer the immune response. Incorporating anti-inflammatory cytokines (e.g., IL-10), or immobilizing cell-adhesive peptides like RGD (arginine-glycine-aspartic acid), can reduce foreign body reactions and improve integration [29] [30]. Furthermore, surfaces engineered with ROS-scavenging molecules (e.g., cerium oxide nanoparticles, selenium) can mitigate oxidative stress and suppress inflammation [26].
3. What is the role of protein adsorption in triggering an immune response to an implanted material? Protein adsorption is the pivotal first event that occurs upon implantation and primarily dictates the subsequent immune recognition [29]. The process unfolds as follows:
- Immediate Protein Layering: Within seconds of implantation, blood and tissue proteins (e.g., fibrinogen, immunoglobulins, complement proteins, albumin) spontaneously adsorb onto the biomaterial's surface.
- Opsonization and Immune Activation: The composition and conformation of these adsorbed proteins act as a signal for immune cells. Adsorbed fibrinogen and immunoglobulins, for instance, are potent opsonins that promote the adhesion and activation of macrophages, leading to the release of pro-inflammatory cytokines like TNF-α [29] [30]. This also activates the complement system, further amplifying inflammation.
- Directing Cell Fate: The resulting protein layer effectively "masks" the synthetic material, and the immune system responds to this protein-coated interface. A layer dominated by albumin is generally associated with lower immune activation, while layers rich in fibrinogen and IgG are highly immunogenic [29].
4. What signaling pathways are activated upon immune recognition of a biomaterial? Immune recognition of biomaterials often occurs via Pattern Recognition Receptors (PRRs) on innate immune cells, triggering conserved pro-inflammatory signaling pathways [33]. The key pathways and their triggers are summarized below.
Diagram: Key Innate Immune Signaling Pathways Activated by Biomaterials. This diagram illustrates how the engagement of Pattern Recognition Receptors (PRRs) by danger signals (DAMPs) or microbial patterns (PAMPs) triggers downstream signaling cascades, leading to the production of pro-inflammatory mediators. (Abbreviations: TLR, Toll-like Receptor; NLRP3, NOD-, LRR- and pyrin domain-containing 3; MyD88, Myeloid Differentiation Primary Response 88; TRIF, TIR-domain-containing adapter-inducing interferon-β; NF-κB, Nuclear Factor Kappa B; MAPK, Mitogen-Activated Protein Kinase; IRF3, Interferon Regulatory Factor 3).
The table below outlines the core signaling pathways involved.
| Pathway | Key Receptors/Triggers | Key Signaling Molecules | Primary Immune Outcome |
|---|---|---|---|
| NF-κB & MAPK | TLRs (e.g., TLR4), IL-1R, TNF-R | MyD88, TRIF, IKK complex | Production of pro-inflammatory cytokines (TNF-α, IL-6, IL-1β) [33]. |
| Inflammasome | NLRP3, AIM2 | ASC, Caspase-1 | Cleavage and secretion of mature IL-1β and IL-18; induction of pyroptosis [33]. |
| cGAS-STING | cGAS (cytosolic DNA sensor) | cGAMP, STING, IRF3 | Production of Type I interferons (IFN-α/β) [27] [33]. |
| ROS-Driven Pathways | Excessive ROS generation | Nrf2, NF-κB, NLRP3 | Amplification of oxidative stress and inflammation [26]. |
Troubleshooting Guides
Problem: Uncontrolled or Chronic Inflammation at the Implant Site
Potential Causes and Solutions:
Cause 1: Excessive Protein Adsorption and Opsonization.
- Solution: Modify the surface to make it more hydrophilic and neutrally charged. Techniques include:
Cause 2: Macrophage Activation and Foreign Body Giant Cell (FBGC) Formation.
- Solution: Engineer surface topography and chemistry to promote an anti-inflammatory (M2) macrophage phenotype.
- Nanotopography: Introduce nanoscale patterns (~68 nm features) that have been shown to downregulate pro-inflammatory cytokine expression [29].
- Bioactive Coatings: Functionalize the material with anti-inflammatory cytokines (e.g., IL-4, IL-10) or ROS-scavenging nanozymes (e.g., CeO₂) to polarize macrophages toward the regenerative M2 state [30] [26].
- Solution: Engineer surface topography and chemistry to promote an anti-inflammatory (M2) macrophage phenotype.
Cause 3: High Surface Roughness or Sharp Features.
- Solution: For permanent implants like titanium, optimize the surface treatment process (e.g., electrochemical polishing, controlled acid etching) to achieve a nanoscale roughness that promotes tissue integration while minimizing mechanical irritation to surrounding cells [29].
Problem: Rapid Phagocytosis and Clearance of Injectable Particulate Systems
Potential Causes and Solutions:
Cause 1: Optimally Sized for Phagocytosis (0.5 - 5 µm).
- Solution: Design particles outside the most phagocytosable range. Sub-micron nanoparticles (~100-200 nm) are less efficiently taken up by macrophages than micron-sized particles and can exhibit enhanced circulation times [27].
Cause 2: "Self" vs. "Non-Self" Recognition by the Immune System.
- Solution: Use "Self" Biomimicry strategies.
- Cell Membrane Coating: Camouflage nanoparticles with membranes derived from the patient's own cells (e.g., red blood cells, neutrophils) to evade immune detection [30].
- CD47 Biomimicry: Functionalize the surface with "don't eat me" signals like the CD47 protein, which binds to SIRPα on macrophages and inhibits phagocytosis [27].
- Solution: Use "Self" Biomimicry strategies.
Problem: Biomaterial-Induced Oxidative Stress and Cytotoxicity
Potential Causes and Solutions:
Cause 1: Generation of Reactive Oxygen Species (ROS).
- Solution: Incorporate antioxidant or ROS-scavenging functionalities.
- Nanozymes: Utilize nanoparticles with enzyme-mimetic activities, such as Cerium Oxide (CeO₂) nanoparticles that mimic superoxide dismutase (SOD) and catalase (CAT), to catalytically neutralize superoxide radicals and hydrogen peroxide [26].
- Natural Antioxidant Delivery: Load biomaterials with natural antioxidants (e.g., polyphenols, vitamins) that can be released locally to quench ROS [26].
- Solution: Incorporate antioxidant or ROS-scavenging functionalities.
Cause 2: Leaching of Cytotoxic Ions from Metallic Implants or Nanoparticles.
- Solution: Employ advanced material processing and coating techniques.
- Alloying: Develop novel biodegradable alloys (e.g., Mg-, Zn-based) with controlled corrosion rates to minimize sudden ion release [28].
- Dense Ceramic Coatings: Apply inert and stable coatings (e.g., titanium nitride, diamond-like carbon) on metallic implants to create a barrier between the substrate and the biological environment [31].
- Solution: Employ advanced material processing and coating techniques.
The Scientist's Toolkit: Key Reagents and Materials
The following table lists essential reagents and materials used in the study and modulation of immune responses to biomaterials.
| Reagent/Material | Function/Description | Key Application |
|---|---|---|
| PEG (Polyethylene Glycol) | A hydrophilic polymer used to create steric hindrance, reducing protein adsorption and opsonization. | Gold standard for creating "stealth" surfaces on nanoparticles and implants to reduce immune recognition [28] [29]. |
| RGD Peptide | A cell-adhesive peptide sequence (Arginine-Glycine-Aspartic acid) found in ECM proteins. | When grafted onto biomaterials, it can improve cell integration and modulate the inflammatory response by providing specific integrin-binding sites [29]. |
| Cerium Oxide (CeO₂) Nanozymes | Nanoparticles that mimic the activity of antioxidant enzymes (SOD and CAT). | Scavenge ROS at implant sites, reducing oxidative stress and polarizing macrophages toward an M2 anti-inflammatory phenotype [26]. |
| Chitosan | A natural, biodegradable, and biocompatible cationic polysaccharide. | Used to form hydrogels for drug delivery and tissue engineering scaffolds; its cationic nature allows for complexation with anionic biomolecules [34]. |
| Toll-like Receptor (TLR) Agonists/Antagonists | Small molecules that specifically activate or inhibit TLR signaling pathways. | Used as experimental tools to dissect the role of specific PRRs in the immune response to a biomaterial [33]. |
| Anti-inflammatory Cytokines (e.g., IL-4, IL-10) | Signaling proteins that promote an anti-inflammatory and pro-healing immune environment. | Can be adsorbed onto or released from biomaterial scaffolds to actively direct macrophage polarization to the M2 state [30]. |
Experimental Protocols for Key Assays
Protocol 1: In Vitro Assessment of Macrophage Polarization on Biomaterial Surfaces
Objective: To evaluate the immunomodulatory potential of a biomaterial by characterizing the phenotype of adherent macrophages.
Workflow:
Diagram: Experimental Workflow for Macrophage Phenotype Analysis. This protocol assesses whether a biomaterial surface promotes a pro-inflammatory (M1) or pro-healing (M2) macrophage response.
Detailed Steps:
- Cell Seeding: Isolate and differentiate primary macrophages (e.g., from murine bone marrow) or use a stable macrophage cell line (e.g., RAW 264.7). Seed cells at a defined density onto the surface of your test biomaterial (e.g., a film, 3D scaffold) and control surfaces (e.g., tissue culture plastic, a known inflammatory material like LPS).
- Incubation: Culture the cells for a relevant period (e.g., 24, 48, 72 hours) in standard culture conditions.
- Cell Harvest and Analysis:
- Gene Expression (RT-qPCR): Lyse cells directly on the material to extract RNA. Analyze the expression of canonical M1 markers (e.g., iNOS, TNF-α, IL-6) and M2 markers (e.g., CD206, Arg1, IL-10). The ratio of M2 to M1 gene expression provides a quantitative measure of immunomodulation [30] [26].
- Surface Protein Expression (Flow Cytometry): Gently detach cells from the material and stain with fluorescently labeled antibodies against M1 (e.g., CD86) and M2 (e.g., CD206) surface proteins. Analyze using flow cytometry.
- Cytokine Secretion (ELISA): Collect the conditioned culture media. Use Enzyme-Linked Immunosorbent Assays (ELISA) to quantify the secretion of cytokines such as TNF-α (M1) and IL-10 (M2) [29] [30].
Protocol 2: Quantifying Reactive Oxygen Species (ROS) Generation
Objective: To measure the level of oxidative stress induced by a biomaterial or nanoparticle in cultured cells.
Detailed Steps:
- Cell Preparation: Seed appropriate cells (e.g., macrophages, primary neutrophils, or other relevant cell lines) in a multi-well plate. Allow them to adhere overnight.
- Treatment and Staining: Treat cells with the test biomaterial (e.g., nanoparticles, material extracts). Include a positive control (e.g., H₂O₂) and a negative control (untreated cells). After incubation, load the cells with a cell-permeable ROS-sensitive fluorescent probe, such as H2DCFDA (2',7'-Dichlorodihydrofluorescein diacetate), according to the manufacturer's protocol.
- Measurement:
- Fluorescence Microscopy: Visualize and image the cells. Increased green fluorescence indicates higher intracellular ROS levels.
- Microplate Reader: Quantify the fluorescence intensity in each well using a fluorescence microplate reader (Ex/Em ~485/535 nm for DCF).
- Data Analysis: Normalize the fluorescence values of the treated groups to the negative control. A significant increase in fluorescence indicates biomaterial-induced oxidative stress [32] [26].
Standardized Assessment: ISO-Compliant Cytotoxicity Testing and Biomaterial Evaluation
Frequently Asked Questions (FAQs)
What is the fundamental difference between direct and indirect cytotoxicity testing methods?
Direct contact methods involve placing the test material or device in direct physical contact with the cell monolayer. In contrast, indirect methods test an extract of the material, where the device is incubated in a culture medium to leach out potential toxins, and this extract is then applied to the cells [35]. The choice between methods depends on the device's physical form and intended clinical use, with direct contact being more sensitive for detecting cytotoxicity from volatile substances or materials that may release particulates [35].
Why might our cytotoxicity test results be inconsistent between different laboratories, even when following ISO 10993-5?
The ISO 10993-5 standard offers wide latitude in test specifications, leading to significant variability in results between laboratories [36]. An interlaboratory comparison study with 52 international laboratories found that only 58% correctly identified the cytotoxic potential of two standard materials. Key factors causing variability include:
- Serum supplementation: The use of serum in the extraction medium (e.g., 10% FBS) can dramatically increase test sensitivity by extracting non-polar constituents.
- Incubation time: Longer incubation of cells with the extract can enhance detection of cytotoxic effects.
- Cell lines and endpoints: Different labs may use different cell lines (L929, ARPE-19, epithelial cells) and different viability assays (WST-1, LDH, MTT), each with varying sensitivities [36].
When should we use direct contact testing over extract testing?
Direct contact is particularly crucial for: 1) Volatile medical devices like perfluoro-octane (PFO) used in vitreoretinal surgery [35]; 2) Devices where physical contact with tissues occurs clinically; and 3) Situations where previous extract methods have failed to detect toxicity that manifested in clinical use [35]. Research confirms that the indirect method alone does not provide a complete picture of cell condition after exposure to a material's surface [37].
How does the upcoming ISO 10993-1:2025 revision impact our cytotoxicity testing strategy?
The 2025 revision mandates a shift from a prescriptive "checklist" approach to a risk-based biological evaluation fully integrated with ISO 14971 [38]. Key changes include:
- Elimination of the "Table A1 mentality" that provided clear prescriptive lists of biological testing
- Device categorization simplified to focus solely on type of contact (intact skin, mucosal membranes, compromised surfaces/tissues, circulating blood)
- More conservative calculation of exposure duration where each day of exposure is considered separately
- Increased emphasis on justifying when tests are not performed and documenting acceptance criteria [38]
What should we do if our medical device fails a cytotoxicity test?
First, perform a root cause analysis to identify the source of reactivity. Consider whether the test method appropriately mimics clinical use, as some materials (like fabrics or surface coatings with inert particles) may fail in vitro tests but not pose actual clinical risks [39]. For devices with known reactivity (like nitrile gloves), compare your device to a legally marketed equivalent and consider additional in vivo testing for acute systemic toxicity if justified [39].
Troubleshooting Common Experimental Issues
Problem: Inconsistent cytotoxicity results between testing laboratories.
| Potential Cause | Solution | Supporting Evidence |
|---|---|---|
| Variations in serum content in extraction media | Standardize serum supplementation at 5-10% to ensure extraction of both polar and non-polar constituents [39]. | Study showed 10% serum supplementation greatly increased test sensitivity for PVC [36]. |
| Different incubation periods with extracts | Extend extraction time to 72 hours for devices intended for prolonged contact (>24 hours) [39]. | Longer incubation of cells with extract greatly increased test sensitivity [36]. |
| Using different cell lines or viability assays | Align cell line selection with clinical exposure; consider using target tissue-specific cells (e.g., retinal cells for ophthalmic devices) [35]. | Direct contact method using ARPE-19 retinal cells detected PFO toxicity that L929 fibroblasts missed [35]. |
Problem: Failing to detect cytotoxicity that manifests in clinical use.
| Scenario | Recommended Action | Case Example |
|---|---|---|
| Testing volatile medical devices | Implement direct contact method with technical steps to prevent evaporation [35]. | Toxic PFO lots causing blindness passed extract tests but failed direct contact tests [35]. |
| Devices with combination materials | Use both direct and indirect methods to assess surface effects and leachables [37]. | Research confirms both methods are needed to evaluate toxin release AND material surface effects [37]. |
| Biomaterials with complex surfaces | Apply direct testing to evaluate cell-surface interactions beyond just leachable chemicals [37]. | Molecular surface of biomaterials directly impacts cytotoxicity and proliferation profiles [37]. |
Experimental Protocols & Methodologies
Background: This protocol was developed to test volatile perfluoro-octane (PFO) after traditional extract methods failed to detect toxicity that caused patient blindness.
Materials:
- ARPE-19 human retinal pigment epithelial cells (or other clinically relevant cell line)
- DMEM/F12 culture medium supplemented with 10% FBS and 1% antibiotic/antimycotic
- 96-well flat bottom plates
- Test materials and controls
Procedure:
- Seed ARPE-19 cells at 10,000 cells/well in 200 µL medium and culture for 7 days, replacing medium every 2-3 days.
- For final 24 hours before testing, incubate cells in culture medium without FBS for cell cycle synchronization.
- Carefully add test substance directly to cells without medium.
- For volatile substances: Add 80 µL PFO directly to wells, then carefully add 120 µL culture medium over the PFO to create a 40:60 ratio.
- Incubate plates for 24 hours at 37°C with 5% CO₂.
- Assess cytotoxicity using cell viability assays (MTT, WST-1) and morphological analysis.
Key Technical Considerations:
- For volatile substances, the liquid-medium layering prevents evaporation while allowing direct cell contact.
- Use clinically relevant cell types (e.g., retinal cells for ophthalmic devices) rather than standard fibroblasts alone.
- Include both positive (phenol) and negative controls (known safe materials from other manufacturers).
Purpose: To obtain a complete biological evaluation of new biomaterials by comparing both methodological approaches.
Sample Preparation:
- Prepare test materials according to ISO 10993-12 guidelines.
- For indirect (extract) method: Use extraction ratio of 6 cm²/ml, 37°C for 24 hours.
- For direct method: Cut materials to fit culture well dimensions.
Testing Workflow:
- Cell Culture: Maintain appropriate cell lines (L929, epithelial cells) under standard conditions.
- Parallel Testing:
- Indirect Group: Apply extracts to cells and incubate 24-72 hours.
- Direct Group: Place materials directly on cell monolayer.
- Assessment:
- Measure cell proliferation using WST-1 assay.
- Quantify cytotoxicity using LDH test kit.
- Analyze cell morphology and viability.
Interpretation: Compare results from both methods to understand whether toxicity arises from leached substances, material surface properties, or both.
Methodology Selection Workflow
Quantitative Data Comparison
| Test Material | Expected Result | Laboratories Reporting\nCorrect Result | Cell Viability Range | Key Influencing Factors |
|---|---|---|---|---|
| Polyethylene (PE) Tubing | Non-cytotoxic (>70% viability) | 58% of labs | 70-100% viability | - Serum content in medium- Extraction parameters- Detection method |
| Polyvinyl Chloride (PVC) Tubing | Cytotoxic (<70% viability) | 58% of labs | 0-100% viability(Mean: 43% ± 30% SD) | - 10% serum increased sensitivity- Longer incubation improved detection |
| Method Type | Examples | Sensitivity | Best For | Limitations |
|---|---|---|---|---|
| Qualitative Methods | MEM Elution, Agar Diffusion | Moderate | Routine screening, devices with simple composition | Subjective scoring, technician-dependent variability |
| Quantitative Methods | MTT/XTT, Neutral Red Uptake | High | Regulatory submissions, dose-response studies | Requires specific equipment, more expensive |
| Direct Contact | Physical placement on cells | Very High | Volatile substances, surface interactions | May cause physical damage unrelated to toxicity |
| Indirect (Extract) | Medium extraction | Moderate | Soluble leachables, chemicals | Misses surface-mediated effects |
The Scientist's Toolkit: Essential Research Reagents & Materials
Key Research Reagent Solutions
| Reagent/Material | Function | Application Notes |
|---|---|---|
| L929 Mouse Fibroblasts | Standard cell line for cytotoxicity screening | Recommended by ISO standards; well-characterized [36] |
| Tissue-Specific Cell Lines (e.g., ARPE-19 retinal cells) | Clinically relevant testing | Essential for devices contacting specific tissues [35] |
| MTT/XTT/WST-1 Assays | Quantitative viability measurement | Detect metabolic activity; more objective than qualitative methods [40] |
| LDH Release Assay | Membrane integrity assessment | Measures cytotoxicity through enzyme leakage [37] |
| Serum-Containing Medium (5-10% FBS) | Extraction of non-polar constituents | Critical for detecting hydrophobic leachables [36] [39] |
| Reference Materials (PE, PVC controls) | Method validation | Essential for interlaboratory comparison and quality control [36] |
Testing Pathway for Material Evaluation
Selecting the appropriate cell model is a critical first step in designing experiments for reducing biomaterial cytotoxicity and inflammatory responses. Your choice directly influences the physiological relevance, reproducibility, and ultimate translational success of your research. The central dilemma often involves choosing between the high biological relevance of primary cells and the practical scalability of immortalized cell lines. This technical support center is designed to guide you through this decision-making process, providing detailed protocols and troubleshooting advice to ensure your biocompatibility data is both reliable and predictive.
Frequently Asked Questions (FAQs)
FAQ 1: What is the core practical difference between primary cells and immortalized cell lines in an experimental setting?
The most significant difference lies in their origin and lifespan. Primary cells are isolated directly from human or animal tissue and have a finite lifespan in culture, ensuring they retain the genotype and phenotype of their tissue of origin [41] [42]. In contrast, immortalized cell lines are derived from tumors or genetically manipulated to proliferate indefinitely, making them convenient for long-term studies but often less biologically representative [43] [44].
FAQ 2: For research focused on inflammatory response, which cell model is more appropriate?
Primary macrophages are generally the gold standard for inflammatory studies. They closely mimic the in vivo response, including key functions like phagocytosis and the production of cytokines in a physiologically relevant manner [14]. However, the choice is context-dependent. Immortalized macrophage cell lines (e.g., THP-1) can be useful for high-throughput preliminary screens, but their response to stimuli may be attenuated or non-physiological compared to primary cells [43]. The final validation of anti-inflammatory drug candidates should ideally be conducted in primary cells.
FAQ 3: My cytotoxicity results are highly variable between experiments. What could be the cause?
Variability is a common challenge, often stemming from the cell model itself.
- If you are using primary cells, a major source of variability is donor-to-donor differences [43]. To mitigate this, use cells from age- and health-matched donors and pool cells from multiple donors if possible.
- If you are using an immortalized cell line, the culprit could be genetic drift or cross-contamination. Ensure you are using a low-passage number, regularly authenticate your cell lines (e.g., via STR profiling), and check for mycoplasma contamination [41].
FAQ 4: How can I improve the physiological relevance of my biocompatibility testing without sacrificing scalability?
Human-induced pluripotent stem cell (iPSC)-derived cells are an emerging and powerful alternative. They offer a renewable source of human-specific cells that can be differentiated into various cell types (e.g., cardiomyocytes, neurons) for highly relevant disease modeling [43] [44]. Technologies like deterministic reprogramming (e.g., ioCells) can provide scalable, consistent, and functionally validated human cells, bridging the gap between primary cells and cell lines [43].
Troubleshooting Guides
Issue 1: Low Cell Viability in Primary Cell Cultures
Problem: Primary cells show poor viability after thawing or during culture, leading to failed experiments.
Possible Causes and Solutions:
- Cause: Improper thawing or handling. Primary cells are more delicate than established cell lines [42].
- Solution: Thaw cells rapidly in a 37°C water bath and immediately dilute the freezing medium with pre-warmed complete culture medium. Use gentle centrifugation speeds. Consider using specialized recovery media.
- Cause: Suboptimal culture conditions.
- Solution: Ensure you are using the specific growth factors, supplements, and extracellular matrix (e.g., collagen, fibronectin) recommended for the primary cell type. Do not use media formulations designed for immortalized cells.
- Cause: Over-confluence leading to differentiation or senescence.
- Solution: Monitor confluence closely and subculture at the recommended density. Do not let primary cells reach 100% confluence.
Issue 2: Inconsistent Inflammatory Response in Macrophage Models
Problem:
- (A) Primary macrophages are not polarizing consistently to the pro-inflammatory (M1) or anti-inflammatory (M2) state.
- (B) An immortalized macrophage cell line is not producing a robust cytokine response upon stimulation.
Solutions:
- For (A) Primary Macrophages:
- Validate Polarization Stimuli: Confirm the concentration and purity of your polarizing agents (e.g., LPS for M1, IL-4 for M2). Use multiple markers (e.g., surface receptors, cytokine secretion) to confirm polarization status.
- Account for Donor Variability: Inherent genetic differences between donors can affect polarization capacity [43]. Plan experiments using cells from multiple donors to ensure findings are generalizable.
- For (B) Immortalized Cell Lines:
- Confirm Differentiation: Many immortalized monocyte lines (like THP-1) require differentiation with PMA (phorbol 12-myristate 13-acetate) before they become macrophage-like. Optimize the concentration and duration of PMA treatment.
- Check for Response Attenuation: Recognize that some cell lines may have inherently blunted responses. If a robust response is critical, transition to a primary cell model for validation [43] [44].
Issue 3: High Background in Cytotoxicity Assays (e.g., MTT)
Problem: High absorbance or fluorescence readings in negative controls, making it difficult to detect a true cytotoxic effect.
Possible Causes and Solutions:
- Cause: Incomplete removal of assay reagent.
- Solution: For assays like MTT that form insoluble formazan crystals, ensure thorough washing steps and complete dissolution of the crystals using the appropriate solvent (e.g., DMSO, isopropanol) before reading the absorbance [15].
- Cause: Material Interference. The biomaterial itself or its degradation products may react with the assay reagents.
- Solution: Run a control well containing only the culture medium and your biomaterial (without cells) to account for any interference. Consider using an alternative assay (e.g., ATP-based luminescence, which is less prone to chemical interference) to confirm results [15].
Standardized Protocol: Cytotoxicity Testing of Biomaterials via Indirect Contact (Extract Elution) Method
This protocol is based on ISO 10993-5 standards, a cornerstone of biocompatibility testing [15].
1. Sample Preparation (Extract Elution):
- Prepare the biomaterial extract by incubating the test material in cell culture medium (e.g., DMEM supplemented with FBS) at a standard surface-area-to-volume ratio (e.g., 3 cm²/mL) for 24 hours at 37°C.
- Prepare serial dilutions of the extract (e.g., 100%, 50%, 25%) for dose-response assessment.
2. Cell Seeding and Exposure:
- Seed cells (e.g., L-929 mouse fibroblasts or a relevant primary cell type) in a 96-well plate at a density that will reach 80% confluence within 24 hours.
- Incubate for 24 hours to allow cell attachment.
- Replace the culture medium with the prepared extract dilutions. Include a negative control (culture medium only) and a positive control (e.g., medium with 1% Triton X-100).
3. Incubation and Assessment:
- Incubate the cells with the extract for a predetermined time (e.g., 24-72 hours) at 37°C and 5% CO₂.
- Assess cytotoxicity quantitatively and qualitatively:
- Quantitative: Perform an MTT assay. Add MTT reagent, incubate for 2-4 hours, dissolve the formed formazan crystals, and measure the absorbance at 570 nm. Calculate cell viability as a percentage of the negative control.
- Qualitative: Observe cells microscopically for morphological changes such as cell rounding, membrane blebbing, or detachment [15].
4. Data Interpretation:
- Cell viability above 80% is generally considered non-cytotoxic.
- Viability between 60-80% indicates mild cytotoxicity.
- Viability below 60% is considered a sign of definite cytotoxicity.
Cell Model Comparison for Biocompatibility Research
Table 1: A comparison of key features to guide model selection for your experiment.
| Feature | Animal Primary Cells | Immortalized Cell Lines | Human iPSC-Derived Cells (e.g., ioCells) |
|---|---|---|---|
| Biological Relevance | Closer to native morphology/function [41] | Often non-physiological (e.g., cancer-derived) [43] | Human-specific and functionally validated [43] |
| Reproducibility | High donor-to-donor variability [43] | Reliable, but prone to genetic drift [41] | High consistency (<2% gene expression variability) [43] |
| Scalability | Low yield, difficult to expand [43] | Easily scalable [43] | Consistent at scale (billions per run) [43] |
| Ease of Use | Technically complex, time-intensive [43] [42] | Simple to culture [43] | Ready-to-use, no special handling [43] |
| Time to Assay | Several weeks post-dissection [43] | 24-48 hours post-thaw [43] | ~10 days post-thaw [43] |
| Human Origin | Typically rodent-derived [43] | Often non-human or cancer-derived [43] | Derived from human iPSCs [43] |
Cytotoxicity Data from a Magnesium-Based Composite
Table 2: Example cytotoxicity data for a Mg-1%Sn-2%HA composite tested on L-929 fibroblasts, demonstrating a concentration-dependent effect on cell viability [15].
| Extract Concentration | Cell Viability (Mean %) | Cytotoxicity Classification |
|---|---|---|
| 100% | 71.51% | Mild |
| 50% | 84.93% | Non-cytotoxic |
| 25% | 93.20% | Non-cytotoxic |
| 12.5% | 96.52% | Non-cytotoxic |
The Scientist's Toolkit: Key Research Reagents & Materials
Table 3: Essential materials and reagents for cytotoxicity and inflammation research.
| Item | Function in Experiments |
|---|---|
| L-929 Mouse Fibroblast Cell Line | A standard cell model recommended by ISO standards for initial cytotoxicity screening of biomaterials [15]. |
| Bone-Marrow-Derived Macrophages (BMDMs) | Primary cells isolated from mouse bone marrow, considered a gold-standard model for studying inflammatory signaling and macrophage polarization [45] [14]. |
| Lipopolysaccharide (LPS) | A Toll-like receptor 4 (TLR4) agonist used to induce a robust pro-inflammatory (M1) response in macrophage models [45] [14]. |
| MTT Assay Kit | A colorimetric assay that measures the metabolic activity of cells via mitochondrial dehydrogenase enzymes; a common readout for cell viability and cytotoxicity [15]. |
| ATP-based Luminescence Assay | A highly sensitive luminometric assay that measures cellular ATP levels as a direct indicator of the number of viable cells [15]. |
| Digital Microfluidic (DMF) Chips | A novel platform for long-term, spatiotemporally controlled cell culture, enabling precise study of macrophage phenotype modulation and drug testing with minimal reagents [46]. |
| Enzyme-Free Detachment Solution | A novel approach using electrochemical current on a conductive polymer to detach adherent cells, preserving delicate cell surface proteins and improving viability over traditional enzymatic methods [47]. |
Signaling Pathways and Experimental Workflows
Inflammatory Response and Resolution Pathway
Cytotoxicity Testing Workflow
Troubleshooting Guides
Flow Cytometry Troubleshooting
This guide addresses common issues encountered during flow cytometry analysis of cellular responses to biomaterials.
| Problem | Possible Causes | Recommendations |
|---|---|---|
| Weak or No Signal | Inadequate fixation/permeabilization [48]. | For intracellular targets, use appropriate fixation (e.g., 4% methanol-free formaldehyde) followed by permeabilization with saponin, Triton X-100, or ice-cold methanol [48]. |
| Low expression target paired with a dim fluorochrome [48]. | Use the brightest fluorochrome (e.g., PE) for the lowest density targets and dimmer fluorochromes (e.g., FITC) for high-density targets [48]. | |
| High Background | Non-specific antibody binding or high antibody concentration [48]. | Titrate antibodies to use optimal concentration. Block cells with BSA or Fc receptor blocking reagents prior to staining [48]. |
| Presence of dead cells [48]. | Use a viability dye (e.g., PI, 7-AAD, or fixable dyes like eFluor) to gate out dead cells during analysis [48]. | |
| Poor Cell Cycle Resolution | Incorrect flow rate [48]. | Run samples at the lowest flow rate setting to reduce coefficients of variation (CVs) and improve phase resolution [48]. |
| Insufficient staining [48]. | Resuspend cell pellet directly in PI/RNase solution and incubate for at least 10 minutes [48]. |
PCR Troubleshooting
This guide helps resolve common problems in PCR, a key technique for analyzing gene expression in cytotoxicity and inflammation studies.
| Problem | Possible Causes | Recommendations |
|---|---|---|
| Low or No Yield | Poor template quality/quantity [49]. | Assess DNA integrity by gel electrophoresis. Increase amount of input DNA or number of PCR cycles [49]. |
| Suboptimal reaction components [49]. | Optimize Mg2+ concentration. Use DNA polymerases with high processivity for complex targets [49]. | |
| Suboptimal thermal cycling [49]. | Optimize denaturation, annealing, and extension temperatures and times. Use a gradient cycler for annealing temperature optimization [49]. | |
| Non-Specific Bands | Excess primers or DNA template [49]. | Optimize primer concentrations (0.1–1 µM). Lower the quantity of input DNA [49]. |
| Low annealing temperature [49]. | Increase annealing temperature stepwise (1-2°C increments). Ensure it is 3-5°C below the primer Tm [49]. | |
| Excess Mg2+ concentration [49]. | Review and lower Mg2+ concentration to prevent non-specific product formation [49]. |
Immunocytochemistry (ICC) Troubleshooting
This guide addresses challenges in ICC, used to visualize protein expression and localization in cells exposed to biomaterials.
| Problem | Possible Causes | Recommendations |
|---|---|---|
| Weak or No Staining | Inadequate antibody application or permeabilization [50] [51]. | Increase concentration or incubation time of primary antibody. Use proper permeabilization reagent (e.g., Triton X-100 for intracellular targets) [50] [51]. |
| Over-fixation [50] [51]. | Reduce time or concentration of the fixative to prevent epitope masking [51]. | |
| Incompatible antibodies [50] [51]. | Confirm species reactivity between primary and secondary antibodies [50]. | |
| High Background | Antibody concentration too high [50] [51]. | Dilute primary and/or secondary antibody further [51]. |
| Insufficient blocking [50] [51]. | Increase incubation time or concentration of serum in the blocking buffer [50]. | |
| Insufficient washing [50] [51]. | Increase number of washes and consider adding very gentle agitation [50]. |
Frequently Asked Questions (FAQs)
Q1: What techniques can I use to profile the tumor immune microenvironment in biomaterial-cancer interaction studies? You can use several tissue-based techniques. Immunohistochemistry (IHC) allows identification of specific cell types (e.g., CD3+, CD8+ T cells) while preserving spatial information [52]. NanoString nCounter technology enables multiplexed gene expression analysis from challenging samples like FFPE tissue without requiring amplification, making it suitable for degraded RNA [52]. Spatial transcriptomics provides a high-resolution view of gene expression within the context of the tissue architecture [52].
Q2: How can flow cytometry support the development of cell therapies, like those involving engineered biomaterials? Flow cytometry is crucial for tracking cellular kinetics (pharmacokinetics) of cell therapies post-administration. It can directly enumerate therapeutic cells (e.g., CAR-T cells) in patient samples and provide additional data on their differentiation state and effector function over time [53]. Furthermore, it supports immunogenicity assessments by measuring humoral (anti-drug antibodies) and cellular immune responses against the therapeutic cells [53].
Q3: What are the standard assays for assessing the cytotoxicity of a novel biomaterial? Standard cytotoxicity assays are classified based on their detection method. According to ISO 10993-5, common tests include the MTT assay, which measures mitochondrial dehydrogenase activity [15]; ATP assays, which use luciferase to detect cellular ATP levels as a sensitive indicator of viability [15]; and dye exclusion tests like trypan blue, which assess membrane integrity [15]. These are typically performed using extract, direct contact, or indirect contact test methods [15].
Q4: My immunocytochemistry results show high background. What are the first steps to fix this? The first steps are to optimize antibody concentrations by diluting your primary and/or secondary antibody further, and to enhance your blocking protocol by increasing the incubation time or serum concentration [50] [51]. You should also run a control without the primary antibody to confirm the background is not originating from the secondary antibody [51].
Experimental Protocols for Cytotoxicity and Anti-Inflammatory Assessment
Protocol 1: In Vitro Cytotoxicity Testing of Biomaterial Extracts (Based on ISO 10993-5)
This protocol is used to evaluate the cytotoxic potential of a novel Mg-1%Sn-2%HA composite or similar biomaterials [15].
- Extract Preparation: Use the elution method. Incubate the biomaterial specimen in Dulbecco's Modified Eagle Medium (DMEM) supplemented with fetal bovine serum (FBS) for 24 hours at 37°C to obtain the extract [15].
- Cell Culture: Seed L-929 mouse fibroblast cells (or other relevant cell line) in culture plates and incubate at 37°C with 5% CO₂ until they form a confluent monolayer [15].
- Exposure: Prepare a series of diluted extracts (e.g., 100%, 50%, 25%). Apply the extracts to the cell monolayers. Include a control group with culture medium only [15].
- Incubation: Incubate the cells with the extract for a predetermined time, typically 24-48 hours at 37°C with 5% CO₂ [15].
- Viability Assessment:
- Microscopic Evaluation: Examine monolayers microscopically for signs of cell degeneration, malformation, and lysis [15].
- Quantitative MTT Assay: a. Add MTT reagent to the cells and incubate for several hours. b. Mitochondrial dehydrogenases in viable cells convert yellow MTT to purple formazan crystals. c. Solubilize the crystals with an organic solvent like isopropanol. d. Measure the absorbance of the solution at 492 nm. Cell viability is calculated as a percentage of the untreated control group [15].
- Interpretation: A cell viability of 70-80% or higher with the undiluted extract is typically considered non-cytotoxic [15].
Protocol 2: Assessing Anti-Inflammatory Potential in Macrophages
This protocol outlines how to test the effect of a novel lingonberry-based dietary supplement or other bioactive compound on the inflammatory response in immune cells [54].
- Cell Culture and Treatment: Culture monocyte/macrophage cells (e.g., THP-1 cell line). Pre-treat cells with a non-cytotoxic concentration of the test substance (e.g., 40-130 µg/ml for the lingonberry extract) for a set time [54].
- Inflammatory Stimulation: Induce inflammation by stimulating the cells with Lipopolysaccharide (LPS), a potent activator of macrophages [54].
- Analysis of Inflammatory Markers:
- Gene Expression: Harvest cell RNA and use Reverse Transcription-quantitative PCR (RT-qPCR) to measure the expression levels of key inflammatory cytokines such as Interleukin (IL)-6, IL-8, and Tumor Necrosis Factor (TNF)α [54].
- Protein Secretion: Collect cell culture supernatants. Use Enzyme-Linked Immunosorbent Assay (ELISA) to quantify the secreted levels of IL-6 and IL-8 proteins [54].
- Data Interpretation: A significant reduction in the expression and secretion of these pro-inflammatory cytokines in the treated group compared to the LPS-only group indicates anti-inflammatory activity [54].
Research Reagent Solutions
This table details key reagents and materials essential for the experiments described in this guide.
| Item | Function/Application |
|---|---|
| L-929 Mouse Fibroblast Cells | A standard cell line used for in vitro cytotoxicity testing of biomaterials according to ISO 10993-5 guidelines [15]. |
| MTT Reagent | A yellow tetrazolium salt used in colorimetric assays to measure cell viability and proliferation; reduced to purple formazan by metabolically active cells [15]. |
| Formalin-Fixed Paraffin-Embedded (FFPE) Tissue | Archival tissue format used for retrospective studies; compatible with IHC and NanoString nCounter analysis for immune profiling [52]. |
| NanoString nCounter Kits | Designed for gene expression analysis from low-quality or FFPE-derived RNA without the need for amplification, avoiding amplification biases [52]. |
| Lipopolysaccharide (LPS) | A potent inflammatory stimulant derived from bacterial cell walls, used to activate macrophages and model inflammation in vitro [54]. |
| Viability Dyes (e.g., 7-AAD, PI, eFluor) | Used in flow cytometry to distinguish and gate out dead cells, which can cause non-specific antibody binding and high background [48]. |
| Phosphatase Inhibitors | Critical components of lysis and fixation buffers during intracellular staining for phospho-proteins to preserve phosphorylation signaling events [48]. |
| Fixation and Permeabilization Buffers | Solutions (e.g., formaldehyde, methanol, Triton X-100, saponin) used to preserve cell structure and allow antibodies to access intracellular targets in ICC and flow cytometry [50] [48]. |
Experimental Workflow Diagrams
Cytotoxicity & Anti-Inflammatory Assessment Workflow
Flow Cytometry Cell Analysis Workflow
Extract Preparation and Concentration-Response Profiling for Material Safety Assessment
Troubleshooting Guides
Troubleshooting Cytotoxicity and Anti-inflammatory Assays
| Problem Category | Specific Issue | Potential Causes | Recommended Solutions |
|---|---|---|---|
| Cytotoxicity Assessment | High cytotoxicity in negative control materials | • Leachables from manufacturing• Residual solvents or sterilants• Particulates causing physical cell damage | • Implement stringent cleaning/rinse steps [39]• Use serum-containing medium (5-10%) to solubilize non-polar constituents [39]• Filter-sterilize extracts for particulate-laden materials [39] |
| Inconsistent results between qualitative and quantitative tests | • Technician scoring variability in qualitative MEM Elution [39]• Different sensitivity thresholds (50% vs 70% viability for passing) [39] | • Standardize with quantitative MTT/XTT for objective data [39]• Establish internal scoring standards with reference materials [39] | |
| Extract Preparation | Poor extraction efficiency | • Incorrect extraction temperature or duration [39]• Unsuitable solvent polarity [39] | • For prolonged-contact devices: 72-hour extraction at 37°C [39]• Use MEM with serum for both polar/non-polar leachables [39] |
| Concentration-Response | No clear dose-response relationship | • Inadequate concentration range [15]• Extract instability during testing [55] | • Include wide range (e.g., 0.78-1000 μg/mL) with serial dilutions [56]• Test extract freshness and use immediately post-preparation [55] |
| Anti-inflammatory Activity | High IC~50~ values in BSA denaturation assay | • Low potency of test material [57]• Incorrect positive control performance | • Compare against reference anti-inflammatories (e.g., diclofenac) [57]• Verify assay temperature stability (37°C→70°C incubation) [57] |
Advanced Troubleshooting: Delayed Inflammatory Responses
| Problem | Causes | Advanced Solutions |
|---|---|---|
| Late-onset cytotoxicity in degrading materials | • Acidic degradation product accumulation [55]• Particle debris from polymer breakdown [55] | • Use accelerated degradation (47°C) to simulate late-stage breakdown [55]• Implement flow culture to prevent acidic byproduct buildup [55] |
| Disconnect between in vitro and in vivo results | • Static culture overestimating toxicity [55]• Fragile in vitro cells vs. in vivo clearance mechanisms [39] | • Apply dynamic flow culture systems (e.g., Quasi Vivo) [55]• Use multiple cell types (fibroblasts, macrophages) to model in vivo FBR [55] |
Frequently Asked Questions (FAQs)
Extract Preparation & Standardization
Q1: What are the critical factors in preparing plant extract solutions for cytotoxicity screening?
The key factors are extraction solvent polarity, temperature, duration, and characterization. Use aqueous or ethanolic solvents depending on target compounds. For Ehretia rigida leaf extract, aqueous extraction at 70°C for 3 days successfully facilitated nanoparticle synthesis and biological testing [57]. Always characterize extracts chemically when possible and report methodology comprehensively to ensure reproducibility [58].
Q2: How should I determine appropriate extraction conditions for my biomaterial?
Follow ISO 10993-12 guidelines. Base conditions on intended clinical use: for limited-duration devices (<24 hours), 24-hour extraction suffices; for prolonged contact (>24 hours), use 72-hour extraction at 37°C [39]. Always include serum (5-10%) in extraction media to capture both polar and non-polar leachables [39].
Q3: Why does my clothing fabric fail cytotoxicity testing when it causes no skin irritation?
This demonstrates the high sensitivity and occasional over-sensitivity of in vitro cytotoxicity tests. The test is ideal for monitoring manufacturing residuals but isn't always predictive of clinical outcomes for certain material types like fabrics [39]. Focus the test's use on quality control and detecting unexpected manufacturing changes rather than absolute safety prediction for these materials [39].
Concentration-Response & Data Interpretation
Q4: What concentration range should I test for initial material safety screening?
Include a wide range with serial dilutions. Studies effectively use ranges from 0.78 μg/mL to 1000 μg/mL, often with two-fold serial dilutions [56]. Ensure you include concentrations both below and above the anticipated therapeutic or exposure range.
Q5: How do I calculate IC~50~ values for anti-inflammatory activity assessment?
Use the BSA denaturation assay with temperature-induced denaturation (37°C for 30 min, then 70°C for 20 min) [57]. Calculate percent inhibition compared to control, then determine the concentration that provides 50% inhibition of denaturation. For Ehretia rigida leaf extract, IC~50~ was 270.8 μg/mL versus 532.9 μg/mL for the silver nanoparticle form [57].
Q6: What does a biphasic dose-response curve indicate in cytotoxicity testing?
This may indicate hormesis - where low concentrations stimulate cellular responses while high concentrations inhibit them [59]. This phenomenon traces back to ancient toxicology concepts (mithridatism) and reflects the body's adaptive responses to low-level stressors [59].
Regulatory Compliance & Validation
Q7: Which cytotoxicity tests are most accepted for regulatory submissions?
The MEM Elution (qualitative) and MTT/XTT (quantitative) tests are most common [39]. While ISO 10993-5 suggests quantitative methods, reviewers routinely accept qualitative MEM Elution [39]. Document test method selection rationale thoroughly in submissions.
Q8: What is the required cell viability percentage for passing cytotoxicity tests?
It depends on the test: MEM Elution requires >~50% viability (score ≤2), while MTT/XTT tests typically require ≥70% viability [39]. Know which threshold applies to your selected method.
Q9: How long should I continue degradation studies for bioresorbable polymers?
Continue beyond mass loss onset to monitor delayed inflammatory responses. For poly(D,L-lactide-co-glycolide), cytotoxic effects emerged only after significant degradation occurred, not in early stages [55]. Use accelerated degradation at 47°C to predict long-term behavior within practical timeframes [55].
Experimental Protocols & Data Tables
Standardized Experimental Protocols
Protocol 1: Direct Contact Cytotoxicity Testing (ISO 10993-5)
This method evaluates the cytotoxic potential of medical device materials using direct cell contact [39].
Materials:
- L-929 mouse fibroblast cells or relevant cell line (e.g., KMST-6, HaCaT) [57] [15]
- Complete DMEM culture medium with 10% FBS and 1% penicillin-streptomycin [57]
- Test material extracts prepared per ISO 10993-12 [39]
- Multi-well culture plates [39]
Procedure:
- Prepare material extracts using appropriate media (MEM with serum recommended) at 37°C for 24-72 hours based on device contact duration [39].
- Culture cells to 80-90% confluence in multi-well plates [15].
- Apply test extracts directly to cells and incubate at 37°C with 5% CO~2~ for 24-72 hours [39].
- Assess cell viability via:
- Score reactivity: 0 (none), 1 (slight), 2 (mild), 3 (moderate), or 4 (severe) per ISO 10993-5 [39].
Protocol 2: BSA Denaturation Anti-inflammatory Assay
This protein denaturation assay evaluates anti-inflammatory potential of test materials [57].
Materials:
- 1% w/v Bovine Serum Albumin (BSA) in Tris-HCl buffer (pH 6.5) [57]
- Test compounds (plant extracts, nanoparticles, reference anti-inflammatories) [57]
- Water bath maintained at 70°C [57]
- Microplate reader capable of reading 660 nm [57]
Procedure:
- Prepare reaction mixtures containing 1% BSA with varying concentrations of test compounds (e.g., 12.5-400 μg/mL) [57].
- Incubate mixtures at 37°C for 30 minutes, then at 70°C for 20 minutes [57].
- Cool to room temperature and measure turbidity at 660 nm [57].
- Calculate percentage inhibition of denaturation using formula [57]: % Inhibition = (Absorbance~control~ - Absorbance~sample~) / Absorbance~control~ × 100
- Determine IC~50~ values from concentration-response curves [57].
Protocol 3: In Vitro Scratch Wound Healing Assay
This method evaluates material effects on cell migration and wound closure [57].
Materials:
- Relevant cell types (KMST-6 fibroblasts, HaCaT keratinocytes) [57]
- Culture plates
- Sterile pipette tips or scratchers
- Incubator maintaining 37°C, 5% CO~2~ [57]
- Imaging system with time-lapse capability [57]
Procedure:
- Seed cells in plates and culture to 100% confluence [57].
- Create a uniform "wound" scratch using sterile tip [57].
- Wash to remove detached cells and add treatments [57].
- Capture images at 0, 6, 12, and 24 hours at predetermined positions [57].
- Quantify wound closure rate using image analysis software [57].
- Calculate percentage wound closure compared to time zero [57].
Quantitative Data Tables
Table 1: Cytotoxicity and Anti-inflammatory Profiles of Natural Extracts and Biomaterials
| Material Type | Cell Type | Highest Non-cytotoxic Concentration | Cytotoxicity Assay | Anti-inflammatory Activity (IC~50~) | Reference |
|---|---|---|---|---|---|
| Ehretia rigida leaf extract | KMST-6, HaCaT | <25 μg/mL | WST-1 | 270.8 μg/mL (BSA denaturation) | [57] |
| Ehretia rigida-AgNPs | KMST-6, HaCaT | <25 μg/mL | WST-1 | 532.9 μg/mL (BSA denaturation) | [57] |
| Mg-1%Sn-2%HA composite | L-929 fibroblasts | 100% extract (71.51% viability) | MTT | Not tested | [15] |
| Poly(D,L-lactide-co-glycolide) | L-929 fibroblasts | Non-cytopic until late degradation | MTT | Induced inflammatory cytokines at degradation | [55] |
| PLA microplastics | A549, HepG2 | 100 μg/L (no viability reduction) | Not specified | Induced oxidative stress | [56] |
Table 2: Concentration-Dependent Cell Viability of Tested Biomaterials
| Material | Concentration | Cell Viability (%) | Experimental Conditions |
|---|---|---|---|
| Mg-1%Sn-2%HA composite [15] | 100% extract | 71.51% | L-929 cells, 7 days, MTT assay |
| 50% extract | 84.93% | Same conditions | |
| 25% extract | 93.20% | Same conditions | |
| 12.5% extract | 96.52% | Same conditions | |
| PLA-based particles [56] | 0.00078 μg/mL | No reduction | A549 and HepG2 cells |
| 100 μg/L | No reduction | Same conditions | |
| Various plant extracts [58] | Effective anti-inflammatory concentrations | No cytotoxicity reported | Oral cell models, systematic review |
Signaling Pathways & Experimental Workflows
Biomaterial-Cell Interaction Signaling Pathways
Comprehensive Safety Assessment Workflow
The Scientist's Toolkit: Research Reagent Solutions
Table 3: Essential Materials for Cytotoxicity and Anti-inflammatory Assessment
| Reagent Category | Specific Products & Methods | Function & Application | Key Considerations |
|---|---|---|---|
| Cell Lines | L-929 mouse fibroblasts [15], KMST-6 skin fibroblasts [57], HaCaT keratinocytes [57], A549 lung epithelial [56] | Standardized models for cytotoxicity screening | Select based on tissue relevance; use multiple types for comprehensive assessment |
| Viability Assays | WST-1 [57], MTT [15], MTS, ATP assays [15] | Metabolic activity measurement as viability proxy | MTT requires solubilization; ATP most sensitive for early toxicity [15] |
| Anti-inflammatory Assays | BSA denaturation [57], ELISA cytokine profiling [55], Protein arrays [55] | Protein stability and inflammatory mediator measurement | BSA denaturation is initial screen; cytokine profiling offers mechanistic insight |
| Extraction Media | MEM with 5-10% serum [39], DMEM with FBS [57], PBS [57] | Solubilizing leachables under simulated conditions | Serum essential for non-polar compounds; temperature critical (37°C) [39] |
| Reference Materials | Diclofenac sodium [57], Legally marketed devices [39] | Positive controls and comparison standards | Required for assay validation and regulatory compliance |
| Advanced Systems | Quasi Vivo flow culture [55], Accelerated degradation setups [55] | Physiological simulation and long-term prediction | Prevents acid buildup in static culture; predicts late-stage degradation effects |
Macrophages are versatile cells of the innate immune system that play a pivotal role in directing inflammatory responses, tissue repair, and restoration of homeostasis. These cells exist on a functional spectrum, broadly categorized into pro-inflammatory M1 and anti-inflammatory M2 phenotypes, though in reality they exhibit a wide range of polarization states. In the context of biomaterial research, understanding and controlling macrophage polarization is fundamental to reducing cytotoxic and pro-inflammatory responses to implanted materials. The host response to biomaterials initiates with protein adsorption at the implant surface, followed by the recruitment of immune cells, with macrophages serving as the primary orchestrators of subsequent inflammatory processes and tissue regeneration outcomes. When exposed to various microenvironmental stimuli, macrophages demonstrate remarkable plasticity, polarizing into distinct functional phenotypes that perform almost opposing functions. This technical support center provides comprehensive troubleshooting guidance and methodological frameworks for researchers developing in vitro macrophage systems to model inflammatory responses, with particular emphasis on applications in biomaterial cytotoxicity and inflammatory response research.
Essential Macrophage Biology for Experimental Design
Macrophage Polarization States and Markers
Macrophages polarize in response to environmental cues, adopting transient phenotypes that can be identified through specific surface markers and secretory profiles.
Table 1: Characteristic Markers for Macrophage Polarization States
| Polarization State | Inducing Stimuli | Surface Markers | Secretory Profile | Primary Functions |
|---|---|---|---|---|
| M1 (Classical) | IFN-γ, LPS | CD40, CD80, CD86, MHC-II | TNF-α, IL-1β, IL-6, IL-12, iNOS | Pro-inflammatory responses, pathogen clearance, tissue destruction |
| M2 (Alternative) | IL-4, IL-13 | CD163, CD204, CD206, Mrc1 | IL-10, TGF-β, Arg1, CCL17 | Immunosuppression, tissue repair, wound healing, fibrosis |
| M2a | IL-4, IL-13 | CD206 | IL-10, IL-1Ra, TGF-β | Type II inflammation, worm expulsion |
| M2b | Immune complexes, TLR agonists | CD86, MHC-II | IL-10, IL-1, TNF-α, IL-6 | Immunoregulation |
| M2c | IL-10, glucocorticoids | CD163, CD206 | IL-10, TGF-β, CCL18 | Matrix deposition, tissue remodeling |
Key Signaling Pathways in Macrophage Polarization
Macrophage polarization is regulated through the activation of several interrelated cellular signaling pathways. The main polarization-related pathways involved in inflammation include:
JAK/STAT Signaling Pathway: This pathway is utilized by more than 70 cytokines and is involved in vital biological processes including immune regulation. When IFN-γ and IL-12 bind to their receptors, JAK is activated, leading to phosphorylation of STAT1, which promotes M1 polarization. Conversely, IL-4 and IL-13 increase STAT6 expression, while IL-6 increases STAT3 expression, both promoting M2 polarization [60].
NF-κB Signaling Pathway: Acting as a "master switch" for various pro-inflammatory molecules, this pathway is triggered when TLRs on macrophage surfaces bind to LPS, activating the classical NF-κB pathway through either the MyD88-dependent pathway or interferon regulatory factor 3 pathway. This results in NF-κB p65/p50 entering the nucleus and controlling M1 polarization, leading to transcription of pro-inflammatory factors including IL-1β, IL-6, and TNF-α [60].
PI3K/Akt Signaling Pathway: This crucial pathway controls inflammatory reactions and regulates macrophage polarization through responses to growth factors and cytokines. The pathway interacts with both JAK/STAT and NF-κB signaling to fine-tune macrophage responses [60].
Macrophage Polarization Signaling Pathways: This diagram illustrates the key signaling pathways driving macrophage polarization toward pro-inflammatory M1 or anti-inflammatory M2 phenotypes.
Troubleshooting Guide: Frequently Asked Questions
Cell Selection and Culture Considerations
Q1: What are the key considerations when selecting macrophage cell sources for biomaterial testing?
The choice between primary macrophages and immortalized cell lines should be guided by your specific research objectives and required physiological relevance. Primary cells (such as bone marrow-derived macrophages or peritoneal macrophages) better reflect in vivo physiology but show donor variability and limited expansion capacity. Immortalized cell lines (like RAW 264.7, THP-1, or IC-21) offer reproducibility and ease of culture but may exhibit altered responsiveness compared to primary cells [61]. Recent research demonstrates significant differences in baseline expression of polarization markers (CD86, MHCII, CD206, EGR2) among macrophages from different tissue origins, which subsequently influences their polarization capacity, repolarization potential, and phagocytic functionality [61]. For biomaterial studies specifically, ensure your selected cell model expresses relevant pattern recognition receptors (TLRs, NLRs) for detecting material-associated DAMPs.
Q2: Why do my macrophages not maintain stable polarization during long-term experiments?
Macrophage polarization is inherently transient and dynamically regulated by microenvironmental cues. The observed instability likely results from several factors:
- Soluble factor degradation: Polarizing cytokines (IFN-γ, IL-4) degrade in culture medium over time. Consider supplemental additions or continuous delivery systems.
- Refractory periods: Macrophages exposed to persistent LPS stimulation become refractory to restimulation due to auto-inhibitory mechanisms like induction of ATF3 and kinase phosphatases [62]. Data indicate that iNOS expression in response to LPS follows transient dynamics even with repeated stimulation every 24 hours [62].
- Plasticity mechanisms: Macrophages actively reprogram their metabolism and signaling pathways in response to changing environmental conditions.
Solution: For sustained polarization states, use controlled release systems (cytokine-encapsulated microparticles, biomaterial-mediated delivery) or consider genetic manipulation to stabilize desired phenotypes. For LPS stimulation specifically, combined treatment with IFN-γ can help recover response magnitude [62].
Experimental Design and Implementation
Q3: How can I better model the transition from acute to chronic inflammation in vitro?
Establishing a sequential polarization model better mimics the in vivo progression from inflammation to resolution:
- Day 0-2: Prime macrophages with M1 stimuli (20 ng/mL IFN-γ + 100 ng/mL LPS)
- Day 2-4: Switch to M2 stimuli (20 ng/mL IL-4 or IL-13)
- Monitor transition efficiency via temporal analysis of surface markers (CD86 → CD206) and secretory profiles (TNF-α → IL-10)
This approach models the natural immune progression where pro-inflammatory responses typically precede reparative phases. For biomaterial applications, you can adapt this timeline to simulate the initial inflammatory phase followed by the foreign body response.
Q4: What are the optimal methods for quantifying macrophage polarization beyond surface markers?
A multi-modal assessment strategy provides the most comprehensive polarization characterization:
- Gene expression: qPCR for hallmark genes (iNOS, TNF-α for M1; Arg1, Ym1, Fizz1 for M2)
- Protein secretion: Multiplex ELISA for cytokine profiles (IL-12, IL-6, TNF-α for M1; IL-10, TGF-β for M2)
- Functional assays: Phagocytosis capacity (pHrodo-labeled targets), metabolomic profiling (glycolytic vs. oxidative phosphorylation rates), and efferocytosis capability
- Morphological analysis: M1 macrophages typically exhibit spread, flattened morphology while M2 display elongated, spindle-like shapes
Biomaterial-Specific Challenges
Q5: How do biomaterial surface properties influence macrophage polarization?
Physical and chemical characteristics of biomaterials significantly direct macrophage polarization responses:
- Surface topography and roughness: Macrophages cultured on rough-hydrophilic titanium surfaces polarize toward anti-inflammatory M2 phenotypes, which correlates with improved clinical outcomes and reduced healing times [63].
- Stiffness/elasticity: Increased substrate rigidity directly decreases pro-inflammatory responses and promotes M2 polarization [64]. Compliant, soft materials (0.5-2 kPa) promote less pronounced polarization compared to rigid tissue culture plastic [61].
- Wettability/hydrophilicity: Hydrophilic surfaces generally promote anti-inflammatory macrophage activation and enhance stem cell recruitment [63].
- Chemical composition: Composite coatings incorporating amorphous hydroxyapatite, lactoferrin, and PEG-PCL copolymer promote M2 polarization with increased IL-10 secretion and reduced TNF-α production, even under inflammatory challenge with LPS [65].
Q6: What controls should I include when testing biomaterial-induced macrophage responses?
Implement a tiered control strategy:
- Baseline controls: Unstimulated macrophages in standard culture conditions
- Polarization controls: M1-stimulated (LPS + IFN-γ) and M2-stimulated (IL-4/IL-13) cultures
- Material controls: Reference materials with known inflammatory profiles (e.g., rough-hydrophilic titanium for anti-inflammatory response)
- Cytocompatibility controls: Assess viability (Live/Dead staining, MTT/WST assays) alongside polarization to distinguish cytotoxic from immunomodulatory effects
The Scientist's Toolkit: Essential Reagents and Materials
Research Reagent Solutions
Table 2: Essential Reagents for Macrophage In Vitro Systems
| Reagent Category | Specific Examples | Function/Application | Considerations |
|---|---|---|---|
| Polarizing Cytokines | IFN-γ, LPS (M1); IL-4, IL-13, IL-10 (M2) | Direct macrophage polarization toward specific phenotypes | Validate species specificity; monitor endotoxin contamination |
| Culture Media | RPMI-1640, DMEM | Support macrophage growth and function | Heat-inactivate FBS (56°C, 30min) to complement inactivation |
| Polarization Markers | Anti-CD86, CD80, MHC-II (M1); Anti-CD206, CD163, CD204 (M2) | Phenotype characterization via flow cytometry | Include appropriate isotype controls; optimize antibody titration |
| Detection Antibodies | ELISA/Luminex: TNF-α, IL-12, IL-6 (M1); IL-10, TGF-β (M2) | Quantify secretory profiles | Establish standard curve within linear range; check cross-reactivity |
| Inhibitors/Agonists | JAK inhibitors (STAT1); ROCK inhibitors (polarization); TLR agonists (M1 priming) | Pathway manipulation for mechanistic studies | Determine optimal concentration to avoid off-target effects |
Quantitative Data Reference Values
Table 3: Expected Response Ranges for Macrophage Polarization
| Parameter | M1 Phenotype | M2 Phenotype | Measurement Method | Time Course |
|---|---|---|---|---|
| iNOS expression | >10-fold increase | No change / slight decrease | Western blot, qPCR | Peak at 24h, declines by 72h [62] |
| TNF-α secretion | 500-2000 pg/mL | <100 pg/mL | ELISA | Detectable by 6h, peaks 12-24h |
| IL-10 secretion | <100 pg/mL | 300-800 pg/mL | ELISA | Detectable by 12h, peaks 24-48h |
| CD86 expression | >80% positive | <20% positive | Flow cytometry | Stable by 24-48h |
| CD206 expression | <15% positive | >70% positive | Flow cytometry | Stable by 24-48h |
| Phagocytic index | Variable | >2-fold increase | Fluorescent bead uptake | Maximal by 24h |
Advanced Methodologies: Experimental Protocols
Dynamic Control of Macrophage Polarization
The transient nature of macrophage activation requires sophisticated control strategies for sustained polarization states. Implement a model-predictive control framework using transfer function models with linear autoregressive with exogenous input terms (ARX) equations coupled with non-linear elements to account for experimentally identified supra-additive and hysteretic effects [62]. This approach enables:
- Trajectory planning: Design time-varying input sequences to achieve desired temporal regulation of polarization markers
- State prediction: Forecast macrophage response dynamics to pro- and anti-inflammatory stimuli
- Experimental validation: Reproduce temporal iNOS dynamics induced by LPS and IFN-γ, and sustain duration/magnitude of expression through optimized stimulation protocols
3D Culture Systems for Enhanced Physiological Relevance
Transitioning from traditional 2D culture to 3D models improves physiological accuracy for biomaterial studies:
- Hydrogel encapsulation: Use PEG-based hydrogels with tunable stiffness (0.5-50 kPa) and incorporated adhesive peptides (RGD, GFOGER) [61]
- Matrix degradability: Include matrix metalloproteinase-sensitive crosslinkers to permit macrophage-mediated remodeling
- Stiffness gradients: Create systems with spatially varying mechanical properties to model tissue-level heterogeneity
- Co-culture systems: Incorporate fibroblasts, endothelial cells, or mesenchymal stem cells to model paracrine signaling networks
Macrophage Experimental Workflow: This diagram outlines the key decision points in designing macrophage-based in vitro systems for inflammatory response modeling.
The development of robust, predictive macrophage-based in vitro systems requires careful consideration of cell source, culture environment, and assessment methodologies. By implementing the troubleshooting strategies and experimental protocols outlined in this technical support guide, researchers can create more physiologically relevant models of acute and chronic inflammatory responses. Particularly in the context of biomaterial research, where macrophage responses ultimately dictate clinical success, these refined approaches enable more accurate prediction of in vivo outcomes and support the development of next-generation immunomodulatory materials with enhanced biocompatibility and reduced inflammatory potential. As the field advances, integrating multi-parametric readouts, temporal dynamics, and heterotypic cell interactions will further enhance the predictive power of these essential experimental systems.
Strategic Material Design: Engineering Biomaterials to Minimize Immune Activation
Troubleshooting Guides
Common Experimental Challenges and Solutions
Table 1: Troubleshooting Guide for Surface Modification Experiments
| Problem Category | Specific Issue | Potential Causes | Recommended Solutions |
|---|---|---|---|
| Bacterial Adhesion & Biofilm Formation | High bacterial adhesion on modified surfaces. | Incorrect surface charge (positive may enhance attachment); unsuitable topography feature size; protein adsorption mediating adhesion [66] [67]. | For passive strategies, use highly hydrophilic (e.g., zwitterionic) or superhydrophobic surfaces [66]. Ensure topographic feature dimensions are smaller than bacterial cells (sub-micron) [67]. |
| Inconsistent antibacterial results across bacterial species. | Differing cell wall properties (e.g., Gram-positive thicker than Gram-negative) leading to varied sensitivity to contact-killing nanostructures [67]. | Characterize efficacy against both Gram-positive and Gram-negative strains. Consider hybrid active-passive strategies for broad-spectrum activity [66]. | |
| Cytotoxicity & Inflammatory Response | Surface modification induces significant cell death. | High surface charge density causing non-specific membrane disruption; excessive release of cytotoxic ions (e.g., Zn²⁺ > 100 μM) from degradable materials [66] [68]. | For cationic surfaces, optimize charge density to minimize non-specific toxicity [66]. For ion-releasing materials, control degradation rate via coatings to maintain local ion concentration below cytotoxic thresholds [68]. |
| Modified surface triggers excessive inflammatory response (foreign body reaction). | Surface chemistry or topography promotes pro-inflammatory macrophage (M1) polarization; protein adsorption leads to fibrinogen-mediated macrophage activation [29] [69]. | Apply anti-inflammatory coatings (e.g., zwitterionic polymers like MPC or SBMA) [69]. Modify surface topography: nanoscale roughness can downregulate pro-inflammatory cytokines compared to micro-rough surfaces [29]. | |
| Coating & Modification Stability | Coating delamination or instability in physiological conditions. | Weak adhesion between coating and substrate; degradation of coating material (e.g., PEG autoxidation) [69]. | Use robust adhesive interlayers (e.g., polydopamine inspired by marine mussels) for substrates like PEEK [69]. Consider stable zwitterionic coatings as alternatives to PEG [69]. |
| Loss of functionalization over time. | Unstable anchoring of bioactive molecules; surface fouling by proteins masking functional groups [66]. | Employ covalent bonding strategies. Use non-fouling background (e.g., PEG or zwitterions) to prevent protein masking of functional groups [66] [69]. |
Advanced Troubleshooting: Complex Scenarios
Table 2: Troubleshooting Complex Multi-Functionalization Issues
| Scenario | Underlying Mechanism | Advanced Resolution Strategies |
|---|---|---|
| Conflicting objectives (e.g., need for both antibacterial properties and optimal tissue cell adhesion). | Surface properties that kill bacteria (e.g., high charge density, nanopillars) may also damage mammalian cells [66] [67]. | Develop hybrid or spatially patterned surfaces. Combine non-fouling chemistries to resist bacterial adhesion with selective bioactive motifs (e.g., RGD peptides) to promote specific cell integration [66] [29]. |
| In vivo performance does not replicate promising in vitro data. | Complex in vivo environment: dynamic blood flow, diverse protein corona formation, and immune system reactions alter surface-biology interactions [70] [29]. | Pre-condition surfaces with relevant biological fluids (e.g., serum) before in vitro testing to study protein corona effects [70]. Design stimuli-responsive surfaces that are activated specifically in the infection microenvironment (e.g., low pH, enzymes) [66]. |
Frequently Asked Questions (FAQs)
1. What are the primary surface property categories we can modify to control the biological response? The three primary categories are: Topography (physical structure and roughness), Chemistry (surface charge, wettability, functional groups), and Biological Functionalization (immobilization of bioactive molecules like peptides or antibodies) [66] [29] [67]. These properties directly influence protein adsorption, which is the initial event governing subsequent cell and bacterial behavior [29].
2. How does surface wettability influence bacterial adhesion? The relationship is complex but follows a general trend: moderately wettable surfaces often promote bacterial attachment, while extremes of high hydrophilicity (forming a hydration barrier) and superhydrophobicity (minimizing contact area) can reduce it [66]. Note that the specific bacterial species and environmental proteins can influence this outcome [66].
3. Can surface topography alone kill bacteria? Yes, certain nanoscale topographies are bactericidal. Inspired by insect wings like cicadas, surfaces with high-aspect-ratio nanopillars can kill bacteria by mechanically rupturing the cell membrane upon contact, a mechanism particularly effective against Gram-negative bacteria [71] [67].
4. What is a key strategy to reduce the cytotoxicity of nanoparticles (NPs) used in functionalization? Surface PEGylation is a common and effective strategy. Coating NPs with poly(ethylene glycol) (PEG) reduces protein corona formation and subsequent cellular uptake, thereby lowering cytotoxicity, as demonstrated for ZnO NPs [70] [72].
5. How can I functionalize a chemically inert biomaterial like PEEK? A widely adopted biomimetic strategy is to use a polydopamine (PDA) adhesive layer. The PDA layer strongly adheres to the PEEK surface, providing a platform for secondary reactions and the immobilization of various molecules, such as zwitterionic polymers or peptides [69].
6. What is the role of surface charge in bacterial adhesion versus killing? Surface charge has a dual role. At low to moderate densities, positive charge can enhance bacterial adhesion via electrostatic attraction. However, beyond a critical threshold (e.g., ~101³–101⁴ N⁺/cm² for quaternary ammonium), the strong electrostatic interaction becomes bactericidal by disrupting the bacterial membrane [66].
7. How can surface modifications modulate the immune response to an implant? Surfaces can be designed to influence immune cell behavior, particularly macrophages. Specific surface chemistries (e.g., zwitterions) and topographies (e.g., nanoscale gratings) can promote a shift from a pro-inflammatory (M1) to an anti-inflammatory/healing (M2) macrophage phenotype, reducing inflammation and improving integration [29] [73] [69].
Experimental Protocols & Methodologies
Protocol 1: Creating a Bioinspired Antibacterial Topography
This protocol details the replication of "Sharklet" topography, a passive antifouling pattern, onto a polymer surface using soft lithography [71].
Workflow Overview
Materials:
- Master Template: Silicon wafer.
- Photoresist and developer.
- PDMS Kit: Sylgard 184 base and curing agent.
- Polymer Substrate: e.g., Polyurethane film.
- Equipment: Spin coater, UV exposure system, plasma cleaner, nanoimprinter.
Step-by-Step Procedure:
- Master Fabrication:
- Clean a silicon wafer with oxygen plasma.
- Spin-coat a layer of photoresist onto the wafer.
- Expose the photoresist to UV light through a photomask containing the Sharklet pattern (rectangular features: 2 µm width, 3 µm height, arranged in a diamond-shaped array with 2 µm spacing) [71].
- Develop the wafer to remove exposed resist, creating the positive relief master.
PDMS Mold Creation:
- Mix PDMS base and curing agent (10:1 ratio), degas in a vacuum desiccator.
- Pour the mixture over the silicon master and cure at 65°C for 2 hours.
- Carefully peel off the cross-linked PDMS, which now contains the negative of the Sharklet pattern.
Replication via Imprinting:
- Place the polymer substrate on the imprinting stage.
- Press the PDMS mold onto the substrate using a nanoimprinter. Apply appropriate heat and pressure based on the polymer's thermal properties (e.g., for polyurethane, 100°C and 20 bar for 5 minutes).
- Cool the system below the polymer's glass transition temperature before demolding.
Characterization and Validation:
- Quality Control: Use Scanning Electron Microscopy (SEM) and surface profilometry to verify the fidelity of the replicated topography.
- Bioassay: Sterilize the sample (e.g., UV light, 70% ethanol). Perform bacterial adhesion assays using standard strains like Staphylococcus aureus or Pseudomonas aeruginosa. Compare adhesion on the textured surface versus a flat control using colony counting or fluorescence microscopy [71] [67].
Protocol 2: Applying a Zwitterionic Anti-inflammatory Coating
This protocol describes the functionalization of a material surface with a zwitterionic polymer (e.g., MPC or SBMA) using a polydopamine (PDA) adhesive primer to mitigate the foreign body response [69].
Workflow Overview
Materials:
- Substrate: e.g., PEEK, Titanium, or glass.
- Dopamine Hydrochloride.
- Tris-HCl buffer (10 mM, pH 8.5).
- Zwitterionic polymer: e.g., poly(MPC-co-[3-(Dimethylamino)propyl]acrylamide) for enhanced stability [69].
- Equipment: Orbital shaker, beakers, UV-Vis spectrometer.
Step-by-Step Procedure:
- Substrate Preparation and PDA Priming:
- Clean substrates sequentially with acetone, ethanol, and deionized water in an ultrasonic bath. Dry with nitrogen.
- Prepare a dopamine solution (2 mg/mL in Tris-HCl buffer, pH 8.5).
- Immerse the clean substrates in the dopamine solution under constant shaking for 4-8 hours. A dark brown/black PDA film will deposit on the surfaces.
- Remove the substrates, rinse with DI water, and dry gently with N₂.
Zwitterionic Grafting:
- Prepare a solution of the zwitterionic copolymer (e.g., 5 mg/mL in DI water).
- Immerse the PDA-coated substrates in the polymer solution. Incubate for 12-24 hours at room temperature to allow covalent grafting to the PDA layer.
- Rise the substrates thoroughly with DI water to remove any physically adsorbed polymer.
Coating Validation and Testing:
- Quality Control:
- In vitro Efficacy Testing:
- Culture macrophage cell lines (e.g., RAW 264.7) on the coated and uncoated surfaces.
- Stimulate macrophages towards a pro-inflammatory (M1) phenotype (e.g., with LPS and IFN-γ).
- After 24-48 hours, collect culture supernatant and measure key pro-inflammatory cytokines (IL-1β, IL-6, TNF-α) using ELISA. A significant reduction on the coated surface indicates successful immunomodulation [69].
Key Signaling Pathways in Host Response
Surface properties are sensed by cells, triggering intracellular signaling cascades that dictate the fate of the biomaterial integration. Key pathways involved in inflammatory and tissue integration responses are summarized below.
Diagram: Key Immune Signaling Pathways Modulated by Surface Properties
Pathway Description: The journey begins with protein adsorption on the implanted surface [29]. The composition and conformation of these adsorbed proteins (the "protein corona") are critical. For instance, adsorbed fibrinogen can promote macrophage activation and pro-inflammatory cytokine release (TNF-α, IL-1β, IL-6) via interactions with Toll-like receptors (TLR-4) [29]. This drives the differentiation of recruited monocytes into M1 pro-inflammatory macrophages, which, if sustained, leads to chronic inflammation, foreign body giant cell formation, and fibrous encapsulation—ultimately causing implant failure [29] [73].
Surface modification strategies aim to steer this process toward a favorable outcome. Zwitterionic coatings, specific nanotopographies, and anti-inflammatory biofunctionalizations can promote the polarization of macrophages toward an M2 pro-healing phenotype [29] [69]. M2 macrophages release anti-inflammatory cytokines like IL-10 and TGF-β, which help resolve inflammation and promote tissue repair and integration, leading to implant success [73].
The Scientist's Toolkit: Research Reagent Solutions
Table 3: Essential Materials for Surface Modification Research
| Category | Reagent / Material | Key Function / Application | Notes |
|---|---|---|---|
| Surface Chemistry | Polydopamine (PDA) | Universal adhesive primer for secondary functionalization on inert surfaces (e.g., PEEK) [69]. | Biomimetic (mussel-inspired). Provides a reactive platform for covalent grafting. |
| Zwitterionic Polymers (MPC, SBMA) | Create ultra-low fouling surfaces; resist protein adsorption and reduce inflammatory response [69]. | Superior stability compared to PEG. MPC mimics cell membrane phospholipids. | |
| Poly(ethylene glycol) (PEG) | Traditional polymer for creating protein-resistant ("stealth") surfaces [70] [67]. | Can undergo autoxidation; may produce anti-PEG antibodies. | |
| Bioactive Molecules | RGD Peptide | Promotes specific cell adhesion and integration by binding to integrin receptors [29]. | Can be coupled to surfaces via PDA or other linkers. |
| Antimicrobial Peptides (AMPs) | Provides "active" contact-killing functionality to surfaces [66] [71]. | Can be immobilized to reduce reliance on released antibiotics. | |
| Topographic Masters | Sharklet Pattern | Passive antifouling topography inspired by sharkskin; inhibits bacterial adhesion [71]. | Feature dimensions: 2 µm width, 3 µm height, 2 µm spacing. |
| Cicada Wing Pattern | Bactericidal nanopillar topography; kills bacteria via mechanical membrane rupture [71] [67]. | Effective against Gram-negative bacteria. Pillar dimensions ~200 nm height, 100 nm diameter. | |
| Characterization Tools | X-ray Photoelectron Spectroscopy (XPS) | Quantifies elemental surface composition and chemical states [69]. | Confirms success of surface chemical modifications. |
| Water Contact Angle (WCA) | Measures surface wettability and hydrophilicity/hydrophobicity [66] [69]. | Simple, rapid indicator of surface chemistry changes. | |
| Scanning Electron Microscopy (SEM) | Visualizes surface topography and nanostructures at high resolution [71] [69]. | Essential for quality control of topographically modified surfaces. |
In the context of reducing biomaterial cytotoxicity and inflammatory responses, polymeric biomaterials are engineered to function as advanced protective barriers. These materials are designed to control the diffusion of cytotoxic substances and create a favorable microenvironment for cells, which is a core objective in modern biomedical research. Biomaterial-supported cell encapsulation matrices demonstrate superior properties for enhancing biological functionality and providing immune protection [74]. These systems are highly significant for translational medicine across multiple therapeutic applications, including cancer therapy, wound healing, tissue regeneration, and drug delivery [74].
The fundamental principle involves using biocompatible polymers to create semi-permeable membranes or matrices that strategically control molecular transport. This controlled diffusion barrier serves dual purposes: it protects encapsulated therapeutic cells from hostile immune factors in the host environment while simultaneously allowing the controlled release of therapeutic molecules from the encapsulated cells [74]. This dynamic exchange capability offers significant advantages over traditional drug delivery systems, which may not provide localized control over cytotoxic environments. The strategic design of these polymeric barriers directly addresses key challenges in biomaterial cytotoxicity and inflammatory response research by focusing on material composition, structural properties, and host-biomaterial interactions.
Key Mechanisms and Material Properties
Material Selection for Optimal Barrier Function
Polymeric biomaterials for protective barriers fall into two main categories: natural and synthetic polymers. Each category offers distinct advantages for controlling cytotoxin diffusion and reducing inflammatory responses.
Natural Polymers are prized for their inherent biocompatibility and low immunogenic properties. Key examples include:
- Proteins: Silk fibroin, collagen, gelatin, keratin, and elastin provide biological recognition sites that can enhance integration [74] [75].
- Polysaccharides: Chitosan, sodium alginate, sodium hyaluronate, cellulose, and cyclodextrin offer tunable permeability and gelation properties [74] [75].
However, natural polymers present challenges including rapid degradation profiles, low mechanical strength, risk of microbial contamination, and potential allergic reactions in some patients [75].
Synthetic Polymers provide superior control over material properties and are less immunogenic than their natural counterparts. Important synthetic options include:
- Polyethylene glycol (PEG): Excellent hydrophilicity and protein resistance [74].
- Polylactic acid (PLA): Controllable degradation kinetics [74].
- Polycaprolactone (PCL): Slow degradation suitable for long-term applications [74].
- Polyvinyl alcohol (PVA): Good film-forming capabilities [74].
The biodegradability of synthetic polymers can be precisely adjusted to match specific clinical timeframes, making them particularly valuable for tissue engineering applications where temporary support is needed [75].
Structural Design Considerations for Diffusion Control
The structural architecture of polymeric barriers significantly influences their protective capacity against cytotoxin diffusion. Several key parameters must be optimized:
Porosity and Pore Size: Perhaps the most critical factor, porosity facilitates nutrient diffusion while controlling the passage of larger cytotoxic molecules [74]. Ideal pore size distribution depends on the specific application, with research indicating pores ranging from 200-400µm suitable for bone tissue engineering, while 50-200µm pores are more effective for soft tissue engineering [75].
Mechanical Properties: Biomaterial stiffness and elasticity influence immune responses by affecting adhesion, migration, activation, and polarization of immune cells [30]. For optimal outcomes, implant mechanical properties should match those of the target tissue [30].
Surface Characteristics: Modifications in surface roughness, topography, chemistry, and charge significantly influence interactions between the implant and biological environment [30]. Physical patterning approaches such as nanopatterning (controlling spacing, spikes, arrays, orientation, and size) have demonstrated effectiveness in modulating biocompatibility and reducing foreign body reactions [30].
Table 1: Key Properties of Polymeric Biomaterials for Cytoprotection
| Property | Impact on Barrier Function | Optimization Strategy |
|---|---|---|
| Chemical Composition | Determines degradation rate & inflammatory potential | Blend natural/synthetic polymers; modify functional groups |
| Porosity | Controls nutrient/waste diffusion & cytotoxin exclusion | Use freeze-drying, porogens, or 3D printing techniques |
| Mechanical Strength | Affects structural integrity under physiological loads | Adjust cross-linking density or polymer molecular weight |
| Surface Morphology | Influences protein adsorption & cell adhesion | Implement surface patterning or plasma treatment |
| Hydrophilicity/Hydrophobicity | Governs protein adsorption & inflammatory cell attachment | Incorporate hydrophilic polymers like PEG |
Experimental Protocols for Evaluation
Cytotoxicity Assessment Methodologies
Rigorous cytotoxicity testing is essential for evaluating the protective efficacy of polymeric barriers. Standardized protocols according to ISO 10993-5 provide reliable frameworks for assessment [15]. The following workflow outlines a comprehensive cytotoxicity evaluation approach:
Figure 1: Cytotoxicity Testing Workflow
Sample Preparation and Extract Generation:
- Prepare biomaterial samples according to intended use (films, hydrogels, 3D scaffolds)
- Use elution method with culture medium (e.g., DMEM supplemented with fetal bovine serum) as extraction vehicle
- Maintain surface area to extraction vehicle ratio according to ISO 10993-12 guidelines
- Incubate extracts at 37°C for 24 hours [15]
Cell Culture Conditions:
- Use appropriate mammalian cell lines (L-929 mouse fibroblast cells are standard)
- Maintain cells in controlled environment (37°C, 5% CO₂)
- Culture for predetermined periods (typically 24-72 hours, up to 7 days for extended evaluation)
- Include positive (toxic) and negative (non-toxic) controls [15] [76]
Assessment Methods:
- Microscopic Evaluation: Examine monolayers for aberrant cell morphology and degeneration
- Quantitative Assays:
- MTT assay: Measures mitochondrial dehydrogenase activity converting yellow MTT to purple formazan
- ATP assays: Detect cellular ATP levels as indicator of metabolic activity
- Membrane integrity tests: Use dye exclusion methods (Trypan Blue) [15]
Advanced Immunomodulation Assessment
Beyond basic cytotoxicity, evaluating the specific effects on immune responses provides deeper insight into barrier function:
Macrophage Polarization Assays:
- Culture macrophages (e.g., RAW 264.7 cell line) on biomaterials
- Assess phenotype markers (pro-inflammatory M1 vs. anti-inflammatory M2)
- Measure cytokine secretion profiles (TNF-α, IL-1β, IL-10, TGF-β) using ELISA
Foreign Body Response (FBR) Evaluation:
- Analyze protein adsorption patterns on material surfaces
- Evaluate fibroblast activity and collagen deposition
- Assess fibrous capsule formation in vivo [30]
Table 2: Standardized Cytotoxicity Assessment Methods for Polymeric Barriers
| Method Type | Principle | Key Measurements | Applications |
|---|---|---|---|
| Extract Testing | Sample extracts incubated with cells | Cell viability, morphology | Initial screening of leachables |
| Direct Contact | Material placed directly on cells | Zone of inhibition, cell lysis | Surface toxicity evaluation |
| Indirect Contact | Material separated by agar or barrier | Diffusion-mediated effects | Semi-permeable barrier function |
| MTT Assay | Mitochondrial enzyme activity | Optical density at 492-570 nm | Metabolic activity quantification |
| ATP Assay | Cellular ATP levels | Luminescence signal | Viable cell count |
| Flow Cytometry | Cell membrane integrity | Propidium iodide/annexin V | Apoptosis/necrosis distinction |
Troubleshooting Guide: FAQs
Q1: Our polymeric barrier shows good cytoprotection but poor cell adhesion. What modification strategies can we implement?
A: This common issue often stems from suboptimal surface chemistry. Consider these approaches:
- Surface Functionalization: Incorporate cell-adhesive motifs like RGD peptides onto polymer chains
- Composite Formation: Blend with natural polymers like chitosan or hyaluronic acid, which have shown excellent cell adhesion properties in cartilage tissue engineering [76]
- Topographical Patterning: Create micro/nano-scale surface patterns to guide cell attachment
- Dynamic Modification: Use stimuli-responsive polymers that change properties after implantation
Q2: How can we balance porosity for nutrient diffusion while maintaining effective cytotoxin exclusion?
A: This critical balance requires strategic design:
- Gradient Porosity: Implement multilayered structures with decreasing pore size toward the exterior
- Smart Gating: Use stimuli-responsive polymers that change pore size in response to environmental cues
- Surface Modification: Apply selective permeable coatings to control diffusion based on molecular size and charge
- Biomimetic Design: Create pore architectures inspired by natural basement membranes with selective permeability
Q3: Our biomaterial triggers excessive fibrous encapsulation in vivo. How can we mitigate this foreign body response?
A: Fibrous encapsulation indicates suboptimal biocompatibility. Address this through:
- Surface Modification: Reduce protein fouling by incorporating hydrophilic polymers like PEG
- Immunomodulatory Signals: Incorporate anti-inflammatory cytokines (IL-4, IL-10) or specific macrophage-polarizing agents
- Mechanical Property Matching: Ensure biomaterial stiffness matches the target tissue to minimize mechanical mismatch
- Degradation Rate Optimization: Adjust polymer composition to match degradation rate with tissue regeneration pace [30]
Q4: What are the most reliable methods for evaluating the inflammatory potential of our polymeric barrier?
A: Implement a tiered assessment strategy:
- In Vitro Macrophage Culture: Use primary macrophages or cell lines to assess inflammatory cytokine secretion
- Lymphocyte Activation Assays: Measure T-cell proliferation and activation in response to material extracts
- Complement Activation Testing: Evaluate complement system activation using plasma-based assays
- In Vivo Implantation Studies: Histological analysis of implant sites for foreign body giant cells and fibrous capsule thickness [30]
Q5: How can we improve the reproducibility of our polymeric barrier fabrication process?
A: Process variability undermines experimental consistency. Consider:
- Advanced Fabrication Techniques: Implement microfluidics for precise control of capsule size and uniformity [74]
- Real-time Monitoring: Incorporate process analytical technology during synthesis
- Standardized Cross-linking: Use precise stoichiometric ratios and reaction conditions
- Quality by Design: Implement design of experiments to identify critical process parameters
Research Reagent Solutions
Table 3: Essential Materials for Polymeric Barrier Research
| Reagent/Material | Function | Key Considerations |
|---|---|---|
| Chitosan | Natural polysaccharide for composite films | Enhances cell adhesion; requires acidic conditions for solubility |
| Poly(ethylene glycol) | Biofouling-resistant polymer | Reduces protein adsorption; can be functionalized |
| Hyaluronic Acid | Natural glycosaminoglycan for hydrogels | Excellent biocompatibility; modulates inflammation |
| Genipin | Natural cross-linking agent | Alternative to glutaraldehyde; lower cytotoxicity |
| MTT Reagent | Mitochondrial activity assay | Forms insoluble formazan; requires solubilization |
| L-929 Fibroblasts | Standardized cell line for cytotoxicity | Recommended by ISO 10993-5 for biocompatibility testing |
| Alamar Blue | Fluorescent cell viability indicator | Non-toxic; allows continuous monitoring |
| Dulbecco's Modified Eagle Medium | Extract preparation medium | With serum for extraction; standardized conditions |
Advanced Material Design Strategies
Immunomodulatory Biomaterial Engineering
Next-generation polymeric barriers go beyond passive protection to actively modulate immune responses. Several advanced strategies have emerged:
Surface Engineering Approaches: Physical and chemical modifications of biomaterial surfaces can significantly influence immune reactions. Research demonstrates that alterations in surface roughness, topography, chemistry, and charge can promote specific interactions with surrounding tissues, thereby improving implant integration and reducing adverse immune responses [30]. For neural applications, softer materials that match brain tissue mechanical properties have been shown to lead to reduced inflammatory reactions [30].
Controlled Release Systems: Incorporating immunomodulatory agents that can be released in a controlled manner represents a powerful approach. These systems can deliver:
- Small Molecule Inhibitors: Targeted agents such as colony-stimulating factor 1 receptor regulators that alter macrophage phenotype from pro-inflammatory to anti-inflammatory states [30]
- Genetic Materials: siRNA and miRNA for precise regulation of genes involved in inflammation [30]
- Biological Factors: Anti-inflammatory cytokines or growth factors that promote regenerative responses
Stimuli-Responsive Materials: "Smart" biomaterials that adapt their properties in response to environmental changes (pH, temperature, enzyme activity) enable precise immunomodulation. These systems can potentially be used for modulating immune response in applications such as vaccination and cancer immunotherapy [30].
The following diagram illustrates the multi-faceted approach to designing advanced immunomodulatory barriers:
Figure 2: Multimodal Barrier Design Strategy
Characterization Techniques for Barrier Efficacy
Comprehensive characterization is essential for validating polymeric barrier performance:
Diffusion Profiling:
- Use fluorescently-labeled dextrans of varying molecular weights to establish diffusion coefficients
- Implement Franz diffusion cells for standardized permeability assessment
- Monitor temporal changes in barrier properties under physiological conditions
Structural Analysis:
- Scanning electron microscopy for surface and cross-sectional morphology
- Mercury porosimetry for pore size distribution
- Atomic force microscopy for surface roughness and mechanical mapping
Biological Validation:
- Co-culture systems with immune cells to simulate inflammatory environments
- Real-time monitoring of barrier integrity using TEER measurements
- Histological evaluation of cell distribution and viability within encapsulated systems
The field of polymeric biomaterials as protective barriers continues to evolve toward more sophisticated, multifunctional systems that not only reduce cytotoxin diffusion but actively promote regenerative environments. By integrating advanced material design with comprehensive biological validation, researchers can develop increasingly effective solutions for reducing biomaterial cytotoxicity and inflammatory responses in clinical applications.
Troubleshooting Guide: Common Experimental Challenges
Table 1: Troubleshooting Common Issues in Smart Biomaterial Development
| Problem Phenomenon | Possible Causes | Recommended Solutions |
|---|---|---|
| Premature drug release | Insufficient cross-linking density; Unstable chemical bonds in physiological conditions | Optimize cross-linker ratio; Use more stable chemical bonds (e.g., stiffer polymers); Test stability in simulated body fluid [77]. |
| Insufficient drug release at target site | Biomaterial insufficiently responsive to pathological stimulus; Drug diffusion barriers | Re-evaluate trigger threshold (e.g., pH, enzyme concentration); Incorporate multiple stimulus mechanisms (e.g., pH+ROS); Use more sensitive cleavable linkers [77] [78]. |
| High cytotoxicity of the biomaterial system | Toxic degradation products; High residual solvent or cross-linker concentrations | Purify polymers thoroughly; Switch to biocompatible cross-linkers (e.g., Schiff bases); Perform extensive cytotoxicity screening (ISO-10993) [30] [79]. |
| Short circulation time or poor retention | Rapid degradation by non-specific enzymes; Incorrect particle size for target tissue | Modify surface with PEG or stealth coatings; Adjust biomaterial mechanical properties to match target tissue [30]. |
| Excessive foreign body reaction or fibrosis | Material surface properties provoke pro-inflammatory macrophage (M1) polarization | Modify surface chemistry/topography to promote anti-inflammatory (M2) polarization; Incorporate anti-inflammatory agents (e.g., DSF, NSAIDs) [30] [73]. |
Frequently Asked Questions (FAQs)
FAQ 1: What are the primary endogenous stimuli used for triggered drug release in inflammatory environments, and how are they leveraged?
Smart biomaterials are designed to respond to specific pathological conditions at the disease site. Key endogenous stimuli and their operational mechanisms include:
- pH: Chronic wounds and inflammatory sites often exhibit a lower (acidic) pH. Biomaterials can be designed using pH-sensitive bonds, such as Schiff bases, which hydrolyze in acidic environments, or polyelectrolytes that swell or shrink with pH changes, thereby releasing the drug [77].
- Enzymes: Specific enzymes, like Matrix Metalloproteinases (MMPs), are upregulated in many inflammatory conditions (e.g., myocardial infarction, chronic wounds). By incorporating enzyme-cleavable peptide sequences (e.g., PLGLAG for MMP-2/9) into the hydrogel's cross-links, the material degrades and releases its payload specifically where these enzymes are active [78].
- Reactive Oxygen Species (ROS): Oxidative stress is a hallmark of chronic inflammation. Biomaterials can be integrated with ROS-sensitive moieties (e.g., thioketal bonds) that break upon exposure to high ROS levels, facilitating on-demand drug release [77].
FAQ 2: How can I engineer a biomaterial to switch from pro-inflammatory (M1) to anti-inflammatory (M2) macrophage polarization?
Directing macrophage polarization is a key immunomodulatory strategy. This can be achieved by:
- Incorporating Bioactive Cues: The biomaterial can be functionalized with or release specific anti-inflammatory cytokines (e.g., IL-4, IL-10) or drugs that promote an M2 phenotype [30] [73].
- Surface Physical Properties: The surface topography (e.g., nanoscale patterns), stiffness, and chemistry of the biomaterial itself can influence immune cell response. Softer materials and specific surface patterns have been shown to reduce pro-inflammatory responses [30].
- Controlled Release of Immunomodulators: Loading and controlling the release of agents like Disulfiram (DSF)—which inhibits GSDMD-mediated pyroptosis—or specific colony-stimulating factor 1 receptor (CSF1R) targets can actively shift macrophages toward a reparative M2 state [80] [30].
FAQ 3: What are the primary cross-linking strategies for creating stable yet responsive hydrogels?
The cross-linking method determines the hydrogel's stability and responsiveness.
- Physical Cross-linking: Based on reversible, non-covalent interactions like hydrogen bonding, ionic chelation, and hydrophobic associations. These hydrogels are often easier to prepare and highly responsive but may have lower mechanical strength and stability [77].
- Chemical Cross-linking: Involves forming a permanent, three-dimensional network through irreversible covalent bonds. Methods include bulk polymerization, "click" chemistry (e.g., Michael addition), and enzyme-mediated reactions. These gels are structurally stable and allow for more controlled drug release [77] [78]. Combining both methods can fine-tune the release profile for complex environments like chronic wounds [77].
FAQ 4: My biomaterial performs well in vitro but fails in vivo. What could be the reason?
This common challenge can arise from several factors:
- Complex Inflammatory Milieu: The in vivo environment is far more complex, with a dynamic interplay of immune cells and cytokines that is difficult to fully replicate in vitro. The material may not adequately respond to the evolving inflammatory signals in a live animal [79].
- Protein Fouling and Foreign Body Reaction (FBR): Upon implantation, proteins immediately adsorb onto the material, triggering a cascade of immune responses that can lead to fibrosis and isolation of the implant, preventing it from functioning as intended [30] [79].
- Endotoxin Contamination: Trace amounts of bacterial endotoxins on the biomaterial can significantly amplify the inflammatory response, leading to failure. Rigorous testing for and removal of endotoxins is crucial for pre-clinical success [79].
Experimental Protocols & Workflows
Protocol 1: Fabrication of a Dual pH/Enzyme-Responsive Hydrogel
This protocol outlines the synthesis of a hydrogel responsive to both acidic pH and MMPs, suitable for targeted drug delivery in inflammatory environments like chronic wounds [77] [78].
1. Materials Preparation
- Polymers: Oxidized Alginate (containing aldehyde groups) and Chitosan (containing amino groups).
- Cross-linker: A peptide sequence (e.g., GGRMSMPV) cleavable by MMP-2/9.
- Therapeutic Agent: An anti-inflammatory drug (e.g., Dexamethasone).
- Buffers: Phosphate Buffered Saline (PBS, pH 7.4) and Acetate Buffer (pH 5.5).
2. Synthesis Steps
- Step 1: Dissolve the MMP-cleavable peptide cross-linker and the drug in PBS.
- Step 2: Add the polymer solutions (Oxidized Alginate and Chitosan) to the mixture from Step 1 under gentle stirring. The primary cross-linking occurs via a Schiff base reaction between the aldehyde and amino groups.
- Step 3: Allow the solution to gelate at 37°C for 1-2 hours.
- Step 4: Wash the formed hydrogel with buffers to remove any unreacted components.
3. Characterization and Release Kinetics
- Swelling Ratio: Measure the weight change of the hydrogel in buffers of different pH (e.g., 7.4 and 5.5) to confirm pH responsiveness.
- In Vitro Drug Release:
- Immerse the loaded hydrogel in release media at pH 7.4 and pH 5.5.
- Add recombinant MMP-2/9 enzymes to one set of tubes at pH 5.5 to simulate the inflammatory environment.
- Collect samples at predetermined time points and use HPLC to quantify the amount of drug released.
Protocol 2: Evaluating Anti-inflammatory Efficacy and Cytotoxicity
This protocol describes a standard in vitro method to assess the bioactivity and safety of a drug-loaded smart biomaterial.
1. Cell Culture
- Culture macrophage cell lines (e.g., RAW 264.7) in standard growth medium. Seed cells in multi-well plates.
2. Treatment Groups
- Group 1: Cells + Culture medium (Negative Control)
- Group 2: Cells + LPS (e.g., 100 ng/mL) to induce inflammation (Positive Control)
- Group 3: Cells + LPS + Empty Biomaterial (to test material cytotoxicity)
- Group 4: Cells + LPS + Drug-Loaded Biomaterial (to test anti-inflammatory efficacy)
3. Analysis
- Cytotoxicity (ISO-10993): After 24 hours, measure cell viability using an MTT or AlamarBlue assay for all groups.
- Immunomodulation:
- qPCR: Isolate RNA and analyze the expression of M1 markers (e.g., iNOS, TNF-α) and M2 markers (e.g., ARG1, CD206).
- ELISA: Collect cell culture supernatant and measure the secretion of pro-inflammatory (e.g., TNF-α, IL-6) and anti-inflammatory (e.g., IL-10) cytokines.
Signaling Pathways in Anti-inflammatory Drug Action
Understanding the molecular pathways is crucial for rational biomaterial design. The following diagram illustrates the mechanism of Disulfiram (DSF), a repurposed drug with significant anti-inflammatory activity, and how a smart biomaterial can target this pathway [80].
The Scientist's Toolkit: Research Reagent Solutions
Table 2: Essential Reagents for Developing Anti-inflammatory Smart Biomaterials
| Reagent / Material | Function / Application | Key Considerations |
|---|---|---|
| Disulfiram (DSF) | A repurposed drug that inhibits Gasdermin D (GSDMD)-mediated pyroptosis, a highly inflammatory form of cell death [80]. | Poor solubility and rapid metabolism limit its application. Requires nano-delivery systems (e.g., lipid nanoparticles) for effective use [80]. |
| MMP-Cleavable Peptides (e.g., PLGLAG) | Serves as a cross-linker in biomaterials that degrades specifically in environments with high MMP activity (e.g., infarcted myocardium, chronic wounds) [78]. | Specificity varies between sequences; choose based on the target MMP subtype (e.g., MMP-2/9) present in the pathology of interest [78]. |
| Schiff Base Forming Polymers | Enable pH-sensitive cross-linking via dynamic covalent bonds between aldehydes and amines. Bonds are stable at neutral pH but break in acidic environments [77]. | Allows for self-healing properties and facile incorporation of drugs. Degradation products must be assessed for biocompatibility. |
| Macrophage Polarization Modulators | Agents (e.g., IL-4, IL-10, CSF1R inhibitors) incorporated into biomaterials to drive macrophages toward the anti-inflammatory M2 phenotype, promoting tissue repair [30] [73]. | The timing and dosage of release are critical. A sustained, localized release is often more effective than a single bolus. |
| PEG (Polyethylene Glycol) | A polymer used to functionalize the surface of nanoparticles and biomaterials to impart "stealth" properties, reducing opsonization and extending circulation time [30]. | The molecular weight and density impact performance. Anti-PEG immune responses are an emerging concern for repeated administrations. |
Nanotopography and Surface Roughness Optimization for Immune Modulation
Frequently Asked Questions (FAQs)
FAQ 1: How does surface nanotopography initially influence the immune response to an implanted biomaterial?
The immune response is initiated by protein adsorption onto the biomaterial surface, a process directly governed by nanotopography. Upon implantation, blood proteins (e.g., albumin, fibrinogen, fibronectin, immunoglobulins) immediately adsorb onto the surface [29]. The scale and pattern of the surface topography determine the amount and conformational state of these adsorbed proteins. This protein layer then dictates subsequent cell interactions, where specific unfolded protein sequences can bind to scavenger receptors on immune cells like macrophages, influencing whether they adopt a pro-inflammatory (M1) or anti-inflammatory, pro-healing (M2) phenotype [81]. Therefore, optimizing nanotopography provides a primary tool for steering the initial immune reaction.
FAQ 2: What is the relationship between surface roughness and the transition from chronic inflammation to successful tissue integration?
Persistent inflammation occurs when the initial inflammatory phase fails to resolve, leading to fibrous encapsulation and implant failure. Surface roughness is a critical factor in preventing this. Studies on titanium implants, for example, show that nanoscale roughness significantly downregulates pro-inflammatory cytokine secretion and promotes a shift in macrophage polarization towards the M2 phenotype compared to micron-scale roughness or smooth surfaces [29]. This results in a more favorable osteoimmune environment, enhancing bone regeneration and implant integration while reducing the risk of fibrous encapsulation [29] [82].
FAQ 3: Can surface design alone maintain the therapeutic function of cells used in advanced therapies?
Yes, specific nanotopographical patterns can directly modulate cell phenotype and function. Research demonstrates that a specific nanopit pattern (120 nm diameter, 100 nm depth, 300 nm spacing in a square arrangement) can maintain the immunomodulatory capacity of Mesenchymal Stromal Cells (MSCs) during in vitro expansion [83]. MSCs cultured on this "SQ" pattern exhibited reduced intracellular tension and retained their ability to suppress T-cell proliferation significantly better than those on flat or randomly disordered patterns [83]. This shows that material surfaces are not just passive scaffolds but active participants in directing cellular therapeutics.
FAQ 4: What are the primary manufacturing techniques for creating controlled nanotopography on implants?
A variety of nanofabrication techniques are employed, each with advantages for specific applications. The table below summarizes the key methods used in both academic research and commercial translation [82].
Table 1: Nanofabrication Techniques for Medical Implants
| Technique | Key Principles | Common Applications | Translational Stage |
|---|---|---|---|
| Electrochemical Anodization | Uses electrical current to create an oxide layer with nano-features. | Creating nanotube arrays on titanium dental and orthopedic implants. | Commercial/Clinical |
| Acid Etching | Uses corrosive chemicals to create micro- and nano-scale roughness. | Surface texturing of titanium implants for bone integration. | Commercial/Clinical |
| Plasma Spraying | Melts and sprays material onto a surface to build up a coarse coating. | Applying hydroxyapatite coatings on metallic implants. | Commercial/Clinical |
| * Electron Beam Lithography* | Uses a focused electron beam to write nanoscale patterns with high precision. | Creating highly ordered model surfaces for fundamental research. | Research & Development |
| Colloidal Lithography | Uses self-assembled nanoparticles as a mask for patterning large areas. | Generating uniform nanopatterns to study immune cell response. | Research & Development |
Troubleshooting Guides
Problem 1: Uncontrolled Pro-inflammatory Response to Biomaterial
Issue: Your in vitro or in vivo models show elevated levels of pro-inflammatory cytokines (e.g., TNF-α, IL-1β) and the formation of foreign body giant cells (FBGCs) around the implant, indicating a strong Foreign Body Response (FBR) [29].
Possible Causes and Solutions:
- Cause 1: Inconsistent or suboptimal surface roughness.
- Cause 2: Non-specific protein adsorption promoting inflammatory cell adhesion.
- Solution: Pre-adsorb the surface with albumin. Studies show that albumin pre-adsorption on nano-structured surfaces can reduce pro-inflammatory cytokine expression from immune cells and promote an anti-inflammatory, pro-healing M2 macrophage phenotype [81]. Alternatively, incorporate cell-adhesive peptides like RGD (Arginine-Glycine-Aspartic acid) into non-fouling polymer coatings (e.g., PEG) to promote integrative cell binding over inflammatory cell adhesion [29].
Experimental Protocol: Macrophage Polarization Immunostaining
- Objective: To quantify the M1/M2 macrophage phenotype ratio in response to your biomaterial surface.
- Materials: Primary human monocytes (e.g., from PBMCs), cell culture materials, macrophage colony-stimulating factor (M-CSF), interferon-gamma (IFN-γ) & lipopolysaccharide (LPS), interleukin-4 (IL-4), fluorescence-labeled antibodies (anti-CD86 for M1, anti-CD206 for M2), and your test biomaterial.
- Procedure:
- Differentiate monocytes into macrophages (M0) by culturing with M-CSF for 7 days.
- Seed the mature macrophages onto your test biomaterial and control surfaces.
- After 48 hours, stimulate cells on one control group with IFN-γ/LPS (to induce M1) and another with IL-4 (to induce M2). Leave test groups unstimulated.
- After 24-48 hours, harvest cells and perform flow cytometry staining for CD86 (M1 marker) and CD206 (M2 marker).
- Analyze the percentage of CD86+ and CD206+ cells to determine the M1/M2 ratio induced by your material's surface.
Problem 2: Poor Osteogenesis and Bone Integration
Issue: Despite good biocompatibility, your orthopedic or dental implant fails to promote sufficient bone formation (osteogenesis), leading to loose implants.
Possible Causes and Solutions:
- Cause 1: Surface topography does not support osteoprogenitor cell differentiation.
- Solution: Implement surfaces with specific osteogenic-promoting nanotopography. For instance, a "Near-Square" (NSQ) nanopit pattern (with controlled disorder) has been shown to promote osteogenic differentiation of MSCs [83]. Combine this with hydroxyapatite (HA) coatings, which are inherently osteoconductive [29].
- Cause 2: The surface elicits an immune response that inhibits bone formation.
- Solution: Employ a strategy of "osteoimmunomodulation." Design surfaces that not only support bone cells but also actively modulate the immune environment. As detailed in FAQ 2, nanoscale roughness on titanium can downregulate pro-inflammatory cytokines and create an environment conducive for bone healing [29]. The goal is to drive the immune response toward a pro-regenerative, anti-inflammatory state.
Experimental Protocol: T-cell Proliferation Suppression Assay (for MSC Immunomodulation)
- Objective: To test if MSCs expanded on your biomaterial surface maintain their capacity to suppress immune cell proliferation, a key therapeutic function [83].
- Materials: Primary human MSCs, test biomaterial surfaces, peripheral blood mononuclear cells (PBMCs) from human blood, cell proliferation dye (e.g., CFSE), T-cell activator (e.g., phytohemagglutinin-P (PHA-P) and IL-2), flow cytometry.
- Procedure:
- Culture MSCs on your test and control surfaces for a predetermined period (e.g., 14 days).
- Isolate PBMCs and label them with CFSE.
- Activate the CFSE-labeled PBMCs with PHA-P and IL-2 to trigger T-cell proliferation.
- Co-culture the activated PBMCs with the pre-cultured MSCs (you can use transwell systems to separate cells if only paracrine effects are to be studied).
- After 5 days, collect the PBMCs and analyze CFSE dye dilution by flow cytometry.
- A lower proliferation index in co-culture with MSCs from the test surface indicates superior immunomodulatory capacity.
Table 2: Impact of Nanotopography Scale on Biological Responses
| Nanotopography Scale / Type | Key Immune/Cell Response | Quantitative Findings / Experimental Readout |
|---|---|---|
| Albumin on 68 nm Hill-like Protrusions [81] | Macrophage (dTHP-1) Phenotype Shift | Increased adsorption; induced anti-inflammatory markers and decreased pro-inflammatory cytokines, suggesting a switch to M2 pro-healing phenotype. |
| SQ Nanotopography (120 nm pits) [83] | Mesenchymal Stromal Cell (MSC) Immunomodulation | Maintained MSC capacity to suppress T-cell proliferation (significantly lower proliferative index) over 6 weeks in culture. |
| Nanoscale vs Micro-rough Titanium [29] | Macrophage Secretion & Osteogenesis | Nanoscale roughness resulted in significantly greater downregulation of inflammatory response and improved osteogenic differentiation compared to micro-roughened surfaces. |
| Hydroxyapatite (HA) Coatings [29] | Osteoblast (OB) vs Osteoclast (OC) Activity | OB attachment and differentiation higher on microrough HA (Ra=2 µm) vs smooth (Ra=1 µm). Greater OC activity was observed on smoother surfaces. |
The Scientist's Toolkit: Essential Research Reagents & Materials
Table 3: Key Reagents for Investigating Nanotopography and Immune Modulation
| Reagent / Material | Function in Experimental Context | Specific Example |
|---|---|---|
| Polycarbonate Surfaces with Nanotopography | Provides a reproducible, non-degradable substrate with defined nano-patterns (e.g., SQ, NSQ) for 2D cell mechanobiology studies. | Used to demonstrate maintenance of MSC multipotency and immunomodulatory capacity [83]. |
| Rho-associated Kinase (ROCK) Inhibitor (e.g., Y-27632) | A small molecule inhibitor used to chemically reduce intracellular tension (actin contractility) in cells. | Used to validate that reducing ROCK-mediated tension in MSCs on flat surfaces drives them toward a more immunomodulatory phenotype [83]. |
| Carboxyfluorescein succinimidyl ester (CFSE) | A fluorescent cell staining dye that dilutes by half with each cell division. Used to track and quantify cell proliferation. | Essential for the T-cell proliferation suppression assay to measure MSC immunomodulatory function [83]. |
| Functionalized Gold Nanoparticles (AuNPs) | Used to create model surfaces with controlled hill-like nanotopography to study the scale-dependence of protein adsorption and immune cell activation. | 16, 38, and 68 nm AuNPs were used to study albumin adsorption and subsequent macrophage response [81]. |
| Antibodies for Flow Cytometry (anti-CD86, anti-CD206) | Cell surface markers used to identify and quantify M1 (pro-inflammatory) and M2 (anti-inflammatory) macrophage populations, respectively. | Critical for immunophenotyping the macrophage response to biomaterials via flow cytometry. |
This technical support center provides troubleshooting guides and FAQs to help researchers address common challenges in designing biomaterial scaffolds that balance critical physical properties with positive immune responses.
Frequently Asked Questions (FAQs)
Q1: Why does my scaffold trigger a strong fibrotic response (excessive scarring) upon implantation? A strong fibrotic response often indicates poor immune compatibility. The scaffold may be promoting a pro-inflammatory environment. To address this:
- Check Macrophage Polarization: The foreign body response is heavily influenced by macrophages. Your scaffold should encourage a transition from pro-inflammatory M1 macrophages to pro-regenerative, anti-inflammatory M2 phenotypes. An imbalance towards M1 can lead to chronic inflammation and fibrosis. [84] [73]
- Evaluate Scaffold Surface and Degradation: The physicochemical properties of your scaffold, including surface topography and stiffness, directly influence immune cell response. Furthermore, ensure the degradation rate matches tissue ingrowth and that the degradation byproducts are non-inflammatory. Fast-degrading scaffolds can overwhelm the site with debris, while slow-degrading ones may sustain a chronic foreign body response. [84] [85]
Q2: My scaffold collapses prematurely during in vivo testing. How can I improve its structural stability? Premature collapse is typically a failure to balance mechanical integrity with porosity and degradation.
- Review Porosity vs. Mechanical Strength: There is an inherent trade-off between high porosity for cell migration/nutrient diffusion and mechanical strength. Reducing porosity can improve strength but may limit cellular infiltration. [85]
- Investigate Material Composition: Consider using composite materials (e.g., combining natural and synthetic polymers) or cross-linking strategies to enhance durability without significantly compromising other key properties. Synthetic polymers like PCL, PLGA, and PEG offer better control over mechanical properties and degradation rates. [86] [85]
Q3: Cell infiltration into my scaffold is poor. What parameters should I adjust? Poor cell infiltration is primarily a function of scaffold architecture.
- Optimize Pore Size and Interconnectivity: Scaffolds require a sufficient fraction of interconnected pores for cell migration, nutrient diffusion, and waste removal. A pore size of 100-500 μm is often recommended for bone tissue engineering, for example. [86] [85]
- Confirm Bioactivity: Ensure the scaffold material or its coatings contain bio-adhesive motifs (e.g., RGD sequences) to facilitate cell attachment and migration. Surface modification techniques like plasma treatment or coating with adhesive glycoproteins can enhance cell-scaffold interactions. [85]
Q4: How can I quantitatively assess the immune response to my biomaterial scaffold? A combination of in vitro and in vivo methods is necessary.
- In Vitro Cytokine Profiling: Use quantitative real-time PCR (qPCR) and ELISA to measure the expression of pro-inflammatory (e.g., IL-1β, TNF-α) and anti-inflammatory cytokines from immune cells cultured with your material. [87]
- In Vivo Histological Analysis: After explanation, tissue sections can be stained for specific immune cell markers (e.g., CD68 for macrophages, CD206 for M2 phenotype) to characterize the cellular immune response and tissue integration at the implant site. [73]
Troubleshooting Guides
Problem: Excessive Inflammatory Response
Potential Causes and Solutions:
| Cause | Diagnostic Experiments | Solution |
|---|---|---|
| Material intrinsically promotes M1 macrophage polarization. | * In vitro: Culture macrophages with material leachates or on material surfaces. Use qPCR to analyze M1 (e.g., iNOS, TNF-α) vs. M2 (e.g., CD206, Arg-1) gene markers. [73] | * Incorporate immunomodulatory agents (e.g., IL-4, IL-10) into the scaffold to steer polarization towards the M2 phenotype. [84] [73] |
| Scaffold degradation is too rapid, producing inflammatory debris. | * Monitor pH changes in culture medium. Characterize degradation profile (mass loss) in simulated body fluid. Check for a surge in pro-inflammatory cytokines. [85] | * Reformulate material to slow degradation (e.g., adjust cross-linking density, use polymers with slower hydrolysis rates like PCL). [85] |
| Surface topography/chemistry is inflammatory. | * Perform protein adsorption studies (e.g., fibronectin). Assess immune cell adhesion and morphology via SEM/confocal microscopy. [85] | * Modify surface with anti-fouling polymers (e.g., PEG) or coat with bio-inert/bio-active proteins (e.g., collagen, laminin). [85] |
Problem: Mismatched Degradation Rate
Potential Causes and Solutions:
| Cause | Diagnostic Experiments | Solution |
|---|---|---|
| Material's inherent hydrolysis rate is misaligned with tissue growth. | * Perform in vitro degradation study in PBS at 37°C, tracking mass loss and molecular weight change over time. Compare with in vivo tissue formation rate (histology). [85] | * Select a different base polymer (e.g., switch from fast-degrading PLA to slower-degrading PCL) or create a copolymer to fine-tune the rate. [86] [85] |
| High porosity or pore interconnectivity accelerates degradation. | * Characterize pore architecture (size, % porosity, interconnectivity) via micro-CT. Correlate with accelerated in vitro degradation profiles. [86] [85] | * Optimize the fabrication parameters to achieve a pore structure that balances cell infiltration with structural longevity. Adjust solid fraction. [85] |
Experimental Protocols & Data Presentation
Standard Protocol: Cytotoxicity Assessment (MTT Assay)
This protocol is used to evaluate the cytotoxic potential of biomaterials or their degradation products, a critical first step in ensuring immune compatibility. [87]
1. Sample Preparation:
- Prepare material extracts by incubating sterile scaffold samples in cell culture medium (e.g., DMEM with 10% FBS) for 24-48 hours at 37°C. Use a surface-area-to-volume ratio as per ISO 10993-5. [87]
- Alternatively, seed cells directly onto sterilized scaffold samples.
2. Cell Seeding and Treatment:
- Seed human periodontal fibroblast cells (or other relevant cell line) in 96-well plates at a density of 5x10⁵ cells/well and allow to adhere overnight. [87]
- Treat triplicate cultures with material extracts or direct-contact samples. Include a negative control (cells with culture medium only) and a positive control (e.g., cells with a known cytotoxic agent).
3. MTT Incubation and Measurement:
- After 24/48 hours, add MTT reagent (3-(4,5-dimethylthiazol-2-yl)-2,5-diphenyltetrazolium bromide) to each well.
- Incubate for 3-4 hours at 37°C to allow formazan crystal formation.
- Solubilize the crystals with dimethyl sulfoxide (DMSO).
- Measure the absorbance at 570 nm using a spectrophotometer. [87]
4. Data Analysis:
- Calculate cell viability (%) as:
(OD_extract_treated / OD_negative_control) * 100. [87] - Viability > 70-80% is typically considered non-cytotoxic according to ISO standards.
Standard Protocol: Pro-Inflammatory Cytokine Gene Expression (qPCR)
This protocol assesses the immunomodulatory potential of a scaffold at the genetic level.
1. Cell Culture and Treatment:
- Plate relevant immune cells (e.g., macrophages) or tissue-specific cells (e.g., fibroblasts) in 6-well plates at 2x10⁴ cells/well.
- Expose cells to test materials in serum-free medium for 24 or 48 hours. [87]
2. RNA Extraction and cDNA Synthesis:
- Isolate total RNA using TRIzol reagent according to the manufacturer's guidelines.
- Assess RNA purity and concentration spectrophotometrically.
- Reverse-transcribe 2 μg of RNA into cDNA using a reverse transcriptase kit. [87]
3. Quantitative Real-Time PCR:
- Use SYBR Green Master Mix and gene-specific primers.
- Use the following primer sequences for key pro-inflammatory cytokines: [87]
- IL-1β
- Forward: CCACAGACCTTCCAGGAGAATG
- Reverse: GTGCAGTTCAGTGATCGTACAGG
- TNF-α
- Forward: CTCTTCTGCCTGCTGCACTTTG
- Reverse: ATGGGCTACAGGCTTGTCACTC
- IL-1β
- Run reactions on a real-time PCR system with a standard amplification protocol (e.g., initial denaturation at 94°C for 2 min, followed by 35 cycles of 94°C for 1 min, 57°C for 30 s, and 72°C for 30 s). [87]
- Use a housekeeping gene like β-actin as an endogenous control.
4. Data Analysis:
- Calculate relative gene expression using the 2^(-ΔΔCT) method. [87]
Quantitative Data for Scaffold Design
Table 1: Target Properties for Scaffolds in Different Tissue Applications
| Tissue Type | Target Porosity | Target Pore Size (μm) | Ideal Degradation Time | Key Immunomodulatory Goal |
|---|---|---|---|---|
| Bone Regeneration [86] | 70%+ (interconnected) | 100 - 500 | 6 - 12+ months | Promote M2 macrophages for osteogenesis; mitigate initial pro-inflammatory phase. [73] |
| Wound Healing [73] | High (>90%) | 50 - 300 | Weeks to a few months | Rapidly establish anti-inflammatory (M2) microenvironment to accelerate closure. [73] |
| Neural Regeneration [34] | N/A (Hydrogel) | N/A (Nanofiber) | Tunable, several months | Modulate microglial activation; suppress chronic inflammation; degrade inhibitory glial scar. [34] |
Table 2: Common Biomaterials and Their Properties
| Material | Type | Key Advantages | Considerations for Immune Compatibility |
|---|---|---|---|
| Chitosan [34] | Natural Polymer | Biocompatible, biodegradable, cationic, adhesive. [34] | Generally good; can be modified to enhance anti-inflammatory effects. |
| PCL [86] | Synthetic Polymer | Good mechanical strength, slow degradation. [86] [85] | More inert; may require surface functionalization or composite design to actively modulate immunity. |
| PLGA [86] | Synthetic Polymer | Tunable degradation rate, FDA approved for some uses. [85] | Acidic degradation products can provoke inflammatory response; needs careful formulation. [85] |
| PEG [34] | Synthetic Polymer | "Stealth" properties, resistant to protein adsorption, highly tunable. [34] [85] | Can be used to create "immunologically silent" surfaces; often used as a hydrogel base. |
| Hyaluronic Acid [84] [86] | Natural Polymer | Native to ECM, excellent biocompatibility, can be enzyme-responsive. [84] | Role in inflammation is complex; can be engineered to be pro- or anti-inflammatory. |
The Scientist's Toolkit: Research Reagent Solutions
Table 3: Essential Materials for Biomaterial Immune Compatibility Research
| Reagent / Material | Function in Experiments | Example Use Case |
|---|---|---|
| Human Periodontal Ligament Fibroblasts [87] | Model cell line for assessing cytotoxicity and inflammatory response in a tissue context. | Evaluating the cytocompatibility of a new dental implant material like PEKK vs. Titanium. [87] |
| MTT Assay Kit [87] | Colorimetric assay to measure cell metabolic activity as an indicator of cytotoxicity. | Determining the safe concentration of biomaterial degradation products. [87] |
| TRIzol Reagent [87] | Monophasic solution for the isolation of high-quality total RNA from cells. | First step in analyzing inflammatory gene expression via qPCR. [87] |
| SYBR Green Master Mix [87] | A dye used for the detection of double-stranded DNA during qPCR amplification. | Quantifying the expression levels of IL-1β and TNF-α genes. [87] |
| Macrophage Cell Line (e.g., RAW 264.7) | Model immune cells to study the polarization response (M1/M2) to biomaterials. | Testing if a scaffold coating successfully shifts macrophages from a pro-inflammatory (M1) to a pro-healing (M2) state. [73] |
| ELISA Kits for Cytokines (e.g., IL-1β, TNF-α, IL-10) | Quantify the secretion of specific proteins in cell culture supernatants. | Confirming that changes in cytokine gene expression (from qPCR) translate to protein level secretion. |
Signaling Pathways and Workflows
Scaffold Immune Interaction
Experimental Workflow for Testing
Benchmarking Biocompatibility: In Vitro-In Vivo Correlation and Material Performance
Troubleshooting Guides and FAQs
Frequently Asked Questions
Q1: Our in vitro tests show a polymer is non-cytotoxic, but animal studies reveal a delayed inflammatory reaction. Why does this discrepancy occur? A1: This common issue arises because standard ISO cytotoxicity tests (e.g., ISO 10993-5) are short-term and may not account for the effects of long-term polymer degradation [55]. The accumulation of acidic degradation products in vivo can create a localized environment that triggers inflammation, a effect often missed in static, closed in vitro systems [55].
- Solution: Implement an accelerated degradation protocol to pre-age the polymer before in vitro testing. Incubate samples in phosphate-buffered saline at an elevated temperature (e.g., 47°C) to simulate late-stage degradation products, then perform cytotoxicity assays [55]. Alternatively, use a dynamic flow culture system to prevent the buildup of acidic by-products and better replicate the in vivo environment [55].
Q2: We are observing an unexpected pro-inflammatory response to a ceramic material that is supposed to be bio-inert. What could be the mechanism? A2: No material is truly bio-inert. Research shows that ceramic nanopowders (e.g., aluminium oxide, zirconium oxide) can activate human macrophages via specific immune pathways [88].
- Solution: Investigate the Toll-like receptor 4 (TLR4) pathway and the NLRP3 inflammasome. You can use a TLR4 small-molecule inhibitor to see if the pro-inflammatory cytokine secretion (e.g., IL-1β, IL-8) is attenuated [88]. Furthermore, evaluate if your ceramic particles provide the necessary "priming" signal for NLRP3 activation, which can be tested by challenging primed cells with ATP and measuring mature IL-1β secretion [88].
Q3: How does the physical form of a biomaterial, such as particle size, influence its inflammatory potential? A3: The physical form is a critical determinant of the host response. Studies on beta-tricalcium phosphate (β-TCP) ceramics found that larger, non-phagocytosable particles (e.g., 32-40 μm) induced significantly higher levels of pro-inflammatory cytokines (TNF-α, IL-1β, IL-8) from human monocytes compared to smaller, phagocytosable particles (1-3 μm) [89]. Larger particles can cause frustrated phagocytosis, leading to sustained inflammation and cytokine release [89].
- Solution: Carefully characterize the size and morphology of your biomaterial, especially if it is intended as a coating or generates wear debris. Aim for a particle size that can be effectively cleared by immune cells if the application allows, or design surfaces that minimize particle shedding [89].
Q4: What are the latest surface modification strategies to reduce the inflammatory response to metal implants? A4: Surface coatings designed to create "bioinert" or "bioactive" interfaces are key strategies.
- Bioinert Strategies: Apply hydrophilic surfactant-based coatings, such as poly(ethylene glycol) (PEG) or polyvinyl alcohol (PVA), to reduce protein adsorption and subsequent cell attachment [90] [7].
- Bioactive Strategies: Engineer surfaces with immunomodulatory ligands. A promising target is the CD47-SIRPα axis. Functionalizing a material with recombinant CD47 can signal through the SIRPα receptor on macrophages, delivering an inhibitory "self" signal that suppresses phagocytosis and inflammatory responses [90].
Key Inflammatory Signaling Pathways in Biomaterial Response
The following diagram illustrates the primary signaling pathways activated by biomaterials, as identified in the research. Targeting these pathways is a key strategy for reducing cytotoxicity and inflammation.
Biomaterial-Induced Inflammatory Signaling
Experimental Protocols for Assessing Cytotoxicity and Inflammation
Protocol 1: Accelerated In Vitro Degradation and Cytotoxicity Testing for Bioresorbable Polymers
This protocol is designed to address the delayed inflammatory reactions observed with polymers like PLGA [55].
Accelerated Degradation:
- Sample Preparation: Compression mould polymer pellets (e.g., PDLLGA, PLLGA) into sheets with a defined volume (e.g., 100 × 100 × 1 mm³) [55].
- Ageing Conditions: Incubate samples in sterile phosphate-buffered saline (PBS) at an elevated temperature of 47°C. This temperature is below the glass transition temperature (Tg) of many polymers and produces consistent, physiologically relevant degradation without altering the primary degradation mechanism [55].
- Time Points: Remove samples at predetermined intervals (e.g., 5, 10, 12 days for PDLLGA; longer for semi-crystalline polymers like PLLGA) based on prior physicochemical characterization [55].
Cytotoxicity Assessment (ISO 10993-5 Direct Contact Test):
- Cell Culture: Use a standard fibroblast cell line (e.g., L929). Seed cells in multi-well plates and culture until ~80% confluent [55].
- Direct Contact: Place the pre-degraded polymer samples directly onto the cell monolayer.
- Incubation: Incubate the cells with the samples for 24-72 hours at 37°C in a 5% CO₂ atmosphere [55].
- Viability Analysis: Perform an MTT assay. Add MTT solution to wells and incubate to allow formazan crystal formation. Solubilize crystals and measure absorbance at 570 nm. Calculate cell viability relative to untreated controls [55].
Protocol 2: Evaluating the Pro-inflammatory Mechanism of Ceramic or Metal Particles
This protocol outlines methods to identify the involvement of TLR4 and NLRP3 inflammasome pathways in the inflammatory response to biomaterial particulates [88].
Cell Culture and Treatment:
Downstream Analysis:
- Gene Expression (RT-qPCR): Extract RNA from cells after ceramic treatment (e.g., 6 hours). Analyze mRNA levels of pro-inflammatory genes (e.g., IL-1β, IL-8, TNF-α, CCL2) [88].
- Protein Secretion (ELISA): Collect cell culture supernatants after treatments (e.g., 24 hours). Measure the secretion of mature IL-1β, IL-8, and other cytokines using ELISA kits [88].
- Data Interpretation: Attenuation of cytokine gene expression and protein secretion in the TLR4 inhibitor group indicates involvement of the TLR4 pathway. A significant increase in IL-1β secretion only after ATP treatment confirms NLRP3 inflammasome involvement [88].
Table 1: Cytotoxicity and Inflammatory Profiles of Biomaterial Classes
| Biomaterial Class | Key Inflammatory/Cytotoxic Mechanisms | Primary Signaling Pathways Involved | Key Cytokines/Chemokines Released | Influential Physical Factors |
|---|---|---|---|---|
| Ceramics (e.g., Al₂O₃, ZrO₂) | Activation of macrophages by nanopowders [88]. | TLR4, NLRP3 Inflammasome [88]. | IL-1β, IL-8 [88]. | Particle size, crystallinity [89]. |
| Polymers (e.g., PLGA, PLA) | Acidic degradation products, accumulation of late-stage degradation products, delayed inflammatory reaction [55]. | G-protein coupled receptor (HCA1) has been proposed for lactate [55]. | IL-6, IL-1β [55]. | Degradation rate, crystallinity, implant geometry [55]. |
| Metals (e.g., CoCr, Co, Ti, Ag NPs) | Ion release (Co²⁺), generation of Reactive Oxygen Species (ROS), oxidative stress [88] [91]. | TLR4, NLRP3 Inflammasome, MAPK, Nrf2/ARE [88] [91]. | IL-8, IL-1β, CCL3, CCL4 [88] [91]. | Ion concentration, nanoparticle size, shape, solubility [91]. |
| Composites | Varies by components; can be designed for immunomodulation [73]. | Can be engineered to modulate M1/M2 macrophage polarization [73]. | Can be tuned to reduce pro-inflammatory (TNF-α, IL-6) and promote anti-inflammatory (IL-10) cytokines [73]. | Surface chemistry, topography, porosity [73]. |
Table 2: Research Reagent Solutions for Immunological Analysis
| Reagent / Kit | Function / Analysis | Example Application in Biomaterial Research |
|---|---|---|
| TLR4 Small-Molecule Inhibitor (e.g., TAK-242/Resatorvid) | Blocks TLR4 signaling pathway. | To mechanistically determine if a biomaterial's inflammatory effect is mediated through the TLR4 receptor [88]. |
| ELISA Kits (for IL-1β, IL-8, TNF-α, etc.) | Quantifies secreted protein levels of specific cytokines and chemokines. | To measure the pro-inflammatory output of macrophages or monocytes exposed to biomaterial samples [88] [89]. |
| RT-qPCR Reagents | Quantifies gene expression levels of inflammatory markers. | To analyze the upregulation of pro-inflammatory genes (e.g., IL1B, IL8, TNF, CCL2) in cells treated with biomaterial extracts or particles [88]. |
| MTT Assay Kit | Measures cell metabolic activity as an indicator of cytotoxicity. | To perform standardized cytotoxicity tests (e.g., ISO 10993-5) on biomaterial extracts or via direct contact [55]. |
| Lactate Dehydrogenase (LDH) Assay Kit | Measures LDH released upon cell lysis, indicating cytotoxicity. | To quantify membrane damage and cell death caused by cytotoxic biomaterials or particles [89]. |
Frequently Asked Questions (FAQs)
FAQ 1: What is the most significant challenge when trying to use in vitro data to predict in vivo biocompatibility? The most significant challenge is the limited physiological relevance of static 2D in vitro cultures, which lack systemic immune factors, tissue-level organization, and the dynamic interplay of different cell types found in a living organism. This often leads to false negatives or positives when assessing a biomaterial's inflammatory potential [92] [93]. For instance, while an in vitro cytotoxicity assay might show no adverse effects, the material could still trigger a chronic inflammatory response or foreign body reaction upon implantation in vivo due to interactions with immune cells like macrophages that are not fully replicated in the simple test [73].
FAQ 2: Are there alternative models that can reduce animal testing without compromising the predictive value for in vivo outcomes? Yes, the Chick Chorioallantoic Membrane (CAM) model is a validated alternative that serves as a bridge between in vitro and in vivo testing. A 2025 study demonstrated that tissue response and histopathological scoring for a bone substitute material in the CAM model were "completely comparable" to those from a standard 10-day subcutaneous rat implantation model, with no statistical differences [92]. This model supports the 3R principles (Replacement, Reduction, and Refinement) by potentially reducing the number of rodents required for initial biocompatibility screening.
FAQ 3: Our in vitro tests show low cytotoxicity, but our prototype consistently fails in rodent implantation studies due to inflammation. What could be the issue? This discrepancy often arises because standard cytotoxicity assays (e.g., MTT, LDH) primarily measure cell viability but do not fully capture the complex cascade of the immune response [73] [93]. The failure in vivo is likely related to the material's properties triggering an unfavorable immune modulation. For example, the material may promote a pro-inflammatory M1 macrophage phenotype instead of the pro-healing M2 phenotype. It is recommended to augment simple viability tests with more advanced in vitro assays that specifically probe the immune response, such as macrophage polarization studies or cytokine secretion profiling [73].
FAQ 4: What are the key methodological considerations for successfully implementing the CAM model for biomaterial validation? Key considerations include [92]:
- Embryonic Development Day (EDD): Implantation is typically performed on EDD 9, with harvesting 24 hours later on EDD 10.
- Material Placement: The biomaterial is transplanted directly onto the vascularized CAM membrane.
- Histopathological Analysis: After harvest and fixation, tissues are embedded, sectioned, and stained (e.g., H&E) for evaluation according to international standards (ISO 10993-6), allowing for direct comparison with data from mammalian models.
Comparison of Validation Models
The table below summarizes the key characteristics of different models used in biomaterial testing.
| Model Type | Typical Duration | Key Readouts | Advantages | Limitations | Predictive Value for In Vivo Inflammation |
|---|---|---|---|---|---|
| In Vitro (2D Culture) | 1-3 days | Cell viability (MTT, LDH), morphology [93]. | Low cost, high throughput, controlled environment [93]. | Lacks systemic immune response and tissue-level complexity [92] [93]. | Low to Moderate |
| CAM Model | 24 hours [92] | Histopathological score, immune cell infiltration (macrophages, lymphocytes), neovascularization [92]. | Vascularized, possesses immune cells, cost-effective, reduced ethical concerns [92]. | Short-term model, non- mammalian immune system [92]. | High (Study shows comparable results to rodent model) [92] |
| Rodent Subcutaneous Implantation | 10+ days [92] | Histopathological score according to ISO 10993-6, irritancy score, fibrosis, capsule formation [92]. | Gold standard for regulatory approval, full mammalian immune response [92]. | High cost, time-consuming, ethical considerations [92]. | High (Established benchmark) [92] |
Detailed Experimental Protocols
Protocol 1: Standardized Histopathological Evaluation Based on ISO 10993-6
This protocol is used for both the CAM and rodent models to ensure comparable quantitative assessment [92].
Tissue Processing and Sectioning:
- Fix explanted tissue with adjacent biomaterial in 4% buffered formaldehyde.
- Dehydrate using a series of increasing alcohol concentrations and clear in xylol.
- Embed in a polymer resin (e.g., Technovit 9100).
- Trim blocks and prepare sections of 4 μm thickness using a rotation microtome.
Staining:
- Perform standard Hematoxylin and Eosin (H&E) staining on the sections.
Scoring and Calculation of Irritancy Score:
- Examine stained sections under a microscope.
- Score the following parameters based on the ISO 10993-6 grading scheme:
- Polymorphonuclear Cells, Lymphocytes, Plasma Cells, Macrophages, Giant Cells, Necrosis: Each graded on a scale (e.g., 0-4). The sum of these scores is multiplied by 2.
- Neovascularization, Fibrosis, Fatty Infiltrate: Each graded on a scale (e.g., 0-4).
- Calculate the Irritancy Score for each implantation site:
Irritancy Score = (Sum of inflammatory cell scores) × 2 + (Sum of tissue response scores) - The final irritancy score for the study group is the average of all implantation site scores.
Protocol 2: Chick Chorioallantoic Membrane (CAM) Assay for Biomaterial Testing
This protocol outlines the steps for using the CAM model as a pre-screening tool [92].
Egg Incubation:
- Incubate fertilized specific pathogen-free (SPF) chicken eggs at 37°C and 70-80% humidity.
- Designate the start of incubation as Embryonic Development Day (EDD) 1.
Window Preparation (on EDD 8):
- Carefully open a small window in the eggshell.
- Place a drop of Dulbecco’s phosphate-buffered saline (DPBS) on the shell membrane to separate and remove it from the underlying CAM.
- Seal the window with sterile tape.
Biomaterial Implantation (on EDD 9):
- Reopen the window and transplant the test biomaterial (e.g., ~40 mg of granules) directly onto the CAM.
- Reseal the window and continue incubation.
Harvesting (on EDD 10):
- Open the egg and harvest the CAM tissue implanted with the biomaterial.
- Fix the tissue in 4% buffered formaldehyde for subsequent histological workup.
Model Validation Workflow
The following diagram illustrates a recommended workflow for validating biomaterials, integrating the CAM model to enhance efficiency.
Histopathological Scoring System
This diagram breaks down the calculation of the irritancy score, a key quantitative metric for evaluating the tissue response.
The Scientist's Toolkit: Research Reagent Solutions
| Item Name | Function / Description | Example Use Case |
|---|---|---|
| Cerabone (Xenogeneic Bone Substitute) | A bovine-derived bone substitute material; used as a reference or test biomaterial in validation studies [92]. | Served as the test material in the 2025 CAM vs. rodent model comparative study [92]. |
| RESOMER Polymers | A brand of bioresorbable polymers (e.g., PLGA) used for constructing medical devices and drug delivery systems [94]. | Commonly used as a base material for scaffolds in bone and soft tissue engineering. |
| Technovit 9100 | A polymer-based embedding medium used for hard and soft tissues prior to sectioning with a microtome [92]. | Used for embedding bone-biomaterial samples for histological sectioning [92]. |
| Mach-1 Mechanical Tester | An instrument for multiaxial mechanical testing (compression, tension, shear) of biomaterials and tissues [94]. | Evaluating the mechanical integration and properties of a biomaterial within explanted tissue. |
| AlamarBlue (Resazurin) | A cell-permeant non-toxic dye used to measure metabolic activity as an indicator of cell viability in vitro [93]. | Monitoring cytotoxicity over time in a 2D or 3D cell culture system without harming the cells. |
For researchers in biomaterial science, establishing biocompatibility is a fundamental first step. However, a finding of "non-cytotoxic" is merely the starting point for assessing a material's true therapeutic potential. A biomaterial can show high cell viability yet fail to support the complex biological processes required for functional tissue regeneration, such as mineralization. This technical support resource provides targeted guidance for evaluating the pro-regenerative capacity of biomaterials, with a specific focus on mineralization—a critical indicator of success in hard tissue engineering. The following protocols, data, and troubleshooting advice are designed to help you demonstrate that your material not only is safe but also actively directs desired biological outcomes.
Core Experimental Protocols
This section details standard methodologies for assessing cytotoxicity and mineralization potential.
Standardized In Vitro Cytotoxicity Testing (Elution Method)
This protocol, based on ISO 10993-5 guidelines, evaluates the cytotoxic potential of a biomaterial using an extract (elution) method [15].
- Objective: To determine the cytotoxic effect of biomaterial extracts on cultured mammalian cells.
- Key Applications: Initial biocompatibility screening for all new biomaterial formulations.
Methodology:
Preparation of Extract:
- Sterilize the biomaterial sample, if applicable.
- Prepare the extraction medium using a culture medium, such as Dulbecco's Modified Eagle Medium (DMEM), supplemented with serum (e.g., 10% Fetal Bovine Serum) [95] [15].
- Incubate the biomaterial in the extraction medium at a prescribed surface-area-to-volume ratio (e.g., 3 cm²/mL) for 24 hours at 37°C [95].
- Collect the supernatant (the "extract") and filter-sterilize it (0.2 μm pore size). This is considered the 100% concentration [95].
Cell Culture and Exposure:
- Culture appropriate cells (e.g., L-929 mouse fibroblast cells or human dental pulp stem cells) in standard conditions (37°C, 5% CO₂) [96] [15].
- Seed cells into a multi-well plate (e.g., 96-well format) and allow them to adhere.
- Replace the culture medium with the prepared extract. Test a range of concentrations (e.g., 100%, 50%, 25%) by diluting the extract with fresh culture medium [15]. Include a negative control (culture medium only) and a positive control (a material known to be cytotoxic).
Viability Assessment (MTT Assay):
- After a defined incubation period (e.g., 24 or 48 hours), remove the extract [95].
- Add a solution of MTT (3-(4,5-dimethylthiazol-2-yl)-2,5-diphenyltetrazolium bromide) to each well and incubate for several hours. Viable cells with active mitochondria will convert the yellow MTT to purple formazan crystals [95] [15].
- Dissolve the formazan crystals with an organic solvent like Dimethyl Sulfoxide (DMSO).
- Measure the absorbance of the solution at around 570 nm using a plate reader. The signal intensity is directly proportional to the number of viable cells [95].
Data Interpretation:
- Calculate cell viability as a percentage of the negative control.
- According to ISO standards, viability >90% is considered non-cytotoxic, 60-90% suggests mild toxicity, 30-60% indicates moderate toxicity, and <30% signifies severe cytotoxicity [95].
Assessing Mineral Induction Ability via Simulated Body Fluid (SBF)
This protocol evaluates a biomaterial's bioactivity—its ability to induce the formation of a bone-like apatite layer on its surface, which is a strong indicator of mineralization potential [96].
- Objective: To determine the in vitro bioactivity and mineral induction capacity of a biomaterial.
- Key Applications: Evaluating the regenerative potential of materials for bone grafts, dental repairs, and other hard tissue implants.
Methodology:
Sample Preparation:
- Prepare the biomaterial in a suitable form, such as a pelleted disk, to ensure a consistent and uniform surface for analysis [96].
Immersion in SBF:
- Prepare Simulated Body Fluid (SBF) with ion concentrations nearly equal to those of human blood plasma, as per the established protocol by Kokubo et al. [96].
- Immerse each sample in a sufficient volume of SBF (e.g., 10 mL) within a flat-bottomed container to maximize surface contact.
- Incubate the samples at 37°C for a predetermined period, typically 14 days [96].
Solution Maintenance:
- To maintain ion concentration and simulate a dynamic environment, replace the SBF solution every other day throughout the immersion period [96].
Post-Test Analysis:
- After incubation, remove the samples from the SBF, rinse gently with deionized water, and allow them to dry.
- Analyze the surface of the samples using Scanning Electron Microscopy (SEM) to observe the morphology of any newly formed crystals.
- Perform Energy-Dispersive X-ray (EDX) Spectroscopy on the surface to confirm the elemental composition of the deposited layer, specifically looking for a high calcium-to-phosphorus ratio indicative of hydroxyapatite [96].
The experimental workflow for the core protocols is summarized below:
Quantitative Data Presentation
Table 1: Cytotoxicity Profiles of Select Biomaterials
Data from a comparative study on dental pulp stem cells, showing the relationship between material concentration and cell viability over time [95].
| Material | Concentration | Incubation Time | Cell Viability (%) | Toxicity Classification |
|---|---|---|---|---|
| NHA-Lactoferrin (NHA-LF) | 1000% | 48 h | 45.68% | Moderate |
| Mineral Trioxide Aggregate (MTA) | 10% | 24 h | 229.53% | Non-cytotoxic |
| Calcium-Enriched Mixture (CEM) | 100% | 48 h | Data not specified | Non-cytotoxic* |
| Nanohydroxyapatite (NHA) | 100% | 48 h | Data not specified | Non-cytotoxic* |
| Mg-1%Sn-2%HA Composite | 100% (undiluted) | 7 days | 71.51% | Mild |
| Mg-1%Sn-2%HA Composite | 50% | 7 days | 84.93% | Mild |
| Mg-1%Sn-2%HA Composite | 25% | 7 days | 93.20% | Non-cytotoxic |
*The study concluded that MTA, CEM, and NHA could all be categorized as non-cytotoxic, except for NHA-LF at the highest concentration [95].
Table 2: Characteristics and Mineral Induction of Carbonated Hydroxyapatite (CHA)
Data from a study synthesizing and characterizing CHA with different carbonate levels for potential dental use [96].
| Material Property / Outcome | Sample A (0.05M CO₃) | Sample B (0.1M CO₃) | Sample C (0.5M CO₃) |
|---|---|---|---|
| Crystallinity (XRD) | High | Moderate | Lower |
| Carbonate Substitution | Low | Medium | High |
| Apatite Formation in SBF | Present | Enhanced | Differentiated |
| Cell Viability | >70% | >70% | >70% |
| Key Conclusion | Bioactive | Highly bioactive | Bioactive |
The Scientist's Toolkit: Essential Research Reagents
Table 3: Key Reagents for Cytotoxicity and Mineralization Assays
| Reagent / Material | Function in Experiment | Example Application |
|---|---|---|
| Dulbecco's Modified Eagle Medium (DMEM) | Serves as the base for creating biomaterial extracts and as a cell culture medium. | Used in the elution method for cytotoxicity testing [95] [15]. |
| Fetal Bovine Serum (FBS) | Supplement for cell culture media; provides essential growth factors and nutrients. | Added to DMEM (e.g., 10-20%) to support cell growth and viability during testing [95] [96]. |
| MTT Reagent | A yellow tetrazolium salt that is reduced to purple formazan by metabolically active cells. | The core of the MTT assay for quantifying cell viability and proliferation [95] [15]. |
| Simulated Body Fluid (SBF) | An acellular solution with ion concentration similar to human blood plasma. | Used to test the bioactivity and apatite-forming ability of biomaterials in vitro [96]. |
| Dimethyl Sulfoxide (DMSO) | An organic solvent used to dissolve water-insoluble formazan crystals produced in the MTT assay. | Added to wells after incubation with MTT to solubilize crystals for absorbance reading [95]. |
| Collagenase/Dispase Enzymes | Enzyme cocktail used to digest the extracellular matrix and isolate primary cells from tissues. | Used to isolate human dental pulp cells from extracted teeth for primary culture [96]. |
Troubleshooting Guides & FAQs
Frequently Asked Questions
Q1: My biomaterial shows excellent cell viability (>90%) in MTT assays, but subsequent animal studies show poor osseointegration and minimal new bone formation. What could be the reason?
A: High cell viability confirms the absence of acute toxicity but does not assess a material's bioactivity. The material may be inert, lacking the specific surface chemistry or release of bioactive ions necessary to stimulate osteogenic differentiation and mineralization. To address this, integrate more predictive in vitro assays:
- Action: Perform the SBF immersion test to confirm apatite-forming ability [96].
- Action: Conduct gene expression analysis (e.g., via RT-PCR) for osteogenic markers like Runx2, Osteocalcin, and Alkaline Phosphatase (ALP) activity in stem cells cultured with your material.
Q2: The results of my MTT assay are inconsistent, with high standard deviations between replicates. What are the common sources of this error?
A: Inconsistency in MTT assays often stems from technical execution. Key areas to check are:
- Cell Seeding Density: Ensure cells are seeded uniformly and at the correct, consistent density across all wells.
- Extract Preparation: The biomaterial extract must be prepared under sterile conditions and filtered (0.2 μm) to remove any particulate matter that could scatter light or physically interfere with cells [95].
- Formazan Solubilization: After adding DMSO, ensure the plate is mixed thoroughly (e.g., on an orbital shaker) to completely dissolve the formazan crystals for a homogeneous solution before reading the absorbance [15].
Q3: After immersion in SBF, I observe no apatite formation on my material via SEM. Does this mean my material is unsuitable for bone regeneration?
A: Not necessarily. A lack of apatite indicates low bioactivity in the SBF model, but this is not an absolute predictor of failure. Consider these points:
- Material Composition: Your material may promote bone healing through other mechanisms, such as strong osteoinduction (stimulating stem cell differentiation) or acting as an effective scaffold for osteoconduction (bone ingrowth).
- Next Steps: Proceed to cell-based osteogenic differentiation assays and in vivo models to get a more comprehensive view of its regenerative capacity. The SBF test is a valuable screening tool, but it is not the only measure of success.
Q4: How can I standardize the biological response to my biomaterial when different cell donors or passages show variable differentiation potential?
A: Donor-to-donor and passage-to-passage variability is a common challenge in biological research.
- Standardization: Use cells from a low passage number (e.g., passage 3-5) to maintain a stable phenotype [95].
- Experimental Design: Always include a well-characterized positive control material (e.g., MTA or a commercial HA) in every experiment to internally benchmark your results and account for batch-to-batch biological variation [95] [96].
- Replication: Perform experiments with biological replicates using cells from at least three different donors to ensure the robustness of your findings.
The relationship between standard and advanced assessment methods is key to comprehensive material evaluation:
Frequently Asked Questions (FAQs)
Q1: What are the key biological stages leading to fibrous encapsulation around an implant?
The formation of a fibrous capsule is a foreign body reaction (FBR) that occurs in six sequential stages [97]:
- Blood-Biomaterial Interaction: Plasma proteins (like albumin and fibrinogen) adsorb onto the material surface.
- Provisional Matrix Formation: The adsorbed proteins recruit innate immune cells, forming a temporary matrix.
- Acute Inflammation: Neutrophils arrive as first responders, typically within the first two days.
- Chronic Inflammation: If the foreign body persists, monocyte infiltration and macrophage activation occur; this stage can last around 3 weeks.
- Foreign Body Giant Cell (FBGC) Formation: Frustrated macrophages fuse together to form FBGCs.
- Fibrous Capsule Formation: Fibroblasts differentiate into myofibroblasts, secreting collagen (primarily type III, later type I) to form a dense, avascular collagenous network that encapsulates the implant [97].
Q2: How can surface modification strategies reduce chronic inflammation and fibrotic encapsulation?
Surface modification is a primary strategy to modulate the host immune response. The key is to alter the material's physicochemical properties to make it less recognizable as a foreign body. Effective approaches include [97]:
- Surface Topography: Textured implants can promote tissue ingrowth that disrupts the formation of a continuous fibrous capsule. Compared to smooth surfaces, textured ones can alter the pathological progression of FBR.
- Chemical Functionalization: Covalently grafting specific functional groups (e.g., amino, carboxyl) or polymers like poly(ethylene glycol) (PEG) onto the material surface can significantly reduce cytotoxicity and inflammatory responses [98]. For instance, PEGylation creates a hydration layer that reduces non-specific protein adsorption (fouling), a critical first step in FBR [99].
- Hydrophilic Coatings: Coatings such as Methacryloyloxyethyl phosphorylcholine (MPC) polymer mimic the cell membrane and effectively resist protein adsorption.
- Bioactive Coatings: Using decellularized extracellular matrix (dECM) or other natural polymers can provide biological cues that promote constructive tissue integration instead of isolation.
Q3: What are the core in vitro and in vivo methods for evaluating long-term biocompatibility?
A comprehensive evaluation combines standardized in vitro pre-screening with in vivo validation.
- In Vitro Evaluation:
- Cytotoxicity Assays: Assess the basal cell toxicity of a material or its extracts. A common method is the MTT assay, which measures cell viability [100].
- Immune Cell Culture Models: Co-culture biomaterials with immune cells (e.g., macrophages) to analyze the secretion of pro-inflammatory (e.g., IL-1β, TNF, IL-6) and anti-inflammatory cytokines (e.g., IL-10), which can predict the material's potential to polarize macrophages toward pro-inflammatory (M1) or pro-healing (M2) phenotypes [99] [79].
- In Vivo Evaluation:
- Subcutaneous Implantation Model: A standard model where the material is implanted under the skin of rodents (e.g., rats) for weeks to months [101].
- Histopathological Analysis: After explantation, tissues are sectioned and stained for microscopic evaluation. Key stains and their purposes are summarized in Table 2 below.
Troubleshooting Guides
Problem: Excessive Fibrous Capsule Formation in Animal Models
Potential Causes and Solutions:
- Cause 1: High Surface Protein Fouling.
- Cause 2: Sustained Pro-inflammatory Macrophage Polarization.
- Solution: Consider incorporating anti-inflammatory agents (e.g., glucocorticoids like Triamcinolone acetonide) into the biomaterial coating. Alternatively, design the material's surface chemistry to promote a shift from M1 to M2 macrophages [97].
- Cause 3: Bacterial Biofilm Contamination.
- Solution: Implement rigorous aseptic protocols during implantation. Explore surface modifications with antimicrobial properties, such as integrating silver nanoparticles (NAg) [97].
Problem: High In Vitro Cytotoxicity Despite Material Purity
Potential Causes and Solutions:
- Cause 1: Intrinsic Material Cytotoxicity.
- Solution: Implement surface functionalization to mask toxic sites. A proven method is the controlled density decoration of surfaces with amino, carboxyl, or PEG groups, which has been shown to significantly lower the cytotoxicity of nanomaterials like nano-silica [98].
- Cause 2: Endotoxin Contamination.
- Solution: Endotoxins are potent immune stimulators. Ensure all materials and reagents are certified for low endotoxin levels, and use validated depyrogenation processes during material fabrication and handling [79].
- Cause 3: High Ionic Leachates.
- Solution: For salt-based materials (e.g., sea salt), consider biological purification processes, such as fermentation with specific microbes (e.g., Aspergillus on hull-less rice), which has been shown to reduce cytotoxicity while maintaining bioactive efficacy [102].
Experimental Protocols & Data Analysis
Detailed Protocol: Subcutaneous Implantation for Biocompatibility Assessment
This protocol is adapted from established in vivo models [101] [97].
1. Implant Preparation:
- Material: Fabricate sterile biomaterial scaffolds (e.g., 8 mm diameter discs).
- Control: Include a well-characterized reference material (e.g., medical-grade silicone) as a control.
2. Animal Model and Surgery:
- Animals: Use male Sprague-Dawley rats (e.g., 8 weeks old, 250 g).
- Anesthesia: Anesthetize animals according to approved ethical guidelines.
- Implantation: Make two 1 cm incisions on the upper dorsal surface. Create subcutaneous pockets and insert one test and one control implant per animal.
- Post-op: Monitor animals for signs of distress or infection.
3. Tissue Collection and Time Points:
- Euthanize animals at predetermined time points (e.g., 1, 4, and 8 weeks post-implantation).
- Excise the implant with the surrounding tissue (e.g., 1-2 cm² area).
- Fix tissue samples in formalin for histology.
4. Histological Processing and Staining:
- Process fixed tissues through graded alcohols, embed in paraffin, and section into thin slices (5 µm).
- Perform the following stains on sequential sections:
- H&E: For general histology and evaluation of inflammation.
- Masson's Trichrome: To visualize collagen deposition and fibrosis.
- Immunohistochemistry (e.g., anti-CD31): To assess vascularization at the implant interface.
5. Semiquantitative Scoring:
- A board-certified pathologist should score the sections in a blinded manner. Parameters include:
- Inflammation severity (e.g., polymorphonuclear neutrophil presence).
- Foreign body reaction (macrophage and FBGC density).
- Fibrous capsule thickness.
- Degree of vascularization.
Quantitative Data from Literature
The following tables summarize experimental data from key studies, providing a benchmark for expected outcomes.
Table 1: Impact of Surface Functionalization on Cell Viability (J774A.1 cells, 24h treatment) [98]
| Material Type | Description | Functional Group Density (mmol/g) | Relative Cell Viability (vs. Control) |
|---|---|---|---|
| Pristine SiO₂ | Unmodified silica nanoparticles | -- | Significantly reduced |
| SiO₂-T-NH₂ | Aminated silica | ~0.8 | Improved vs. Pristine |
| SiO₂-T-COOH | Carboxylated silica | ~0.45 | Improved vs. Pristine |
| SiO₂-T-PEG | PEGylated silica | ~0.18 | Highest viability, comparable to control |
Table 2: Key Histological Stains for Evaluating Foreign Body Response [101] [97]
| Staining Method | Target / Principle | Interpretation of Results |
|---|---|---|
| Hematoxylin & Eosin (H&E) | Cell nuclei (blue/purple), cytoplasm & ECM (pink). | Identifies general tissue structure, inflammatory cell infiltration (e.g., neutrophils, macrophages), and necrosis. |
| Masson's Trichrome | Collagen fibers (blue/green), nuclei (dark brown/black), cytoplasm (red). | Visualizes and quantifies collagen deposition and fibrous capsule thickness. |
| Immunohistochemistry (CD31) | CD31 protein (PECAM-1) on endothelial cells. | Assesses neo-vascularization at the implant-tissue interface; more vessels indicate better integration. |
Signaling Pathways in Fibrosis
The following diagram illustrates the key molecular and cellular signaling pathways that drive fibrotic encapsulation, integrating signals from immune cells and fibroblasts [99] [97].
Diagram Title: Key Signaling Pathways in Fibrous Encapsulation
The Scientist's Toolkit: Research Reagent Solutions
Table 3: Essential Materials for Biomaterial Biocompatibility Evaluation
| Reagent / Material | Function / Application | Example & Notes |
|---|---|---|
| 3-aminopropyldimethoxymethylsilane | Silane coupling agent for introducing controlled density of amino groups on material surfaces (e.g., nano-silica) [98]. | Used in a step-wise reaction to create aminated SiO₂ (SiO₂-T-NH₂), a precursor for further functionalization. |
| Carboxyl PEG (e.g., COOH-PEG) | Polymer for surface PEGylation to reduce protein fouling and cytotoxicity [98] [99]. | Activated with NHS/EDC chemistry for covalent conjugation to aminated surfaces, creating stealth biomaterials (SiO₂-T-PEG). |
| Succinic Anhydride | Reagent for converting surface amino groups into carboxyl groups [98]. | Enables the creation of carboxyl-functionalized materials (SiO₂-T-COOH) for further bioconjugation or to alter surface charge. |
| N-Hydroxysuccinimide (NHS) / EDC | Crosslinking agents for activating carboxyl groups for amide bond formation. | Critical for covalently linking biomolecules (e.g., PEG, peptides) to material surfaces in aqueous conditions [98]. |
| Reconstructed Human Epidermis (RHE) | In vitro model for assessing skin irritation potential of device extracts [100]. | A non-animal testing method (e.g., SkinEthic RHE) that complies with ISO 10993-23 standards. |
| Anti-CD31 Antibody | Marker for endothelial cells; used in immunohistochemistry to evaluate vascularization [101]. | Indicates the level of blood vessel formation at the implant-tissue interface, a key sign of integration. |
| Masson's Trichrome Stain | Histological stain to differentiate collagen fibers (blue/green) from other tissue components [101]. | Essential for quantifying the extent and thickness of fibrous capsules in explanted tissues. |
For researchers and scientists in drug development and medical devices, achieving successful clinical translation of biomaterials hinges on effectively mitigating cytotoxicity and uncontrolled inflammatory responses. This technical support center provides a structured guide to troubleshooting common experimental challenges, grounded in current research on modulating the body's reaction to implanted materials. The following sections offer detailed protocols, data analysis, and visual guides to support your work in developing safer, more effective biomedical solutions.
FAQs & Troubleshooting Guides
How can I predict long-term inflammatory responses to biodegradable polymers in a timely manner?
The Issue: Standard in vitro cytotoxicity tests (e.g., ISO 10993-5) are short-term, while adverse inflammatory reactions to materials like poly(lactide-co-glycolide) often manifest months or years later in vivo, during the late stages of degradation [55].
The Solution: Implement an accelerated degradation protocol to pre-condition your samples before cytotoxicity assessment [55].
Detailed Experimental Protocol:
- Sample Preparation: Compression mould polymer pellets (e.g., PDLLGA 85:15 or PLLGA 85:15) into sheets of a standardized volume (e.g., 100 x 100 x 1 mm³). Anneal semi-crystalline polymers like PLLGA to stabilize crystalline structure [55].
- Accelerated Degradation:
- Incubate samples in sterile phosphate-buffered saline (PBS) at an elevated temperature of 47°C.
- This temperature is critical—it is below the polymer's glass transition temperature (Tg) to avoid altering the fundamental degradation mechanism while accelerating the process.
- Remove samples at pre-determined time points informed by prior physicochemical characterization (e.g., mass loss, molecular weight drop) [55].
- Cytotoxicity Assessment: Apply the degraded samples to your standard cytotoxicity tests, such as the direct contact test with fibroblast cells (e.g., L929 cells) [55].
- Advanced Modelling: For increased physiological relevance, use a dynamic flow culture system (e.g., Quasi Vivo) to test degraded polymers. This prevents the accumulation of acidic degradation products, more accurately replicating the in vivo environment where tissue fluid is exchanged [55].
What are the key cellular and molecular checkpoints for evaluating the inflammatory response to an implanted biomaterial?
The Issue: A simplistic assessment of cell viability is insufficient to predict the complex immune response to an implant, which can lead to fibrous encapsulation and failure [103] [104].
The Solution: Systematically profile the phenotype of immune cells, particularly macrophages, and the cytokines they secrete at the material-tissue interface.
Detailed Experimental Protocol:
- Cell Culture Model: Use primary human monocytes differentiated into macrophages, or a macrophage cell line. Co-culture these with your biomaterial.
- Phenotype Analysis (Macrophage Polarization):
- Pro-inflammatory M1 Phenotype: Monitor surface markers and gene/protein expression of key mediators like Tumor Necrosis Factor-alpha (TNF-α), Interleukin-6 (IL-6), IL-1β, and inducible Nitric Oxide Synthase (iNOS) [103].
- Pro-healing M2 Phenotype: Monitor markers like IL-10, and scavenger receptors (e.g., mannose receptor) [103].
- Techniques: Flow cytometry for surface markers, RT-qPCR for gene expression, and ELISA or western blot for protein quantification.
- Cytokine Profiling:
- Use protein arrays or multiplex ELISAs to quantify a broad panel of cytokines and chemokines in the conditioned media. Key players to track include TNF-α, IL-1β, IL-6, IL-12, IL-23 (pro-inflammatory), and IL-10 (anti-inflammatory) [103] [55].
- Also, monitor enzymes like cyclooxygenase-2 (COX-2), which is involved in prostaglandin synthesis and linked to fibrosis [103].
My biomaterial shows excellent in vitro biocompatibility but fails in vivo due to local toxicity. What could be wrong?
The Issue: This is a common translational roadblock. In vivo failure can stem from unforeseen local tissue reactions to wear debris, ion release, or a persistent foreign body response that static in vitro models cannot capture [105].
The Solution: Investigate particle- and ion-specific toxicity, and employ more sophisticated, dynamic in vitro models.
Detailed Experimental Protocol:
- Investigate Wear Debris Toxicity:
- Generate realistic wear particles: For metal alloys (e.g., CoCr), simulate in vivo wear to generate cobalt nanoparticles (CoNPs) or other relevant debris [105].
- Mechanistic Toxicity Screening:
- Reactive Oxygen Species (ROS) Assay: Treat cells (e.g., macrophages, osteoblasts) with particles and measure ROS generation using fluorescent probes. CoNPs are known to cause significant ROS via Fenton chemistry [105].
- Ferroptosis Pathway Analysis: For metal particles, investigate ferroptosis—an iron-dependent cell death. Measure depletion of reduced glutathione (GSH) and inhibition of glutathione peroxidase 4 (GPx4) activity [105].
- Hypoxia-Like Response: Assess stabilization of Hypoxia-Inducible Factor-1α (HIF-1α), which can be induced by cobalt ions and lead to a pro-inflammatory cascade [103] [105].
- Use Advanced 3D Models:
- Implement 3D cell culture, organ-on-a-chip technologies, or dynamic flow bioreactors. These systems better mimic the mechanical and chemical microenvironment of an implant site, allowing for more predictive assessment of the foreign body response [55].
The table below summarizes cytotoxicity and inflammatory data from selected studies on common biomaterials, providing a reference for your own experimental outcomes.
Table 1: Cytotoxicity and Inflammatory Response of Selected Biomaterials
| Biomaterial | Test Model | Key Cytotoxicity / Inflammatory Findings | Quantitative Outcome | Reference Context |
|---|---|---|---|---|
| PDLLGA 85:15 (degraded) | L929 fibroblasts (in vitro, accelerated degradation) | Cytotoxicity linked to late-stage degradation products. | Significant cytotoxicity observed after 10-12 days at 47°C (extrapolated to late-stage degradation at 37°C). | [55] |
| PLLGA 85:15 (degraded) | L929 fibroblasts (in vitro, accelerated degradation) | Delayed cytotoxic response due to slower degradation. | Cytotoxicity and significant IL-6 release only after 56 days at 47°C. | [55] |
| Cobalt Nanoparticles (CoNPs) | Macrophages / various cell lines (in vitro) | Induction of oxidative stress and novel cell death pathways. | Triggers ROS, depletes GSH, inhibits GPx4 activity—hallmarks of ferroptosis. | [105] |
| Collagen Scaffold + pIL-10 | Rodent subcutaneous and myocardial implant (in vivo) | Modulation of inflammation via gene delivery. | Reduced infiltrating macrophages (ED1+ cells) and pro-inflammatory cytokines (IL-1α, IL-6, TNF-α). | [104] |
Visualizing Key Signaling Pathways in the Inflammatory Response
The following diagram illustrates the key cellular and molecular events following biomaterial implantation, highlighting critical checkpoints for intervention.
Diagram: Biomaterial-Induced Inflammation and Therapeutic Modulation. This flowchart depicts the host response cascade post-implantation, from initial protein adsorption to the critical balance between pro-inflammatory M1 and pro-healing M2 macrophage phenotypes, which dictates the outcome. Dashed lines indicate potential points for therapeutic intervention.
The Scientist's Toolkit: Essential Research Reagents & Materials
This table lists key materials and their functions for studying and mitigating biomaterial cytotoxicity and inflammation.
Table 2: Essential Reagents for Biomaterial Biocompatibility Research
| Category / Item | Specific Examples | Function in Research |
|---|---|---|
| Bioresorbable Polymers | Poly(D,L-lactide-co-glycolide) (PDLLGA), Poly(L-lactide-co-glycolide) (PLLGA) | Model materials for bone repair and drug delivery; allow study of degradation-dependent cytotoxicity [55]. |
| Natural Biomaterials | High Molecular Weight Hyaluronic Acid, Chitosan | Serve as base materials with intrinsic anti-inflammatory and ROS-scavenging properties [104]. |
| Anti-inflammatory Agents | Dexamethasone (steroid), Celecoxib (NSAID), IL-10 cytokine/plasmid | Positive controls or therapeutic cargo to actively suppress the inflammatory response to implants [103] [104]. |
| Cell Lines | L929 fibroblasts, RAW 264.7 macrophages, THP-1 monocytes | Standardized models for initial cytotoxicity screening (fibroblasts) and in-depth immunomodulation studies (macrophages) [55]. |
| Assay Kits | ELISA/Multiplex Array Kits (for TNF-α, IL-6, IL-1β, IL-10), ROS detection kits, GSH/GPx4 Activity Assays | Quantify key inflammatory cytokines, oxidative stress, and specific cell death pathways like ferroptosis [103] [55] [105]. |
Successfully translating low-cytotoxicity biomaterials requires moving beyond basic viability tests to a mechanistic understanding of the host immune response. By employing accelerated degradation models, profiling macrophage polarization, investigating particle-specific toxicity pathways like ferroptosis, and leveraging advanced material design strategies such as high-throughput screening and intelligent biomaterials, researchers can de-risk the development pipeline and create more predictive and successful biomedical solutions.
Conclusion
The strategic reduction of biomaterial cytotoxicity and inflammatory response requires a multidisciplinary approach that integrates fundamental understanding of immune-material interactions, standardized assessment methodologies, innovative material design strategies, and rigorous validation protocols. Future directions should focus on developing advanced 3D models that better recapitulate human tissue environments, creating smart biomaterials with dynamic responsive capabilities, and establishing more predictive in vitro-in vivo correlations. The continued evolution of biomaterials with enhanced immunocompatibility will critically advance regenerative medicine, implantable devices, and drug delivery systems, ultimately improving patient outcomes through reduced inflammation and successful long-term integration.
References
- 1. FOREIGN BODY REACTION TO BIOMATERIALS - PMC [https://pmc.ncbi.nlm.nih.gov/articles/PMC2327202/]
- 2. Foreign Body - an overview [https://www.sciencedirect.com/topics/engineering/foreign-body]
- 3. Foreign Body Reaction to Implanted Biomaterials and Its ... [https://www.frontiersin.org/journals/bioengineering-and-biotechnology/articles/10.3389/fbioe.2021.622524/full]
- 4. Domesticating the Foreign Body Response: Recent Advances ... [https://pmc.ncbi.nlm.nih.gov/articles/PMC6774350/]
- 5. Biomaterials: Foreign Bodies or Tuners for the Immune ... [https://pmc.ncbi.nlm.nih.gov/articles/PMC6386828/]
- 6. Investigating Immunomodulatory Biomaterials for ... [https://www.mdpi.com/2306-5354/10/12/1411]
- 7. State-of-the-art surfactant-based coatings for biomaterials [https://www.sciencedirect.com/science/article/abs/pii/S0378517325007161]
- 8. Immunocompatible elastomer with increased resistance to ... [https://www.nature.com/articles/s41467-024-52023-z]
- 9. Macrophages as Multifaceted Orchestrators of Tissue Repair [https://pmc.ncbi.nlm.nih.gov/articles/PMC12255350/]
- 10. Macrophage polarization: an important role in inflammatory ... [https://www.frontiersin.org/journals/immunology/articles/10.3389/fimmu.2024.1352946/full]
- 11. Macrophage polarization in cancer and beyond: from ... [https://www.sciencedirect.com/science/article/abs/pii/S0304383525003386]
- 12. Evaluating cell viability assessment techniques: a comparative ... [https://biomedical-engineering-online.biomedcentral.com/articles/10.1186/s12938-025-01452-y]
- 13. How to test for inflammation: a quick guide [https://www.everlywell.com/blog/inflammation/how-to-test-for-inflammation/?srsltid=AfmBOoocMwKDP0pOaf0YsFuGSVB5V-59Gbv59mDtXnUJXD5r8Kyv0Fdv]
- 14. Inflammation: a matter of immune cell life and death [https://www.nature.com/articles/s44385-025-00010-4]
- 15. A review of cytotoxicity testing methods and in vitro study of ... [https://pmc.ncbi.nlm.nih.gov/articles/PMC12534221/]
- 16. molecular mechanisms via inflammasome signaling - PMC [https://pmc.ncbi.nlm.nih.gov/articles/PMC12362934/]
- 17. Oxidative Stress: Signaling Pathways, Biological Functions ... [https://pmc.ncbi.nlm.nih.gov/articles/PMC12209598/]
- 18. Redox regulation: mechanisms, biology and therapeutic ... [https://www.nature.com/articles/s41392-024-02095-6]
- 19. Therapeutic Strategies Targeting Oxidative Stress and ... [https://www.mdpi.com/2673-6411/5/4/35]
- 20. Advances in hyaluronic acid-based biomaterials: applications ... [https://pmc.ncbi.nlm.nih.gov/articles/PMC12534349/]
- 21. How Protein Adhesion Can Affect Your Experiments and ... [https://bitesizebio.com/42250/how-protein-adhesion-can-affect-your-experiments-and-what-to-do-about-it/]
- 22. Mechanisms of competitive protein exchange on surfaces [https://www.sciencedirect.com/science/article/pii/S0927776525004345]
- 23. Mechanisms of competitive protein exchange on surfaces [https://pubmed.ncbi.nlm.nih.gov/40609300/]
- 24. Controlling interfacial protein adsorption, desorption and ... [https://www.nature.com/articles/s41467-025-65030-5]
- 25. Protein-Protein Interactions Support—Troubleshooting [https://www.thermofisher.com/my/en/home/technical-resources/technical-reference-library/protein-assays-analysis-support-center/protein-protein-interactions-support/protein-protein-interactions-support-troubleshooting.html]
- 26. Mechanism and Application of Biomaterials Targeting ... [https://www.mdpi.com/1422-0067/26/1/245]
- 27. Engineering the physical characteristics of biomaterials for ... [https://www.sciencedirect.com/science/article/abs/pii/S0168365924009015]
- 28. Next-Generation Biomaterials: Design Strategies, Clinical ... [https://pmc.ncbi.nlm.nih.gov/articles/PMC12529143/]
- 29. Modulation of immune-inflammatory responses through ... [https://pmc.ncbi.nlm.nih.gov/articles/PMC8554547/]
- 30. Engineering the Immune Response to Biomaterials - PMC [https://pmc.ncbi.nlm.nih.gov/articles/PMC12097135/]
- 31. Strategies and applications of antibacterial surface- ... [https://www.sciencedirect.com/science/article/pii/S2452199X25003020]
- 32. Evaluating Nanoparticle-Induced Cytotoxicity: Mechanisms ... [https://www.sciopen.com/article/10.26599/NBE.2025.9290129]
- 33. Pattern recognition receptors: function, regulation and ... [https://www.nature.com/articles/s41392-025-02264-1]
- 34. Biomaterials and stem cells targeting the microenvironment for ... [https://pubs.rsc.org/en/content/articlehtml/2025/bm/d4bm01521e]
- 35. Comparison between direct contact and extract exposure ... [https://www.nature.com/articles/s41598-018-19428-5]
- 36. Toxic or not toxic? The specifications of the standard ISO ... [https://pmc.ncbi.nlm.nih.gov/articles/PMC10304299/]
- 37. The Preliminary Assessment of New Biomaterials Necessitates... [https://pubmed.ncbi.nlm.nih.gov/36365516/]
- 38. ISO 10993-1:2025 Publication Is Imminent [https://veranex.com/blog/iso-10993-1-2025-implications-med-device-innovators-manufacturers]
- 39. Cytotoxicity Testing for Medical Devices: A Guide to ... [https://www.mddionline.com/testing/cytotoxicity-testing-for-medical-devices-a-guide-to-compliance-best-practices]
- 40. A comparison of in vitro cytotoxicity assays in medical ... [https://www.sciencedirect.com/science/article/abs/pii/S0273230018301594]
- 41. Cell Lines vs. Primary Cells [https://www.stemcell.com/physiological-relevance-of-human-primary-cells-vs-cell-lines]
- 42. Primary vs Immortal Cell Lines [https://www.criver.com/eureka/ask-scientist-whats-difference-between-primary-and-immortalized-cells]
- 43. Primary cells vs. cell lines: Is it not time for something better? [https://www.bit.bio/blog/primary-cells-vs-cell-lines]
- 44. Stop Sabotaging Your Science With the Wrong Cell Type [https://www.synthego.com/blog/crispr-cell-type-model/]
- 45. Control of Inflammatory Response by Tissue Microenvironment [https://pmc.ncbi.nlm.nih.gov/articles/PMC11118380/]
- 46. Long-term digital microfluidic chips for regulating macrophage ... [https://pubs.rsc.org/en/content/articlehtml/2025/lc/d4lc00947a]
- 47. An improved way to detach cells from culture surfaces [https://news.mit.edu/2025/improved-way-detach-cells-culture-surfaces-1118]
- 48. Flow Cytometry Troubleshooting Guide [https://www.cellsignal.com/learn-and-support/troubleshooting/flow-cytometry-troubleshooting-guide?srsltid=AfmBOoqa93_uqCbBTAOebNHloTLsDM2IgSBqsCtOKSQmF5Oe3p9eQ5VT]
- 49. PCR Troubleshooting Guide | Thermo Fisher Scientific - US [https://www.thermofisher.com/us/en/home/life-science/cloning/cloning-learning-center/invitrogen-school-of-molecular-biology/pcr-education/pcr-reagents-enzymes/pcr-troubleshooting.html]
- 50. Immunocytochemistry Troubleshooting: ICC Help & ... [https://www.bio-techne.com/applications/imaging/immunocytochemistry/troubleshooting]
- 51. Immunocytochemistry Troubleshooting | Tips & Tricks [https://www.stressmarq.com/support/technical-support/troubleshooting/immunocytochemistry-troubleshooting/?srsltid=AfmBOoqb7CCLTxIdpzooUBIeTC4pIsS0r5LRj5VoV1F6p4UkIbmvA1cg]
- 52. Techniques for Profiling the Cellular Immune Response ... [https://pmc.ncbi.nlm.nih.gov/articles/PMC9332307/]
- 53. Flow Cytometry Assays for Cell Therapy [https://www.bioagilytix.com/blog/flow-cytometry-assays-for-cell-therapy/]
- 54. In vitro assessment of the cytotoxicity and anti-inflammatory ... [https://pmc.ncbi.nlm.nih.gov/articles/PMC8393499/]
- 55. Evaluation of the in vitro cytotoxicity and modulation ... [https://www.sciencedirect.com/science/article/abs/pii/S1742706121004876]
- 56. The Cytotoxicity of Biodegradable Microplastics and ... [https://www.mdpi.com/2673-8929/4/3/58]
- 57. Anti-inflammatory, cytotoxic, and potential wound healing ... [https://www.nature.com/articles/s41598-025-24111-7]
- 58. Crude Plant Extracts and Their Anti-Inflammatory Potential ... [https://www.mdpi.com/1422-0067/26/23/11253]
- 59. The dose response principle from philosophy to modern ... [https://pmc.ncbi.nlm.nih.gov/articles/PMC6226566/]
- 60. Advances in the study of macrophage polarization in ... [https://journal-inflammation.biomedcentral.com/articles/10.1186/s12950-023-00360-z]
- 61. investigating how macrophage origin influences responses ... [https://www.frontiersin.org/journals/biomaterials-science/articles/10.3389/fbiom.2024.1399448/full]
- 62. Experimental Control of Macrophage Pro-Inflammatory ... [https://pmc.ncbi.nlm.nih.gov/articles/PMC7381235/]
- 63. Macrophage response to hydrophilic biomaterials ... [https://www.sciencedirect.com/science/article/abs/pii/S0142961218305830]
- 64. Biomaterials approaches to modeling macrophage ... [https://pmc.ncbi.nlm.nih.gov/articles/PMC4975673/]
- 65. Macrophage in vitro Response on Hybrid Coatings ... [https://www.mdpi.com/2079-6412/9/4/236]
- 66. Strategies and applications of antibacterial surface-modified ... [https://pmc.ncbi.nlm.nih.gov/articles/PMC12274879/]
- 67. Surface texturing and combinatorial approaches to improve ... [https://www.frontiersin.org/journals/physics/articles/10.3389/fphy.2022.994438/full]
- 68. Surface modification on Zn-based biodegradable metals [https://link.springer.com/article/10.1007/s44251-025-00101-9]
- 69. Comparison between SBMA and MPC coatings on PEEK ... [https://www.nature.com/articles/s41598-025-25082-5]
- 70. Cytotoxicity-Related Bioeffects Induced by Nanoparticles [https://pmc.ncbi.nlm.nih.gov/articles/PMC6920110/]
- 71. Bioinspired Topographic Surface Modification of Biomaterials [https://pmc.ncbi.nlm.nih.gov/articles/PMC8999667/]
- 72. Reducing ZnO nanoparticle cytotoxicity by surface ... [https://pubs.rsc.org/en/content/articlelanding/2014/nr/c4nr00458b]
- 73. Advanced biomaterials in immune modulation: The future ... [https://www.sciencedirect.com/science/article/abs/pii/S0378517325008099]
- 74. Cell encapsulated biomaterials for translational medicine - PMC [https://pmc.ncbi.nlm.nih.gov/articles/PMC12596701/]
- 75. A Critical Review on Polymeric Biomaterials for Biomedical ... [https://pmc.ncbi.nlm.nih.gov/articles/PMC8433665/]
- 76. Evaluation of cell interaction with polymeric biomaterials ... [https://link.springer.com/article/10.1007/s10856-017-5875-x]
- 77. Smart Responsive and Controlled-Release Hydrogels for ... [https://pmc.ncbi.nlm.nih.gov/articles/PMC10747460/]
- 78. Enzyme-responsive biomaterials for biomedical applications [https://www.nature.com/articles/s43246-025-00983-0]
- 79. Interplay between biomaterials and the immune system [https://www.sciencedirect.com/science/article/pii/S1742706122007255]
- 80. Disulfiram as an anti-inflammatory agent: mechanisms, nano ... [https://pmc.ncbi.nlm.nih.gov/articles/PMC12486247/]
- 81. Surface nanotopography mediated albumin adsorption ... [https://www.sciencedirect.com/science/article/pii/S2590049821000576]
- 82. Modification of the surface nanotopography of implant ... [https://pmc.ncbi.nlm.nih.gov/articles/PMC8554633/]
- 83. Nanotopography reveals metabolites that maintain the ... [https://www.nature.com/articles/s41467-023-36293-7]
- 84. Frontiers | Smart biomaterials : as active immune modulators to shape... [https://www.frontiersin.org/journals/cell-and-developmental-biology/articles/10.3389/fcell.2025.1669399/full]
- 85. The Concept of the Optimal Bioscaffold: Parameters ... [https://www.mdpi.com/2227-9059/13/11/2688]
- 86. -Based Additive Manufactured Composite/ Biomaterial for... Scaffolds [https://pmc.ncbi.nlm.nih.gov/articles/PMC12030672/]
- 87. Assessing the role of PEKK implant material on cytotoxicity, ... [https://pmc.ncbi.nlm.nih.gov/articles/PMC12357294/]
- 88. Inflammatory responses to metal oxide ceramic ... - Nature [https://www.nature.com/articles/s41598-021-89329-7]
- 89. Size dependent induction of proinflammatory cytokines and ... [https://www.sciencedirect.com/science/article/abs/pii/S014296121100202X]
- 90. Addressing the Inflammatory Response to Clinically Relevant ... [https://pmc.ncbi.nlm.nih.gov/articles/PMC4333742/]
- 91. Cytotoxicity of Metal‐Based Nanoparticles: From Mechanisms ... [https://pmc.ncbi.nlm.nih.gov/articles/PMC9165481/]
- 92. Validation of the Chick Chorioallantoic Membrane (CAM) ... [https://pmc.ncbi.nlm.nih.gov/articles/PMC12041968/]
- 93. Advances in Cytotoxicity Testing: From In Vitro Assays to In ... [https://www.mdpi.com/1422-0067/26/22/11202]
- 94. Resource Guide | Society for Biomaterials (SFB) [https://biomaterials.org/about-society/resource-guide]
- 95. Comparative evaluation of cytotoxic effects of a new ... [https://pmc.ncbi.nlm.nih.gov/articles/PMC11835352/]
- 96. Evaluation of mineral induction ability and cytotoxicity ... [https://pmc.ncbi.nlm.nih.gov/articles/PMC11621306/]
- 97. Decoding Fibrotic Encapsulation in Plastic Surgery implants [https://www.sciencedirect.com/science/article/abs/pii/S0927776525006988]
- 98. 一种可降低细胞毒性及官能团密度可控的纳米二氧化硅 ... [https://patents.google.com/patent/CN110642258A/zh]
- 99. Design of therapeutic biomaterials to control inflammation - PMC [https://pmc.ncbi.nlm.nih.gov/articles/PMC8884103/]
- 100. 体外刺激试验 [https://namsa.com/zh-CN/services/testing/tests/in-vitro-irritation-assay/]
- 101. Biocompatibility and structural insights of seaweed-derived ... [https://www.nature.com/articles/s41598-025-19632-0]
- 102. CN109661220A - 细胞毒性降低的熔岩海盐及其的制备方法 [https://patents.google.com/patent/CN109661220A/zh]
- 103. Modulation of Inflammatory Response to Implanted ... [https://pmc.ncbi.nlm.nih.gov/articles/PMC5681444/]
- 104. Biomaterial-Mediated Modification of the Local ... [https://pmc.ncbi.nlm.nih.gov/articles/PMC4432793/]
- 105. Research progress on nanotoxicity and detoxification of ... [https://pmc.ncbi.nlm.nih.gov/articles/PMC12258216/]