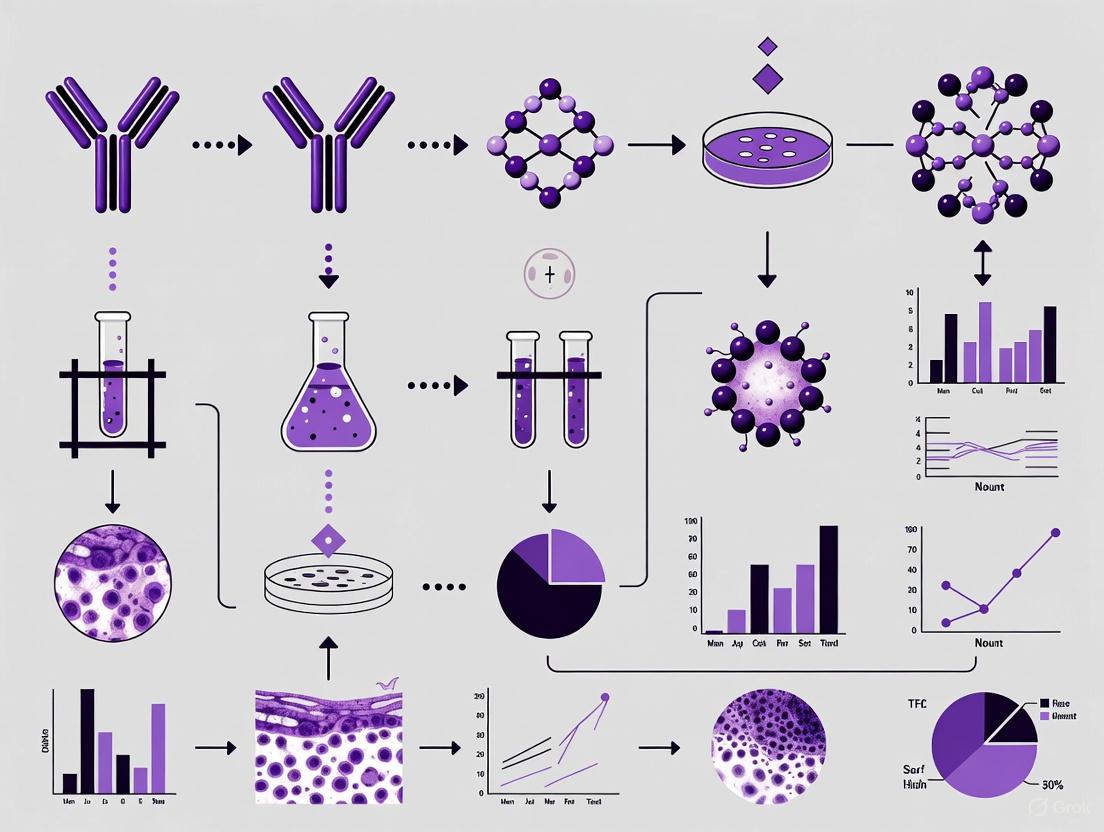
Immunohistochemistry Methods for Tissue Integration Analysis: A Comprehensive Guide from Basics to Advanced Applications
This article provides a comprehensive guide to immunohistochemistry (IHC) methods for analyzing protein expression and localization within tissues.
Immunohistochemistry Methods for Tissue Integration Analysis: A Comprehensive Guide from Basics to Advanced Applications
Abstract
This article provides a comprehensive guide to immunohistochemistry (IHC) methods for analyzing protein expression and localization within tissues. It covers foundational principles, detailed methodological protocols for both basic and advanced multiplex techniques, essential troubleshooting strategies for common issues, and rigorous validation approaches to ensure data reliability. Designed for researchers, scientists, and drug development professionals, this resource integrates established practices with current advancements, including semi-quantitative analysis and standardized reporting, to support robust tissue-based research in both preclinical and clinical settings.
Understanding Immunohistochemistry: Core Principles and Tissue Context in Biomarker Analysis
Immunohistochemistry (IHC) is an antibody-based technique used to characterize protein expression within tissue while preserving its structural and organizational context [1]. First reported in 1942 by Coons et al., IHC has evolved into a fundamental tool that combines immunological, anatomical, and biochemical techniques to image discrete components in tissues [2]. The technique relies on the specific recognition of an epitope by an antibody, allowing researchers to visualize and document the high-resolution distribution and localization of specific cellular components within their proper histological context [1] [2].
IHC's unique capability to maintain tissue architecture while detecting specific proteins makes it invaluable for both research and clinical applications. In biomedical research, IHC is used to detect proteins of interest in various contexts, as well as in drug development to test drug efficacy by detecting either the activity or the up- or down-regulation of disease markers [1] [2]. In clinical pathology, IHC is essential for identifying various pathogenic features—including neoplasia, metastasis, infection, and inflammation—within tissue samples for diagnostic purposes [1].
Fundamental Principles of IHC
Core Methodology
IHC exploits the specific relationship between an antibody and an antigen to visualize protein expression in situ [1]. The process can be performed using either direct or indirect detection methods. Direct detection involves a primary antibody directly conjugated to a label, while indirect detection uses an unlabeled primary antibody followed by labeled secondary antibodies that recognize the primary antibody [3]. The indirect method provides signal amplification as multiple secondary antibodies can bind to a single primary antibody [3].
Detection Systems
Modern IHC detection systems typically utilize enzymes such as Horseradish Peroxidase (HRP) conjugated to antibodies [3]. These systems often employ polymers where multiple enzyme molecules are attached to a single antibody backbone, producing more intense staining as there are more molecules for the chromogen to attach [3]. The most common chromogens are DAB (3,3'-diaminobenzidine), which produces a brown precipitate, and AP Red (or other red chromogens), typically used for skin sections where brown DAB might be masked by brown melanin pigment [3]. Double staining using both DAB and AP Red on the same tissue section allows pathologists to visualize two antigens simultaneously on a single slide [3].
IHC Workflow and Protocols
Complete IHC Workflow Diagram
Sample Preparation Protocol
Tissue Collection and Fixation
Proper tissue collection and fixation are critical first steps that directly impact sample integrity and macromolecular accessibility [1]. Chemical fixatives, particularly cross-linking fixatives like formaldehyde, paraformaldehyde, and glutaraldehyde, are most commonly used [1]. Formaldehyde fixation generates methylene bridges that covalently crosslink proteins in tissue samples, preserving tissue morphology but potentially masking antigenic epitopes [2]. Consistent fixation conditions (fixative type, pH, temperature, time) are essential for reproducible results [3].
Tissue Embedding and Sectioning
Tissue samples fixed in formaldehyde are typically embedded in paraffin, creating formalin-fixed paraffin-embedded (FFPE) tissue blocks [1]. FFPE tissue provides superb maintenance of cell structure and allows for long-term tissue storage [1]. Alternatively, tissues incompatible with formalin-fixation can be embedded in cryogenic material and snap-frozen for frozen section preparation [1]. FFPE tissues are usually cut into thin sections (4-5 μm) using a microtome, while frozen sections are cut using a cryostat [2]. Using high-quality sections that are thin, flat, and thoroughly dried onto charged or APES-coated slides is essential for optimal staining [3].
Antigen Retrieval Methods
Antigen retrieval is crucial for FFPE tissues as formaldehyde fixation can mask epitopes, preventing antibody binding [2]. The two primary antigen retrieval methods are:
Heat-Induced Epitope Retrieval (HIER): This method uses heat to break protein cross-links and unwind proteins, rendering epitopes accessible to antibodies [1]. Common HIER buffers include citrate (pH 6.0), EDTA (pH 8.0), and Tris-EDTA (pH 9.0) [4]. Heating can be performed using microwave ovens, water baths, or pressure cookers, with microwave ovens often providing superior results for many antibodies [1].
Proteolytic-Induced Epitope Retrieval (PIER): This method utilizes proteolytic enzymes like proteinase K, pepsin, or trypsin to digest protein cross-links and recover antigenicity [1] [4]. PIER requires careful optimization of time, temperature, enzyme type, and concentration to avoid damaging tissue morphology [4].
Table 1: Antigen Retrieval Methods and Applications
| Method | Mechanism | Common Reagents | Optimal For | Considerations |
|---|---|---|---|---|
| Heat-Induced Epitope Retrieval (HIER) | Heat breaks cross-links and unwinds proteins | Citrate buffer (pH 6.0), EDTA (pH 8.0), Tris-EDTA (pH 9.0) | Most epitopes; provides cleaner staining | pH critical for optimization; microwave often superior to water bath [1] [4] |
| Proteolytic-Induced Epitope Retrieval (PIER) | Enzymatic digestion of cross-links | Proteinase K, pepsin, trypsin | Epitopes resistant to HIER; certain antibodies | Risk of tissue damage; requires precise optimization [1] [4] |
Immunostaining Protocol
Blocking and Permeabilization
Blocking is essential to minimize background staining from non-specific antibody binding and endogenous enzyme activity [4]. Key blocking steps include:
- Endogenous enzyme blocking: For peroxidase-based detection systems, endogenous peroxidase must be blocked using hydrogen peroxide or commercial peroxidase inhibitors [3] [4]. For alkaline phosphatase systems, endogenous phosphatase must be inactivated [4].
- Biotin blocking: If using streptavidin-biotin amplification systems, endogenous biotin must be blocked [4].
- Protein blocking: Non-specific protein binding sites are blocked using protein-based blockers like BSA, normal serum, or commercial blocking buffers [4].
- Autofluorescence quenching: For fluorescent detection, chemical treatments can reduce natural tissue autofluorescence [4].
Antibody Incubation and Detection
Primary antibody incubation conditions (time, temperature, concentration) must be optimized for each antibody [1]. Antibodies are available in concentrated or ready-to-use (RTU) formats, with RTUs offering increased laboratory efficiency, better quality control, and easier reagent management [3]. Secondary antibody selection should match the host species of the primary antibody, with polymer-based detection systems providing enhanced sensitivity through signal amplification [3].
Visualization and Counterstaining
After immunostaining, tissues are typically counterstained to provide structural context [1]. Hematoxylin is most commonly used for chromogenic detection, staining nuclei blue [3]. For fluorescent detection, nuclear stains like DAPI or Hoechst are used [2]. Finally, slides are mounted using aqueous or permanent mounting media and coverslipped to preserve staining and create the ideal refractive index for microscopy [1].
Quantitative IHC Analysis
H-Score Methodology
Quantitative IHC analysis enables objective assessment of protein expression levels. The H-score is a commonly used quantitative method that incorporates both the intensity and percentage of stained cells [5]. The H-score formula is: H-score = Σpi(i+1), where "pi" represents the percentage of positive cell counts in total cell counts, and "i" represents the intensity (typically scored as 0, 1+, 2+, or 3+) [5]. This scoring system provides a continuous variable from 0-300 for data analysis.
Quantitative IHC Analysis Diagram
Case Study: ESCC Biomarker Analysis
A 2021 study demonstrated the application of quantitative IHC in identifying biomarkers for esophageal squamous carcinoma (ESCC) [5]. The study evaluated expressions of PCNA, p53, EGFR, and VEGF in 30 ESCC and 30 non-ESCC patients using quantitative computerized IHC with H-scoring [5].
Table 2: Quantitative IHC Analysis of ESCC Biomarkers [5]
| Biomarker | Biological Function | H-score in ESCC | H-score in Non-ESCC | Statistical Significance | AUC Value | Clinical Relevance |
|---|---|---|---|---|---|---|
| PCNA | Proliferating cell nuclear antigen; marker of cellular proliferation | Significantly higher | Lower | P < 0.05 | 0.80 | Clearly demarcates proliferating areas in esophageal tissue [5] |
| EGFR | Epidermal growth factor receptor; cell division regulation | Significantly higher | Lower | P < 0.05 | 0.74 | Constant activation leads to uncontrolled cell division [5] |
| VEGF | Vascular endothelial growth factor; angiogenesis stimulation | Significantly higher | Lower | P < 0.05 | 0.70 | Reinforces microvascular permeability and macrophage migration [5] |
| p53 | Tumor suppressor protein | Not significantly different | Similar | P > 0.05 | N/A | Frequently mutated in cancers but not significant in this ESCC study [5] |
| Combined Panel | Triplicate combination of PCNA, EGFR, VEGF | N/A | N/A | P < 0.01 | 0.86 | Enhanced diagnostic sensitivity over single biomarkers [5] |
The study found that biomarker combinations provided superior diagnostic sensitivity compared to individual proteins, with the triplicate combination achieving an AUC prediction probability of 0.86 [5]. This demonstrates the power of quantitative IHC in developing diagnostic biomarker panels.
Essential Research Reagents and Materials
Table 3: Essential IHC Research Reagent Solutions
| Reagent Category | Specific Examples | Function | Application Notes |
|---|---|---|---|
| Fixatives | Formaldehyde, paraformaldehyde, glutaraldehyde | Preserve tissue architecture and antigenicity | Aldehyde-based fixatives most common; optimization of time, temperature, pH critical [1] [2] |
| Embedding Media | Paraffin, cryogenic embedding compounds | Stabilize tissue for sectioning | FFPE superb for morphology; frozen sections for antigen sensitivity [1] [4] |
| Primary Antibodies | Monoclonal (clone D5F3, EP38Y), Polyclonal | Specific recognition of target epitopes | Monoclonal offers specificity; polyclonal may offer sensitivity; choose based on validation [3] [5] |
| Detection Systems | HRP-polymer, alkaline phosphatase-polymer | Signal amplification and visualization | Polymer systems provide enhanced sensitivity; choose based on application [3] |
| Chromogens | DAB (brown), AP Red, AEC (red) | Generate visible precipitate at antigen site | DAB most common; red chromogens for melanin-rich tissues [3] [2] |
| Antigen Retrieval Buffers | Citrate (pH 6.0), EDTA (pH 8.0), Tris-EDTA (pH 9.0) | Unmask epitopes obscured by fixation | pH critical for optimization; EDTA may be superior for certain membrane targets [1] [4] |
| Blocking Reagents | BSA, normal serum, commercial blockers, peroxidase inhibitors | Reduce non-specific background | Essential for clean staining; multiple types may be needed [4] |
| Counterstains | Hematoxylin, DAPI, Hoechst | Provide structural context | Hematoxylin for chromogenic; DAPI/Hoechst for fluorescent [3] [2] |
Troubleshooting and Optimization
Common IHC Issues and Solutions
Achieving optimal IHC results requires careful attention to technique and troubleshooting. Key issues include:
- Weak or absent staining: May result from improper antigen retrieval, insufficient antibody concentration, or over-fixation. Optimize retrieval method and validate antibody dilution [3].
- High background staining: Often caused by inadequate blocking, insufficient washing, or endogenous enzyme activity. Ensure proper blocking steps and standardized washing protocols [3].
- Uneven staining: Can result from section adhesion problems, concentration gradients during reagent application, or uneven heating during antigen retrieval. Use charged slides and ensure even reagent application [3].
- Non-specific staining: May indicate antibody cross-reactivity. Check antibody specification sheets and include appropriate controls [3].
Quality Control Measures
Implementing rigorous quality control is essential for reliable IHC results:
- Appropriate controls: Always include positive and negative controls that are carefully examined to validate results [3].
- Standardization: Use standardized washing steps (duration, volume, agitation) throughout the procedure to ensure consistency [3].
- Antibody validation: Know your primary antibody by checking specification sheets and validating new antibody batches [3].
- Documentation: Maintain detailed records of fixation conditions, retrieval methods, and antibody lots for reproducibility.
Advanced Applications and Future Directions
IHC continues to evolve with technological advancements. Quantitative computerized IHC, as demonstrated in the ESCC study, enables objective biomarker quantification and enhances diagnostic precision [5]. Multiplex IHC allows simultaneous detection of multiple markers on a single section, providing comprehensive profiling of tissue microenvironment [3]. In drug development, IHC is used to test drug efficacy by detecting modulation of disease markers in target tissues [2].
The integration of IHC with digital pathology and artificial intelligence represents the future of tissue-based diagnostics, enabling high-throughput analysis, pattern recognition, and development of predictive algorithms for personalized medicine approaches [5]. As these technologies advance, IHC will continue to be an indispensable tool for visualizing cellular components in tissue architecture, bridging the gap between molecular biology and histological context.
Immunohistochemistry (IHC) is a cornerstone technique in biomedical research and clinical diagnostics, enabling the visualization and localization of specific proteins within tissue samples. [6] The reliability and quality of IHC results are profoundly influenced by pre-analytical variables—those factors affecting the sample before it undergoes the actual staining process. [7] This application note details standardized protocols for the critical pre-analytical phases of tissue collection, fixation, and sectioning, providing researchers with methodologies to ensure superior sample quality for downstream IHC analysis.
The Impact of Pre-Analytical Variables
Pre-analytical variables constitute any and all steps in tissue processing, starting from sample acquisition to the point of analysis. [7] Inconsistent handling during these initial stages is a major source of variability, leading to compromised morphology, antigen degradation, masking of epitopes, and ultimately, unreliable and non-reproducible data. [8] [7] Adherence to standardized protocols is therefore not merely a recommendation but a necessity for generating high-quality, comparable research findings, particularly in translational studies and drug development.
Protocols for Tissue Collection and Fixation
Principles of Tissue Fixation
Fixation is the fundamental process of preserving tissue structure and antigenicity immediately following collection. Its primary purpose is to rapidly terminate cellular enzyme activity, prevent autolysis and bacterial decay, and stabilize biomolecules for subsequent processing and analysis. [9] The choice of fixative and fixation conditions requires careful consideration to balance optimal morphological preservation with the retention of antigenicity for the target(s) of interest.
Fixative Types and Properties
The table below summarizes the key characteristics of common fixatives used in IHC workflows.
Table 1: Common Fixatives in IHC and Their Properties
| Fixative Type | Mechanism of Action | Key Advantages | Key Disadvantages | Common Applications |
|---|---|---|---|---|
| Formalin (10% NBF) | Cross-linking via methylene bridges | Excellent morphology, strong tissue penetration, low background | Potential epitope masking requiring antigen retrieval | Gold standard for FFPE tissues; general IHC |
| Paraformaldehyde (PFA) | Cross-linking | Lacks methanol found in formalin; "fresher" fixative | Requires preparation and may repolymerize | Cell culture, perfusion fixation, immunofluorescence |
| Glutaraldehyde | Strong cross-linking | Excellent structural preservation, ideal for EM | Poor penetration, high autofluorescence, often requires quenching | Primarily electron microscopy |
| Precipitative (e.g., Methanol, Ethanol, Acetone) | Protein precipitation | No cross-linking, good for some sensitive epitopes | Poorer morphology, often incompatible with antigen retrieval | Frozen sections, cytology preparations |
Step-by-Step Protocol: Tissue Fixation for IHC
Materials:
- 10% Neutral Buffered Formalin (NBF) or other chosen fixative
- Specimen containers
- Phosphate-Buffered Saline (PBS)
Procedure:
- Tissue Collection and Trimming: Immediately upon dissection, place the tissue into a pre-labeled container filled with a volume of fixative that is 10-20 times greater than the tissue volume. [9] For larger specimens (e.g., >4 mm thick), neatly trim to ensure uniform fixation. [6]
- Fixation Duration: Fix the tissue for 18-24 hours at room temperature. [9] Under-fixation can lead to proteolytic degradation, while over-fixation excessively cross-links proteins and masks epitopes, making antigen retrieval more challenging. [6]
- Post-Fixation Rinse: Following fixation, rinse the tissue thoroughly with PBS to remove residual fixative, which can interfere with downstream processing.
Protocols for Tissue Processing and Sectioning
Tissue Processing and Paraffin Embedding
This process removes water from the fixed tissue and replaces it with paraffin wax, providing the structural support needed for thin sectioning.
Procedure:
- Dehydration: Pass the fixed tissue through a series of graded ethanol solutions (e.g., 70%, 80%, 95%, and two changes of 100% ethanol) to gradually remove all water. [9]
- Clearing: Immerse the tissue in a clearing agent, such as xylene, which is miscible with both ethanol and molten paraffin. This step prepares the tissue for wax infiltration. [8] [9]
- Infiltration and Embedding: Transfer the tissue to molten paraffin wax using an embedding station. After thorough infiltration, orient the tissue in an embedding mold, cover with fresh paraffin, and allow it to cool and solidify into a block. [9]
Microtomy and Slide Preparation
Materials:
- Microtome (e.g., Epredia HM 355S) [8]
- Poly-L-lysine or other charged slides
- Warm water bath (40-45°C)
Procedure:
- Sectioning: Using a microtome, cut the paraffin block to obtain thin sections typically 4-5 μm thick for IHC. [9] For nucleic acid extraction from FFPE tissue, thicker sections (e.g., 10 μm) may be used. [8]
- Floating and Mounting: Float the ribbon of sections on a warm water bath to remove wrinkles. Carefully pick up the sections onto charged slides, which enhance tissue adhesion. [9]
- Drying: Bake the mounted slides in an oven at 60°C for 1-2 hours to firmly adhere the tissue to the slide surface. [9] Properly prepared slides can be stored at 4°C until needed. [8]
Experimental Validation of Pre-Analytical Conditions
To ensure the quality of tissues processed through the above protocols, the following validation experiments are recommended.
Validation of Nucleic Acid Integrity
For studies involving subsequent genomic or transcriptomic analyses, it is critical to assess the impact of pre-analytical steps on nucleic acids. DNA and RNA can be degraded during fixation and processing.
Protocol: DNA/RNA Extraction and QC from FFPE Tissue [8]
- Nucleic Acid Extraction: Use commercial kits designed for FFPE tissue (e.g., QIAamp DNA FFPE Tissue kit, AllPrep DNA/RNA FFPE kit, RNeasy FFPE kit). Perform simultaneous DNA/RNA extraction when possible. Include DNase I digestion for RNA purification and RNase A digestion for DNA purification. [8]
- Quality Control:
- Purity: Use a UV spectrophotometer (e.g., Nanodrop) to assess the A260/A280 ratio, with a target of ~1.8 for DNA and ~2.0 for RNA. [8]
- Integrity: For DNA, perform PCR amplification of targets of varying lengths (e.g., 152 bp, 268 bp, 676 bp) to check for fragmentation. For RNA, use a BioAnalyzer to determine the RNA Integrity Number (RIN). [10]
Table 2: Expected Outcomes from Nucleic Acid QC of FFPE Tissue
| Biomolecule | QC Method | Acceptable Outcome | Notes |
|---|---|---|---|
| DNA | PCR Amplification | Robust amplification of shorter fragments (e.g., 152-268 bp) | Longer amplicons may fail due to fragmentation. [10] |
| DNA | Targeted NGS | High concordance with fresh-frozen tissue when excluding variants with low VAF (e.g., <5%) | Helps overcome FFPE-induced sequencing artefacts. [8] |
| RNA | Microarray / nCounter | High correlation with matched fresh-frozen tissue (e.g., R² > 0.9) | Demonstrated as feasible in breast cancer tissue. [8] |
Effect of Immunostaining on Downstream Molecular Analysis
If IHC-guided laser microdissection is planned, it is vital to understand how the immunostaining process itself affects biomolecules.
Key Findings: [10]
- DNA: The most robust biomolecule. Immunostaining causes no significant change in quality but can lead to a 50-75% decrease in total yield. It remains suitable for PCR and methylation analyses.
- RNA: Highly susceptible to degradation during the initial aqueous steps of staining due to RNase activity. Protocols require rigorous RNase inhibition.
- Protein: Can be successfully analyzed by one-dimensional electrophoresis and mass spectrometry after immunostaining but may be less amenable to solution-phase assays.
The Scientist's Toolkit: Essential Research Reagents
Table 3: Key Reagent Solutions for Pre-Analytical IHC Workflows
| Reagent / Kit | Function | Example Product / Note |
|---|---|---|
| 10% Neutral Buffered Formalin | Standard tissue fixation | Most common fixative for histology; ensures consistent pH. |
| Ethanol Series | Tissue dehydration | Gradual dehydration (70% to 100%) prevents excessive tissue shrinkage. |
| Xylene | Clearing agent | Clears ethanol from tissue prior to wax infiltration. |
| Paraffin Wax | Tissue embedding and support | Provides a solid matrix for microtomy. |
| Nucleic Acid Extraction Kits | DNA/RNA purification from FFPE | Specialized kits (e.g., from QIAGEN) are optimized for cross-linked, fragmented FFPE material. [8] |
| Microtome | Sectioning paraffin blocks | Essential for producing thin, consistent tissue sections. [8] |
Workflow and Pathway Diagrams
Pre-Analytical IHC Workflow
Pre-analytical IHC workflow with validation points
Fixation Impact on Analysis
Fixation effects on downstream analysis
The choice between Formalin-Fixed Paraffin-Embedded (FFPE) and frozen tissue preservation is a fundamental decision that significantly impacts experimental outcomes in immunohistochemistry (IHC) and tissue integration analysis research. These two methods employ fundamentally different approaches to stabilize tissue: FFPE uses chemical cross-linking and paraffin embedding to preserve tissue architecture at room temperature, while frozen tissue employs rapid cryopreservation to maintain biomolecules in their native state at ultra-low temperatures [11] [12]. For researchers investigating protein localization, expression patterns, and cellular interactions, this initial preservation step can determine the success or failure of downstream analyses. Within the context of a broader thesis on IHC methods, understanding the technical specifications, advantages, and limitations of each preservation approach is paramount for generating reliable, reproducible data that advances drug development and basic research.
The historical predominance of FFPE in pathology archives and the growing preference for frozen tissues in molecular research create a methodological divergence that researchers must navigate with careful consideration of their specific analytical goals. This application note provides a structured comparison and detailed protocols to guide researchers in selecting the appropriate preservation method for their IHC-based research questions.
Technical Comparison: FFPE versus Frozen Tissue
Core Characteristics and Research Applications
The decision between FFPE and frozen tissue involves balancing multiple factors including biomolecule integrity, morphological preservation, logistical constraints, and research objectives.
Table 1: Comprehensive Comparison of FFPE and Frozen Tissue Characteristics
| Characteristic | FFPE Tissue | Frozen Tissue |
|---|---|---|
| Preservation Process | Formalin fixation followed by paraffin embedding [11] | Snap-freezing in liquid nitrogen followed by storage at -80°C [11] |
| Protein Integrity | Denatured proteins due to formalin cross-linking; may affect antibody binding [11] [13] | Native protein conformation preserved; optimal for functional studies [11] [12] |
| Nucleic Acid Quality | Fragmented DNA/RNA; suitable for some molecular analyses with optimized protocols [11] | High-quality, intact DNA and RNA ideal for sequencing and gene expression studies [14] [12] |
| Tissue Morphology | Excellent architectural preservation; superior for pathological diagnosis [11] [15] | Good structural preservation but potential for ice crystal artifacts [16] [17] |
| Storage Requirements | Room temperature; stable for decades [11] [12] | -80°C or lower; vulnerable to power failures [11] [14] |
| Cost & Logistics | Low-cost long-term storage; easy transport [13] | High energy costs; requires reliable freezer infrastructure [14] |
| IHC Applications | Requires antigen retrieval for most targets; well-established for diagnostic IHC [18] [17] | No antigen retrieval typically needed; ideal for labile epitopes and phospho-specific antibodies [16] |
| Best Suited For | Histopathology, retrospective studies, biobanking [15] [13] | Molecular studies (proteomics, RNA-Seq), rapid intraoperative analysis [15] [12] |
Performance in Downstream Analytical Applications
The preservation method significantly influences data quality across various research applications, particularly in modern genomic and proteomic analyses.
Table 2: Analytical Performance Across Research Applications
| Application | FFPE Tissue Performance | Frozen Tissue Performance |
|---|---|---|
| Immunohistochemistry | Good with antigen retrieval; potential for epitope masking [17] | Excellent for native epitopes; minimal background [16] |
| DNA Sequencing | Higher error rates (C>T transitions); shorter read lengths [19] | Gold standard for accuracy; longer read lengths [14] |
| RNA Sequencing | Challenging due to fragmentation; requires specialized kits [14] | Optimal for transcriptome analysis; high-quality data [14] [12] |
| DNA Methylation Studies | Potential overestimation of methylation levels [20] | Highly comparable to fresh tissue [20] |
| Protein Biochemistry | Denatured proteins limit utility for functional assays [11] | Suitable for mass spectrometry, Western blotting [13] [12] |
| Long-term Biobanking | Exceptional; decades-long stability at room temperature [11] | Limited by freezer reliability; typically years not decades [14] |
Decision Framework and Experimental Design
Selection Algorithm for Preservation Methods
The following workflow diagram outlines a systematic approach for selecting the appropriate tissue preservation method based on research objectives and practical constraints:
Hybrid Approaches and Advanced Considerations
For complex research programs requiring multiple analytical modalities, consider a hybrid approach where tissues are divided and preserved using both methods. This is particularly valuable in translational research and biomarker discovery where morphological context and molecular data are complementary [15] [13]. When designing studies that may incorporate both FFPE and frozen tissues from different sources, ensure consistent handling procedures and document any pre-analytical variables that may affect cross-comparison.
Recent advances in FFPE-compatible sequencing technologies and antigen retrieval methods have narrowed the performance gap between the two preservation methods for some applications [14] [19]. However, for novel epitopes or unvalidated antibodies, frozen tissue remains the preferred starting point for method development due to superior antigen preservation.
Experimental Protocols for IHC
Comprehensive IHC Protocol for FFPE Tissue Sections
The FFPE IHC protocol requires particular attention to antigen retrieval to reverse formalin-induced cross-links that mask epitopes.
Table 3: Essential Reagents for FFPE IHC
| Reagent/Category | Specific Examples | Function & Application Notes |
|---|---|---|
| Fixation | 10% Neutral Buffered Formalin (NBF) [18] | Preserves tissue architecture through protein cross-linking; standard 18-24 hour fixation |
| Embedding Medium | Paraffin wax [11] | Provides structural support for microtomy; enables thin sectioning (4-7µm) |
| Antigen Retrieval Buffers | Sodium citrate (pH 6.0), Tris-EDTA (pH 9.0) [18] | Reverses formalin cross-links; choice depends on target antigen |
| Blocking Reagents | Normal serum, serum-free protein blocks [18] [16] | Reduces non-specific antibody binding; serum should match secondary antibody species |
| Detection Systems | HRP-conjugated antibodies with DAB substrate [18] | Enzymatic chromogenic detection; produces insoluble brown precipitate |
Detailed Step-by-Step Protocol:
Sectioning and Deparaffinization:
- Cut paraffin blocks into 4-7µm sections using a microtome and transfer to charged slides [18].
- Deparaffinize slides by immersion in xylene (2 changes, 3 minutes each) [18].
- Rehydrate through graded ethanols (100%, 100%, 95%, 70%, 50%) - 3 minutes each [18].
- Rinse in running tap water for 10 minutes; do not allow sections to dry hereafter [18].
Antigen Retrieval:
- Choose appropriate retrieval method based on target antigen:
- Heat-Induced Epitope Retrieval (HIER): Place slides in retrieval buffer (e.g., 10mM sodium citrate, pH 6.0) and heat using pressure cooker, microwave, or steaker at approximately 98°C for 15-20 minutes [18] [17].
- Protease-Induced Epitope Retrieval (PIER): Apply protease solution (e.g., 0.05% trypsin) and incubate at 37°C for 10 minutes [18].
- Cool slides completely after HIER (30-60 minutes) [18].
- Rinse gently with wash buffer (PBS or TBS).
- Choose appropriate retrieval method based on target antigen:
Immunostaining:
- Blocking: Incubate sections with protein blocking reagent (e.g., 2-10% normal serum or commercial serum-free block) for 30-60 minutes at room temperature [18] [16].
- Primary Antibody: Apply optimized primary antibody dilution in blocking buffer and incubate overnight at 4°C in a humidity chamber [18].
- Washing: Wash slides 3 times with wash buffer (PBS/TBS with 0.025% Triton X-100) for 5 minutes each [18].
- Secondary Antibody: Apply appropriate enzyme-conjugated secondary antibody (e.g., HRP-anti-rabbit) for 1 hour at room temperature [18].
- Washing: Repeat wash step as above.
Detection and Counterstaining:
- Chromogenic Development: Incubate with substrate solution (e.g., DAB for HRP) until desired stain intensity develops (typically 5-10 minutes) [18].
- Counterstaining: Apply hematoxylin for 30-60 seconds to visualize nuclei [18].
- Dehydration and Mounting: Dehydrate through graded ethanols (95%, 100%, 100%) and xylene, then mount with organic mounting medium [18].
Comprehensive IHC Protocol for Frozen Tissue Sections
Frozen tissue IHC prioritizes preservation of antigenicity through rapid processing and minimal fixation.
Table 4: Essential Reagents for Frozen Tissue IHC
| Reagent/Category | Specific Examples | Function & Application Notes |
|---|---|---|
| Embedding Medium | Optimal Cutting Temperature (OCT) compound [16] | Water-soluble embedding matrix; provides support for cryosectioning |
| Freezing Agent | Chilled isopentane (2-methylbutane) [16] | Enables rapid "snap-freezing" to minimize ice crystal formation |
| Fixatives | Acetone, Methanol, 4% Paraformaldehyde (PFA) [16] | Post-sectioning fixation; choice depends on antigen preservation needs |
| Blocking Reagents | Normal serum, BSA, commercial protein blocks [16] | Reduces non-specific binding; critical for frozen sections |
| Detection Systems | Fluorescently-conjugated antibodies [16] | Commonly used for frozen IHC; enables multiplexing |
Detailed Step-by-Step Protocol:
Tissue Freezing and Sectioning:
- Snap-Freezing: Place fresh tissue in OCT-filled mold and orient correctly. Slowly submerge in chilled isopentane bath cooled by dry ice until opaque (10-20 seconds) [16]. Store frozen blocks at -80°C until sectioning.
- Cryosectioning: Equilibrate frozen block to cryostat temperature (-20°C) for 15-30 minutes [18] [16]. Cut sections at 5-8µm thickness and transfer to charged slides [16].
- Storage: Store slide-mounted sections at -80°C for up to several months [18].
Fixation and Permeabilization:
Blocking and Immunostaining:
- Blocking: Incubate sections with protein blocking solution (e.g., 5% normal serum) for 30-60 minutes at room temperature [16].
- Optional Blocks: For biotinylated antibodies, perform avidin/biotin blocking; for peroxidase systems, block endogenous peroxidase with 3% H₂O₂ [16].
- Primary Antibody: Apply optimized primary antibody dilution and incubate for 1-2 hours at room temperature or overnight at 4°C [16].
- Washing: Wash slides 3 times with wash buffer for 5 minutes each.
- Secondary Antibody: Apply fluorophore-conjugated secondary antibody for 45-60 minutes at room temperature in the dark [16].
Mounting and Imaging:
Troubleshooting Common IHC Issues
Problem Identification and Resolution Strategies
The following workflow diagram outlines a systematic approach for diagnosing and resolving common IHC problems across both FFPE and frozen techniques:
Method-Specific Troubleshooting Guidelines
FFPE-Specific Issues:
- Epitope Masking: Optimize antigen retrieval by testing different buffers (citrate vs. Tris-EDTA), pH values, and heating methods [18] [17]. Extend retrieval time incrementally if staining remains weak.
- Over-fixation Artifacts: Standardize formalin fixation time to 18-24 hours; prolonged fixation increases cross-linking and requires more aggressive retrieval [17].
- Tissue Degradation: Ensure prompt tissue processing after collection; delays before fixation can cause nucleic acid degradation and protein cleavage [11].
Frozen Tissue-Specific Issues:
- Ice Crystal Damage: Ensure rapid "snap-freezing" using isopentane chilled by dry ice; slow freezing causes disruptive ice crystals [16] [17].
- Sectioning Difficulties: Allow proper block equilibration in cryostat (-20°C for 15-30 minutes); use anti-roll plates to prevent section curling [16].
- Antigen Loss: Limit post-sectioning fixation time; test different fixatives (acetone vs. PFA) for optimal antigen preservation [16].
The choice between FFPE and frozen tissue preservation is not merely a technical consideration but a strategic decision that influences research capabilities, data quality, and translational potential. FFPE tissues offer unparalleled advantages for morphological studies, retrospective research, and clinical applications where architectural context is paramount. Frozen tissues provide superior preservation of biomolecules in their native state, enabling advanced molecular analyses and functional studies. Contemporary research increasingly leverages both methods in complementary approaches, recognizing that the preservation protocol should be tailored to specific research questions rather than adhering to a universal standard.
For researchers developing IHC methods within tissue integration analysis projects, initial validation experiments should compare both preservation methods when feasible, particularly for uncharacterized antibodies or novel targets. As the field advances, improved antigen retrieval methods for FFPE tissues and standardized freezing protocols continue to narrow the performance gap. However, the fundamental trade-off between morphological integrity and molecular preservation remains, requiring informed decisions based on analytical priorities and practical constraints. By applying the structured comparison and detailed protocols presented in this application note, researchers can optimize their tissue preservation strategies to generate reliable, reproducible data that advances both basic science and drug development.
Antigen retrieval (AR) is a foundational technique in immunohistochemistry (IHC) that enables effective antibody binding by reversing the epitope masking caused by chemical fixation. In formalin-fixed, paraffin-embedded (FFPE) tissues—the standard for pathological diagnosis—formalin creates methylene bridges between proteins, leading to cross-linking that obscures antigenic sites and renders them inaccessible to antibodies [21] [22]. This process is critical because without AR, IHC staining can result in false negatives, weak signals, and unreliable data, particularly problematic for diagnostic markers and therapeutic targets like HER2 in breast cancer [22] [23].
The development of AR, particularly Heat-Induced Epitope Retrieval (HIER), marked a revolutionary milestone, effectively dividing IHC for FFPE tissues into pre-AR and post-AR eras [24]. By breaking the formaldehyde-induced cross-links, AR restores the antigenicity of tissues, allowing researchers and clinicians to unlock the vast potential of archival FFPE tissue collections for both diagnostic pathology and translational research [24] [22]. This protocol outlines the principles and applications of AR, providing detailed methodologies to achieve consistent and robust staining results.
Principles of Antigen Retrieval
The Problem of Formalin Fixation
Formalin fixation preserves tissue architecture by creating protein cross-links; however, these methylene bridges sterically hinder antibody access to epitopes [21] [22]. This masking effect alters protein conformation and reduces antigen accessibility, leading to diminished immunoreactivity. The need for AR is particularly acute when using monoclonal antibodies, which target a single, specific epitope, compared to polyclonal antibodies that recognize multiple epitopes and may retain some binding capacity even after fixation [21].
Mechanisms of Unmasking
AR techniques primarily work by reversing the effects of formalin fixation. The exact mechanism is believed to involve the hydrolytic cleavage of the formaldehyde cross-links, the unfolding of epitopes, and the chelation of bound calcium ions [22] [25]. This process dissociates interfering proteins, exposes the antigenic sites, and allows the epitope to regain a conformation recognizable by the antibody [22].
Antigen Retrieval Methods
Two principal methods are employed for antigen retrieval: heat-induced and enzymatic. The choice between them depends on the target antigen, antibody, and tissue type.
Heat-Induced Epitope Retrieval (HIER)
HIER is the most commonly used and generally effective method. It involves applying high heat to tissue sections in a specific retrieval buffer to break the cross-links [21] [22]. The key variables requiring optimization are:
- Buffer pH: Critical for success; citrate-based buffers (pH ~6.0) and Tris-EDTA buffers (pH ~9.0) are most common. The optimal pH is antigen-dependent [21] [25].
- Temperature: Effective retrieval typically requires temperatures between 90°C and 100°C [21].
- Incubation Time: Generally between 10-30 minutes, depending on the heating apparatus and tissue type [21].
Commonly used devices and their standard protocols are summarized in the table below.
Table 1: Comparison of Common HIER Methods and Conditions
| Heating Apparatus | Typical Temperature | Typical Time | Advantages | Considerations |
|---|---|---|---|---|
| Pressure Cooker [25] | Full pressure (~120°C) | 3 minutes after reaching pressure | Fast, even heating | Can be harsh on delicate tissues |
| Microwave [25] | 98-100°C | 20 minutes | Widely accessible | Risk of hot spots and uneven retrieval; slides must not dry out |
| Steamer/Rice Cooker [25] | 95-100°C | 20 minutes | Gentle boiling, less vigorous | Longer protocol |
| Water Bath [25] | 60-95°C | Overnight (60°C) or 20 min (95°C) | Gentle for fragile tissues | Very long incubation at lower temperatures |
Proteolytic-Induced Epitope Retrieval (PIER)
PIER uses proteolytic enzymes like trypsin, pepsin, or proteinase K to digest the cross-linked proteins and expose the epitopes [22] [26]. This method is typically employed when HIER is ineffective or when the antigen is known to be sensitive to heat. Optimization of PIER requires careful titration of:
- Enzyme Type: Selection based on the antigen and tissue.
- Enzyme Concentration: Too little is ineffective, too much damages tissue morphology.
- Incubation Time and Temperature: Typically 10-15 minutes at 37°C [22].
While useful, PIER has a lower success rate than HIER and carries a higher risk of damaging tissue morphology and the target antigen itself if over-digested [22].
Buffer Selection for HIER
The choice of retrieval buffer is antigen-specific and often requires empirical testing. The three most common buffers are:
- Sodium Citrate Buffer (10 mM, pH 6.0): A versatile, widely-used buffer for many antigens [25].
- Tris-EDTA Buffer (10 mM Tris, 1 mM EDTA, pH 9.0): Often preferred for nuclear antigens and more challenging targets [25].
- EDTA Buffer (1 mM, pH 8.0): Another high-pH alternative for difficult antigens [25].
Table 2: Common Antigen Retrieval Buffers and Their Applications
| Buffer | pH | Commonly Used For | Preparation Guide |
|---|---|---|---|
| Sodium Citrate | 6.0 | A broad range of cytoplasmic and membrane antigens | 2.94 g Tri-sodium citrate dihydrate in 1L dH₂O. Add 0.5 mL Tween 20 [25]. |
| Tris-EDTA | 9.0 | Nuclear antigens (e.g., Ki-67), phospho-epitopes, and more challenging targets | 1.21 g Tris base, 0.37 g EDTA in 1L dH₂O. Add 0.5 mL Tween 20 [25]. |
| EDTA | 8.0 | An alternative high-pH buffer for select antigens | 0.37 g EDTA in 1L dH₂O. Adjust pH with NaOH [25]. |
Advanced Applications and Integrated Workflows
The principles of AR extend beyond routine IHC, enabling advanced analytical techniques.
Quantitative IHC (qIHC)
Novel amplification systems now allow for precise protein quantification directly in FFPE tissues. One such method, qIHC, uses a known ratio of labeled-to-unlabeled secondary antibodies to generate countable dots, with each dot corresponding to a single antigen molecule [23]. This provides a sensitive, quantitative, and robust assay with a larger dynamic range and lower limit of detection than traditional IHC or ELISA, as demonstrated in accurate HER2 measurements [23].
Epitope Characterization for Antibody Discovery
Epitope binning is a critical step in therapeutic antibody development, grouping antibodies based on epitope similarities. High-throughput methods like Epitope Binning-seq use mammalian cell display and next-generation sequencing to simultaneously profile numerous query antibodies against a reference antibody without individual purification, dramatically accelerating candidate screening [27]. Complementary "dock binning" uses computational docking models to predict epitope regions, and combining these experimental and computational approaches provides a powerful strategy for localizing antigenic hotspots [28].
Integration with Mass Spectrometry Imaging (MSI)
Combining IHC with MSI overcomes throughput limitations. Antibodies conjugated to metal tags or organic mass tags can be simultaneously detected using mass spectrometry, enabling highly multiplexed imaging of dozens of proteins while preserving spatial context [29]. This integration of highly specific antibody binding with the multiplexing power of MSI is advancing biomarker discovery and spatial proteomics.
The Scientist's Toolkit: Essential Reagents and Materials
Table 3: Key Research Reagent Solutions for Antigen Retrieval
| Item | Function/Description | Examples/Specifications |
|---|---|---|
| Antigen Retrieval Buffers | Solutions to break cross-links and expose epitopes. pH is critical. | Citrate (pH 6.0), Tris-EDTA (pH 9.0), EDTA (pH 8.0) [25]. |
| Proteolytic Enzymes | Enzymes for PIER to digest cross-linking proteins. | Trypsin, Pepsin, Proteinase K [22] [26]. |
| Heating Apparatus | Device for performing HIER under controlled conditions. | Pressure cooker, scientific microwave, vegetable steamer, water bath [25]. |
| Validated Primary Antibodies | Antibodies tested and validated for IHC on FFPE tissue. | Check manufacturer's datasheet for recommended AR conditions [21]. |
| Detection System | Visualization system, often enzyme-based (e.g., HRP). | Polymer-based systems for enhanced sensitivity and low background [26]. |
| Blocking Reagents | Reduce non-specific background staining. | Normal serum, BSA, or proprietary protein blocks [26]. |
Experimental Protocol: Standard HIER Using a Pressure Cooker
This protocol provides a detailed step-by-step method for achieving robust and consistent antigen retrieval using a pressure cooker, a common and effective approach [25].
Materials and Reagents
- Tissue Sections: 4-5 µm thick FFPE sections mounted on slides.
- Antigen Retrieval Buffer: e.g., Tris-EDTA (pH 9.0) or Sodium Citrate (pH 6.0).
- Equipment: Domestic stainless steel pressure cooker, hot plate, slide rack, forceps.
- Staining Equipment: Access to an automated or manual IHC stainer for subsequent steps.
Step-by-Step Procedure
Deparaffinization and Rehydration:
- Deparaffinize slides by immersing in xylene (or substitute), 2 changes, 5 minutes each.
- Hydrate through graded ethanols: 100% (2x), 95%, 70%, 5 minutes each.
- Rise briefly in distilled water. Do not let sections dry out.
Heating and Retrieval:
- Add a sufficient volume of antigen retrieval buffer to the pressure cooker to cover slides by several centimeters. Place on the hot plate and begin heating, with the lid resting on top but not secured.
- Once the buffer is boiling, carefully transfer the rehydrated slides from the water into the slide rack within the pressure cooker.
- Secure the pressure cooker lid according to the manufacturer's instructions.
- Once full pressure is reached, start timing and maintain pressure for 3 minutes [25].
Cooling:
- After 3 minutes, turn off the hotplate and move the pressure cooker to a sink.
- Activate the pressure release valve and run cold water over the cooker to depressurize and cool it.
- Once safe to open, remove the lid and run cold tap water into the cooker for 10 minutes to cool the slides and allow epitopes to re-form into a stable conformation [25].
Completion:
- Proceed with the standard IHC staining protocol, starting with blocking and application of the primary antibody.
Workflow and Data Visualization
The following diagram illustrates the logical decision-making process for selecting and optimizing an antigen retrieval method, integrating key factors from the protocols above.
Antigen retrieval is an indispensable technique for successful immunohistochemistry in FFPE tissues. While HIER is the preferred initial approach, the optimal protocol must be determined empirically for each antibody and tissue type. Mastery of AR principles and protocols ensures reliable, sensitive, and reproducible results, unlocking the full potential of archival tissue samples for diagnostic pathology, biomarker discovery, and therapeutic development. As IHC continues to evolve with quantitative methods and multiplexed imaging, robust antigen retrieval remains the critical first step in effective antibody binding.
Immunohistochemistry (IHC) is a foundational technique for tissue integration analysis research, enabling the visualization of protein distribution, subcellular localization, and abundance within a physiological context [6]. The specificity and reliability of any IHC experiment hinge on the appropriate selection of antibody reagents. An antibody is a blood protein produced in the immune system that specifically binds to a target antigen; a primary antibody binds directly to the target antigen of interest, while a secondary antibody binds to the primary antibody to facilitate detection [30] [31]. The selection process requires careful consideration of multiple interdependent factors to ensure specific, sensitive, and reproducible results, which is critical for researchers and drug development professionals relying on accurate tissue analysis data.
Core Considerations for Primary Antibody Selection
Understanding Your Target Protein and Antigen
A deep understanding of your target protein's biology is the first critical step in informed antibody selection. Key characteristics to consider include the protein's expression level, subcellular localization, structure, stability, homology to related proteins, and any post-translational modifications (PTMs) or involvement in upstream signaling events [32]. Consulting resources such as UniProt, the Human Protein Atlas, and literature databases provides valuable biological context [32].
The antibody must be raised against an immunogen (a specific region of the target antigen) for successful detection [30] [31]. The chosen immunogen defines which epitope the antibody recognizes. It is essential to verify that the immunogen sequence is contained within the region of the protein you are trying to detect, especially when working with protein isoforms or specific domains [31]. Furthermore, sample processing significantly impacts epitope recognition. Some antibodies only recognize proteins in their denatured state (e.g., for western blotting), while others require proteins in their native, folded conformation [30]. For IHC, fixation methods like formalin-induced cross-linking can mask epitopes, often necessitating an antigen retrieval step to reverse these cross-links and expose the binding site [30] [6].
Antibody Clonality: Monoclonal vs. Polyclonal
The clonality of an antibody—whether it is polyclonal or monoclonal—fundamentally affects its specificity, sensitivity, and consistency.
Table 1: Comparison of Polyclonal and Monoclonal Antibodies for IHC
| Feature | Polyclonal Antibodies | Monoclonal Antibodies |
|---|---|---|
| Origin | Heterogeneous mixture from multiple B-cell clones [31] | Homogeneous population from a single B-cell clone [31] |
| Epitope Recognition | Multiple epitopes on the same antigen [30] [33] | Single, specific epitope [30] [33] |
| Sensitivity | Generally higher due to binding multiple epitopes [30] | Can be lower, but high-affinity clones exist |
| Specificity | Lower; potential for cross-reactivity with similar proteins [33] [31] | Higher; minimal cross-reactivity [33] [31] |
| Lot-to-Lot Variability | Higher [32] [31] | Very low [30] [32] |
| Tolerability to Antigen Conformation | Greater tolerability to fixation, pH, and temperature changes [30] | More sensitive to changes in protein conformation [33] |
| Ideal Use Case | Detecting low-abundance targets; native proteins [31] | Long-term projects; specific modification detection [33] |
A third category, recombinant antibodies, is produced using in vitro genetic engineering. Recombinant monoclonals offer the superior specificity of monoclonals combined with animal-free manufacturing, exceptional lot-to-lot consistency, and a scalable, secure supply [32] [31]. For the highest level of experimental reproducibility, recombinant monoclonal antibodies are recommended when a suitable clone is available [31].
Host Species and Isotype
The host species in which the primary antibody was raised has critical implications for experimental design, particularly when using a secondary antibody for detection [30] [32]. A fundamental rule is to choose a primary antibody host species that is different from the species of the tissue sample being tested [30]. For example, when studying a mouse tissue, select a rabbit-raised primary antibody instead of a mouse-raised one. This prevents the anti-mouse secondary antibody from binding to endogenous immunoglobulins in the mouse tissue, which causes non-specific background staining and false positives [32]. This "mouse-on-mouse" background can be addressed with specialized blocking kits, but the simplest solution is to choose a primary antibody from an alternate host species [30].
The antibody class or isotype (e.g., IgG, IgM) is also important because the secondary antibody must be directed against the specific class and subclass of the primary antibody, especially for monoclonal antibodies [30] [33]. This is crucial for multiplexed experiments where primary antibodies from the same host species but different subclasses are used with isotype-specific secondary antibodies.
Validation and Specificity
Antibody validation is the process of providing evidence that an antibody is specific and sensitive for its intended target and application. Given that validation in one application (e.g., western blot) does not guarantee performance in another (e.g., IHC), it is imperative to choose an antibody that has been specifically validated for use in IHC [32].
The most trusted method for confirming specificity is genetic validation using knockout (KO) controls [31] [34]. This involves testing the antibody on a cell line or tissue where the gene encoding the target protein has been inactivated. A specific antibody will produce a clear signal in the wild-type (control) sample and no signal in the isogenic KO sample [31]. The YCharOS initiative, a collaborative effort between academia and antibody manufacturers, has established a consensus platform using KO cell lines to systematically characterize antibody performance in common applications, providing openly accessible data to the research community [34]. When selecting an antibody, always check the datasheet for KO validation data and look for supporting images from IHC experiments.
The Scientist's Toolkit: Research Reagent Solutions
Table 2: Essential Reagents for IHC Experiments
| Reagent / Material | Function / Purpose |
|---|---|
| Primary Antibody | Binds specifically to the protein target of interest [30]. |
| Secondary Antibody (conjugated) | Binds to the primary antibody and carries a label (enzyme or fluorophore) for detection, providing signal amplification [31]. |
| Formalin/Paraformaldehyde Fixative | Preserves tissue integrity and morphology by creating protein cross-links; the most common fixative for IHC [6]. |
| Antigen Retrieval Buffer | Reverses cross-links introduced by formalin fixation to expose hidden epitopes, enabling antibody binding [30] [6]. |
| Blocking Serum | Reduces non-specific background staining by occupying reactive sites in the tissue before antibody incubation. |
| Chromogenic Substrate (e.g., DAB) | For enzyme-conjugated antibodies, produces an insoluble colored precipitate at the antigen site for brightfield microscopy [6]. |
| Fluorophore (e.g., CoraLite Plus dyes) | For fluorescent detection; emits light at a specific wavelength when excited, allowing visualization by fluorescence microscopy [6] [33]. |
| Mounting Medium with DAPI | Preserves the stained sample under a coverslip; DAPI is a dye that stains nuclear DNA, providing a cellular counterstain [6]. |
| Isotype Control | A non-immune immunoglobulin of the same species and isotype as the primary antibody; used to confirm specific binding via the Fab paratope [33]. |
| KO Cell Line or Tissue | Serves as a critical negative control to validate antibody specificity by confirming the absence of signal when the target is absent [31] [34]. |
Experimental Protocols for Antibody Validation in IHC
Protocol: Antibody Titration and Staining Optimization
Purpose: To determine the optimal dilution of a primary antibody for IHC that provides strong specific signal with minimal background.
- Sample Preparation: Cut consecutive sections from your FFPE (Formalin-Fixed, Paraffin-Embedded) tissue block of interest. A positive control tissue known to express the target is ideal [33].
- Deparaffinization and Antigen Retrieval: Deparaffinize sections in xylene and rehydrate through a graded alcohol series. Perform antigen retrieval using the recommended method (e.g., heat-induced epitope retrieval in citrate or EDTA buffer) [6].
- Blocking: Block endogenous peroxidase activity (for chromogenic detection) and then incubate sections with a blocking serum (e.g., normal goat serum) to prevent non-specific binding.
- Primary Antibody Incubation: Prepare a series of primary antibody dilutions. A good starting point is to test a range around the manufacturer's recommendation (e.g., 1:50, 1:100, 1:200, 1:500) [33]. Apply the different dilutions to consecutive tissue sections and incubate. The incubation can be performed for 1 hour at room temperature or overnight at 4°C. If background is high, shorter incubations at room temperature are recommended [33].
- Detection and Visualization: Incubate with the appropriate conjugated secondary antibody. For chromogenic detection, apply the enzyme substrate (e.g., DAB for HRP) and monitor color development. Counterstain with hematoxylin, dehydrate, and mount.
- Analysis: Examine the stained slides under a microscope. The optimal dilution is the one that yields the strongest specific staining with the cleanest background. If high background persists at all dilutions, consider further protocol adjustments like shorter incubation times or using F(ab')2 fragment secondary antibodies to avoid Fc receptor binding [33].
Protocol: Specificity Validation Using Knockout Controls
Purpose: To confirm the specificity of an antibody signal by comparing staining in wild-type versus knockout tissue.
- Source Control Tissues: Obtain matched tissue samples from a wild-type and a KO model (e.g., a CRISPR/Cas9-generated KO mouse) for your target protein [31]. The KO status must be confirmed at the protein level.
- Parallel Processing: Process both the wild-type and KO tissue samples identically and simultaneously: fix with the same fixative for the same duration, embed in paraffin, and section at the same thickness [34].
- Parallel Staining: Stain consecutive sections from both the wild-type and KO tissue blocks following the optimized IHC protocol from section 4.1, using the same antibody batch and dilution.
- Interpretation: A specific antibody will produce a clear, localized signal in the wild-type tissue and an absent or dramatically reduced signal in the KO tissue. Any signal remaining in the KO tissue is likely due to non-specific binding or cross-reactivity, indicating the antibody is not suitable for IHC without further validation [31] [34].
Decision Workflow and Visualization
The following diagram outlines the logical decision process for selecting a primary antibody for an IHC experiment, integrating the key considerations discussed in this note.
IHC Antibody Selection Workflow
A rigorous, hypothesis-driven approach to antibody selection is fundamental for generating reliable and meaningful IHC data in tissue integration research. By systematically considering the target antigen, choosing the appropriate clonality and host species, and insisting on application-specific validation—particularly with knockout controls—researchers can significantly enhance the specificity, sensitivity, and reproducibility of their experiments. Adopting these fundamentals and standardized protocols, as championed by community initiatives, will advance the quality of scientific discovery and drug development.
Step-by-Step IHC Protocols and Advanced Multiplex Staining Techniques
Immunohistochemistry (IHC) is an indispensable technique in biomedical research and diagnostic pathology that allows for the specific visualization of target molecule distributions within tissue architecture without destroying histological context [35]. For researchers investigating tissue integration analysis, IHC provides critical insights into protein expression patterns, cellular localization, and pathological alterations within complex tissue environments. The unique capacity of IHC to preserve spatial relationships while detecting specific antigens makes it particularly valuable for drug development professionals studying disease mechanisms and therapeutic targets [35]. This application note provides a comprehensive protocol and framework for the complete IHC staining workflow, emphasizing standardization approaches essential for generating reliable, reproducible data in research settings.
The foundational principle of IHC relies on specific antigen-antibody reactions visualized through various detection systems [35]. When properly optimized, IHC enables researchers to confirm target molecule expressions within their native tissue microenvironment, providing crucial information that complements other molecular techniques. For scientists investigating tissue integration, this contextual preservation is paramount—it allows for the co-analysis of target molecules alongside their subcellular, cellular, and intercellular relations [35]. The following sections detail the complete workflow from tissue preparation through counterstaining, with specific attention to the technical considerations that ensure experimental success.
Materials and Methods
Research Reagent Solutions
Successful IHC requires carefully selected reagents at each procedural stage. The table below outlines essential materials and their functions within the IHC workflow.
Table 1: Essential Reagents for IHC Staining Workflow
| Reagent Category | Specific Examples | Primary Function |
|---|---|---|
| Fixatives | 10% Neutral Buffered Formalin (NBF), 4% paraformaldehyde with picric acid [36] | Preserves tissue architecture and antigenicity by preventing autolysis and degradation |
| Processing Reagents | Ethanol series (70%, 90%, 100%), Xylene, Paraffin [36] | Dehydrates, clears, and infiltrates tissue for microtomy sectioning |
| Antigen Retrieval Solutions | EDTA-based (pH 9.0), Citrate-based (pH 6.0) [37] [36] | Reverses formaldehyde-induced epitope masking through heat-induced epitope retrieval (HIER) |
| Blocking Reagents | Normal serum, Bovine serum albumin (BSA), Protein blocking buffers [35] [36] | Reduces non-specific background staining by occupying hydrophobic binding sites |
| Primary Antibodies | Monoclonal (clone BP6165 [37]), Polyclonal [3] | Specifically binds to target antigen of interest with varying sensitivity and specificity |
| Detection System Components | Biotinylated secondary antibodies, Streptavidin-HRP, DAB chromogen [36] | Amplifies and visualizes primary antibody binding through enzymatic reactions |
| Counterstains | Mayer's Hematoxylin, DAPI, Methyl Green, Eosin [38] [39] [40] | Provides contrasting stain to visualize tissue morphology and context |
Complete IHC Staining Protocol
Tissue Preparation and Sectioning
Proper tissue preparation establishes the foundation for successful IHC staining. Ischemia time before fixation should be minimized as alteration in IHC results for biomarkers like Ki-67 has been reported with variable ischemic times [35].
Fixation: Immerse tissue in 10% Neutral Buffered Formalin (NBF) for 24 hours at room temperature with a tissue-to-fixative ratio between 1:1 to 1:20 [35]. For specialized applications, formaldehyde fixative solutions containing 4% paraformaldehyde with 14% saturated picric acid (pH 6.9) may be used to enhance morphology preservation [36]. Avoid fixation beyond 24 hours as this may mask or destroy tissue antigens [36].
Processing and Embedding: Dehydrate fixed tissues through a graded ethanol series (70%, 90%, 100%), clear in xylene, and infiltrate with molten paraffin at 58°C [36]. Proper dehydration is critical as paraffin is immiscible with water.
Sectioning: Cut tissue sections at 3-5 μm thickness using a rotary microtome [37] [35]. Float sections in a 56°C water bath and mount onto charged or gelatin-coated slides to enhance adhesion [3] [36]. Dry slides overnight at room temperature before storage or use.
Deparaffinization and Rehydration
Before IHC staining, paraffin-embedded sections must undergo deparaffinization and rehydration to enable aqueous-based reagents to penetrate the tissue.
- Immerse slides in xylene (mixed isomers) twice for 10 minutes each [36].
- Transfer through graded alcohols: 100% alcohol twice for 10 minutes, 95% alcohol for 5 minutes, 70% alcohol for 5 minutes, and 50% alcohol for 5 minutes [36].
- Rinse with deionized water and rehydrate in wash buffer (1X PBS) for 10 minutes [36].
Antigen Retrieval
Formaldehyde fixation creates methylene bridges that cross-link proteins and mask epitopes, necessitating antigen retrieval for many targets [35].
Heat-Induced Epitope Retrieval (HIER): Incubate slides in preheated antigen retrieval solution (e.g., EDTA pH 9.0 or sodium citrate pH 6.0) using a heating device. Maintain at 100°C for 30 minutes on a heating plate, 10 minutes in a pressure cooker, or 8-15 minutes in a microwave oven [38] [35]. Allow slides to cool gradually to room temperature in the retrieval solution.
Enzymatic Retrieval: For limited antigens such as some cytokeratins, incubate sections with trypsin or proteinase K for 10-20 minutes at 37°C [35].
Immunostaining Procedure
The following protocol utilizes a chromogenic detection system with horseradish peroxidase (HRP) and 3,3'-diaminobenzidine (DAB).
Endogenous Enzyme Blocking: Apply peroxidase blocking reagent (3% H₂O₂ in water or methanol) for 5-15 minutes to quench endogenous peroxidase activity [3] [36]. Rinse with wash buffer.
Protein Blocking: Apply serum blocking reagent (1-3% normal serum from the secondary antibody species or BSA) for 15 minutes to reduce non-specific background [35] [36]. Do not rinse after this step.
Primary Antibody Incubation: Apply optimized concentration of primary antibody diluted in incubation buffer (e.g., 1% BSA in PBS). Incubate overnight at 2-8°C in a humidified chamber [36]. For monoclonal antibody BP6165, a dilution of 1:200 for 30 minutes at room temperature has been successfully used [37].
Secondary Antibody and Detection: Incubate with biotinylated secondary antibody for 30-60 minutes, followed by High Sensitivity Streptavidin-HRP conjugate for 30 minutes [36]. Wash thoroughly between steps.
Chromogen Application: Apply DAB chromogen solution (prepared by mixing DAB concentrate with diluent at 1:20 ratio) for 3-20 minutes, monitoring development under a microscope [37] [36]. Terminate reaction by rinsing with wash buffer.
Counterstaining and Mounting
Counterstaining provides morphological context to the specific IHC signal.
Nuclear Counterstaining: For chromogenic IHC with DAB, apply Mayer's Hematoxylin for approximately 30 seconds [38] [39]. Rinse and immerse in bluing reagent (alkaline solution such as ammonia water or lithium carbonate) to convert nuclear color from red to blue/purple [41] [40].
Mounting: Dehydrate through graded alcohols (70%, 95%, 100%), clear in xylene, and coverslip using organic mounting media for DAB stains [36]. For AEC chromogen (red), use aqueous mounting media as AEC is alcohol-soluble [36].
The complete IHC staining workflow is visually summarized in the following diagram:
IHC staining workflow from tissue preparation to mounting
Results and Data Interpretation
Counterstain Selection and Applications
Appropriate counterstain selection is crucial for creating optimal contrast that allows the primary staining product to stand out while providing morphological context. The table below summarizes common counterstains and their applications.
Table 2: Counterstain Options for IHC Applications
| Counterstain | Target | Color | Staining Time | Compatible Chromogens | Key Considerations |
|---|---|---|---|---|---|
| Mayer's Hematoxylin [38] [39] | Nuclei (binds to lysine residues on histones) | Blue to violet | 30 seconds [39] | DAB (brown), AEC (red) | Progressive stain; provides clear, sharp nuclear staining with little background [39] |
| Nuclear Fast Red [38] | Nucleic acids | Red | 5 minutes | DAB (brown), BCIP/NBT (blue) | Rapid staining; provides good contrast against blue, purple, brown, and green stains |
| Methyl Green [38] | Nucleic acids | Green | 5 minutes | DAB (brown), AEC (red) | Differentiates between DNA and RNA; excellent contrast against brown and red stains |
| Eosin [38] | Cytoplasm | Pink to red | 2-5 minutes | DAB (brown), Vector Blue | General cytosolic stain; acts as non-nuclear counterpart to hematoxylin |
| DAPI [38] [40] | Nucleic acids | Blue (fluorescent) | 5-15 minutes | Alexa Fluor dyes (488, 594, 647) | Less membrane permeable than Hoechst; typically used for fixed cells |
| Hoechst 33342 [38] | Nucleic acids | Blue (fluorescent) | 5-15 minutes | Alexa Fluor dyes | Membrane permeable; suitable for live or fixed cell applications |
| Propidium Iodide [38] | Nucleic acids | Red (fluorescent) | 5-15 minutes | FITC, Alexa Fluor 488 | DNA intercalating dye; ideal for experiments using green reporter labels |
Quality Control and Validation
Robust IHC requires systematic quality control measures to ensure result reliability and reproducibility. The following diagram illustrates the essential quality control framework:
Essential quality control components for validating IHC results
Controls fall into two primary categories: antigen (tissue) controls and reagent controls [41]. Positive controls consist of tissues with known expression of the target antigen, verifying that both procedure and reagents are functioning correctly even if test samples are negative [41]. Negative controls include tissues known not to express the target antigen, which check for non-specific signals and false-positive results [41]. Knockout tissues provide particularly robust negative controls, as demonstrated with TMEM119 knockout mouse brain tissue showing complete absence of staining [41].
Reagent controls are equally critical. The no-primary antibody control, where tissue is incubated with antibody diluent alone followed by secondary antibodies and detection reagents, ensures that observed staining results specifically from primary antibody binding rather than non-specific detection system interactions [41]. Isotype controls utilize non-immune antibodies of the same isotype and concentration as the primary antibody to identify non-specific antibody-tissue interactions [41]. For automated IHC systems, controls in liquid form (CLFs) prepared from genetically modified cell lines provide standardized quality assessment with regular circular shape and better cell distribution when applied automatically [37].
Troubleshooting Common IHC Issues
Even with optimized protocols, IHC experiments may encounter technical challenges that require systematic troubleshooting.
Table 3: Troubleshooting Guide for Common IHC Problems
| Problem | Potential Causes | Solutions |
|---|---|---|
| Weak or No Staining | Inadequate antigen retrieval, Primary antibody too dilute, Over-fixation, Improper epitope compatibility | Optimize HIER conditions (pH, time, temperature) [35]; Titrate primary antibody concentration [3]; Reduce fixation time; Verify antibody specification sheet for recommended protocols [3] |
| High Background Staining | Inadequate blocking, Endogenous enzyme activity not blocked, Primary antibody concentration too high, Non-specific antibody binding | Extend protein blocking time (30 min to overnight) [35]; Ensure complete peroxidase blocking (check erythrocytes as indicator) [3]; Titrate primary antibody; Use Fc receptor blocking for lymphoid tissues [35] |
| Uneven Staining | Section adhesion problems, Inconsistent washing, Concentration gradients during reagent application | Use charged slides instead of protein-based adhesives [3]; Standardize washing steps (duration, volume, agitation) [3]; Ensure even application of reagents across entire section [3] |
| Counterstain Too Strong | Hematoxylin concentration too high, Differentiation step omitted, Excessive counterstaining time | Regulate and standardize counterstain concentration and time [3]; For regressive hematoxylin, include differentiation in acid alcohol; Reduce counterstaining time, especially for nuclear antigens [41] |
| Tissue Morphology Damage | Excessive microwaving during HIER, Over-digestion with proteases, Section drying during procedure | Optimize HIER conditions to avoid "microwave burn" [35]; Titrate enzymatic retrieval concentration and time; Maintain tissue hydration throughout procedure |
Discussion
Advanced Applications in Tissue Integration Research
For researchers investigating tissue integration analysis, IHC offers several advanced applications that provide deeper insights into complex biological systems. Multiplex staining approaches enable the simultaneous detection of multiple antigens within the same tissue section, revealing cellular interactions and spatial relationships that single-marker staining cannot capture [42]. Both fluorescent and chromogenic multiplexing methods are available, each with distinct advantages. Fluorescent detection is particularly valuable for co-localization studies where targets occupy the same cellular compartments, as fluorophores with minimal spectral overlap can be distinguished even when precisely overlapping [42]. Chromogenic multiplexing with enzymes such as HRP (producing brown DAB precipitate) and AP (producing red Vector Red) allows visualization of multiple targets using standard brightfield microscopy [3].
When designing multiplex experiments, two key parameters must be considered: avoiding cross-reactivity between detection reagents and selecting fluorochromes or chromogens with minimal spectral overlap [41] [42]. This typically requires primary antibodies from different species to ensure secondary antibody specificity. For complex multiplex panels, species-specific secondary antibodies conjugated to distinct fluorophores (e.g., Alexa Fluor dyes with well-separated emission spectra) enable clear discrimination of multiple targets [41].
Recent technological advancements have significantly enhanced IHC capabilities for tissue integration research. Automated quantitative analysis methods based on deep learning techniques and image processing algorithms now enable precise identification and quantification of nuclear, membrane, and cytoplasmic expressions in whole-slide images [43]. These computational approaches employ optical density separation to differentiate between hematoxylin and DAB staining components, combined with advanced segmentation algorithms like CellViT for nuclear segmentation and region growing algorithms for membrane and cytoplasmic analysis [43]. Such automated systems achieve greater accuracy in specific quantitative metrics compared to traditional manual interpretation, providing robust tools for high-throughput tissue integration studies [43].
Standardization and Reproducibility Considerations
Standardization remains a critical challenge in IHC, particularly for multi-center studies and clinical translation of tissue integration research. Multiple factors introduce variability, including differences in tissue handling, fixation conditions, antigen retrieval methods, and detection systems [35]. Pre-analytical variables such as ischemia time before fixation significantly impact results for sensitive antigens including phosphoproteins and Ki-67 [35]. Implementing standardized protocols with controlled fixation conditions (fixative type, pH, temperature, duration) is essential for generating reproducible, reliable data [3].
Automated IHC staining systems have substantially improved reproducibility in both research and clinical settings [37] [35]. These systems minimize operator-dependent variability through standardized reagent application, incubation times, and washing procedures. For example, the LYNX480 PLUS platform with its integrated quality control module automatically applies controls in liquid form (CLFs) and maintains consistent staining conditions across multiple runs [37]. Such automated solutions provide more regular staining patterns and better cell distribution compared to manual methods, while also conserving scarce patient tissue that would otherwise be used for control sections [37].
The choice between ready-to-use (RTU) antibodies and concentrates represents another consideration for standardization. RTU antibodies increase laboratory efficiency, enhance quality control, and simplify reagent management through defined test numbers and manufacturer-verified expiry dates [3]. They reduce run-to-run variation, particularly when used with automated stainers and associated detection systems [3]. Concentrated antibodies offer greater flexibility for protocol optimization and have a lower initial purchase price, but require preparation time and validation [3]. For laboratories implementing new antibody assays, RTU formats significantly reduce validation workload while ensuring consistency.
The complete IHC staining workflow from deparaffinization to counterstaining represents a multifaceted technical procedure that, when properly optimized and controlled, generates invaluable data for tissue integration analysis research. This application note has detailed the essential steps, reagents, and quality control measures required to produce reliable, interpretable IHC results. Each component—from tissue preparation through final mounting—contributes to the overall success of the experiment, with particular attention to antigen preservation, specific signal detection, and appropriate morphological context through counterstaining.
For drug development professionals and researchers, mastering these IHC techniques enables sophisticated investigation of disease mechanisms, biomarker localization, and therapeutic target validation within preserved tissue architecture. The continuing advancements in automated staining platforms, multiplex detection methods, and computational analysis tools promise even greater capabilities for extracting meaningful biological insights from tissue samples. By adhering to the standardized protocols and quality control frameworks outlined in this document, researchers can ensure that their IHC data meets the rigorous standards required for publication, regulatory submission, and translational application.
Immunohistochemistry (IHC) is a foundational technique that uses antibody-epitope interactions to detect and visualize specific proteins within tissue samples, providing critical insights into protein distribution, subcellular localization, and abundance in a semi-quantitative manner [6]. The visualization of these protein targets can be achieved through two primary detection methodologies: chromogenic and fluorescent. Chromogenic detection involves enzyme-conjugated antibodies that generate colored precipitates at the antigen site, while immunofluorescence (IF) employs fluorophore-conjugated antibodies that emit light at specific wavelengths when excited by special lighting [44]. The choice between these systems represents a critical decision point in experimental design, significantly impacting factors ranging from multiplexing capability to signal permanence and analytical precision.
Within the context of tissue integration analysis research, understanding the nuances of each detection method is paramount for generating reliable, reproducible data. Chromogenic methods, particularly those utilizing 3,3'-diaminobenzidine (DAB), have long been the workhorse of pathological diagnostics and research due to their permanence and compatibility with standard brightfield microscopy [45]. In contrast, fluorescent detection systems have gained prominence in research settings for their superior multiplexing capabilities, dynamic range, and suitability for quantitative analysis, especially with advances in fluorescence microscopy and fluorophore chemistry [6]. This application note provides a comprehensive comparison of these fundamental detection methodologies, offering detailed protocols and analytical frameworks to guide researchers in selecting and implementing the optimal system for their specific research objectives.
Core Principles and Comparative Analysis
Chromogenic Detection Systems
Chromogenic detection operates on an enzyme-mediated principle where an enzyme-conjugated antibody converts a soluble substrate into an insoluble, colored precipitate that deposits at the site of antigen expression [46]. The most common enzymes used are horseradish peroxidase (HRP) and alkaline phosphatase (AP), which act upon chromogenic substrates such as DAB (producing a brown end product) or 3-amino-9-ethylcarbazole (AEC) (producing a red end product) [46]. The resulting stained slides can be viewed with a standard brightfield microscope, making the technique widely accessible.
Signal amplification is often crucial for detecting low-abundance targets. Several established methods enhance sensitivity:
- Avidin-Biotin Complex (ABC) Method: Biotin-conjugated secondary antibodies link primary antibodies to an avidin-biotin-peroxidase complex. The high enzyme-to-antibody ratio within these large complexes significantly increases sensitivity compared to direct detection methods [46].
- Labeled Streptavidin-Biotin (LSAB) Method: This method uses a biotin-conjugated secondary antibody to link the primary antibody to a streptavidin-peroxidase complex. Its advantage lies in a smaller complex size than the ABC method, which facilitates better tissue penetration and can further enhance sensitivity [46].
- Polymer-Based Methods: In this approach, multiple secondary antibodies and enzymes are conjugated to a polymer backbone. This system offers increased sensitivity and specificity compared to streptavidin-biotin-based systems, while also reducing the number of procedural steps by incorporating the staining into a single incubation [46].
A notable development in chromogenic substrates is the use of 3,3',5,5'-tetramethylbenzidine (TMB), which produces a vibrant blue-green reaction product. This color differentiates clearly from the brown of DAB, hematoxylin-counterstained nuclei, and endogenous melanin, making it particularly valuable for tissues with high endogenous pigment levels as it can eliminate the need for melanin bleaching [47]. However, a significant limitation of TMB is that its staining results are not stable long-term and require image preservation via slide scanning [47].
Fluorescent Detection Systems
Fluorescent detection relies on fluorochromes—molecules that absorb light at a specific wavelength and emit light at a longer, characteristic wavelength [46]. In this system, antibodies are conjugated to fluorochromes such as FITC/Alexa Fluor 488 (green), Texas Red/Alexa Fluor 594 (red), or Cy5/Alexa Fluor 647 (far red) [48]. The stained tissue sections are visualized using a fluorescence microscope equipped with specific light sources and filters to excite the fluorochromes and capture their emitted light.
The key advantage of fluorescence is the ability to label multiple antigens simultaneously, a technique known as multiplexing. The narrow emission spectra of fluorochromes, compared to the broad absorption of chromogens, allow for the separate identification of several targets on the same slide. While traditional IF can typically handle 2-8 markers [44], advanced platforms like the Akoya PhenoCycler-Fusion can detect up to 60 markers on a single slide by using repeated dye cycles with sophisticated color separation software [44]. This makes fluorescent mIHC "great for studying proteins in the same cell area" and ideal for complex studies like cancer immune microenvironments [45].
However, fluorescent detection has its own set of challenges. Photobleaching can diminish the fluorescent signal over time, and background noise from autofluorescence—where endogenous tissue elements like collagen, elastin, and lipofuscin naturally fluoresce—can obscure specific signals [48]. These issues can be mitigated by using frozen sections, avoiding the green channel where autofluorescence is common, employing autofluorescence quenching techniques, and using signal amplification methods like tyramide signal amplification (TSA) to overpower the background [48].
Direct Comparison of Key Characteristics
The table below provides a systematic, quantitative comparison of the core features of chromogenic and fluorescent detection systems to aid in the selection process.
Table 1: Comparative Analysis of Chromogenic and Fluorescent Detection Systems
| Feature | Chromogenic IHC | Fluorescent IHC (Traditional) | Ultra-high-plex IF |
|---|---|---|---|
| Detection Chemistry | Enzyme (HRP/AP) + chromogen (DAB, AEC, TMB) [45] [46] | Direct or secondary fluorophores (e.g., Alexa Fluor dyes) [44] [46] | Repeated dye cycles with color separation software [44] |
| Maximum Markers/Slide | 3–5 markers (limited by color overlap) [45] | 2–8 markers [44] | 10–60 markers [44] |
| Signal Stability | Permanent, archivable for years [45] [48] | Moderate, fades over time; requires digital archiving [45] [44] | Moderate (software-corrected) [44] |
| Sensitivity / Dynamic Range | Moderate [44]; High sensitivity with ABC/LSAB amplification [46] | High [44] [46] | Very High [44] |
| Quantitative Analysis | Basic; semi-quantitative scoring is subjective [49] | Highly exact counting; wide, steady signal range [45] | High, enabled by advanced software [44] |
| Co-localization Studies | Limited; difficult to distinguish mixed colors [45] [46] | Excellent; clear with signal separation [45] [46] | Excellent [44] |
| Equipment Needed | Standard brightfield microscope [45] | Fluorescence microscope or scanner [45] | Advanced scanner + AI analytics [44] |
| Best Application | Diagnostic workflows, routine lab work, archived tissues [45] [44] | Spatial biology, co-localization, immune cell studies [45] [44] | Complex tumor microenvironments & large protein panels [44] |
Experimental Protocols
General IHC Workflow
The following diagram illustrates the standard immunohistochemistry workflow, highlighting key decision points shared by both chromogenic and fluorescent methods.
Figure 1: Core IHC Workflow with Chromogenic and Fluorescent Branches
Detailed Protocol: Multiplex Fluorescent IHC
This protocol is adapted from a published research methodology for staining mouse brain tissue sections, which successfully employed multiplex immunofluorescence to visualize multiple neuronal markers concurrently [50].
Tissue Preparation:
- Perform transcardial perfusion with ice-cold 4% paraformaldehyde (PFA) in PBS to fix tissue in situ [50].
- Post-fix the dissected brain in 4% PFA overnight at 4°C [50].
- Cryoprotect the tissue by immersing it in a 30% sucrose solution in PBS at 4°C for 3 days [50].
- Embed tissue in OCT compound and store at -80°C. Cut 50 μm thick sections using a cryostat and collect them in 24-well plates containing PBS [50].
Staining Procedure:
- Primary Antibody Incubation: Dilute primary antibodies in a solution of PBST (0.3% Triton), 0.5% BSA, and 0.05% thimerosal. Incubate the tissue sections with the primary antibody solution for 48 hours at 4°C [50].
- Washing: Wash sections 3 times in PBS to remove unbound primary antibodies [50].
- Secondary Antibody Incubation: Incubate sections with fluorophore-conjugated secondary antibodies (e.g., Goat anti-Rabbit 568, Goat anti-Chicken 488) at a dilution of 1:1000 for 2 hours at room temperature, protected from light [50].
- Nuclear Counterstaining: Stain with DAPI (1:1000 in PBS) for 15 minutes at room temperature [50].
- Mounting: Mount sections onto SuperFrost Plus slides using an appropriate aqueous mounting medium with anti-fade properties. Apply coverslips [50].
Imaging and Analysis:
- Visualize sections using a spinning disk confocal microscope or an automated high-throughput slide scanner equipped for fluorescence [50].
- Use separate laser lines and emission filters specific for each fluorophore (e.g., DAPI, Alexa Fluor 488, Alexa Fluor 568) to capture individual channels.
- Merge channels and analyze using digital image analysis software for co-localization studies and cell population quantification.
Detailed Protocol: Chromogenic IHC with DAB
This protocol outlines a standard chromogenic detection procedure using the widely adopted DAB substrate and a polymer-based detection system for enhanced sensitivity.
Tissue Preparation:
- Use formalin-fixed, paraffin-embedded (FFPE) tissue sections cut at 4–5 μm thickness and mounted on charged slides.
- Deparaffinize and rehydrate sections through a series of xylene and graded ethanol baths.
- Perform heat-induced epitope retrieval (HIER) using a citrate or Tris-EDTA buffer solution in a decloaking chamber or water bath, as required for the target antigen.
Staining Procedure:
- Blocking: Block endogenous peroxidase activity by incubating sections with 3% hydrogen peroxide for 10-15 minutes. Rinse with buffer. Block non-specific protein binding with a serum or protein block (e.g., 2.5% normal horse serum) for 20 minutes [46].
- Primary Antibody Incubation: Apply the optimized dilution of the primary antibody to the sections and incubate for 30-60 minutes at room temperature or overnight at 4°C. Rinse with buffer.
- Polymer Detection System: Apply a polymer-based HRP-conjugated secondary antibody system (which combines the secondary antibody and enzyme into a single reagent) for 30 minutes at room temperature. Rinse with buffer thoroughly [46].
- DAB Development: Prepare the DAB substrate solution according to the manufacturer's instructions. Apply it to the tissue sections and monitor the development of the brown precipitate under a microscope (typically 12 minutes). Immerse the slides in distilled water to stop the reaction [46].-
- Counterstaining: Counterstain with hematoxylin for 20-45 seconds to visualize nuclei. Differentiate in acid alcohol if necessary, and "blue" in a mild ammonia solution or running tap water [48].
- Dehydration and Mounting: Dehydrate sections through graded ethanols and xylene. Mount with a permanent, non-aqueous mounting medium and a coverslip [48].
Imaging and Analysis:
- Image slides using a standard brightfield microscope or a whole-slide scanner.
- For quantitative analysis, use digital pathology software with algorithms trained to identify and quantify DAB staining intensity, which provides more objective and reproducible data than semi-quantitative pathologist scoring [49] [51].
The Scientist's Toolkit: Essential Research Reagents and Materials
Successful execution of IHC experiments relies on a suite of critical reagents and materials. The following table details key components and their functions for both chromogenic and fluorescent workflows.
Table 2: Essential Reagents and Materials for IHC Detection Systems
| Item | Function/Description | Example Products/Types |
|---|---|---|
| Primary Antibodies | Bind specifically to the target protein (antigen) of interest. | Monoclonal or polyclonal antibodies validated for IHC/IF [50]. |
| Secondary Antibodies | Conjugated to an enzyme or fluorophore; bind to the primary antibody for detection and signal amplification. | HRP-conjugated polymer systems; Fluorophore-conjugated (e.g., Alexa Fluor series) [50] [46]. |
| Chromogenic Substrates | Enzymatic conversion produces a colored, insoluble precipitate at the antigen site. | DAB (brown), AEC (red), TMB (blue-green) [47] [46]. |
| Fluorophores | Molecules that emit light at specific wavelengths upon excitation; used for detection in IF. | Alexa Fluor 488 (green), Alexa Fluor 594 (red), Cy5 (far red) [48]. |
| Signal Amplification Kits | Enhance detection sensitivity for low-abundance targets. | Tyramide Signal Amplification (TSA) kits; Avidin-Biotin Complex (ABC) kits; Polymer-based detection systems [45] [46]. |
| Counterstains | Provide contrast by staining cellular compartments not targeted by the primary antibody. | Hematoxylin (nuclear, for chromogenic); DAPI (nuclear, for fluorescent) [48] [50]. |
| Mounting Media | Preserves the stained sample and provides the correct refractive index for microscopy. | Permanent non-aqueous (for chromogenic); Aqueous anti-fade (for fluorescent, prevents photobleaching) [48]. |
| Blocking Reagents | Reduce non-specific background binding of antibodies. | Normal serum from the host species of the secondary antibody; BSA [50] [6]. |
| Antigen Retrieval Buffers | Reverse formaldehyde-induced cross-links to expose hidden epitopes. | Citrate buffer (pH 6.0), Tris-EDTA buffer (pH 9.0) [44]. |
Choosing between chromogenic and fluorescent detection systems depends on a balance of experimental goals, available resources, and technical requirements. The following decision diagram synthesizes the key selection criteria to guide researchers.
Figure 2: Detection System Selection Guide
In conclusion, both chromogenic and fluorescent detection systems are powerful tools for tissue integration analysis research. Chromogenic IHC, with its permanence, simplicity, and compatibility with standard pathology workflows, remains the gold standard for diagnostic applications and single-target studies where long-term sample archiving is essential [45] [48]. In contrast, fluorescent IHC offers unparalleled capabilities for multiplexing, precise co-localization analysis, and objective quantification, making it indispensable for complex research applications such as characterizing the tumor microenvironment [45] [44].
The ongoing development of both technologies—including new chromogens like TMB and advanced fluorophores with minimal spectral overlap—continues to push the boundaries of what is possible in tissue-based research [47] [44]. Furthermore, the integration of digital image analysis and artificial intelligence is revolutionizing data extraction from both chromogenic and fluorescent slides, enabling more accurate, reproducible, and high-throughput quantitative data [49] [51]. By carefully considering the experimental requirements outlined in this application note, researchers can strategically select and optimize the detection system that best aligns with their specific scientific objectives.
Mastering Multiplex Immunohistochemistry (mIHC) for Tumor Microenvironment Analysis
Multiplex Immunohistochemistry (mIHC) represents a pivotal advance in tissue-based protein detection, enabling the simultaneous visualization of multiple antigens within a single tissue section. By moving beyond the "one marker per slide" paradigm of traditional IHC, mIHC provides rich insights into the spatial organization, phenotypic heterogeneity, and functional interplay of diverse cellular populations in their native tumor microenvironment (TME). This capability is particularly transformative in modern oncology and immunology, where unraveling the complexity of the TME is essential for understanding disease pathogenesis and therapeutic response [52]. The technique leverages highly specific antibodies, advanced labeling and amplification chemistries, and sophisticated imaging and computational analysis workflows to provide deep insights into cellular complexity and spatial organization for advanced biomedical research [52].
The importance of mIHC in TME analysis lies in its capacity to reveal the spatial and temporal dynamics of protein expression in tissue samples. This technology offers a detailed look at the cellular composition of tumors, aiding in the identification of therapeutic targets and prognostic markers. Furthermore, mIHC facilitates a better understanding of the interactions between different cell types within the TME, which is essential for developing effective cancer therapies. The simultaneous detection of multiple targets contributes to a comprehensive analysis, enabling a more integrated approach to cancer diagnosis and treatment planning [53]. Studies have demonstrated that mIHC-based biomarkers can predict response to immunotherapy with higher accuracy (AUC ~0.8) compared to other modalities like PD-L1 IHC alone, making it a powerful tool for immuno-oncology research [54].
Fundamental Principles and Detection Systems
Core Principles of Multiplex IHC
At the heart of mIHC is the antibody-antigen binding event, where the specificity and affinity of primary antibodies determine both sensitivity and selectivity. The key differentiator from single-plex IHC is the ability to detect and discriminate multiple protein targets within the tissue's architectural context without loss of morphological or spatial information [52]. mIHC protocols can be broadly classified based on several factors:
- Detection chemistry: Chromogenic (enzyme-mediated colorimetric), fluorescent (fluorophore-tagged), metal-based (isotopically labeled), and DNA-barcoded/oligonucleotide-conjugated strategies
- Staining format: Simultaneous ("all-in-one" cocktail) versus sequential (cyclic) application of antibodies and detection reagents
- Amplification method: Use of polymer systems, tyramide signal amplification (TSA), hybridization-based signal amplification, or metal-conjugated oligonucleotides
- Sample preparation: Applicability to formalin-fixed paraffin-embedded (FFPE), fresh frozen, and cytological preparations [52]
The combination of these factors enables the detection of anywhere from 2–5 (chromogenic) to over 60–100 (highly multiplexed cyclic DNA-barcoding or mass cytometry-based) markers in a single specimen, redefining how researchers view tissue complexity [52].
Detection and Signal Amplification Systems
Fluorescent Detection systems rely on fluorophore-conjugated antibodies (direct) or secondary detection (indirect) to produce discrete emission wavelength signals upon excitation. A vast range of organic dyes is available (e.g., Alexa Fluor, Cyanine, FITC), with typical experiments detecting 4–7 markers per "round," and higher capacity via cyclic or spectral unmixing approaches [52]. Key considerations for fluorescent detection include:
- Spectral separation is essential to minimize cross-talk
- Advanced multispectral microscopy and computational unmixing enable analysis of closely related emission spectra
- Signal is subject to photobleaching and tissue autofluorescence, which can be mitigated by quenching reagents or math-based unmixing algorithms [52]
Tyramide Signal Amplification (TSA) is a major innovation in multiplex IHC that provides exceptional sensitivity. In this method, horseradish peroxidase (HRP) catalyzes the deposition of tyramide-linked fluorophores or haptens onto electron-rich residues adjacent to the antigen site, resulting in covalent, spatially restricted signal amplification with sensitivity 100-fold greater than traditional methods [52]. TSA is particularly valuable for:
- Detecting low-abundance targets in tissue sections
- Enabling the use of same-species primary antibodies by antibody stripping between cycles
- Achieving high spatial resolution through localized, covalent deposition of reporter molecules [52]
Polymer-based Amplification systems link multiple enzyme molecules to backbone structures (often dextran), increasing signal by enhancing the number of reported substrate conversions per antibody event. They are common in automated IHC platforms and can be incorporated in both chromogenic and fluorescent assays [52].
Table 1: Comparison of Major mIHC Detection Technologies
| Technology | Plex Capacity | Key Features | Limitations | Best Applications |
|---|---|---|---|---|
| Chromogenic IHC | 3-5 markers | Compatible with brightfield microscopy; stable, archivable slides | Spectral overlap limits plex capacity; semi-quantitative at best | Clinical pathology workflows; low-plex spatial analysis |
| Fluorescent IHC | 4-7 markers (up to 10+ with unmixing) | High sensitivity; quantitative potential; subcellular resolution | Photobleaching; tissue autofluorescence | High-resolution TME mapping; co-localization studies |
| TSA-based mIHC | 5-8 markers for TSA-based; 30-60 for non-TSA cyclical | Exceptional sensitivity (100x amplification); enables same-species antibodies | Excess deposition can obscure targets; requires optimization | Detection of low-abundance targets; high-plex cyclic staining |
| DNA-barcoded (CODEX) | 30-60 markers | Very high plex capacity; high spatial resolution | Specialized instrumentation required; complex workflow | Comprehensive immune cell profiling; complex cellular interactions |
| Imaging Mass Cytometry | 40+ markers | Ultra-high plex; no spectral overlap | Destructive to samples; lower spatial resolution | Deep phenotyping of rare cell populations; systems-level analysis |
Experimental Design and Panel Configuration
Antibody Selection and Validation
Successful mIHC hinges on the use of highly specific, validated, and reproducible antibody clones. Monoclonal antibodies, especially recombinant monoclonal antibodies, are widely favored for their specificity, lot-to-lot consistency, and amenability to direct labeling or genetic engineering. Polyclonal antibodies are occasionally incorporated when increased analyte sensitivity is required, but their batch variability can be problematic [52].
Rigorous antibody validation is critical to avoid false positives and signal cross-talk. Key validation strategies include:
- Testing on positive and negative control tissues or cell lines (with and without antigen expression)
- Use of isotype controls and "knockout" validation with genetically modified models
- Titration and single-plex testing under intended experimental conditions (fixation, retrieval, tissue type)
- Assessment of subcellular localization; comparing observed tissue distribution to canonical patterns [52]
Panel Design Considerations
A rational antibody panel must avoid cross-reactivity and consider multiple factors:
- Species/isotype compatibility (using antibodies from different species if employing secondary-detection schemes)
- Epitope stability across sequential staining or stripping steps in cyclic protocols
- Fluorophore or chromogen compatibility; avoiding spectral/channel overlap
- Ensuring detection reagents do not inactivate each other or the antigen [52]
Panel validation begins with each antibody as a single stain, ensuring specificity and sensitivity before combining, and proceeds with panel-wise optimization for signal-to-noise, sequence, and antigen retrieval compatibility [52].
Table 2: Essential Research Reagent Solutions for mIHC
| Reagent Category | Specific Examples | Function | Key Considerations |
|---|---|---|---|
| Primary Antibodies | CD3, CD8, CD4, CD20, CD68, FoxP3, PD-1, PD-L1, Pan-CK, SOX10 | Target antigen detection | Validate specifically for mIHC; verify species reactivity; check compatibility with fixation |
| Signal Amplification Reagents | Tyramide conjugates, polymer-HRP/AP systems | Enhance detection sensitivity | TSA provides 100x amplification but requires careful titration; polymer systems offer more moderate amplification |
| Fluorophore Conjugates | Alexa Fluor series, Cy dyes, FITC | Signal generation | Consider spectral overlap, brightness, photostability; match to microscope filter sets |
| Antigen Retrieval Buffers | Citrate buffer (pH 6.0), Tris-EDTA (pH 9.0) | Expose epitopes masked by fixation | Optimal pH and buffer varies by antibody; heat-induced epitope retrieval most common |
| Blocking Reagents | Normal serum, BSA, casein, commercial blocking buffers | Reduce non-specific binding | Should match host species of secondary antibodies; protein-based blockers most common |
| Nuclear Counterstains | DAPI, Hoechst, SYTOX dyes | Cell segmentation and identification | Should be spectrally distinct from antibody labels; DAPI most common for fluorescence |
| Mounting Media | ProLong Gold, Vectashield, commercial antifade media | Preserve fluorescence and prepare for imaging | Antifade components extend fluorophore lifetime; hardening vs. non-hardening formulations |
| Antibody Stripping Reagents | Acidic buffers, SDS-containing solutions, commercial stripping buffers | Remove antibodies between cycles | Must remove antibodies without damaging tissue or deposited labels; test on control tissues |
Experimental Workflow Design
The following diagram illustrates the core decision-making workflow for establishing an mIHC experiment, from initial planning through final analysis:
Detailed mIHC Protocols
Standard TSA-Based Multiplex IHC Protocol
This protocol provides a detailed methodology for a 6-plex TSA-based immunofluorescence staining of FFPE tissue sections for TME analysis, with the ability to detect 6-8 markers simultaneously while eliminating species restrictions on antibody selection [53].
Materials Required:
- FFPE tissue sections (4-5 μm thickness) on charged slides
- Primary antibodies against targets of interest (e.g., Pan-CK, CD3, CD8, CD68, PD-L1, FoxP3)
- Corresponding HRP-conjugated secondary antibodies
- Tyramide-conjugated fluorophores (6-8 distinct fluorophores)
- Antigen retrieval buffer (pH 6.0 or 9.0, depending on antibodies)
- Blocking buffer (commercial IHC blocking reagent or 2.5% normal serum)
- Humidified staining chamber
- Microwave or pressure cooker for antigen retrieval
- Fluorescence microscope with multispectral imaging capabilities
Procedure:
Slide Preparation and Deparaffinization:
- Bake slides at 60°C for 30 minutes to melt paraffin
- Deparaffinize in xylene (3 changes, 5 minutes each)
- Rehydrate through graded ethanol series (100%, 95%, 70% - 2 minutes each)
- Rinse in distilled water
Antigen Retrieval:
- Place slides in antigen retrieval buffer in a microwave-safe container
- Heat in microwave at high power for 20 minutes (maintain boiling)
- Cool slides for 20-30 minutes at room temperature
- Rinse with distilled water followed by wash buffer (PBS or TBS)
Peroxidase Blocking:
- Incubate with 3% hydrogen peroxide for 10 minutes to quench endogenous peroxidase activity
- Rinse with wash buffer (2 changes, 2 minutes each)
Protein Blocking:
- Apply protein block (2.5% normal serum or commercial blocking buffer) for 30 minutes at room temperature
- Tap off excess block (do not rinse)
Primary Antibody Incubation:
- Apply first primary antibody at optimized dilution
- Incubate overnight at 4°C in a humidified chamber
- Alternatively, incubate for 1-2 hours at room temperature
HRP-Conjugated Secondary Antibody:
- Rinse slides with wash buffer (3 changes, 2 minutes each)
- Apply species-appropriate HRP-conjugated secondary antibody
- Incubate for 30 minutes at room temperature
- Rinse with wash buffer (3 changes, 2 minutes each)
Tyramide Signal Amplification:
- Apply fluorophore-conjugated tyramide working solution
- Incubate for 5-10 minutes at room temperature
- Rinse with wash buffer (3 changes, 2 minutes each)
Antibody Stripping:
- Heat slides in antigen retrieval buffer at 95°C for 20 minutes
- Cool to room temperature for 20 minutes
- Alternatively, use low-pH stripping buffer for 10 minutes at room temperature
Repeat Staining Cycle:
- Repeat steps 5-8 for each additional marker in the panel
- Perform peroxidase blocking only at the beginning of the protocol
Nuclear Counterstaining and Mounting:
- Apply DAPI (1 μg/mL) for 5 minutes at room temperature
- Rinse with wash buffer (2 changes, 2 minutes each)
- Coverslip using antifade mounting medium
- Store slides at 4°C in the dark until imaging
Critical Steps and Troubleshooting:
- Always include controls: no primary antibody, single stains for spectral unmixing
- Optimize tyramide concentration and incubation time to prevent over-amplification
- Verify complete antibody removal after stripping by omitting the next primary antibody
- Protect fluorophores from light during and after staining to prevent photobleaching
Whole Slide Imaging and Region of Interest Selection Protocol
Image Acquisition Parameters:
- Use a multispectral imaging system (e.g., Vectra, CODEX, or similar)
- Acquire whole slide scans at 10x magnification for overview
- Capture high-power fields (20x or 40x) for detailed analysis
- For fluorescence imaging, establish exposure times for each channel that avoid pixel saturation
- Include a spectral library from single-stained controls for unmixing
Region of Interest (ROI) Selection Strategy:
- For heterogeneous tissues (e.g., tumors), sample multiple regions:
- Tumor core (minimum 3 ROIs)
- Invasive margin (interface between tumor and stroma)
- Stromal regions distant from tumor
- Sample size guidance:
- Minimum of five high-power fields (HPFs), typically 0.33-0.64 mm² each
- For rare cell types or highly heterogeneous markers, increase to 10+ HPFs
- For whole slide imaging, use automated ROI selection algorithms to reduce bias
- Document ROI selection criteria consistently across all samples [54]
Image Analysis and Data Processing
Computational Analysis Workflow
The analysis of mIHC data requires a structured computational pipeline to transform raw images into quantitative biological insights. The following diagram outlines the key steps in this process:
Key Analysis Steps
Color Deconvolution and Spectral Unmixing: For both mIHC and mIF, color deconvolution and spectral unmixing, respectively, are essential for accurate assignment of marker expression. This process has a pronounced impact on the downstream steps of cell segmentation, phenotyping and scoring [54].
- For chromogenic mIHC: Color deconvolution algorithms extract hematoxylin and separate chromogen channels as 8-bit images, resulting in a separate chromogenic channel for each immunostain
- For fluorescent mIHC: Spectral unmixing separates the overlapping emission spectra of multiple fluorophores using a reference spectral library collected from single-stained controls
- Implementation: Use commercial software (InForm, HALO) or open-source solutions (ImageJ, QuPath) [54]
Tissue and Cell Segmentation:
- Tissue segmentation: Classify tissue into relevant compartments (tumor, stroma, necrosis) using machine learning classifiers or threshold-based approaches
- Cell segmentation: Identify individual cells using nuclear markers (DAPI) with membrane/cytoplasmic markers to define cell boundaries
- Algorithm selection: Watershed, gradient flow, or deep learning-based segmentation (U-Net, Cellpose)
Cell Phenotyping and Quantification:
- Assign cell phenotypes based on marker expression combinations using Boolean gating or machine learning approaches
- Generate quantitative data: cell densities, percentages, and intensity measurements
- Account for cellular heterogeneity through clustering approaches (Phenograph, FlowSOM)
Spatial Analysis:
- Calculate cell-to-cell distances and neighbor relationships
- Determine spatial patterns (clustered, random, dispersed)
- Analyze cellular interactions and neighborhood compositions
- Assess compartment-specific localization (intra-tumoral vs. stromal) [55]
Integration with Transcriptomic Data
Advanced approaches such as Spatially-resolved Transcriptomics via Epitope Anchoring (STvEA) enable the enrichment of mIHC images with single-cell RNA sequencing data. This method performs transcriptome-guided annotation of highly multiplexed cytometry datasets, increasing the level of detail in histological analyses by enabling systematic annotation of nuanced cell populations, spatial patterns of transcription, and interactions between cell types [56].
The STvEA approach consists of three major steps:
- Computational consolidation of the protein expression spaces of the mIHC dataset and a matching CITE-seq dataset using a shared antibody panel
- Using the consolidated protein expression space to transfer features from the CITE-seq dataset into the mIHC images
- Finding an optimal clustering of the CITE-seq mRNA expression data such that the resulting cell populations can be accurately mapped into the mIHC images based on their antigenic profile [56]
Applications in Tumor Microenvironment Analysis
Immune Context Classification in Melanoma
A prospective study explored the heterogeneous nature of metastatic melanoma using mIHC and flow cytometry. Multiplex IHC data quantified immune subset numbers present intra-tumoral (IT) versus the tumor stroma, plus distance of immune subsets from the tumor margin. The study provided a model which defines metastatic melanoma immune context into four categories using the presence or absence of PDL1+ melanoma cells and/or macrophages, and their location within the tumor or on the periphery, combined with the presence or absence of IT CD8+ T cells. This model interprets melanoma immune context as a spectrum of tumor escape from immune control, and provides a snapshot upon which interpretation of checkpoint blockade inhibitor therapy responses can be built [55].
Key findings from this study include:
- mIHC detected significantly higher Treg numbers than FACS and showed preferential CD4+ T cell distribution in the tumor stroma
- Significant differences in T cell subset distribution were observed, with a higher percentage of IT vs stromal CD8+ T cells (p < 0.05), and an inverse relationship for CD4+ T cells, with a higher percentage in the stroma than IT (p < 0.005)
- mIHC showed a close association between the presence of IT CD8+ T cells and PDL1 expression in melanoma, which was more prevalent on macrophages than on melanoma cells [55]
Predictive Biomarker Discovery
mIHC technologies have been used to define predictive biomarkers for response to immunotherapy. Examples include:
- Quantifying the proportion of intratumoral CD8+CD39+ cells in predicting response to anti-PD-1 therapy
- Assessing the density of CD8+FoxP3+ T cells in patients with non-small cell lung carcinoma
- Evaluating the density of programmed cell death protein-1 (PD-1)+ to PD-L1+ cells within a certain proximity in patients with Merkel cell carcinoma
- A combinatorial biomarker using CD8+FoxP3+PD-1low/mid+ and CD163+PD-L1− cell densities in patients with advanced melanoma [54]
These mIHC-based biomarkers have shown area under the curve (AUC) values on the order of 0.8 for predicting response to anti-PD-(L)1 therapies, outperforming other modalities like PD-L1 IHC alone, interferon-gamma-related gene signatures, and mutational density [54].
Table 3: Quantitative mIHC Analysis of Immune Cell Distribution in Metastatic Melanoma
| Immune Cell Population | Intra-Tumoral Region (%) | Tumor Margin (%) | Stromal Region (%) | Statistical Significance |
|---|---|---|---|---|
| CD8+ T cells | 45.2 ± 8.7 | 32.1 ± 6.5 | 22.7 ± 5.3 | p < 0.05 (IT vs Stromal) |
| CD4+ T cells | 18.5 ± 5.2 | 26.8 ± 6.1 | 54.7 ± 9.3 | p < 0.005 (IT vs Stromal) |
| Treg (CD4+FoxP3+) | 12.3 ± 3.8 | 18.9 ± 4.5 | 68.8 ± 10.2 | p < 0.001 (IT vs Stromal) |
| B cells (CD20+) | 8.7 ± 2.9 | 15.6 ± 4.1 | 75.7 ± 11.4 | p < 0.005 (IT vs Stromal) |
| Macrophages (CD68+) | 46.8 ± 9.1 | 28.9 ± 6.3 | 24.3 ± 5.8 | Not significant |
| Dendritic Cells (CD11c+) | 15.3 ± 4.2 | 22.7 ± 5.1 | 62.0 ± 9.7 | p < 0.05 (IT vs Stromal) |
Troubleshooting and Quality Control
Common Technical Challenges and Solutions
High Background or Non-Specific Staining:
- Increase blocking time or try alternative blocking reagents
- Optimize antibody concentrations through careful titration
- Increase wash stringency (add detergents such as Tween-20)
- Ensure complete quenching of endogenous peroxidase activity
Weak or Absent Signal:
- Verify antigen retrieval efficiency; try alternative pH buffers or methods
- Check antibody compatibility with fixation methods
- Increase primary antibody concentration or incubation time
- For TSA-based methods: optimize tyramide concentration and incubation time
Incomplete Antibody Removal After Stripping:
- Increase stripping time or temperature
- Try alternative stripping buffers (low pH vs. high temperature)
- Include a control slide without primary antibody to verify stripping efficiency
Spectral Bleed-Through or Overlap:
- Re-evaluate fluorophore combinations for better spectral separation
- Use spectral unmixing with single-stain controls for each marker
- Reduce exposure times to prevent channel crossover
Tissue Damage or Loss:
- Use charged or adhesive slides to improve tissue adherence
- Reduce harshness of antigen retrieval methods
- Add protective steps during heating cycles
Quality Assurance and Validation
Implementing robust quality control measures is essential for generating reproducible mIHC data:
Pre-analytical Controls:
- Include control tissues with known expression patterns for each antibody
- Use multi-tissue blocks containing both positive and negative tissues
- Standardize fixation and processing conditions across all samples
Analytical Controls:
- Include no-primary antibody controls for autofluorescence assessment
- Create single-stain controls for spectral library generation
- Use isotype controls to assess non-specific binding
- Include biological controls with known expression patterns
Post-analytical Validation:
- Verify cell segmentation accuracy through manual review
- Confirm phenotyping calls by pathologist review
- Assess reproducibility through intra- and inter-observer concordance testing
- Implement batch correction for multi-experiment studies [54]
Multiplex immunohistochemistry has emerged as a transformative technology for comprehensive analysis of the tumor microenvironment. By enabling simultaneous detection of multiple biomarkers within their native spatial context, mIHC provides unique insights into cellular composition, functional states, and intercellular interactions that drive disease progression and treatment response. The protocols and methodologies outlined in this document provide a foundation for implementing robust mIHC workflows in research and translational settings.
Future developments in mIHC technology will likely focus on several key areas:
- Increased multiplexing capacity through improved detection chemistries and imaging modalities
- Enhanced computational methods for data integration and analysis
- Standardization of protocols and analytical approaches across laboratories
- Integration with other omics technologies (transcriptomics, genomics) for multi-dimensional tissue analysis
- Development of automated platforms for high-throughput clinical applications [53]
As these technologies mature, mIHC is poised to become an increasingly powerful tool for unraveling the complexity of the tumor microenvironment, advancing our understanding of disease mechanisms, and accelerating the development of novel therapeutic strategies.
Immunohistochemistry (IHC) is a vital technique in pathology and research that enables precise visualization of specific proteins within tissue samples, combining biological specificity with advanced imaging to help clinicians diagnose diseases and researchers understand cellular functions at a molecular level [57]. The 3,3'-Diaminobenzidine (DAB) chromogen produces a brown, insoluble precipitate at the site of target antigen expression, which, with its high contrast against the haematoxylin counterstain, allows for clear visualization of protein localization [58].
However, DAB presents specific challenges for quantification. Unlike some histological stains, DAB does not follow the Beer-Lambert law, meaning the relationship between stain intensity and antigen concentration is not linear. The brown DAB reaction product is not a true absorber of light but a scatterer of light with a very broad, featureless spectrum [59]. This non-stoichiometric nature, combined with the amplification steps inherent in IHC protocols, means that "darkness of stain" does not directly equate to "amount of reaction products" or antigen expression levels [59]. Therefore, semi-quantitative approaches focusing on area-based measurements rather than intensity measurements provide more reliable and reproducible results for DAB quantification [59].
Equipment and Software Requirements
Research Reagent Solutions
The following table details essential materials and digital tools required for IHC and DAB quantification:
Table 1: Essential Research Reagents and Digital Tools for DAB-Based IHC
| Category | Item/Solution | Function/Application |
|---|---|---|
| Core Reagents | Primary Antibodies | Target specific antigens within tissue sections with high specificity [57]. |
| Secondary Antibodies | Enzyme- or fluorophore-conjugated antibodies that amplify the signal for visualization [57]. | |
| DAB Chromogen | Forms an insoluble brown precipitate at the site of target antigen localization [58]. | |
| Haematoxylin Counterstain | Stains cell nuclei, providing structural context and contrast to DAB staining [58]. | |
| Digital Pathology Hardware | Automated Slide Scanners | Convert glass slides into high-resolution, computable Whole Slide Images (WSIs) [57] [60]. |
| High-Resolution Cameras | Enable precise digital capture of stained tissue samples for analysis [57]. | |
| Analysis Software | Fiji/ImageJ | Open-source platform for bioimage analysis, including color deconvolution and thresholding [59]. |
| Digital Pathology Software | Facilitates image analysis, quantification, data storage, and sharing [57]. |
Fiji Installation and Plugin Setup
The semi-quantitative analysis of DAB staining requires specific plugins within Fiji. Researchers should ensure they have the Morphology plugins installed, which are available via an update site in the Fiji updater [59]. These plugins include functions essential for advanced binary image operations used in the quantification workflow.
Step-by-Step Experimental Protocol
Image Preprocessing and Color Deconvolution
The first critical step separates the DAB signal from the haematoxylin counterstain, which is fundamental for accurate quantification.
- Image Acquisition and Import: Obtain a digital whole-slide image (WSI) of the IHC-stained tissue section using a slide scanner or high-resolution camera. Open the image in Fiji.
- Color Deconvolution: Navigate to
Plugins › Colour Deconvolution. This plugin uses a standardized vector to separate the image into three distinct channels: one representing the Haematoxylin stain (blue/purple nuclei), one representing the DAB stain (brown signal), and a residual third channel. - Channel Selection: Select the DAB channel for all subsequent quantification steps. This provides a grayscale image where the intensity of each pixel corresponds to the presence of DAB precipitate.
Workflow for Percent Area quantification
For determining the percentage of the tissue area that is positive for DAB staining, follow this workflow. The process is also summarized in the diagram below.
Workflow Steps:
- Convert to Mask: With the DAB channel selected, convert the grayscale image into a binary mask using
Process › Binary › Convert to Mask. - Apply Threshold: Manually or automatically set a threshold to distinguish positive DAB signal from background. Use
Image › Adjust › Threshold. Carefully adjust the threshold sliders until the highlighted areas accurately represent the DAB-positive regions. Click "Apply." - Analyze Particles and Calculate %Area: Use the
Analyze Particlesfunction to quantify the masked areas. Set an appropriate size filter to exclude dust or non-specific small particles. The result will include the total area of the selected particles. The %Area is calculated as(Total DAB-Positive Area / Total Measured Tissue Area) * 100. This value can be used for statistical analysis [59].
Workflow for Positive Cell Counting
A more advanced method involves identifying DAB-positive nuclei, which provides the number of positive cells per field. This workflow builds upon the percent area method and is illustrated in the following diagram.
Workflow Steps:
- Create a Binary Mask of DAB Signal: Follow the steps in Section 3.2 to create a binary mask of the DAB stain. This will serve as the seed image.
- Segment Nuclei from Haematoxylin Channel: Switch to the Haematoxylin channel obtained from color deconvolution. Use thresholding and the
Analyze Particlesfunction with appropriate size constraints to create a binary mask of all cell nuclei. This will serve as the mask image. - Binary Reconstruction: Use the
Binary Reconstructionfunction found in the Morphology plugins. Use the nuclei mask as the mask and the DAB binary mask as the seed. This operation identifies nuclei that overlap with the DAB signal. - Count Positive Cells: The result of the binary reconstruction is a new binary image containing only the DAB-positive nuclei. Use
Analyze Particleson this image to count the number of positive cells, which can then be expressed as positive cells per field or as a percentage of total nuclei [59].
Data Presentation and Analysis
The quantitative outputs from the described protocols should be summarized for easy comparison between experimental groups. The following table provides a template for data organization.
Table 2: Summary of Semi-Quantitative DAB Analysis Data
| Experimental Group | Sample Size (n) | % DAB-Positive Area (Mean ± SD) | Positive Cells per Field (Mean ± SD) | Total Nuclei Count (Mean) |
|---|---|---|---|---|
| Control Group | e.g., 10 | e.g., 5.2 ± 1.5 | e.g., 45 ± 12 | e.g., 850 |
| Treatment Group A | e.g., 10 | e.g., 15.8 ± 3.2 | e.g., 210 ± 45 | e.g., 880 |
| Treatment Group B | e.g., 10 | e.g., 22.4 ± 4.1 | e.g., 295 ± 52 | e.g., 865 |
| Difference (A vs Control) | 10.6 | 165 |
Visualization of Comparative Data
For statistical comparison and data exploration, specific graphs are recommended:
- Boxplots are excellent for visualizing the distribution of data (e.g., %Area) across different groups, showing the median, quartiles, and potential outliers [61].
- 2-D Dot Charts are useful for displaying individual data points (e.g., positive cell counts) for each sample within the groups, providing a clear view of the data spread and central tendency [61].
Methodological Notes and Troubleshooting
- Thresholding Consistency: Threshold setting is a critical and subjective step. For consistency within a study, determine a threshold based on an initial set of representative images and apply the same value to all subsequent images. Using automated thresholding algorithms (e.g., Otsu, Li) can also improve reproducibility.
- Artifact Exclusion: Carefully inspect images for artifacts, tissue folds, or tears. Use the region of interest (ROI) tool in Fiji to exclude these areas from analysis to prevent skewed results.
- Validation: Always correlate quantitative findings with a pathologist's or experienced researcher's qualitative assessment to ensure biological relevance.
- Beyond DAB Quantification: The field of computational pathology is rapidly evolving. Emerging trends include the use of deep learning for tasks like virtual staining, where deep generative models can simulate IHC images (e.g., HER2, ER) from standard H&E-stained samples, offering a potential cost-effective alternative [62] [60] [58].
Immunohistochemistry (IHC) serves as a fundamental method in both clinical diagnostics and experimental research, enabling the visualization and assessment of specific protein expression within tissue contexts, including complex tissues like bone [63]. The analytical process culminates in the post-analytical phase—the interpretation and reporting of results—which remains a significant challenge for the field. Despite the geometric progression in IHC-generated data annually, the lack of standardization at this final stage often renders comparisons between different studies impossible [63]. This application note addresses this critical gap by detailing established and emerging standardized scoring systems, providing researchers and drug development professionals with clear protocols to enhance the reproducibility and reliability of their IHC data within tissue integration analysis research.
The fundamental attributes of any effective scoring system, as suggested by Crissman et al., are that it must be definable, reproducible, and produce meaningful results [63]. Furthermore, key principles for appropriate scoring include masking of experimental material to reduce subjectivity, thorough examination of all tissues, specification of lesion parameters, clear scoring definitions, and interpretation consistency, ideally with a single scientist scoring all samples within a reasonable timeframe [63]. This document expands upon these principles with detailed, applicable methodologies.
Established Manual Scoring Systems and Protocols
Major Approaches to IHC Interpretation
Comprehensive analysis of IHC literature has identified six major approaches for interpreting and presenting IHC results [63]. The selection of a specific approach should be guided by the scientific hypothesis, the morphological features of the IHC marker expression, and the intended statistical analysis.
Table 1: Major Approaches for IHC Data Interpretation and Reporting
| Approach | Description | Best Use Cases | Key Considerations |
|---|---|---|---|
| Description of Morphological Parameters | Qualitative analysis using verbal description of immunopositive cells/tissue components and staining properties (e.g., weak/moderate/strong intensity, pattern) [63]. | Pilot studies, non-primary methods, or when nuanced details might be lost in categorization [63]. | Not suitable for statistical comparison; valuable for capturing subtle, context-specific details [63]. |
| Evaluation of Positively Stained Cells | Quantitative counting of the absolute number of IHC-positive cells or structures in different experimental groups [63]. | Simple, direct comparison of marker presence across defined groups. | Relies on clear definition of what constitutes a "positive" cell; can be time-consuming for large sample sets. |
| Semiquantitative Scoring Systems | Multiparametric systems that convert subjective perceptions into ordinal scores, often combined into a total score [63]. | Universal approach for including histopathologic information in biomedical research; allows for statistical analysis [63]. | Reduces subjectivity, especially with multiple observers; requires careful parameter selection and definition [63]. |
| The Allred Score (for ER/PR) | An 8-point system combining proportion score (0-5) and intensity score (0-3) for nuclear staining in breast cancer [64]. | Clinical prediction of benefit from hormonal therapies in breast cancer [64]. | A "gold standard" system; clinical evidence shows scores ≥3 indicate likely benefit from therapy [64]. |
| HER2 ASCO/CAP Guidelines | Detailed criteria for assessing membrane intensity and percentage of complete/incomplete staining in invasive breast cancer [65]. | Determining HER2 status for targeted therapy (e.g., trastuzumab) [65]. | Critical for distinguishing HER2-low (1+ or 2+/ISH-) expression; challenges in borderline/heterogeneous cases [65]. |
| Digital & AI-Assisted Analysis | Use of digital pathology platforms and deep learning algorithms for quantitative, objective analysis [66] [67]. | High-throughput studies, complex multiplex IHC, or when maximal objectivity is required [66] [67]. | Enhances reproducibility; requires computational resources and algorithm validation [66]. |
Detailed Protocol: The Allred Score for ER/PR
The Allred score is a well-validated, semiquantitative system for assessing estrogen receptor (ER) and progesterone receptor (PR) status in breast cancer, as employed in recent multinational quality assurance studies [64].
Experimental Protocol:
- Sample Preparation: Tissue sections from formalin-fixed, paraffin-embedded (FFPE) blocks are cut. Optimal fixation in neutral buffered formalin (NBF) or similar formalin-based fixative for no shorter than 8 hours and no longer than 48 hours is critical [64].
- Staining: Perform IHC staining for ER or PR using standardized, validated protocols and appropriate controls (positive and negative tissue controls).
- Microscopy and Scoring: Evaluate the stained slides under a microscope. The scoring system is a two-part process:
- Proportion Score (PS): Estimate the proportion of invasive tumor cells showing positive nuclear staining.
- 0: No positive nuclei.
- 1: <1% positive nuclei.
- 2: 1% to 10% positive nuclei.
- 3: 11% to 33% positive nuclei.
- 4: 34% to 66% positive nuclei.
- 5: >66% positive nuclei.
- Intensity Score (IS): Assess the average intensity of the positive nuclear staining.
- 0: No staining.
- 1: Weak intensity.
- 2: Moderate intensity.
- 3: Strong intensity.
- Proportion Score (PS): Estimate the proportion of invasive tumor cells showing positive nuclear staining.
- Calculation of Total Score: Add the Proportion Score and the Intensity Score to obtain a final Allred Score, which ranges from 0 to 8.
- Interpretation: A total score of ≥3 is considered positive and indicates a likelihood of benefit from hormonal therapies such as tamoxifen or aromatase inhibitors [64].
Detailed Protocol: HER2 IHC Scoring by ASCO/CAP Guidelines
Accurate HER2 scoring is vital for patient selection for HER2-targeted therapies. The following protocol is based on the 2018 ASCO/CAP guidelines, as used in recent large-scale concordance studies [65].
Experimental Protocol:
- Sample Preparation and Staining: Use FFPE tissue sections stained for HER2 using a validated assay (e.g., anti-Her2/neu (4B5) Rabbit Monoclonal Primary Antibody). Include positive and negative controls in the staining run [65].
- Microscopy and Scoring: Evaluate the entire invasive tumor component. Score based on the circumferential membrane staining pattern and its intensity.
- Score 0: No staining observed in tumor cells.
- Score 1+: Faint/barely perceptible membrane staining in >10% of tumor cells; the cells are only stained in part of their membrane.
- Score 2+: Weak to moderate complete, basolateral, or lateral membrane staining in >10% of tumor cells.
- Score 3+: Intense complete, basolateral, or lateral membrane staining in >10% of tumor cells.
- Interpretation and Reflex Testing:
- HER2-Positive: IHC 3+ or IHC 2+ with confirmation of HER2 gene amplification by in situ hybridization (ISH).
- HER2-Negative: IHC 0, IHC 1+, or IHC 2+ with a negative ISH result.
- HER2-Low: IHC 1+ or IHC 2+ with a negative ISH result. This category is now therapeutically relevant with the advent of novel antibody-drug conjugates but shows relatively poor reproducibility (kappa 0.323), highlighting the need for careful training and standardization [64] [65].
The workflow below illustrates the logical decision process for HER2 assessment and the relationship between different IHC scoring systems, from manual methods to advanced digital analysis.
Advanced and Digital Analysis Methods
Digital Pathology and Deep Learning
Digital pathology platforms enable the transition from subjective visual assessment to quantitative, objective analysis. A key application is the development of optimized, reproducible criteria for challenging biomarkers. For instance, a deep learning-guided quantitative analysis of BRAF V600E IHC in colorectal cancer established refined, CRC-specific interpretation criteria by systematically evaluating staining intensity and percentage, thereby improving concordance with molecular testing [66].
Experimental Protocol: Deep Learning-Guided Quantitative IHC Analysis
- Cohort Selection: Collect a cohort of cases with paired IHC and genetic testing results (e.g., 250 colorectal cancer cases with BRAF V600E IHC and genetic testing) [66].
- Whole Slide Imaging (WSI): Scan IHC-stained slides at high resolution (e.g., 40x) using a digital slide scanner [66] [67].
- Color Deconvolution: Use algorithms to separate the hematoxylin (nuclear) and chromogen (target protein) signals from the RGB image, creating an 8-bit image for quantitative analysis of the chromogen signal [54].
- Quantitative Feature Extraction: Employ a deep learning platform to extract quantitative features from the deconvoluted IHC images. This includes measuring absorbance optical density (AOD) values and calculating H-scores (a product of staining intensity and percentage of positive cells) [66].
- Criterion Establishment and Validation: Use the quantitative data to establish optimal intensity and percentage thresholds for positive classification. Validate these criteria against a separate test cohort and across different IHC platforms and antibody clones to ensure robustness and reproducibility [66].
Multiplex IHC (mIHC/mIF) Analysis
Multiplex IHC and immunofluorescence allow for the simultaneous detection of multiple markers on a single tissue section, defining complex immunophenotypes and spatial relationships within the tumor microenvironment [54]. The analysis of these assays requires specialized computational workflows.
Experimental Protocol: Key Steps in mIHC/IF Image Analysis
- Image Acquisition: Acquire whole slide images or images of specific regions of interest (ROIs) using a calibrated scanner. The choice depends on the research question and marker heterogeneity. A minimum of five high-power fields (HPFs) is often sampled, though whole slide imaging reduces selection bias [54].
- Spectral Unmixing (mIF) / Color Deconvolution (mIHC): For mIF, unmix the fluorescence signals from different markers to assign the specific contribution of each. For mIHC, use color deconvolution to separate the contributing chromogens into individual channels [54].
- Tissue and Cell Segmentation: Use software algorithms to identify tissue regions and segment individual cells, often distinguishing between nuclei, cytoplasm, and membrane [54].
- Phenotyping and Spatial Analysis: Classify cells based on their marker expression (e.g., CD8+ T cells, CD68+ macrophages). Analyze the spatial relationships between different cell types, such as proximity or distance metrics, which can be highly predictive of therapeutic response [54].
Table 2: The Scientist's Toolkit: Essential Reagents and Platforms for Reproducible IHC
| Category | Item | Function & Importance |
|---|---|---|
| Tissue Processing | Neutral Buffered Formalin (NBF) | Standardized fixative that preserves tissue architecture and antigenicity. Critical for pre-analytical control [64]. |
| Antibodies & Detection | Validated Primary Antibody Clones | Specificity and sensitivity are paramount. Use clinically validated clones (e.g., HER2 4B5, PD-L1 22C3) for clinical work [65] [67]. |
| Polymer-based Detection System | Amplifies the signal while minimizing background, enhancing sensitivity and reproducibility [63]. | |
| Controls | Positive Tissue Control | Verifies the staining protocol worked correctly. Should be included in every run [65]. |
| Negative Control Reagent | Distinguishes specific from non-specific staining, essential for interpreting faint staining or background [65]. | |
| Digital Analysis | Digital Slide Scanner | Converts glass slides into high-resolution whole slide images for quantitative or AI-based analysis [66] [67]. |
| Image Analysis Software | Enables quantitative assessment of staining intensity, H-score calculation, and cell counting, reducing observer subjectivity [66] [54]. |
The move towards standardized, reproducible IHC scoring is fundamental for generating reliable data in both research and clinical decision-making. While well-established systems like the Allred and ASCO/CAP HER2 guidelines provide a strong foundation for specific biomarkers, the principles of definable, reproducible, and meaningful scoring must be applied to all IHC analyses. The integration of digital pathology and artificial intelligence, as demonstrated in advanced biomarker prediction models for colorectal and breast cancer, represents the future of IHC interpretation, offering enhanced objectivity, throughput, and prognostic precision [66] [67]. By adhering to detailed protocols, participating in quality assurance programs, and leveraging new technologies, researchers and drug developers can significantly improve the consistency and impact of their immunohistochemistry data.
Solving Common IHC Problems: A Practical Troubleshooting and Optimization Guide
In the context of tissue integration analysis research, the reliability of immunohistochemistry (IHC) is paramount. A failed stain can compromise data integrity, leading to incorrect conclusions in research and drug development. Weak or absent staining often stems from a complex interplay of factors across the entire IHC workflow, from tissue preparation to final detection [68] [69]. This application note provides a systematic checklist and detailed protocols to help researchers efficiently diagnose and resolve the common yet critical issue of weak or no staining, ensuring the generation of robust and reproducible data.
Systematic Troubleshooting Checklist
A methodical approach is essential for diagnosing the root cause of staining failure. The following table organizes potential issues and solutions based on key stages of the IHC protocol.
Table 1: Systematic Troubleshooting Guide for Weak or No Staining
| Protocol Stage | Potential Cause | Diagnostic Checks & Solutions |
|---|---|---|
| Tissue & Sample Preparation | Inadequate fixation (over- or under-fixation) [70] [69] | Fix tissue promptly after dissection. For cross-linking fixatives like formalin, standardize fixation time (usually 24-72 hours) [69]. |
| Epitope not present or expressed at low levels [70] | Run a positive control tissue known to express the target. Consult protein/RNA databases to confirm expected expression. | |
| Sample storage issues or dried tissue sections [68] [71] | Use freshly cut slides. If storage is necessary, store at 4°C and ensure sections remain covered in liquid throughout staining. | |
| Insufficient deparaffinization [68] | Repeat with new sections using fresh xylene to ensure complete paraffin removal. | |
| Antigen Retrieval | Ineffective antigen retrieval [68] [70] | Optimize retrieval method (e.g., microwave oven or pressure cooker is preferred over water bath) [68]. |
| Epitope destroyed by overly harsh retrieval [70] | Optimize retrieval conditions; consider using a different buffer (e.g., Citrate vs. EDTA) or shorter incubation. | |
| Antibodies & Staining | Primary antibody concentration too low or incubation time too short [68] [70] [71] | Increase antibody concentration and/or incubation time. Perform an antibody titration experiment. |
| Incompatible primary antibody [70] | Confirm the antibody is validated for IHC and specifically for your sample type (e.g., FFPE vs. frozen). | |
| Antibody degraded due to improper storage or freeze-thaw cycles [70] [71] | Aliquot antibodies; avoid repeated freeze-thaw cycles. Follow manufacturer's storage instructions. | |
| Suboptimal antibody diluent [68] | Use the antibody diluent recommended by the manufacturer, as the signal can vary significantly with different diluents. | |
| Detection System | Insensitive detection system [68] | Use a sensitive polymer-based detection system rather than avidin-biotin or directly conjugated HRP systems. |
| Enzyme-substrate reaction failure [72] | Verify that enzyme (e.g., HRP) and substrate are active. Ensure buffers do not contain inhibitors like sodium azide. |
Key Experimental Protocols
Protocol for Optimizing Antigen Retrieval
Heat-Induced Epitope Retrieval (HIER) is critical for unmasking antigens in formalin-fixed, paraffin-embedded (FFPE) tissues [68] [69].
Detailed Methodology:
- Deparaffinize and Hydrate: Process slides through xylene and a graded series of alcohols to water.
- Retrieval Buffer: Prepare a fresh 1X antigen retrieval buffer, such as 10 mM Sodium Citrate (pH 6.0) or 1 mM EDTA (pH 8.0) [72] [69].
- Heating Method: Place the slides in a coplin jar filled with buffer and perform retrieval using one of the following:
- Cooling: After heating, allow the slides to cool in the buffer at room temperature for 20-30 minutes.
- Rinse: Rinse slides gently with distilled water before proceeding to the staining protocol.
Protocol for Antibody Titration and Validation
Determining the optimal primary antibody concentration is crucial for balancing signal intensity with background [70] [71].
Detailed Methodology:
- Prepare Slides: Select a positive control tissue section with known expression of the target protein.
- Serial Dilution: Prepare a series of dilutions of the primary antibody (e.g., 1:50, 1:100, 1:200, 1:500) in the manufacturer's recommended diluent [68].
- Staining: Apply the different antibody dilutions to adjacent tissue sections and run the entire IHC protocol uniformly.
- Microscopic Analysis: Examine the stained slides under a microscope. The optimal dilution is the one that provides the strongest specific signal with the lowest non-specific background.
- Control: Always include a negative control (e.g., omission of primary antibody or use of an isotype control) to identify background from the detection system.
Workflow Visualization
The following diagram illustrates the logical decision-making process for diagnosing weak or no staining, guiding you from the initial problem to potential solutions.
The Scientist's Toolkit: Essential Research Reagent Solutions
Selecting the right reagents is fundamental to successful IHC. The following table details key solutions and their specific functions in overcoming staining challenges.
Table 2: Key Research Reagent Solutions for IHC
| Reagent / Solution | Function & Importance in Troubleshooting |
|---|---|
| Antigen Retrieval Buffers (e.g., Citrate, EDTA) [72] [69] | Breaks protein cross-links formed during fixation, unmasking epitopes and is often the critical factor in restoring signal in FFPE tissues. |
| SignalStain Antibody Diluent [68] | A specialized diluent that can enhance signal and reduce background compared to standard buffers like TBST/5% NGS. Performance is antibody-specific. |
| SignalStain Boost IHC Detection Reagents [68] | Polymer-based detection systems that offer superior sensitivity over traditional avidin-biotin (ABC) systems, amplifying weak signals. |
| Peroxidase Suppressor [72] | Blocks endogenous peroxidase activity, especially in red blood cells and myeloid cells, which is essential for reducing high background in HRP-based detection. |
| Normal Serum from Secondary Host [70] [69] | Used in blocking steps to bind non-specifically to reactive sites, minimizing background staining caused by the secondary antibody. |
| Sodium Borohydride [72] | Reduces fixative-induced autofluorescence caused by aldehyde fixatives (e.g., formalin), improving the signal-to-noise ratio in immunofluorescence. |
| Protein Phosphatase Inhibitors (PPIs) [70] | Preserves labile phosphorylation epitopes by inhibiting endogenous phosphatases during tissue processing and staining; crucial for phospho-specific antibodies. |
Reducing High Background and Nonspecific Staining for Clearer Results
High background and nonspecific staining are pervasive challenges in immunohistochemistry (IHC) that can compromise data interpretation, particularly in tissue integration analysis research. These artifacts obscure specific signals, leading to false positives and reducing the reliability of experimental outcomes. In IHC, background staining refers to unwanted antibody binding to non-target sites, while nonspecific staining occurs when antibodies interact with cellular components other than the target antigen [73]. For researchers and drug development professionals, addressing these issues is crucial for accurate biomarker validation, drug efficacy testing, and clinical diagnostics. This application note provides a systematic framework for identifying, troubleshooting, and resolving staining artifacts through optimized protocols and reagent solutions, enabling clearer and more reproducible IHC results in complex tissue environments.
Classification and Origins of Staining Artifacts
Table 1: Common Types and Causes of Staining Artifacts in IHC
| Artifact Type | Primary Causes | Characteristic Appearance |
|---|---|---|
| High Background Staining | Inadequate blocking, overfixation, improper antibody concentration, endogenous enzyme activity not quenched | Diffuse, even staining across entire tissue section |
| Nonspecific Nuclear Staining | Electrostatic interactions between charged antibodies and nuclear components [74] | Isolated nuclear staining without cytoplasmic/membrane localization |
| Edge Artifact | Uneven reagent distribution, tissue drying during processing | Enhanced staining at tissue edges |
| Patchy Staining | Incomplete tissue penetration, uneven fixation | Irregular staining patterns across tissue |
The underlying mechanisms of staining artifacts often originate in the pre-analytical phase. Tissue fixation represents a critical balance – underfixation fails to preserve tissue architecture and antigen integrity, while overfixation, particularly with formaldehyde-based fixatives, creates excessive methylene bridges that covalently crosslink proteins, masking target epitopes and increasing non-specific interactions [2] [6]. In formalin-fixed paraffin-embedded (FFPE) tissues, the fixation process can generate methylene bridges that obscure antigenic epitopes, necessitating retrieval methods but simultaneously creating potential for background if not properly controlled [2].
Antibody-related factors constitute another major source of artifacts. Excessive antibody concentrations saturate specific binding sites and promote off-target interactions, while antibodies with improper specificity may cross-react with structurally similar epitopes on non-target proteins [73]. Polyclonal antibodies are particularly prone to nonspecific binding due to their heterogeneous composition, though monoclonal antibodies can also exhibit cross-reactivity [75]. Electrostatic interactions present a special challenge with antibody-oligonucleotide conjugates used in advanced multiplexing techniques, where negatively charged DNA probes can bind nonspecifically to positively charged cellular proteins like histones, resulting in pronounced nuclear staining [74].
Research Reagent Solutions for Background Reduction
Table 2: Key Reagents for Minimizing Background and Nonspecific Staining
| Reagent Category | Specific Examples | Mechanism of Action | Application Notes |
|---|---|---|---|
| Blocking Agents | BSA (1-3%), normal serum, non-fat dry milk | Occupies nonspecific binding sites on tissue and slide surface | Use serum from same species as secondary antibody; optimize concentration empirically |
| Blocking Peptides | Immunizing peptide antigens [75] | Competitively binds paratope of primary antibody, preventing nonspecific binding | Use 5-fold excess weight relative to antibody; pre-incubate 30min RT or 4°C overnight |
| Polyanionic Competitors | Dextran sulfate (0.02-0.1%) [74] | Competes with negatively charged probes for electrostatic binding to cellular components | Particularly effective for antibody-oligo conjugates; higher concentrations may reduce affinity |
| Nucleic Acid Competitors | Salmon sperm DNA (0.2 mg/mL), poly(TTG) sequences (1 μM) [74] | Blocks hybridization of DNA-conjugated antibodies to intracellular nucleic acids | Essential for DNA-based detection systems (e.g., HCR, SABER) |
| Aldehyde Quenchers | Ethanolamine, sodium borohydride | Neutralizes free aldehyde groups after glutaraldehyde fixation | Critical when using glutaraldehyde-containing fixatives |
| Detergents | Triton X-100 (0.1-0.3%), Tween-20 | Reduces hydrophobic interactions between antibodies and tissue components | Improves antibody penetration while reducing hydrophobic binding |
Optimized Protocols for Specific Applications
Standard IHC Background Reduction Protocol
The following comprehensive protocol integrates multiple strategies to minimize background in conventional IHC applications:
Sample Preparation and Blocking:
- Deparaffinization and Antigen Retrieval: Completely remove paraffin from FFPE sections using xylene or xylene-free alternatives. Perform heat-induced epitope retrieval (HIER) using appropriate buffer (e.g., citrate buffer pH 6.0 or Tris-EDTA buffer pH 9.0) optimized for your target antigen [2].
- Endogenous Enzyme Blocking: Quench endogenous peroxidase activity with 3% hydrogen peroxide in methanol for 15 minutes at room temperature. For alkaline phosphatase-based detection, use levamisole or specific inhibitors.
- Protein Blocking: Incubate sections with blocking solution containing 1-3% BSA, 5% normal serum from the same species as the secondary antibody, and 0.1% Triton X-100 in PBS for 1 hour at room temperature [73] [75].
- Primary Antibody Application: Dilute primary antibody in blocking solution with optimized concentration. Include 0.02-0.1% dextran sulfate and 150 mM NaCl to shield electrostatic interactions [74]. Incubate according to validated conditions.
Detection and Visualization:
- Secondary Antibody Application: Apply enzyme-conjugated or fluorophore-conjugated secondary antibody diluted in blocking solution without dextran sulfate. Include 150 mM NaCl to maintain ionic shielding.
- Controlled Development: For chromogenic detection, strictly monitor development time under microscope to prevent over-development. Immediately stop reaction by transferring slides to distilled water.
Specialized Protocol for Antibody-Oligonucleotide Conjugates
For researchers employing DNA-conjugated antibodies in techniques such as SABER or immuno-HCR, nonspecific nuclear staining presents a particular challenge that requires specialized approaches:
Pre-hybridization and Buffer Optimization:
- ssDNA to dsDNA Conversion: Pre-hybridize antibody-conjugated single-stranded DNA with a short complementary DNA strand (10-20bp) at 5:1 molar excess in hybridization buffer. Incubate at 37°C for 30 minutes to form double-stranded DNA, which prevents hybridization to intracellular nucleic acids [74].
- Optimized Staining Buffer: Prepare antibody incubation buffer containing:
- 1-3% BSA
- 0.1 mg/mL normal IgG
- 0.1% Triton X-100
- 0.02-0.1% dextran sulfate
- 150 mM NaCl
- 5 mM EDTA
- Optional: 0.2 mg/mL salmon sperm DNA or 1 μM poly(TTG) sequences [74]
- Controlled Antibody Labeling: Maintain oligo-to-antibody ratio at approximately 1-3 DNA molecules per antibody to balance signal amplification with minimal structural disruption [74].
Validation and Controls:
- Peptide Blocking Control: For specificity validation, pre-incubate parallel aliquots of primary antibody with a 5-fold excess (by weight) of immunizing peptide for 30 minutes at room temperature or overnight at 4°C before application to tissue sections [75]. Specific staining will be absent in the peptide-blocked sample.
- Concentration Titration: Systematically titrate both primary and secondary antibody concentrations using a geometric dilution series (e.g., 1:100, 1:500, 1:1000, 1:2000) to identify the optimal dilution that provides strong specific signal with minimal background.
Fixation and Tissue Processing Considerations
The foundation of clean IHC staining begins with optimal tissue fixation and processing. Different fixatives present distinct advantages and challenges for preserving antigenicity while minimizing background:
Table 3: Fixation Protocols and Their Impact on Background Staining
| Fixative Type | Optimal Fixation Time | Antigen Retrieval Requirement | Background Risk | Tissue Morphology |
|---|---|---|---|---|
| 10% Neutral Buffered Formalin | 18-24 hours [76] | High (HIER typically needed) [2] | Moderate (increases with overfixation) | Excellent |
| B5-Based Fixative | 2.5 hours [76] | Moderate | Low (but contains toxic mercury) | Superior nuclear detail |
| Acetic Acid-Zinc-Formalin (AZF) | 2.5-24 hours [76] | Moderate | Low to moderate | Good |
| Ethanol/Methanol | 1-4 hours | None to low | Low (but poor morphology) | Fair (tissue shrinkage) |
Recent research directly comparing fixation and decalcification protocols for challenging specimens like bone marrow trephine biopsies demonstrated that the choice of fixative significantly impacts IHC quality. A study testing 11 different protocols found that commercial B5-based fixative combined with EDTA-based decalcification produced the lowest number of inadequate IHC stains (5 out of 25 biomarkers), while "in-house" B5-based fixative with EDTA yielded the worst performance (8 inadequate stains out of 25) [76]. This highlights the importance of standardized, quality-controlled reagents in the pre-analytical phase.
For bone marrow and other calcified tissues, decalcification methods must be carefully selected. Strong inorganic acids effectively decalcify but dramatically impair antigenicity, while EDTA-based decalcification, though slower, preserves epitopes far better [76]. The integration of a final wash with 70% ethanol after decalcification helps remove excess reagents before tissue processing [76].
Emerging Technologies and Future Perspectives
Advanced computational approaches are transforming IHC artifact detection and resolution. Artificial intelligence (AI) platforms like MARQO can now analyze whole-slide IHC images with unprecedented accuracy, automatically flagging likely positive cells while distinguishing specific staining from background artifacts [77]. These tools maintain slide integrity without requiring segmentation and complete analysis in minutes rather than hours, dramatically improving workflow efficiency.
Dual-modality AI frameworks that integrate both H&E and IHC stained images have demonstrated exceptional performance in predicting biomarker status with AUROC scores exceeding 0.96-0.97 for MSI/MMRd and PD-L1 prediction [67]. These systems provide a comprehensive analytical framework that enhances predictive accuracy by leveraging complementary information from multiple staining modalities, effectively compensating for limitations in individual assays.
For highly multiplexed imaging approaches, novel protocol adaptations are resolving previously incompatible techniques. A recently developed TUNEL method replaces proteinase K digestion with pressure cooker-induced antigen retrieval, preserving protein antigenicity while maintaining TUNEL sensitivity [78]. This innovation enables seamless integration of apoptosis detection with multiplexed immunofluorescence cycles, expanding the analytical potential for tissue integration studies.
As IHC continues to evolve toward higher multiplexing capabilities and quantitative applications, implementing the systematic approaches outlined in this application note will be essential for generating reliable, reproducible data. Through optimized reagent selection, controlled experimental conditions, and appropriate validation controls, researchers can effectively minimize staining artifacts to uncover clear, biologically meaningful results in complex tissue environments.
Optimizing Antibody Titration and Incubation Conditions
Immunohistochemistry (IHC) is a foundational technique for visualizing protein distribution, subcellular localization, and abundance within tissue samples, providing critical insights for biomedical research and diagnostic applications [6]. The reliability and quality of IHC data heavily depend on the precise optimization of antibody titration and incubation conditions. Within the broader context of a thesis on immunohistochemistry methods for tissue integration analysis, this application note addresses the critical need for standardized, efficient protocols that enhance antibody performance while conserving valuable reagents. We provide detailed methodologies and quantitative frameworks for establishing robust IHC conditions, incorporating recent advancements such as minimal-volume incubation strategies [79] to address common challenges in reagent limitation and protocol efficiency.
Background and Significance
The Critical Role of Antibodies in IHC
IHC relies on the specific binding of antibodies to target epitopes within tissue samples, allowing for the precise localization of proteins in their physiological context [6]. Unlike techniques such as western blot or ELISA that analyze denatured or homogenized proteins, IHC preserves spatial information, making it indispensable for understanding protein function in complex tissues. The technique's success hinges on the specificity of antibody-epitope interactions and the effectiveness of signal detection systems, both of which are directly influenced by antibody concentration and incubation parameters.
Key Challenges in IHC Optimization
Optimizing IHC presents several interconnected challenges. Antibody consumption represents a significant cost factor, particularly when using rare or expensive antibodies [79]. Non-specific binding can lead to false positives, especially when antibodies are used at suboptimal concentrations. Epitope preservation during fixation and the penetration of antibodies into tissue sections further complicate protocol standardization. Recent investigations confirm that the conventional practice of immersing membranes in large antibody volumes (typically 10mL) results in substantial waste, as most antibodies in the bulk solution remain unreacted [79]. This understanding has driven the development of minimal-volume approaches that maintain detection efficiency while dramatically reducing reagent consumption.
Experimental Design and Principles
Theoretical Framework for Antibody Titration
Antibody titration aims to identify the concentration that provides optimal signal-to-noise ratio, maximizing specific staining while minimizing background. The fundamental principle involves achieving saturating binding at the target epitopes without exceeding the threshold where non-specific interactions become significant. In conventional IHC, this typically involves testing a dilution series of primary antibody across identical tissue sections. The ideal dilution produces intense specific staining with minimal background, often achievable at higher dilutions than manufacturers typically recommend.
Incubation Condition Considerations
Multiple factors influence antibody binding efficiency during incubation:
- Temperature and Agitation: While conventional protocols often recommend overnight incubation at 4°C with agitation [79], recent evidence suggests that room temperature incubation with minimal-volume approaches can yield equivalent results in significantly reduced time [79].
- Time: Sufficient incubation time must be allowed for antibody diffusion into tissues and epitope binding, but excessively long incubations can increase non-specific binding.
- Buffer Composition: Protein-based blocking agents (e.g., BSA, serum) in the antibody dilution buffer help reduce non-specific binding [50].
The relationship between these factors can be visualized in the following optimization workflow:
Materials and Reagents
Research Reagent Solutions
Successful IHC optimization requires careful selection of reagents at each experimental stage. The following table outlines essential materials and their functions:
Table 1: Essential Reagents for IHC Optimization
| Reagent Category | Specific Examples | Function | Optimization Considerations |
|---|---|---|---|
| Fixatives | 4% Paraformaldehyde (PFA), Formalin, Methanol, Acetone [6] | Preserve tissue architecture and antigenicity | Cross-linking fixatives (PFA) require antigen retrieval; precipitative fixatives (methanol) may not [6] |
| Blocking Agents | Normal serum, BSA, Skim milk [79] [50] | Reduce non-specific antibody binding | Match serum species to secondary antibody host; use protein-based blockers in antibody dilution buffer |
| Antibody Diluents | PBS/TBS with 0.1-0.3% Triton X-100 and 0.5% BSA [50] | Maintain antibody stability and tissue penetration | Detergent concentration affects penetration; BSA preserves antibody function |
| Primary Antibodies | Foxp2 (1:10K), GFP (1:1K), TH (1:10K) [50] | Specifically bind target epitopes | Titration is essential; higher dilutions often reduce background |
| Secondary Antibodies | Species-specific conjugates (1:1000) [50] | Amplify signal through enzyme or fluorophore conjugation | Must target primary antibody host species; concentration affects signal-to-noise |
| Detection Substrates | Chromogenic precipitates, Fluorophores [6] | Generate detectable signal | Chromogenic for brightfield; fluorophores for fluorescence microscopy |
Equipment and Specialized Materials
- Humidity Chambers: Essential for preventing evaporation during antibody incubation, particularly for minimal-volume methods [6]. Can be created using plastic boxes with wet paper towels and raised platforms [6].
- Sheet Protectors: Common stationery materials that enable minimal-volume antibody distribution as an alternative to conventional large-volume incubation [79].
- Sectioning Equipment: Cryostat for frozen sections; microtome for paraffin-embedded sections [50].
- Imaging Systems: Spinning disk confocal microscopy [50] or automated slide scanning systems for image acquisition and analysis.
Detailed Protocols
Conventional Antibody Titration Protocol
This protocol establishes the optimal working concentration for a new primary antibody using standard IHC methods.
Materials:
- Serial tissue sections containing the target antigen
- Primary antibody stock solution
- Appropriate blocking buffer (e.g., 5% normal serum in PBS)
- Antibody diluent (PBST with 0.3% Triton X-100 and 0.5% BSA [50])
- Detection system components
Procedure:
- Section Preparation: Cut 5-10 serial sections of appropriate thickness (e.g., 50μm [50]) from the tissue block of interest.
- Fixation: If using frozen sections, post-fix in 4% PFA for 15 minutes followed by PBS washes.
- Antigen Retrieval: Perform if required for the specific antibody and fixative combination.
- Blocking: Incubate sections in blocking buffer for 1 hour at room temperature to reduce non-specific binding.
- Antibody Dilution Series: Prepare a range of primary antibody dilutions (e.g., 1:100, 1:500, 1:1000, 1:2000, 1:5000) in antibody diluent.
- Primary Antibody Incubation: Apply diluted antibody to sections and incubate overnight at 4°C in a humidity chamber [50].
- Washing: Wash sections 3 times in PBS or TBST for 5 minutes each with agitation.
- Secondary Antibody Incubation: Apply appropriate species-specific secondary antibody at standard dilution (typically 1:1000 [50]) for 2 hours at room temperature.
- Detection: Process according to chromogenic or fluorescent detection protocol.
- Analysis: Evaluate staining intensity and specificity to determine optimal dilution.
Minimal-Volume Incubation Using Sheet Protector Strategy
This recently developed protocol dramatically reduces antibody consumption while maintaining detection sensitivity [79].
Materials:
- Sheet protectors (standard office stationery)
- Nitrocellulose membrane or tissue sections
- Primary antibody at predetermined optimal concentration
- Blotting paper towels
Procedure:
- Membrane Preparation: After blocking, transiently immerse membrane in wash buffer to remove excess blocking solution.
- Blotting: Thoroughly blot membrane with paper towel to absorb residual moisture, creating a semi-dried state.
- Assembly: Place the prepared membrane on a leaflet of a cropped sheet protector.
- Antibody Application: Apply minimal volume of primary antibody working solution directly to the membrane (20-150μL for a mini-sized membrane) [79].
- Distribution: Gently place the upper leaflet of the sheet protector on the membrane, allowing the antibody solution to disperse as a thin liquid layer through surface tension.
- Incubation: Incubate the assembled "SP unit" at room temperature for designated time (15 minutes to 2 hours) [79].
- Extended Incubation Handling: For incubations exceeding 2 hours, place the SP unit on a wet paper towel and seal inside a zipper bag to prevent evaporation.
- Completion: Continue with standard washing and detection steps.
Table 2: Quantitative Comparison of Conventional vs. Minimal-Volume Incubation
| Parameter | Conventional Method | Sheet Protector Strategy | Significance |
|---|---|---|---|
| Antibody Volume | 10mL [79] | 20-150μL [79] | 50-500x reduction in consumption |
| Incubation Time | Overnight (18h) [79] | 15min - 2h [79] | 6-72x reduction in time |
| Incubation Temperature | 4°C [79] | Room temperature [79] | Simplified equipment requirements |
| Agitation Requirement | Yes (60 RPM) [79] | No agitation needed [79] | Simplified setup |
| Reported Sensitivity | Baseline | Comparable to conventional [79] | No compromise in detection quality |
Protocol for Fixation Optimization
Proper fixation is crucial for epitope preservation and affects antibody binding efficiency.
Materials:
- Fresh tissue samples
- Fixatives: 4% PFA, formalin, methanol
- PBS for washing
- Sucrose solution (30%) for cryoprotection [50]
Procedure:
- Perfusion vs. Immersion: Decide between vascular perfusion for whole organisms or immersion fixation for dissected tissues.
- Perfusion Fixation:
- Immersion Fixation:
- Dissect tissue and immediately immerse in fixative.
- Fix for 2-24 hours at room temperature depending on tissue size.
- Cryoprotection: Transfer fixed tissue to 30% sucrose in PBS at 4°C for 3 days [50].
- Sectioning: Embed tissue in OCT compound and section using cryostat.
- Storage: Store sections at -80°C until use.
The experimental setup for comparing fixation and incubation methods can be visualized as follows:
Results and Data Interpretation
Quantitative Analysis of Optimization Parameters
Systematic optimization of IHC parameters yields measurable improvements in assay performance. The following table summarizes expected outcomes from proper titration and incubation optimization:
Table 3: Expected Outcomes from Optimization Procedures
| Optimization Parameter | Unoptimized Result | Optimized Result | Measurement Method |
|---|---|---|---|
| Primary Antibody Concentration | High background or weak specific signal | Strong specific signal with minimal background | Quantitative intensity measurement |
| Incubation Time | Incomplete binding or excessive non-specific binding | Saturated specific signal | Time course analysis |
| Incubation Temperature | Slow kinetics (4°C) or increased background (RT) | Balanced kinetics and specificity | Comparison across temperatures |
| Incubation Volume | High reagent consumption with equivalent signal | Minimal reagent use with equivalent signal | Signal intensity normalization |
| Fixation Method | Epitope destruction or poor morphology | Preserved antigenicity and tissue structure | Comparative staining intensity |
Troubleshooting Common Optimization Challenges
Even with systematic optimization, challenges may arise during IHC experiments:
- High Background Staining: Increase antibody dilution; optimize blocking conditions; include detergent in wash buffers; shorten incubation time.
- Weak Specific Signal: Decrease antibody dilution; extend incubation time; optimize antigen retrieval; verify antibody specificity.
- Inconsistent Staining Between Experiments: Standardize fixation times; prepare fresh antibody solutions; control incubation temperatures precisely; use consistent washing procedures.
- Cellular Morphology Issues: Optimize fixation method and duration; avoid over-fixation; ensure proper section thickness.
Applications in Tissue Integration Analysis
Within the context of a thesis on immunohistochemistry methods for tissue integration analysis, optimized antibody protocols enable several advanced applications:
Multiplexed Labeling for Cellular Interaction Studies
Optimized titration is particularly crucial for multiplexed IHC, where multiple proteins are detected simultaneously in the same tissue section. Carefully balanced antibody concentrations prevent cross-reactivity and ensure specific detection of each target. For example, Mendelsohn et al. successfully simultaneously detected Foxp2, Pou6f2, and TH in mouse brain sections using carefully optimized antibody combinations [50].
Quantitative Analysis of Protein Distribution
With properly optimized and standardized IHC conditions, semi-quantitative analysis of protein expression patterns becomes feasible. This enables researchers to map protein distribution across tissue regions and compare expression levels between experimental conditions, providing insights into functional organization within complex tissues.
Integration with Complementary Techniques
Optimized IHC protocols provide spatial context for findings obtained through other methods such as western blot or ELISA [6]. This integrated approach strengthens conclusions by correlating protein presence and modification status with specific cellular and subcellular localizations.
Optimization of antibody titration and incubation conditions represents a critical step in ensuring reliable, reproducible, and efficient IHC experiments. The protocols presented here provide a systematic framework for establishing these parameters, with particular emphasis on recent innovations that dramatically reduce reagent requirements without compromising detection sensitivity. The minimal-volume sheet protector strategy [79] offers a practical solution for laboratories facing reagent limitations or seeking to improve protocol efficiency. When implemented within a comprehensive optimization strategy that includes appropriate fixation, blocking, and detection steps, these methods yield robust IHC data suitable for sophisticated tissue integration analysis. As IHC continues to evolve with advancements in multiplexing, quantitative imaging, and computational analysis, standardized optimization approaches will remain fundamental to generating high-quality data that advances our understanding of protein localization and function in biological systems.
Addressing Overstaining and Enhancing Signal-to-Noise Ratio
In immunohistochemistry (IHC), achieving precise and reproducible results is fundamentally dependent on optimizing staining intensity and the signal-to-noise ratio (SNR). Overstaining creates excessive background signal that obscures specific staining, while a poor SNR compromises the accurate detection of target antigens, leading to potential misinterpretation [6]. These parameters are critical for the validity of tissue integration analysis research, where quantitative assessment of protein localization and expression is essential.
This Application Note provides detailed protocols and analytical methods for systematically addressing these challenges. By implementing these standardized procedures, researchers can enhance data quality, improve inter-laboratory reproducibility, and generate more reliable quantitative results for drug development applications.
Understanding and Controlling Overstaining
Primary Causes of Overstaining
Overstaining typically results from suboptimal protocol conditions that generate excessive, non-specific signal. Key contributing factors include:
- Antibody Concentration: Excessive primary or secondary antibody concentration is a primary cause of high background [6].
- Fixation Issues: Overfixation with formaldehyde-based fixatives can mask epitopes through excessive cross-linking, often leading to increased non-specific background staining as users attempt to compensate with higher antibody concentrations [6].
- Insufficient Blocking: Inadequate blocking of endogenous enzymes or non-specific protein binding sites allows non-targeted deposition of chromogens or fluorescent tags [6].
- Extended Incubation: Prolonged incubation with detection enzymes (e.g., HRP) or chromogenic substrates (e.g., DAB) leads to excessive precipitate formation [6].
Protocol for Optimizing Staining Conditions
The following systematic protocol helps identify and correct conditions leading to overstaining.
Materials:
- Primary antibody against target antigen
- Matching secondary antibody system (chromogenic or fluorescent)
- Blocking serum (normal serum from host species of secondary antibody)
- Appropriate antigen retrieval solution (e.g., citrate-based or EDTA-based)
- Phosphate-buffered saline (PBS)
- Positive control tissue sections
Method:
- Antibody Titration: Prepare a series of primary antibody dilutions (e.g., 1:50, 1:100, 1:200, 1:500, 1:1000) in antibody diluent.
- Staining Procedure:
- Perform standard deparaffinization and rehydration on FFPE tissue sections.
- Conduct antigen retrieval optimized for your target antigen.
- Block sections with appropriate normal serum for 30 minutes at room temperature.
- Apply different antibody dilutions to consecutive sections.
- Incubate primary antibody for 1 hour at room temperature (or overnight at 4°C for weak antigens).
- Apply appropriate secondary detection system as per manufacturer's instructions.
- Develop with chromogen/DAB or visualize fluorescence for consistent, pre-determined time.
- Counterstain, dehydrate, clear, and mount.
- Analysis: Examine stained sections under microscopy. The optimal dilution provides strong specific staining with minimal background. It is typically one dilution factor higher than the concentration that begins to show background haze.
Troubleshooting Overstaining
The table below summarizes common problems and solutions for addressing overstaining.
Table 1: Troubleshooting Guide for Overstaining in IHC
| Problem | Potential Cause | Recommended Solution |
|---|---|---|
| High background across entire section | Non-specific antibody binding | Increase blocking time; titrate down primary antibody concentration; include detergent (e.g., 0.05% Tween-20) in wash buffers [6] |
| Specific staining weak despite background | Overfixation | Optimize antigen retrieval time/temperature; use enzymatic epitope retrieval for heavily cross-linked samples [6] |
| High background in specific tissue elements (e.g., connective tissue) | Endogenous biotin or enzyme activity | Apply endogenous enzyme blocking steps prior to primary antibody incubation |
| DAB precipitate too dark/dense | Chromogen incubation too long | Reduce development time; monitor development microscopically to stop reaction once optimal intensity is reached |
Strategies for Enhancing Signal-to-Noise Ratio
The Signal-to-Noise Ratio (SNR) is a quantitative measure of the target-specific signal strength relative to the background noise. A high SNR is critical for distinguishing true positive staining from non-specific background and for the accuracy of subsequent quantitative analysis [80].
Systematic SNR Analysis and Improvement
A systematic approach to SNR, adapted from principles used in advanced imaging technologies, involves analyzing and controlling key variables [81]. The major noise sources in a detection system can be categorized as:
- Shot Noise: inherent statistical variation in photon or electron signal, proportional to the square root of the signal.
- Dark Noise: thermal noise generated within the detection camera or sensor.
- Read Noise: electronic noise introduced during signal readout and amplification [81].
The overall SNR can be described by the equation: SNR = (G × P × Q × t) / √(G² × P × Q × t + G² × Id × t + Nr²) Where G is system gain, P is incident photon flux, Q is quantum efficiency, t is exposure time, Id is dark current, and Nr is read noise [81].
Protocol for SNR Optimization in Fluorescent IHC
This protocol focuses on maximizing SNR in fluorescent IHC, which is particularly susceptible to noise from various sources.
Materials:
- High-quality antibodies validated for IHC/IF
- High-efficiency fluorophores (e.g., Alexa Fluor series)
- Antifade mounting medium
- High-purity buffers
- Signal enhancement systems (if needed, e.g., tyramide signal amplification)
Method:
- Sample Preparation:
- Use fresh, properly fixed tissues to minimize autofluorescence. Over-fixation with glutaraldehyde should be avoided as it increases autofluorescence [6].
- Ensure sections are of uniform thickness.
- Staining Optimization:
- Titrate all antibodies to find the concentration that yields the highest specific signal with the lowest background.
- Include rigorous negative controls (e.g., no primary antibody, isotype control) to accurately assess background levels.
- Use fluorophores with high quantum yields and good spectral separation for multiplexing.
- Image Acquisition:
- Cool the camera (e.g., to -70°C for EMCCD) to significantly reduce dark noise [81].
- Determine the optimal exposure time – long enough to collect sufficient signal but not so long that it leads to sensor saturation or bleaching.
- Use hardware binning where appropriate to increase the collected signal per pixel, though at the cost of spatial resolution [81].
- Post-Acquisition Processing:
- Apply computational methods, such as deep learning models, which can be trained to denoise images, effectively enhancing the SNR without requiring longer exposure times [82].
Computational SNR Enhancement
Machine learning, particularly deep neural networks, offers a powerful post-acquisition tool for SNR enhancement. These models can be trained to predict high-SNR images from noisy, short-acquisition inputs [82]. The workflow involves training a network with paired examples of low-SNR and high-SNR images. Once trained, the network can infer high-quality, high-SNR data from rapidly acquired, noisier inputs, significantly improving efficiency and capability for quantitative analysis [82].
Quantitative Analysis and Validation
Moving from semi-quantitative to quantitative analysis is key to objective IHC data interpretation and directly benefits from optimized staining and high SNR.
Automated Quantitative IHC (qIHC)
Novel qIHC methods, such as dot-counting assays, enable precise protein quantification directly in FFPE specimens [23]. This technology uses a known ratio of labeled to unlabeled secondary antibody. The resulting specific signals appear as discrete dots that can be counted, allowing for a direct correlation between the dot number and the amount of target biomarker present [23].
Table 2: Comparison of IHC Analysis Methods
| Method | Description | Output | Key Advantage |
|---|---|---|---|
| Pathologist Visual Scoring [80] | Semi-quantitative assessment by trained pathologist (e.g., H-score, 0-3+). | Ordinal data | Incorporates morphological context; widely available. |
| Computer-Aided Pixel Analysis [80] | Software quantification of stain intensity and percentage positive area within annotated regions. | Continuous data (%Pos, OD*%Pos) | Reduces subjectivity; produces continuous data for robust statistics. |
| Quantitative IHC (qIHC) [23] | Dot-counting method using a calibrated amplification system. | Absolute count (dots/cell) | True quantitative measurement; high sensitivity and dynamic range. |
| Virtual Staining [58] | Deep learning models generate virtual IHC stains from H&E images. | Synthetic IHC image | Preserves tissue; reduces time and cost; allows stain multiplexing. |
Protocol for Computer-Aided Quantitative Analysis
This protocol outlines the use of software for quantifying IHC staining, a method that strongly correlates with pathologist visual scores (Spearman correlation up to 0.90) [80].
Materials:
- Digitized whole slide images (WSI) of IHC-stained sections
- Image analysis software (e.g., Aperio Genie, ImageScope)
- Pathologist-annotated or software-classified regions of interest (ROI)
Method:
- Slide Digitization: Scan IHC slides at high resolution (e.g., 40x magnification) using a whole slide scanner [80].
- Region of Interest (ROI) Classification:
- Manual Annotation: A pathologist or trained technician outlines carcinomatous areas directly on the digital image using annotation software.
- Automated Classification: Use a histologic pattern recognition algorithm (e.g., Aperio Genie Classifier). Train the software by annotating examples of different tissue classes (e.g., carcinoma, stroma, glass). Iteratively refine the classifier until it accurately identifies ROIs [80].
- Stain Quantification:
- Use a color deconvolution algorithm to isolate the chromogen (e.g., DAB) and counterstain (e.g., hematoxylin) into separate image channels [80].
- Set the optical density (OD) vectors for each stain using control slides.
- Within the classified ROI, quantify the staining using metrics like:
- %Pos: The percentage of carcinoma area with positive staining.
- OD*%Pos: The product of staining intensity (OD) and the positive percentage [80].
- Statistical Validation: Compare software-derived data with pathologist scores to ensure strong correlation and validate the analysis pipeline.
The Scientist's Toolkit
Table 3: Essential Research Reagent Solutions for IHC Optimization
| Item | Function | Application Note |
|---|---|---|
| Formalin/PFA | Cross-linking fixative that preserves tissue morphology and antigenicity. | The standard fixative; overfixation can mask epitopes, requiring antigen retrieval [6]. |
| Citrate or EDTA Buffer | Solution for heat-induced epitope retrieval (HIER). | Breaks protein cross-links formed during fixation to unmask hidden epitopes [6]. |
| Normal Serum | Blocking agent to reduce non-specific antibody binding. | Should be from the species in which the secondary antibody was raised [6]. |
| Primary Antibody | Binds specifically to the protein target of interest. | Must be validated for IHC; titration is critical to avoid overstaining and maximize SNR [6]. |
| HRP-Conjugated Secondary Antibody | Enzyme-linked antibody that binds the primary antibody for chromogenic detection. | Enables signal generation; part of a standardized kit for assays like HercepTest [23]. |
| DAB Chromogen | Enzyme substrate that produces a brown, insoluble precipitate at the antigen site. | Common chromogen; development time must be controlled to prevent overstaining [80]. |
| iCARD / qIHC System | Specialized amplification system for quantitative dot counting. | Used in qIHC assays to convert antibody-antigen complexes into countable dots for precise quantification [23]. |
| Antifade Mounting Medium | Preserves fluorescence and reduces photobleaching. | Essential for maintaining SNR in immunofluorescence over time. |
| Color Deconvolution Software | Algorithmically separates overlapping stains in digital images. | Critical for accurate quantitative analysis of chromogenic IHC [80]. |
Workflow and Pathway Diagrams
IHC Optimization and Analysis Workflow
The diagram below outlines the core workflow for IHC staining and analysis, highlighting key decision points for optimization.
Signal-to-Noise Optimization Pathway
This diagram illustrates the relationship between key experimental factors and their impact on the final signal-to-noise ratio.
In immunohistochemistry (IHC), the accurate localization of specific antigens is paramount for valid research and diagnostic outcomes. A critical challenge in this technique is the presence of endogenous elements within tissue samples that can cause non-specific binding and high background staining, leading to compromised data interpretation [73]. This application note details essential blocking strategies to mitigate two major sources of this background: endogenous enzyme activity and non-specific Fc receptor binding. These protocols are vital for researchers, scientists, and drug development professionals engaged in tissue integration analysis, ensuring the high specificity and reliability required for advanced IHC applications [83] [84].
The Necessity of Blocking in IHC
Blocking is an indispensable step performed after sample preparation but prior to incubation with the primary antibody [83] [85]. Its purpose is to occupy all potential non-specific binding sites in the tissue sample, thereby preventing detection reagents from binding to sites unrelated to specific antibody-antigen reactivity [83]. Without adequate blocking, antibodies can bind to various tissue components via simple adsorption, charge-based interactions, hydrophobic forces, and other non-immune interactions, resulting in false-positive signals and inaccurate conclusions [83] [73]. The choice of blocking strategy directly influences the signal-to-noise ratio, which is a key determinant of assay quality.
Blocking Endogenous Enzyme Activity
Chromogenic detection in IHC often relies on enzymes like Horseradish Peroxidase (HRP) and Alkaline Phosphatase (AP). However, many tissues contain endogenous versions of these enzymes that will react with the substrate, producing nonspecific staining that obscures the specific signal [84] [85].
Endogenous Peroxidase Blocking
Target Tissues: Endogenous peroxidases and "pseudoperoxidase" activity are particularly prevalent in tissues such as kidney, liver, and red blood cells [84] [85].
Standard Protocol: The most common method involves incubating de-paraffinized and re-hydrated tissue sections with a solution of 0.3% hydrogen peroxide (H₂O₂) for 10-15 minutes at ambient temperature or 37°C [84] [85]. This concentration is effective while minimizing potential damage to tissue sections or epitope integrity that can occur with higher concentrations [84]. Following incubation, slides should be washed twice with buffer before proceeding with the staining protocol [84].
Validation: To confirm the presence and successful blockade of endogenous peroxidase activity, a negative control sample can be reacted with a peroxidase substrate like 3,3'-Diaminobenzidine (DAB) alone. Any colored precipitate indicates residual activity [84].
Table 1: Summary of Endogenous Enzyme Blocking Methods
| Enzyme Target | Common Locations | Blocking Reagent | Incubation Time | Validation Method |
|---|---|---|---|---|
| Peroxidase (HRP) | Kidney, liver, red blood cells [84] [85] | 0.3% Hydrogen Peroxide [84] [85] | 10-15 minutes [84] | Reaction with DAB substrate [84] |
| Alkaline Phosphatase (AP) | Kidney, intestine, bone, lymphoid tissue [84] [85] | 1 mM Levamisole [84] [85] | During secondary AB incubation [84] | Reaction with BCIP/NBT substrate [84] |
Endogenous Alkaline Phosphatase Blocking
Target Tissues: Endogenous Alkaline Phosphatase (AP) is commonly found in the kidney, intestine, osteoblasts, and lymphoid tissue, and generally shows higher activity in frozen tissues [84] [85].
Standard Protocol: Endogenous AP activity can be effectively inhibited by including 1 mM levamisole hydrochloride (or tetramisole hydrochloride) in the substrate solution during the secondary antibody incubation step [84] [85]. It is important to note that levamisole does not inhibit the intestinal isoform of AP; for tissues containing this isoform, alternative detection systems may be necessary.
Validation: The presence of endogenous AP is tested by incubating a control sample with a solution of 5-bromo-4-chloro-3-indolyl-phosphate (BCIP) and nitro blue tetrazolium (NBT). Development of a blue color indicates positive endogenous activity [84].
The following workflow outlines the logical sequence for assessing and blocking endogenous enzyme activity to ensure clean IHC results.
Blocking Non-Specific Fc Receptor Binding
The Fc Receptor Challenge
Fc receptors (FcRs) are cell surface proteins expressed on various immune cells, including myeloid, granulocyte, and B cells [86]. Their physiological role is to bind the Fc region of host antibodies, initiating immune processes like endocytosis, phagocytosis, and antigen presentation [86] [87]. A significant complication in IHC, especially when using mouse monoclonal antibodies on mouse tissue (a common practice in research), is that the secondary antibody will bind indiscriminately to all Fc receptors occupied by endogenous IgG, not just the primary antibody bound to the target antigen [85]. This results in high background staining and false positives.
Fc Receptor Blocking Strategies
Several effective strategies exist to mitigate Fc receptor-mediated background:
- Protein Blocking with Serum: Using 1-5% (w/v) normal serum from the same species as the secondary antibody is a common practice. The serum contains antibodies and proteins like albumin that bind to reactive sites, preventing the non-specific binding of the secondary antibody [83] [85]. It is critical that the serum matches the secondary antibody species, not the primary antibody species [83].
- F(ab) Fragment Antibodies: A highly effective method, particularly for mouse-on-mouse studies, involves using primary antibodies that are F(ab) fragments. These fragments lack the Fc portion and therefore cannot bind to Fc receptors, eliminating this source of background [85].
- Dedicated Fc Receptor Blocking Reagents: Commercial reagents containing purified antibodies specifically designed to inhibit the binding of monoclonal antibodies to human Fcγ receptors are available [86]. The protocol typically involves incubating the sample with the Fc Receptor Binding Inhibitor for 15-20 minutes on ice before proceeding with the primary antibody stain, without an intermediate wash step [86].
Additional Blocking Considerations
Blocking Endogenous Biotin
Tissues rich in endogenous biotin (e.g., liver, kidney, mammary gland) can produce high background when using avidin-biotin complex (ABC) detection methods [84] [85]. Blocking is a two-step process:
- Step 1: Incubate the sample with an excess of free, unlabeled avidin or streptavidin to bind all endogenous biotin.
- Step 2: Incubate with an excess of free biotin to block all unoccupied binding sites on the avidin/streptavidin molecules [84] [85]. For tissues with high endogenous biotin, using polymer-based detection systems that do not rely on biotin is a recommended alternative [85].
Protein Blocking for General Non-Specific Binding
Beyond Fc receptors, general non-specific protein-binding sites must be blocked. Solutions of 1-5% Bovine Serum Albumin (BSA), gelatin, or casein from non-fat dry milk are frequently used [83] [85]. These proteins compete with the antibody for non-specific sites. A key caution is that non-fat dry milk contains biotin and should not be used with biotin-streptavidin detection systems [83]. Many labs use pre-formulated commercial blocking buffers, which offer optimized performance, consistency, and longer shelf lives compared to homemade preparations [83] [85].
Integrated Protocols and Reagent Toolkit
Comprehensive Workflow for Blocking
For a robust IHC experiment, a logical sequence that incorporates multiple blocking steps is essential. The following protocol provides a detailed guide from sample preparation through to primary antibody incubation.
Research Reagent Solutions
A well-prepared toolkit is fundamental for executing effective blocking strategies. The following table lists essential reagents and their specific functions in the blocking process.
Table 2: Essential Reagents for IHC Blocking Protocols
| Reagent | Function / Purpose | Key Considerations |
|---|---|---|
| Hydrogen Peroxide (0.3%) | Quenches endogenous peroxidase activity to prevent background in HRP-based systems [84] [85]. | Higher concentrations (e.g., 3%) may damage tissues or epitopes [84]. |
| Levamisole (1 mM) | Inhibits endogenous alkaline phosphatase activity [84] [85]. | Ineffective against the intestinal isoform of AP [84]. |
| Normal Serum (1-5%) | Blocks non-specific protein binding sites; reduces Fc-mediated binding [83] [85]. | Must match the species of the secondary antibody [83]. |
| Bovine Serum Albumin (BSA) | Inexpensive, general-purpose protein blocker that competes for non-specific sites [83] [85]. | Ensure solution is free of precipitates and contaminants [83]. |
| Avidin/Biotin Blocking Kit | Sequential application blocks endogenous biotin in tissues [84] [85]. | Critical for liver, kidney, and brain tissues when using ABC methods [85]. |
| Fc Receptor Binding Inhibitor | Purified antibody that specifically blocks FcγR on human cells, reducing non-specific antibody binding [86]. | Incubate with sample for 15-20 min on ice before primary antibody without washing [86]. |
| F(ab) Fragment Antibodies | Primary antibodies lacking the Fc region, eliminating Fc receptor binding [85]. | The optimal solution for "mouse-on-mouse" IHC [85]. |
The implementation of thorough and tailored blocking protocols is a non-negotiable aspect of high-quality immunohistochemistry. By systematically addressing the major sources of non-specific signal—endogenous enzymes, endogenous biotin, general protein interactions, and Fc receptor binding—researchers can dramatically improve the signal-to-noise ratio in their experiments. The protocols and reagents detailed in this application note provide a solid foundation for achieving specific, reliable, and reproducible staining, which is critical for accurate data interpretation in tissue integration analysis research and drug development. As IHC technologies advance, particularly in multiplexing, the principles of effective blocking will remain a cornerstone of valid experimental design.
Ensuring Reliability: IHC Assay Validation, Standardization, and Scoring Methodologies
Implementing Evidence-Based Guidelines for IHC Analytic Validation
Immunohistochemistry (IHC) serves as a critical tool in diagnostic pathology and research, providing essential spatial protein expression data within tissue architecture. The accuracy and reproducibility of IHC assays are fundamental to both clinical decision-making and rigorous scientific investigation. This document outlines evidence-based protocols for the analytic validation of IHC assays, framed within the broader context of a thesis on immunohistochemistry methods for tissue integration analysis research. The guidelines presented herein are synthesized from the latest College of American Pathologists (CAP) recommendations, specifically the 2024 "Principles of Analytic Validation of Immunohistochemical Assays: Guideline Update," which ensures accuracy and reduces variation in IHC laboratory practices [88] [89]. The implementation of these standardized validation principles is crucial for generating reliable, interpretable, and comparable data in research settings, particularly in the field of drug development where precise biomarker quantification is paramount.
Core Principles and Quantitative Requirements of IHC Validation
Analytic validation establishes that an IHC test consistently and accurately detects its intended target. The updated CAP guidelines provide a harmonized framework for validation, distinguishing between laboratory-developed tests (LDTs) and FDA-cleared/approved assays, as well as between predictive and nonpredictive markers [88]. The central goal is to achieve a minimum of 90% overall concordance between the new assay and a validated comparator [89].
The following table summarizes the key quantitative requirements for initial analytic validation and verification as per the 2024 CAP guideline update.
Table 1: Summary of Initial Analytic Validation and Verification Case Requirements
| Assay Type | Application | Minimum Case Requirement | Key Considerations |
|---|---|---|---|
| Laboratory-Developed Test (LDT) [89] | Nonpredictive | 10 positive and 10 negative tissues | Validation set should include high and low expressors and span the expected range of clinical results. |
| Laboratory-Developed Test (LDT) [89] | Predictive | 20 positive and 20 negative tissues | Rationale for fewer cases must be documented by the laboratory director. |
| FDA-Cleared/Approved Assay [89] | Predictive (Unmodified) | Follow manufacturer's instructions; if none, 20 positive and 20 negative tissues | The validation set must include challenges based on the intended clinical use. |
| Assay on Cytology Specimens [88] | Fixed differently from original validation | 10 positive and 10 negative cases (minimum recommended) | Required for each new analyte-fixation method combination (e.g., alcohol-fixed smears, cell blocks). |
A pivotal update in the 2024 guidelines is the requirement for separate validation of each assay-scoring system combination for predictive markers with distinct scoring schemes (e.g., HER2, PD-L1). This means that if a single antibody is used across different tumor types with unique scoring criteria, each specific application must be independently validated with 20 positive and 20 negative cases [88] [89]. Furthermore, the guidelines now explicitly address validation for cytology specimens fixed in alternative fixatives (e.g., alcohol), mandating separate validation studies to account for potential variations in antigen sensitivity [88].
Experimental Protocol for Validating a Laboratory-Developed IHC Assay
This protocol provides a step-by-step methodology for the initial analytic validation of a nonpredictive, laboratory-developed IHC assay, based on CAP guidelines and established best practices [88] [89] [3].
Validation Study Design and Comparator Selection
The foundation of a robust validation is a well-considered study design. The guideline outlines several acceptable comparator models, ordered here from most to least stringent [88]:
- Comparison to IHC results from cell lines with known protein content ("calibrators").
- Comparison with a non-IHC method (e.g., flow cytometry, FISH).
- Comparison with testing results from another certified laboratory using a validated assay.
- Comparison with prior testing results of the same tissues in the same laboratory.
- Comparison with expected antigen localization and architecture. The laboratory director must select the most appropriate comparator based on the antigen and assay's intended use.
Step-by-Step Workflow for Assay Validation and Optimization
The following diagram illustrates the comprehensive workflow for IHC assay validation, from initial tissue selection to final data analysis and approval.
Detailed Methodologies for Key Phases
Phase 1: Tissue Selection and Pre-Analytical Steps
- Cohort Assembly: Select a minimum of 10 positive and 10 negative cases for a nonpredictive LDT. Tissues must be fixed and processed identically to future clinical specimens, ideally using 10% neutral buffered formalin with standardized fixation times [89] [3].
- Sectioning: Cut tissue sections at 4-5 µm and mount them on charged or APES-coated slides to ensure optimal adhesion during subsequent procedures [3].
- Fixation Control: Ensure consistent and optimal fixation. Under-fixed or over-fixed tissues yield variable results and complicate troubleshooting [3].
Phase 2: IHC Staining and Optimization
- Antigen Retrieval: Optimize the retrieval method (e.g., pH, buffer, heat platform) for the specific primary antibody and tissue type. Do not assume a universal retrieval method is suitable for all antibodies [3].
- Antibody Titration: For concentrated antibodies, perform a dilution series to determine the optimal concentration that provides specific staining with minimal background. Always consult the antibody specification sheet [3].
- Blocking Steps:
- Detection System: Choose a sensitive and specific detection system (e.g., polymer-based). Standardize all washing steps (duration, volume, agitation) between reagent applications to ensure run-to-run consistency [3].
- Counterstaining: Apply a hematoxylin counterstain at a regulated intensity to provide morphological context without obscuring the specific chromogen signal [3].
Phase 3: Analysis and Documentation
- Microscopic Evaluation: A pathologist or qualified scientist must evaluate all test and control slides. Assess the staining for its presence, location (nuclear, cytoplasmic, membranous), pattern, and intensity. The validation set should include high and low expressors to ensure the assay spans the expected dynamic range [89].
- Concordance Calculation: Calculate the overall concordance between the new assay and the chosen comparator. The result must meet or exceed the 90% threshold for validation to be successful [89].
- Documentation: Comprehensively document all procedures, reagents (including clone and lot numbers), results, and calculations in a formal validation report. This report must be approved by the laboratory director before the assay is placed into clinical service [88].
The Scientist's Toolkit: Essential Reagents and Materials
The following table details key research reagent solutions and their critical functions in the IHC validation process.
Table 2: Essential Research Reagent Solutions for IHC Assay Validation
| Reagent/Material | Function & Role in Validation | Best Practice Considerations |
|---|---|---|
| Primary Antibodies [3] | Binds specifically to the target antigen; defines assay specificity. | Use clone name for identification; choose based on specificity/sensitivity; test with your staining system. |
| Detection System [3] | Amplifies the primary antibody signal for visualization; critical for sensitivity. | Select a system that provides precise, specific staining with adequate sensitivity (e.g., polymer-based). |
| Chromogens [3] | Produces an insoluble colored precipitate at the antigen site. | DAB (brown) is standard; AP Red is useful for skin or double-staining. |
| Antigen Retrieval Reagents [3] | Unmasks epitopes obscured by formalin fixation; key for antibody performance. | Optimize pH and buffer type (e.g., citrate, EDTA) for each antibody. |
| Control Tissues [88] [3] | Validates assay performance in each run; includes known positive, negative, and internal controls. | Use appropriate controls with every run; essential for quality assurance. |
| Charged/APES Coated Slides [3] | Provides strong adhesion for tissue sections during processing. | Prevents section loss and ensures even reagent coverage. |
Revalidation and Quality Assurance Protocols
Once an IHC assay is validated, ongoing quality assurance is mandatory. The CAP guidelines specify requirements for confirming assay performance after various changes [89]. The following diagram outlines the decision-making pathway for revalidation.
Adherence to these evidence-based validation and revalidation protocols ensures that IHC assays used in research and drug development generate accurate, reproducible, and reliable data, thereby upholding the highest standards of scientific integrity and contributing to robust tissue integration analysis.
In the field of immunohistochemistry (IHC) for tissue integration analysis research, the use of appropriate positive and negative controls is a fundamental requirement for ensuring the validity, reproducibility, and interpretability of experimental data. Controls are indispensable tools that verify the specificity of antigen-antibody reactions, confirm proper technique execution, and detect any non-specific staining or background interference. Without rigorously implemented controls, IHC results are susceptible to misinterpretation, potentially leading to erroneous conclusions in research and drug development contexts.
The fundamental purpose of controls is to provide a systematic framework for data validation. Positive controls confirm that all components of the IHC protocol are functioning correctly, demonstrating that the experimental conditions can successfully detect a known antigen. Conversely, negative controls help distinguish specific staining from non-specific background, artefact, or cross-reactivity. For researchers and scientists engaged in tissue integration studies, implementing a robust control strategy is not optional but essential for generating reliable, publication-quality data that accurately represents the localization and expression levels of target antigens within complex tissue architectures.
Types of Controls and Their Applications
Classification and Purpose of IHC Controls
Table 1: Types of Controls in Immunohistochemistry
| Control Type | Purpose | Composition | Interpretation of Results |
|---|---|---|---|
| Positive Control | Verifies that the entire IHC protocol functions correctly and the antibody detects its target antigen. | Tissue known to express the target antigen [90]. | Expected: Specific staining in antigen-positive areas.Action if Fails: Troubleshoot antibody, dilution, or protocol steps [90]. |
| Negative Control | Distinguishes specific antibody staining from non-specific background signal. | Omission of primary antibody (replaced by buffer or non-immune serum) or use of an isotype control [90]. | Expected: No specific staining.Action if Fails: Investigate secondary antibody cross-reactivity or blocking issues [90]. |
| Tissue Control | Assesses overall tissue morphology and staining protocol integrity, independent of the specific antibody. | A multi-tissue block containing various structures (e.g., intestine, liver) to validate the staining system [91]. | Expected: Consistent, expected staining patterns across different tissue types.Action if Fails: Troubleshoot basic staining protocol (e.g., H&E) or tissue processing. |
| Internal Control | Uses inherent endogenous elements within the test tissue itself as a built-in reference. | Endogenous cells or structures within the test section known to consistently express a ubiquitous protein. | Expected: Staining in specific internal structures (e.g., cytokeratin in epithelial cells).Action if Fails: May indicate issues with tissue antigenicity or processing. |
Control Selection Workflow Logic
The following diagram outlines the decision-making process for selecting and interpreting controls in an IHC experiment, ensuring systematic validation.
Detailed Experimental Protocols
Protocol for Control Slide Preparation and Staining
This protocol provides a detailed methodology for incorporating and processing control slides within an IHC experiment, based on standardized procedures [92].
Materials & Reagents:
- Positive Control Tissues: Formalin-fixed, paraffin-embedded (FFPE) tissue blocks or cell pellets known to express the target antigen [90].
- Negative Control Reagents: Antibody diluent (for omission control), isotype-matched immunoglobulin, or serum from the primary antibody host species.
- Tissue Sectioning: Microtome, water bath, positively charged glass slides.
- Deparaffinization and Rehydration:
- Xylene (fresh), 100% ethanol, 95% ethanol, 70% ethanol, deionized water [92].
- Antigen Retrieval Solutions:
- 10 mM sodium citrate buffer (pH 6.0) or 1 mM EDTA (pH 8.0) [92].
- Blocking Solution:
- Antibodies: Validated primary antibody, appropriate enzyme- or fluorophore-conjugated secondary antibody.
- Detection System: SignalStain Boost IHC Detection Reagents or similar polymer-based systems, DAB Substrate Kit [90].
- Counterstain: Mayer's Hematoxylin [92].
- Mounting Medium: Aqueous-based for fluorescent detection; resin-based for chromogenic detection [93].
Procedure:
- Sectioning:
- Cut serial sections (typically 4-5 μm thick) from both the test and positive control FFPE blocks using a microtome.
- Float sections on a warm water bath (42-48°C) and mount onto charged glass slides.
- Dry slides in a 56-60°C oven for 15-60 minutes to ensure adhesion [92].
Deparaffinization and Rehydration:
Antigen Retrieval (for FFPE tissues):
- Heat-Induced Epitope Retrieval (HIER) is most common.
- Place slides in a coplin jar filled with antigen retrieval buffer (e.g., 10 mM Sodium Citrate, pH 6.0). Ensure slides are fully covered.
- Heat in a microwave oven at high power (approx. 700W) for 5 minutes. Monitor to prevent boiling over.
- Repeat heating 2-3 times, replenishing buffer if needed to prevent drying.
- Cool slides at room temperature for at least 20 minutes [92].
- Alternative: Enzyme-Induced Epitope Retrieval (EIER) using 0.1% trypsin in PBS at 37°C for 2-30 minutes [92].
Endogenous Enzyme Blocking (if using enzyme-based detection):
Blocking:
- Remove excess liquid and carefully wipe around the tissue section.
- Apply enough blocking solution (e.g., 5% normal serum or 1% BSA) to cover the tissue.
- Incubate in a humidified chamber for 30 minutes at room temperature [93].
- Tip: Do not rinse after blocking. Tap off excess solution before applying primary antibody.
Antibody Incubation:
- Positive Control Slide: Apply optimized dilution of primary antibody in diluent.
- Negative Control Slide: Apply antibody diluent only, non-immune serum, or an isotype control at the same concentration as the primary antibody [90].
- Test Slide: Apply the same primary antibody as the positive control.
- Ensure the tissue is completely covered. Incubate slides in a humidified chamber at 37°C for at least 60 minutes or at 4°C overnight [92] [90].
- Wash slides with PBS or TBST, 3 changes of 5 minutes each [90].
Detection:
Signal Development and Counterstaining:
- For Chromogenic Detection (DAB):
- Apply freshly prepared substrate solution. Monitor development visually for 5-10 minutes until desired intensity is achieved.
- Stop the reaction by immersing in deionized water [92].
- Counterstaining:
- Immerse slides in Mayer's Hematoxylin for 0.5-5 minutes.
- Rinse in running tap water for 5 minutes to "blue" the stain [92].
- Dehydrate through graded ethanols (70% → 100%), clear in xylene, and mount with resin-based medium [92] [93].
- For Chromogenic Detection (DAB):
Experimental Setup for Control Validation
This diagram illustrates the parallel processing of control and test slides to ensure a validated IHC outcome.
The Scientist's Toolkit: Essential Research Reagent Solutions
Table 2: Key Reagents for IHC Quality Control
| Reagent / Solution | Critical Function | Application Notes & Best Practices |
|---|---|---|
| Validated Primary Antibodies | Binds specifically to the target antigen. The key reagent defining assay specificity. | Use antibodies validated for IHC. Check product data sheets for recommended protocols, dilutions, and controls [90]. |
| Positive Control Tissues | Provides a known antigen reference to verify protocol functionality. | Can be FFPE cell pellets or tissue microarrays (TMAs) with characterized antigen expression [91] [90]. |
| Antibody Diluent | Dilutes antibodies while maintaining stability and reducing non-specific binding. | Use the diluent recommended by the antibody manufacturer. Specific commercial diluents can enhance signal and reduce background [90]. |
| Polymer-Based Detection Systems | Amplifies the primary antibody signal for visualization with high sensitivity. | Superior to older biotin-based systems as they minimize background from endogenous biotin in tissues like liver and kidney [90]. |
| Antigen Retrieval Buffers | Reverses formaldehyde-induced cross-links, exposing epitopes for antibody binding. | Citrate (pH 6.0) and EDTA (pH 8.0) are common. The optimal buffer and retrieval method (microwave, pressure cooker) are target-dependent [92] [90]. |
| Blocking Serums & Proteins | Reduces non-specific binding of antibodies to tissue, minimizing background. | Use 5-10% normal serum from the species of the secondary antibody or 1-5% BSA. Do not use serum from the primary antibody host species [92] [93]. |
Integrating Controls into a Comprehensive Quality Management System
For research and drug development, quality control extends beyond individual experiments to encompass the entire laboratory workflow. Integrating IHC controls into a formal Quality Management System (QMS) covering pre-analytical, analytical, and post-analytical phases is crucial for generating reliable data [94].
In the pre-analytical phase, quality checks focus on specimen collection, fixation, processing, and embedding. Variations here significantly impact antigen preservation and staining quality [94]. The analytical phase involves the actual IHC staining and includes the implementation of controls as detailed in this document. Pathologists and scientists must be involved in final quality control by examining control slides to determine if the staining is adequate for interpretation [94]. The post-analytical phase involves accurate reporting, archiving of slides and blocks, and managing turnaround times [94].
Adherence to these quality control best practices ensures that IHC data generated for tissue integration analysis research is robust, reproducible, and capable of supporting high-impact scientific conclusions and drug development decisions.
Immunohistochemistry (IHC) stands as a cornerstone technique in pathology and research, enabling the visualization and localization of specific proteins within tissue samples at a microscopic level [73]. By combining principles from histology, immunology, and biochemistry, IHC provides crucial insights into cellular patterns, shapes, and structures that are essential for diagnosing diseases and understanding cellular functions [73]. The technique relies on the specific binding of antibodies, either monoclonal or polyclonal, to target antigens within tissue sections, with detection achieved through various labels including fluorescent compounds, enzymes, and metals [73].
The interpretation of IHC results has evolved significantly from purely qualitative assessments to increasingly sophisticated quantitative methodologies. Traditional qualitative approaches, based on pathologist visual scoring, remain widely used in clinical diagnostics but are inherently limited by subjectivity and semi-quantitative nature [95]. In research and drug development, there is a growing emphasis on quantitative approaches that offer greater precision, reproducibility, and statistical power [96]. This application note provides a comprehensive comparative analysis of these interpretation approaches, detailing their applications, methodologies, and integration into modern IHC-based research.
IHC Principle and Workflow
Fundamental Principles
The core principle of IHC involves specific binding of antibodies tagged with labels to target antigens within tissues, thus visualizing the localization and distribution of these antigens [73]. IHC can be performed using two primary methods: the direct method, where the primary antibody is directly conjugated to a label, and the indirect method, which utilizes a labeled secondary antibody that binds to the primary antibody, providing signal amplification [73]. This fundamental capability to precisely localize target proteins without tissue digestion provides IHC with a unique advantage over other molecular biology techniques like western blotting or ELISA [73].
Standard IHC Workflow
The following diagram illustrates the core workflow of a standard IHC procedure, from tissue preparation to final interpretation:
Each step in this workflow is critical for ensuring specificity, sensitivity, and reproducibility of results [73] [95]. Tissue handling and fixation are particularly crucial for preserving cellular integrity and preventing degradation during sample processing [73]. Fixation stabilizes cells and tissues, preserving morphological detail for diagnosis and specialized testing, with adequate sample size and fixative volume being essential for effective fixation [73].
IHC Interpretation Approaches
Qualitative and Semi-Quantitative Assessment
Traditional Visual Scoring Methods Pathologist visual scoring represents the traditional approach to IHC interpretation, where staining is evaluated based on spatial arrangement, percentage of positively stained cells, staining intensity, and established thresholds [73]. Commonly used semi-quantitative scoring systems include:
- Immunoreactive Score (IRS): Evaluates both staining intensity and percentage of positive cells, often on a 12-point scale [97].
- H-SCORE: Calculated as a summation of the percentage of area stained at each intensity level multiplied by the weighted intensity (e.g., 0-3) [96].
- All-or-Nothing Scoring: Simple binary assessment of presence or absence of staining.
- Categorical Scoring: Ordinal scoring systems (e.g., 0, 1+, 2+, 3+) based on predetermined thresholds [98] [96].
Applications and Limitations Qualitative assessment is sufficient for many diagnostic applications where the primary question is whether a specific antigen is present or absent [98]. Semi-quantitative approaches find application in diagnostic pathology for biomarkers such as hormone receptors in breast cancer (ER, PR), HER2, and Ki-67, where established clinical thresholds exist [98] [58]. However, these approaches suffer from inherent subjectivity, leading to intra- and inter-observer variability [73] [96]. The semi-quantitative nature of the data also limits statistical analysis capabilities compared to continuous variables generated by quantitative methods [96].
Quantitative Assessment
Digital Image Analysis Digital pathology platforms enable the scanning of glass slides into high-resolution whole slide images (WSI), facilitating computer-aided analysis [58] [96]. Quantitative approaches typically involve:
- Whole Slide Digitization: Using slide scanners to create digital images at 20x or 40x magnification [96].
- Tissue Classification: Algorithms such as Genie Histology Pattern Recognition software classify image areas into relevant categories (e.g., carcinoma, stroma) [96].
- Color Deconvolution: Separation of chromogen (e.g., DAB) and counterstain (e.g., hematoxylin) signals [96].
- Pixel-Based Quantification: Measurement of staining intensity as optical density (OD) and calculation of percentage positive staining (%Pos) [96].
Advanced Quantitative Methodologies Emerging approaches push the boundaries of IHC quantification:
- Multiplexed IHC: Uses multiple labels to detect several antigens simultaneously within the same tissue section, enabling study of cell populations and their functional states in situ [73] [29].
- Mass Tag Technologies: Integration of mass tags with mass spectrometry imaging (MSI) expands detection capabilities beyond the limitations of traditional chromogenic or fluorescent detection [29].
- Artificial Intelligence: Deep learning models, particularly generative adversarial networks (GANs) and contrastive learning approaches, enable advanced image analysis tasks including virtual staining [58].
Comparative Analysis of Interpretation Methods
Performance Comparison
Table 1: Comparative Analysis of IHC Interpretation Approaches
| Parameter | Qualitative Assessment | Semi-Quantitative Assessment | Digital Quantification | AI-Enhanced Analysis |
|---|---|---|---|---|
| Data Output | Presence/Absence | Ordinal Scores (0, 1+, 2+, 3+) | Continuous Variables (%Pos, OD) | Predictive Scores, Virtual Staining |
| Subjectivity | High | Moderate | Low | Very Low |
| Reproducibility | Low to Moderate | Moderate | High | Very High |
| Throughput | High | Moderate | High for analysis, but requires digitization | Very High once implemented |
| Equipment Needs | Standard Microscope | Standard Microscope | Slide Scanner, Analysis Software | Advanced AI Infrastructure |
| Cost | Low | Low | Moderate to High | High |
| Diagnostic Accuracy | 85% [98] | Varies with marker and experience | 93% correlation with pathologist scores [98] | Under validation |
| Inter-observer Agreement | Low (κ = 0.5-0.7) | Moderate (κ = 0.7-0.8) | High (κ = 0.92) [98] | Not fully established |
| Statistical Power | Low | Moderate | High | Very High |
| Key Applications | Initial Screening, Diagnostic Classification | Clinical Decision Making (e.g., HER2, ER) | Biomarker Validation, Clinical Trials | Biomarker Discovery, Predictive Modeling |
Technical Validation
Studies have demonstrated strong correlation between digital quantification and pathologist visual scoring. In one study comparing S100A1 staining in ovarian serous carcinoma, Spearman correlations of 0.88 for percentage positive staining (%Pos) and 0.90 for combined optical density and percentage positive staining (OD*%Pos) were observed between computer-derived measurements and pathologist visual scores [96]. Computer-aided classification of carcinomatous areas also showed strong agreement with manual pathologist annotations, indicating that software can efficiently classify disease-relevant regions in IHC images [96].
Experimental Protocols
Protocol 1: Standard IHC Staining and Semi-Quantitative Analysis
Materials and Reagents
- Primary antibodies (e.g., anti-GBP2, anti-PD-L1, anti-p53, anti-Ki-67) [98] [97]
- Secondary detection system (e.g., HRP-conjugated polymers)
- Chromogenic substrate (e.g., 3,3'-Diaminobenzidine, DAB)
- Counterstain (hematoxylin)
- Antigen retrieval solution (e.g., EDTA-based, pH 9.0) [97]
- Blocking solution (e.g., serum-based protein block)
Methodology
- Tissue Preparation: Cut 4-5μm sections from formalin-fixed, paraffin-embedded (FFPE) tissue blocks and mount on charged slides.
- Deparaffinization and Rehydration: Bake slides at 60°C for 30 minutes, followed by xylene and graded ethanol series.
- Antigen Retrieval: Perform heat-induced epitope retrieval using appropriate buffer (e.g., EDTA, pH 9.0) in a pressure cooker or water bath [97].
- Endogenous Peroxidase Blocking: Incubate with 3% hydrogen peroxide for 10 minutes.
- Protein Blocking: Apply serum-based blocking solution for 10-30 minutes to reduce non-specific binding.
- Primary Antibody Incubation: Apply optimized antibody dilution and incubate for 60 minutes at room temperature or overnight at 4°C.
- Secondary Detection: Apply appropriate HRP-conjugated secondary detection system for 30 minutes.
- Chromogen Development: Incubate with DAB substrate for 3-10 minutes, monitoring development microscopically.
- Counterstaining: Apply hematoxylin for 30-60 seconds, followed by bluing in running tap water.
- Dehydration and Mounting: Process through graded ethanol, clear in xylene, and mount with permanent mounting medium.
Semi-Quantitative Evaluation
- Independently evaluate stained sections by at least two pathologists [97].
- For IRS scoring: Assess both staining intensity (0-3) and percentage of positive cells (0-4), with final score calculated as the product (0-12) [97].
- For categorical scoring: Use established criteria (e.g., HER2 criteria: 0, 1+, 2+, 3+) based on complete, basolateral, or lateral membrane staining patterns and percentage of stained tumor cells [99].
Protocol 2: Digital Quantitative Analysis
Materials and Equipment
- Whole slide scanner (e.g., Aperio ScanScope, Leica Aperio)
- Digital image analysis software (e.g., Aperio ImageScope, HALO, QuPath)
- Computer workstation with sufficient processing power and storage
Methodology
- Slide Digitization: Scan stained slides at 20x or 40x magnification using a whole slide scanner [96].
- Tissue Classification:
- Manually annotate representative regions of interest (ROI) for training algorithms
- Apply pattern recognition algorithms (e.g., Genie Classifier) to classify tissue into relevant compartments (e.g., carcinoma, stroma) [96]
- Color Deconvolution:
- Isolate individual stains using color deconvolution algorithms
- Set optimal RGB optical density values for hematoxylin and DAB based on control slides [96]
- Quantitative Analysis:
- For nuclear markers: Calculate percentage of positive nuclei and average staining intensity
- For membrane markers: Calculate percentage of positive membrane staining and staining intensity
- For cytoplasmic markers: Calculate percentage of cytoplasmic area stained and intensity
- Data Export and Statistical Analysis:
- Export numerical data for statistical analysis
- Normalize values as needed for cross-experiment comparisons
Validation Parameters
- Compare digital quantification results with pathologist visual scoring for validation [96]
- Establish inter- and intra-assay coefficients of variation
- Determine dynamic range and limit of detection for each assay
Research Reagent Solutions
Table 2: Essential Research Reagents for IHC Studies
| Reagent Category | Specific Examples | Function | Technical Considerations |
|---|---|---|---|
| Primary Antibodies | Anti-p53, Anti-Ki-67, Anti-HER2, Anti-PD-L1 [98] [97] | Target antigen recognition | Validate for specific applications; optimize concentration using checkerboard titration [95] |
| Detection Systems | HRP-conjugated polymers, Avidin-biotin systems | Signal amplification | Choose based on sensitivity requirements; consider endogenous enzyme activities |
| Chromogens | 3,3'-Diaminobenzidine (DAB), Permanent Red | Visualize target localization | DAB provides permanent staining; consider compatibility with quantification algorithms |
| Counterstains | Hematoxylin, Nuclear Fast Red | Provide morphological context | Hematoxylin most common; intensity affects quantification thresholding |
| Antigen Retrieval Buffers | EDTA (pH 9.0), Citrate (pH 6.0) [97] | Unmask epitopes altered by fixation | Optimization required for each antibody-target combination |
| Blocking Reagents | Serum proteins, BSA, casein | Reduce non-specific binding | Should match species of secondary antibody |
| Mounting Media | Aqueous, Organic | Preserve staining and enable visualization | Consider compatibility with automated scanning systems |
Advanced Applications and Future Perspectives
Current Applications in Research and Diagnostics
IHC serves indispensable roles across scientific and clinical domains, with applications spanning diagnostic, prognostic, predictive, and therapeutic contexts [73]. In diagnostic pathology, IHC aids in lesion identification, tumor classification, and determination of primary site for metastatic carcinomas of unknown origin [73]. For prognostic applications, IHC provides information about disease progression and patient outcomes, while predictive applications focus on forecasting response to specific therapies [73]. Therapeutically, IHC helps identify targets for directed treatments and assesses treatment efficacy [73].
In breast cancer diagnostics, IHC biomarkers including estrogen receptor (ER), progesterone receptor (PgR), HER2, and Ki-67 are essential for clinical categorization and treatment decisions [58]. For non-small cell lung cancer (NSCLC), HER2 IHC testing is recommended to assess for HER2 protein overexpression (IHC 3+), with specific scoring criteria adapted from gastric cancer guidelines [99].
Emerging Technologies and Future Directions
Virtual Staining and AI Deep generative models offer promising approaches for virtual staining, particularly for breast cancer biomarkers (HER2, PgR, ER, Ki-67) [58]. These AI models can generate virtual IHC images from standard H&E-stained samples, potentially reducing costs, preserving tissue specimens, and decreasing laboratory workload [58]. By giving an indication of IHC results from H&E samples alone, virtual staining could reduce diagnostic turnaround times and improve accessibility in resource-limited settings [58].
Multiplexed Imaging and Mass Spectrometry Integration The integration of mass tags with mass spectrometry imaging (MSI) represents a cutting-edge approach that overcomes the throughput limitations of conventional IHC [29]. This technology enables highly multiplexed protein detection within tissue sections, with two main categories of mass tags:
- Inorganic Mass Tags (IMTs): Include metal elements and lanthanides [29]
- Organic Mass Tags (OMTs): Include rhodamine mass tags, boric acid mass tags, and photocleavable mass tags [29]
These advancements in multiplexed detection facilitate comprehensive molecular profiling while maintaining spatial context, offering new insights into clinical diagnostic and therapeutic strategies [29].
The evolution of IHC interpretation from qualitative assessment to quantitative analysis represents a significant advancement in pathology and research. While qualitative and semi-quantitative approaches remain valuable for diagnostic applications, quantitative methods offer enhanced precision, reproducibility, and statistical power essential for research and drug development. The integration of digital pathology, artificial intelligence, and multiplexed imaging technologies continues to expand the capabilities of IHC, promising more comprehensive tissue analysis and improved patient care. As these technologies mature, standardized protocols and validation frameworks will be crucial for ensuring reliability and adoption across research and clinical settings.
Multiplex immunohistochemistry (mIHC) has emerged as a transformative technique that enables simultaneous detection of multiple antigens in a single tissue section, providing deep insights into cellular complexity and spatial organization for advanced biomedical research [52]. By moving beyond the "one marker per slide" paradigm of traditional IHC, mIHC offers powerful capabilities for unraveling the complexities of the tissue microenvironment, from tumor immunology to neuroscience [100]. However, the increased power of mIHC comes with substantial technical challenges that necessitate rigorous validation protocols to ensure data reliability and reproducibility.
The validation of mIHC panels requires concerted efforts to optimize and validate multiplex staining protocols prior to their application on patient samples or in research studies [54]. As the Society for Immunotherapy of Cancer emphasizes in their recent best practice guidelines, proper validation is essential as these technologies mature and move toward clinical use [54]. This application note provides a comprehensive framework for validating mIHC panels, addressing both technical hurdles and analytical considerations to generate robust, reproducible data for tissue integration analysis research.
Technical Hurdles in Multiplex IHC and Strategic Solutions
Key Technical Challenges
Researchers face several significant technical hurdles when developing and implementing mIHC panels. The table below summarizes the four primary challenges and corresponding solutions:
Table 1: Key Technical Challenges in Multiplex IHC and Recommended Solutions
| Challenge | Impact on Research | Recommended Solution |
|---|---|---|
| Antibody Host Species Restrictions [100] | Limits antibody panel design; prevents use of optimal antibodies from same species | Use species-independent detection methods (e.g., TSA amplification) [100] |
| Signal vs. Noise Dilemma [100] | Weak signals difficult to distinguish from background; photobleaching in fluorescence | Implement tyramide signal amplification (TSA) for bright, stable signals [100] |
| Tissue Damage from Harsh Stripping [100] | Damages morphology; destroys/masks antigens; poor reproducibility | Utilize gentle elution processes that preserve tissue integrity [100] |
| Multi-Day Workflows [100] | Creates research bottlenecks; stretches experiments across days | Adopt streamlined protocols with rapid elution for same-day completion [100] |
Antibody Validation and Panel Design Considerations
Successful mIHC hinges on the use of highly specific, validated, and reproducible antibody clones. Rigorous antibody validation is critical to avoid false positives and signal cross-talk [52]. Key validation strategies include:
- Testing on control tissues: Use positive and negative control tissues or cell lines with and without antigen expression [52]
- Isotype and knockout controls: Employ isotype controls and "knockout" validation with genetically modified models [52]
- Titration and single-plex testing: Optimize under intended experimental conditions (fixation, retrieval, tissue type) [52]
- Subcellular localization assessment: Compare observed tissue distribution to canonical patterns [52]
A rational antibody panel must avoid cross-reactivity and consider species/isotype compatibility, epitope stability across sequential staining, and fluorophore/chromogen compatibility to avoid spectral overlap [52]. Panel validation should begin with each antibody as a single stain, ensuring specificity and sensitivity before combining, and proceed with panel-wise optimization for signal-to-noise, sequence, and antigen retrieval compatibility [52].
Analytical Validation Framework for Multiplex IHC
Validation Parameters and Standards
Analytical validation ensures that mIHC assays reliably detect the intended targets with appropriate sensitivity, specificity, and reproducibility. The College of American Pathologists (CAP) updated their guidelines in 2024 to include specific recommendations for IHC assays, many of which apply to multiplex platforms [88].
Table 2: Key Analytical Validation Parameters for Multiplex IHC Panels
| Validation Parameter | Recommended Approach | Acceptance Criteria |
|---|---|---|
| Precision/Reproducibility [88] | Run validation set on different instruments over multiple days by different personnel | ≥90% concordance for all IHC assays [88] |
| Accuracy [88] | Compare to non-immunohistochemical method (flow cytometry, FISH) or validated IHC assay | Performance characteristics equivalent to gold standard |
| Sensitivity/Specificity [52] | Test on positive/negative control tissues; use knockout validation | Minimal false positives/negatives; clear signal discrimination |
| Assay Robustness [101] | Pressure testing with known artifacts; check spectral bleed, TSA blocking | Consistent performance across anticipated variables |
| Multiplex Validation [102] | Validate each marker individually then in combination; compare to monoplex IHC | Equivalent sensitivity to conventional IHC for each marker |
For assays with distinct scoring systems employed depending on tumor site or clinical indication, laboratories should separately validate each assay-scoring system combination [88]. Additionally, when applying IHC to cytology specimens fixed differently from tissues used for initial validation, separate validations with a minimum of 10 positive and 10 negative cases are recommended [88].
Image Analysis and Data Management Validation
The digital image processing pipeline for mIHC assays must also be validated and optimized, with quality assurance and quality controls applied to all steps from image acquisition and processing through final data output [54]. Key considerations include:
- Image acquisition: Use calibrated scanners, well-focused images, and reduced tiling effects [54]
- Color deconvolution and spectral unmixing: Essential for accurate assignment of marker expression in both mIHC and multiplex IF [54]
- Tissue and cell segmentation: Critical for single-cell resolution analysis [54]
- Batch-to-batch correction: Quality control measure to ensure consistency [54]
For region of interest (ROI) selection, whole slide imaging followed by automated ROI detection has been shown to improve the signal-to-noise ratio for certain mIF assays, resulting in improved predictive value [54]. This approach also reduces potential selection bias, which will benefit standardizing outputs across studies and institutions.
Experimental Protocols for Multiplex IHC Validation
Comprehensive Panel Validation Workflow
The following diagram illustrates the end-to-end workflow for developing and validating a multiplex IHC panel:
Tyramide Signal Amplification (TSA) Protocol
TSA is a cornerstone technique in high-sensitivity, high-resolution multiplex IHC, particularly valuable for detecting low-abundance targets [52]. The protocol below details the steps for TSA-based sequential staining:
Protocol: TSA-Based Sequential Multiplex IHC
Tissue Preparation
- Cut formalin-fixed, paraffin-embedded (FFPE) sections at 4-5μm thickness
- Perform deparaffinization and rehydration through xylene and graded ethanol series
- Conduct antigen retrieval using appropriate buffer (e.g., citrate, EDTA) and method (heat-induced epitope retrieval recommended)
Primary Antibody Incubation
- Apply species-validated primary antibody at optimized concentration
- Incubate for appropriate time and temperature (typically 1 hour at room temperature or overnight at 4°C)
- Wash with appropriate buffer to remove unbound antibody
HRP-Conjugated Secondary Application
- Apply HRP-conjugated secondary antibody specific to primary antibody host species
- Incubate for 30-60 minutes at room temperature
- Wash thoroughly to remove unbound secondary antibody
Tyramide Signal Amplification
- Prepare tyramide-fluorophore conjugate working solution per manufacturer instructions
- Apply to tissue section and incubate for 2-10 minutes (optimize for each target)
- Stop reaction by washing with appropriate buffer
Antibody Elution (for Sequential Rounds)
- Apply gentle elution buffer (not harsh stripping buffer) to remove primary-secondary antibody complexes
- Validate complete removal by verifying absence of signal
- Repeat steps 2-5 for subsequent targets with different fluorophores
Counterstaining and Mounting
- Apply nuclear counterstain (e.g., DAPI) if using fluorescence detection
- Apply appropriate mounting medium
- Seal coverslip for preservation
Critical Considerations:
- The covalent deposition of tyramide enables permanent labeling of the tissue at the site of enzymatic activity [52]
- A single HRP molecule can catalyze the deposition of hundreds to thousands of tyramide molecules, improving sensitivity by up to 100-fold compared to standard IHC [52]
- Careful optimization is required to prevent cumulative tissue damage from repeated HRP reactions and to ensure complete antibody removal between cycles [52]
Validation Against Chromogenic IHC Protocol
For predictive biomarkers intended for clinical use, validation against established chromogenic IHC is essential:
Sample Selection
- Select 20-30 FFPE samples covering expression range (negative, weak, moderate, strong)
- Include positive and negative controls as defined by clinical guidelines
Parallel Staining
- Perform conventional chromogenic IHC with DAB development
- Perform multiplex IHC with fluorescence detection
- Ensure identical antigen retrieval conditions for both methods
Quantitative Comparison
Statistical Analysis
- Calculate correlation coefficients for continuous measures
- Determine Cohen's kappa for categorical assessments
- Assess inter-observer variability among pathologists
The Scientist's Toolkit: Essential Research Reagent Solutions
Table 3: Essential Research Reagents and Materials for Multiplex IHC Validation
| Reagent/Material | Function | Application Notes |
|---|---|---|
| Validated Primary Antibodies [52] | Binds specific target antigens | Use recombinant monoclonal antibodies for lot-to-lot consistency; validate with knockout tissues |
| Tyramide Signal Amplification Kits [100] [52] | Signal amplification for low-abundance targets | Enables detection of targets with up to 100-fold greater sensitivity; compatible with sequential staining |
| Species-Specific Secondary Antibodies [52] | Detection of primary antibodies | Conjugated to enzymes (HRP) or fluorophores; critical for indirect detection methods |
| Multispectral Imaging System [54] [101] | Image acquisition and spectral unmixing | Enables separation of overlapping signals; essential for high-plex fluorescence panels |
| Automated Staining Platform [101] [102] | Standardized assay performance | Improves reproducibility and throughput; essential for clinical trial samples |
| Cell Lines and Control Tissues [101] | Assay controls and validation | Use lines/tissues expressing endogenous levels of target; avoid overexpression models |
The validation of multiplex IHC panels requires a systematic approach that addresses both technical hurdles in staining and analytical challenges in image analysis and data interpretation. By implementing the frameworks and protocols outlined in this application note, researchers can overcome the key challenges of antibody species restrictions, signal-to-noise optimization, tissue preservation, and workflow efficiency.
As multiplex IHC technologies continue to evolve and move toward clinical implementation, adherence to rigorous validation standards and guidelines will be essential for generating reliable, reproducible data. The integration of automated platforms, advanced imaging systems, and computational analysis tools will further enhance the robustness and throughput of multiplex IHC, ultimately advancing its application in both research and clinical diagnostics for improved understanding of tissue microenvironment biology.
Post-analytical variables in immunohistochemistry (IHC)—such as scoring systems, data interpretation, and visualization—significantly impact reproducibility in tissue integration studies. Inconsistent scoring protocols and inadequate data presentation can obscure biological insights, particularly in biomarker-driven drug development. This protocol provides standardized workflows for scoring, data tabulation, and visualization to minimize variability, leveraging IHC best practices and spatial analysis techniques [103] [104].
Quantitative Data Presentation
Structured tables summarize critical IHC data, enabling direct comparison of antibody performance, scoring outcomes, and analytical parameters. Below are standardized templates for reporting:
Table 1: Antibody Validation Metrics in IHC Biomarker Studies
| Antibody Target | Clone/Reagent | Specificity (Western Blot) | Correlation (Pearson’s r²) | Prognostic Significance (Log-Rank P-value) |
|---|---|---|---|---|
| Estrogen Receptor (ER) | 1D5 | Confirmed (MCF-7/BT474 cells) | 0.94–0.96 vs. other ER clones | Not assessed |
| EGFR | 31G7 | Confirmed | 0.61 vs. 2-18C9 | 0.06 (high expression → worse prognosis) |
| EGFR | H11 | Not specified | Weak correlation with other clones | 0.015 (high expression → worse prognosis) |
| EGFR | 2-18C9 | Confirmed | 0.61 vs. 31G7 | Not significant |
| HER3 | RTJ1 | Non-specific | Non-reproducible | Not significant |
Data derived from breast cancer cohort (n=642) and lung cancer cohort (n=42) [103].
Table 2: Scoring System Comparison for IHC Biomarker Quantification
| Scoring Method | Advantages | Limitations | Suitable for |
|---|---|---|---|
| Quantitative Immunofluorescence | High precision; continuous data | Requires specialized equipment | Biomarkers with continuous expression (e.g., ER) |
| Semi-Quantitative (e.g., H-score) | Simple; widely adopted | Subject to interpreter bias | Categorical biomarkers (e.g., EGFR in breast cancer) |
| Binary (Positive/Negative) | Fast; clinically applicable | Loses granularity | Biomarkers with clear cutoffs (e.g., PD-L1) |
Based on IHC standardization guidelines [103] [105].
Experimental Protocols
Protocol 1: Standardized IHC Scoring for Reproducibility
Objective: Minimize inter-observer variability in IHC scoring for tissue-based biomarkers. Materials:
- FFPE tissue sections stained via IHC
- Light microscope or automated imaging system
- Validated antibodies (e.g., ER SP1, EGFR 31G7) [103]
Steps:
- Pre-Analytical Setup:
- Use controls (positive/negative) for each staining batch.
- Optimize antigen retrieval: Heat-induced retrieval (citrate buffer, pH 6) for ER SP1; proteinase K (5 min, RT) for EGFR 31G7 [103].
Scoring Workflow:
- Digital Quantification:
- Capture whole-slide images.
- Use image analysis software (e.g., ImageJ) to measure staining intensity (0–3 scale) and percentage of positive cells.
- Calculate H-score: (3 × % strong staining) + (2 × % moderate) + (1 × % weak) [103].
- Pathologist Assessment:
- Two blinded pathologists score slides independently.
- Resolve discrepancies via consensus review.
- Digital Quantification:
Data Recording:
- Record scores in structured tables (see Table 1).
- Validate with survival analysis (e.g., log-rank test for EGFR) [103].
Protocol 2: Spatial RNA-Protein Correlation in Gastroesophageal Tissues
Objective: Integrate single-molecule RNA in situ hybridization (smRNA-ISH) with IHC for spatial validation. Materials:
- RNAscope 2.5 HD Reagent Kit (Fast Red dye)
- Target-specific antibodies (e.g., anti-KRT17 for basal epithelial cells) [104]
Steps:
- Tissue Preparation:
- Fix gastroesophageal tissues in 4% PFA.
- Embed in paraffin and section at 5 µm.
Multiplexed Staining:
- Perform smRNA-ISH for target transcripts (e.g., DKK2, KREMEN1) per RNAscope protocol.
- Add immunofluorescence (IF) for proteins (e.g., P63):
- Block with 5% BSA, incubate with primary antibody (1:200), then Alexa Fluor–conjugated secondary antibody [104].
Imaging & Analysis:
- Use confocal or light-sheet microscopy (e.g., ZEISS Lightsheet 7).
- Overlay RNA (red) and protein (green) signals to identify co-localization.
Visualization Workflows
Diagram 1: IHC Scoring Standardization Pathway
Diagram 2: Spatial RNA-Protein Integration Workflow
Research Reagent Solutions
Table 3: Essential Reagents for IHC and Spatial Analysis
| Reagent/Category | Function | Example Products |
|---|---|---|
| Validated Primary Antibodies | Target-specific biomarker detection | ER SP1 (Thermo Fisher); EGFR 31G7 (Zymed/Invitrogen) [103] |
| Antigen Retrieval Buffers | Unmask epitopes in FFPE tissues | Sodium citrate (pH 6); Tris/EDTA (pH 9) [103] |
| RNA-Protein Staining Kits | Simultaneous RNA and protein detection | RNAscope 2.5 HD Kit (Fast Red); Alexa Fluor secondaries [104] |
| Tissue Clearing Reagents | Enable 3D imaging in whole-mount tissues | CUBIC reagents (Urea, Quadrol) [106] |
| Mounting Media with DAPI | Nuclear counterstaining for microscopy | ProLong Gold with DAPI (Molecular Probes) [103] |
Conclusion
Immunohistochemistry remains an indispensable technique for tissue integration analysis, bridging cellular morphology with molecular expression. Mastering IHC requires careful attention to each step of the process—from controlled specimen preparation and optimized staining protocols to rigorous validation and standardized interpretation. The adoption of evidence-based guidelines has significantly improved laboratory practices and data reliability. Future directions point toward increased automation, the expanded use of multiplexed staining to decipher complex cellular interactions within the tumor microenvironment, and the development of more sophisticated digital pathology tools for objective, high-throughput analysis. By adhering to these principles and leveraging new technologies, researchers can maximize the potential of IHC to generate robust, clinically relevant insights in biomedical research and therapeutic development.
References
- 1. Immunohistochemistry (IHC) | Cell Signaling Technology [https://www.cellsignal.com/learn-and-support/overview-of-ihc]
- 2. Overview of Immunohistochemistry (IHC) [https://www.thermofisher.com/us/en/home/life-science/protein-biology/protein-biology-learning-center/protein-biology-resource-library/pierce-protein-methods/overview-immunohistochemistry.html]
- 3. Intro to Immunohistochemistry (IHC) Staining: Steps & Best ... [https://www.leicabiosystems.com/us/knowledge-pathway/immunohistochemistry-an-overview-steps-to-better-ihc-staining/]
- 4. 免疫组化-IHC-免疫组织化学技术 - 赛默飞 [https://www.thermofisher.cn/cn/zh/home/life-science/cell-analysis/cellular-imaging/ihc.html]
- 5. Quantitative immunohistochemistry (IHC) analysis of ... [https://pmc.ncbi.nlm.nih.gov/articles/PMC8339853/]
- 6. Immunohistochemistry (IHC): The Complete Guide [https://www.antibodies.com/applications/immunohistochemistry]
- 7. Different approaches for interpretation and reporting of ... [https://diagnosticpathology.biomedcentral.com/articles/10.1186/s13000-014-0221-9]
- 8. Systematic review and feasibility study on pre-analytical ... [https://www.nature.com/articles/s41598-024-69285-8]
- 9. Immunohistochemistry (IHC): Experimental Protocols and ... [https://www.antibodysystem.com/archive/387.html]
- 10. Effect of Immunohistochemistry on Molecular Analysis of ... [https://pmc.ncbi.nlm.nih.gov/articles/PMC3201191/]
- 11. FFPE vs Frozen Tissue Samples [https://www.biochain.com/blog/ffpe-vs-frozen-tissue-samples/]
- 12. FFPE vs. Fresh Frozen Tissue: Which is Better? [https://superiorbiodx.com/blog/ffpe-vs-frozen-tissue/]
- 13. FFPE vs. Frozen Tissue Samples - iProcess Global Research [https://iprocess.net/ffpe-vs-frozen-tissue-samples/]
- 14. Fresh frozen vs FFPE samples for next-generation ... [https://www.lexogen.com/blog/fresh-frozen-vs-ffpe-samples-for-next-generation-sequencing-studies/]
- 15. Advantages and Drawbacks of Paraffin and Frozen Tissues [https://waxitinc.com/advantages-and-drawbacks-of-paraffin-and-frozen-tissues-2/]
- 16. IHC-Frozen protocols [https://www.abcam.com/en-us/technical-resources/protocols/ihc-with-frozen-samples]
- 17. Tips and Techniques for Troubleshooting ... [https://www.sigmaaldrich.com/US/en/technical-documents/protocol/protein-biology/immunohistochemistry/antibody-immunohistochemistry-expert-tips-and-techniques?srsltid=AfmBOop6beohRF5MrwuTHx5K7TF5ypRddySJTsVik1pCXuSTDx_p49K2]
- 18. Immunohistochemistry Protocols [https://www.antibodies.com/applications/immunohistochemistry/ihc-protocol]
- 19. Comparison of Clinical Targeted Next-Generation ... [https://www.sciencedirect.com/science/article/pii/S1525157813000913]
- 20. Fresh and frozen cardiac tissue are comparable in DNA ... [https://www.nature.com/articles/s41598-023-43788-2]
- 21. Using Unmasking For... | Vector Labs Epitopes Antigen Retrieval [https://vectorlabs.com/blog/unmasking-epitopes-using-antigen-retrieval/]
- 22. : Uncovering Antigen Masking to Improve... - Cusabio Retrieval Antigen [https://www.cusabio.com/c-21205.html]
- 23. A novel quantitative immunohistochemistry method for ... [https://www.nature.com/articles/modpathol2016176]
- 24. Antigen Retrieval Immunohistochemistry [https://pmc.ncbi.nlm.nih.gov/articles/PMC3201121/]
- 25. IHC antigen protocol | Abcam retrieval [https://www.abcam.com/en-us/technical-resources/protocols/ihc-antigen-retrieval]
- 26. Immunohistochemistry staining [https://www.abcam.com/en-us/knowledge-center/immunohistochemistry/ihc-staining]
- 27. Epitope binning for multiple antibodies simultaneously ... [https://www.nature.com/articles/s42003-024-06363-7]
- 28. Characterizing Epitope Binding Regions of Entire Antibody ... [https://pmc.ncbi.nlm.nih.gov/articles/PMC7464469/]
- 29. Advancing tissue analysis: Integrating mass tags with ... [https://www.sciencedirect.com/science/article/abs/pii/S1874391925000636]
- 30. Considerations When Selecting A Primary Antibody [https://vectorlabs.com/blog/considerations-when-selecting-a-primary-antibody/?srsltid=AfmBOop99mYG57RFvknI45CIB7U0wHlaoBGzWcfmw5VtKW6g17173aZ4]
- 31. How to choose and use antibodies [https://www.abcam.com/en-us/technical-resources/guides/antibody-basics/how-to-choose-and-use-antibodies]
- 32. Important Considerations for Antibody Selection - CST Blog [https://blog.cellsignal.com/antibody-essentials-part-5-important-considerations-for-antibody-selection]
- 33. Selecting Antibodies For IHC [https://www.ptglab.com/support/immunohistochemistry-protocol/selecting-antibodies-for-ihc/?srsltid=AfmBOor16AIG0TnTjAmJA8HLT0UcyRgH8_ohmjT2DvudFCtsFyJ6JYfP]
- 34. A consensus platform for antibody characterization [https://www.protocols.io/view/a-consensus-platform-for-antibody-characterization-dnum5eu6.html]
- 35. Immunohistochemistry for Pathologists: Protocols, Pitfalls, ... [https://pmc.ncbi.nlm.nih.gov/articles/PMC5122731/]
- 36. Chromogenic IHC Staining Protocol of Paraffin-embedded ... [https://www.rndsystems.com/resources/protocols/protocol-preparation-and-chromogenic-ihc-staining-paraffin-embedded-tissue]
- 37. A novel automated IHC staining system for quality control ... [https://pmc.ncbi.nlm.nih.gov/articles/PMC11864879/]
- 38. IHC Counterstains | Thermo Fisher Scientific - US [https://www.thermofisher.com/us/en/home/life-science/protein-biology/protein-biology-learning-center/protein-biology-resource-library/pierce-protein-methods/ihc-counterstains.html]
- 39. Mayer's Hematoxylin Protocol [https://ihcworld.com/2024/01/21/mayers-hematoxylin-protocol/]
- 40. IHC Counterstains for Enzyme/Chromogen and ... [https://www.enzo.com/note/ihc-counterstains-for-enzyme-chromogen-and-fluorescent-immunostaining/]
- 41. IHC training | Abcam [https://go.myabcam.com/ihc-training-part-3?elqTrackId=b99a5cbc0f514491a86797d1dcd2c742&elq=00000000000000000000000000000000&elqaid=2050&elqat=2&elqCampaignId=&elqak=8AF5347A32AE47221187AABBC85FE8C3F80079AED0F3B1C0DA87BA1BA3437B9834C7]
- 42. Choosing Detection Techniques for IHC/ISH: Fluorescence ... [https://www.leicabiosystems.com/us/educational-resources/webinars/selecting-the-right-detection-for-your-ihcish-project-fluorescence/]
- 43. A fully automated quantitative analysis method based on ... [https://www.sciencedirect.com/science/article/pii/S2950261625000342]
- 44. IHC vs IF: Key Differences, Use Cases & Which to Choose [https://www.ihisto.io/post/ihc-vs-if-comparison]
- 45. Chromogenic vs. Fluorescent Techniques [https://www.celnovte.com/solution/multiplex-immunohistochemistry-chromogenic-vs-fluorescent-techniques/]
- 46. IHC Detection Systems: Advantages and Disadvantages [https://www.novusbio.com/ihc-detection?srsltid=AfmBOoohm0WR6O0eWunn7oFxQsgHtKdR41B_tvnUz-NJGZ5MOuZRC00c]
- 47. Advantages and limitations of 3,3',5,5' [https://pubmed.ncbi.nlm.nih.gov/40017395/]
- 48. IHC or IF: Which is Best for My Study? [https://www.stagebio.com/blog/ihc-or-if-which-is-best-for-my-study]
- 49. Comparison of Semi-Quantitative Scoring and Artificial ... [https://pmc.ncbi.nlm.nih.gov/articles/PMC8774232/]
- 50. Immunohistochemistry (Histology + Imaging)-Mendelsohn ... [https://www.protocols.io/view/immunohistochemistry-histology-imaging-mendelsohn-dyuq7wvw.html]
- 51. Automated measurement of estrogen receptor in breast ... [https://www.sciencedirect.com/science/article/pii/S0023683722011916]
- 52. Multiplex immunohistochemistry (mIHC): A technical deep ... [https://www.abcam.com/en-us/knowledge-center/immunohistochemistry/multiplex-immunohistochemistry-mihc]
- 53. Optimizing mIHC Techniques: Strategies for High Precision ... [https://www.celnovte.com/solution/optimizing-mihc-techniques-strategies-for-high-precision-results/]
- 54. Society for Immunotherapy of Cancer - PubMed Central - NIH [https://pmc.ncbi.nlm.nih.gov/articles/PMC11749220/]
- 55. Multiplex immunohistochemistry accurately defines the ... [https://www.nature.com/articles/s41598-018-28944-3]
- 56. Single-cell transcriptomic analysis of mIHC images via ... [https://pmc.ncbi.nlm.nih.gov/articles/PMC7935366/]
- 57. How Immunohistochemistry (IHC) Works — In One Simple ... [https://www.linkedin.com/pulse/how-immunohistochemistry-ihc-works-one-simple-6h1uc/]
- 58. H&E to IHC virtual staining methods in breast cancer [https://www.nature.com/articles/s41746-025-01741-9]
- 59. How to quantify of DAB staining using FIJI, like CD8 [https://forum.image.sc/t/how-to-quantify-of-dab-staining-using-fiji-like-cd8/38353]
- 60. AI-Powered histopathology slide image interpretation in ... [https://pmc.ncbi.nlm.nih.gov/articles/PMC12576219/]
- 61. 14 Comparing quantitative data between individuals [https://bookdown.org/pkaldunn/SRM-Textbook/BetweenQuantData.html]
- 62. Machine learning methods for histopathological image ... [https://www.sciencedirect.com/science/article/pii/S2001037024004549]
- 63. Different approaches for interpretation and reporting of immunohistochemistry analysis results in the bone tissue – a review - PMC [https://pmc.ncbi.nlm.nih.gov/articles/PMC4260254/]
- 64. Reproducibility of Immunohistochemical Testing of Estrogen ... [https://www.frontierspartnerships.org/journals/british-journal-of-biomedical-science/articles/10.3389/bjbs.2025.15455/full]
- 65. Current status and challenges in HER2 IHC assessment: scoring survey results in Japan | Breast Cancer Research and Treatment [https://link.springer.com/article/10.1007/s10549-024-07532-2]
- 66. Deep Learning-Guided Quantitative Analysis Establishes ... [https://www.sciencedirect.com/science/article/abs/pii/S0023683725001254]
- 67. Synergistic H&E and IHC image analysis by AI predicts ... [https://www.nature.com/articles/s43856-025-01045-9]
- 68. Immunohistochemistry (IHC) Troubleshooting Guide & the Importance of Using Controls | Cell Signaling Technology [https://www.cellsignal.com/learn-and-support/troubleshooting/ihc-troubleshooting-guide]
- 69. Tips and Techniques for Troubleshooting Immunohistochemistry (IHC) [https://www.sigmaaldrich.com/US/en/technical-documents/protocol/protein-biology/immunohistochemistry/antibody-immunohistochemistry-expert-tips-and-techniques]
- 70. Immunohistochemistry Troubleshooting [https://www.antibodies.com/applications/immunohistochemistry/ihc-troubleshooting]
- 71. Immunohistochemistry Troubleshooting | Tips & Tricks [https://www.stressmarq.com/support/technical-support/troubleshooting/immunohistochemistry-troubleshooting/]
- 72. IHC Troubleshooting Guide [https://www.thermofisher.com/us/en/home/life-science/protein-biology/protein-biology-learning-center/protein-biology-resource-library/pierce-protein-methods/ihc-troubleshooting-guide.html]
- 73. Review of immunohistochemistry techniques: Applications, ... [https://www.sciencedirect.com/science/article/abs/pii/S0740257024000467?utm_source=chatgpt.com]
- 74. How to Eliminate Non Specific Binding of Antibody Oligo ... [https://www.aboligo.com/blog/knowledge-hub-1/how-to-eliminate-non-specific-binding-of-antibody-oligo-conjugates-17]
- 75. Blocking with immunizing peptide protocol [https://www.abcam.com/en-us/technical-resources/protocols/blocking-with-immunizing-peptides]
- 76. a pilot study to identify the best fixation and decalcification ... [https://pmc.ncbi.nlm.nih.gov/articles/PMC12142299/]
- 77. Mount Sinai Scientists Create AI-Powered Tool to Improve ... [https://www.mountsinai.org/about/newsroom/2025/mount-sinai-scientists-create-ai-powered-tool-to-improve-cancer-tissue-analysis]
- 78. TUNEL protocol that preserves protein antigenicity for co [https://www.protocols.io/view/tunel-protocol-that-preserves-protein-antigenicity-ddus26we.html]
- 79. Sheet Protector Strategy for Western Blot to Reduce ... [https://pmc.ncbi.nlm.nih.gov/articles/PMC12462392/]
- 80. Quantitative comparison of immunohistochemical staining ... [https://pmc.ncbi.nlm.nih.gov/articles/PMC3379953/]
- 81. Signal-to-noise ratio analysis and improvement for ... [https://pmc.ncbi.nlm.nih.gov/articles/PMC7656320/]
- 82. Artificial neural network for enhancing signal-to-noise ratio ... [https://www.nature.com/articles/s41598-024-60682-7]
- 83. Blocking Strategies for IHC [https://www.thermofisher.com/us/en/home/life-science/protein-biology/protein-biology-learning-center/protein-biology-resource-library/pierce-protein-methods/blocking-strategies-ihc.html]
- 84. Methods to Block Endogenous Detection [https://www.thermofisher.com/us/en/home/life-science/protein-biology/protein-biology-learning-center/protein-biology-resource-library/pierce-protein-methods/methods-block-endogenous-detection.html]
- 85. Blocking in IHC [https://www.abcam.com/en-us/technical-resources/guides/ihc-guide/blocking-in-ihc]
- 86. Fc Receptor Binding Inhibitor Polyclonal Antibody (14- ... [https://www.thermofisher.com/antibody/product/Fc-Receptor-Binding-Inhibitor-Antibody-Polyclonal/14-9161-73]
- 87. Antibody Functional Assays as Measures of Fc Receptor ... [https://pmc.ncbi.nlm.nih.gov/articles/PMC5543561/]
- 88. Principles of Analytic Validation of Immunohistochemical ... [https://www.cap.org/protocols-and-guidelines/cap-guidelines/current-cap-guidelines/principles-of-analytic-validation-of-immunohistochemical-assays]
- 89. Principles of Analytic Validation of Immunohistochemical ... [https://www.guidelinecentral.com/guideline/24377]
- 90. 免疫组织化学(IHC) 疑难排除指南和使用对照的重要性 [https://www.cellsignal.cn/learn-and-support/troubleshooting/ihc-troubleshooting-guide]
- 91. Validating your H&E Staining Systems [https://www.leicabiosystems.com/us/knowledge-pathway/validating-your-he-staining-systems/]
- 92. 免疫组织化学操作步骤 [https://www.sigmaaldrich.com/HK/zh/technical-documents/protocol/protein-biology/immunohistochemistry/immunohistochemistry-protocol?srsltid=AfmBOop6RZAxhf_qDKCab9vOFzJzuhE-g6z6K0HKQ4RQeT7CItgoJZGz]
- 93. IHC Protocol [https://www.bostonbioproducts.com/resources/ihc-protocol/]
- 94. Quality and safety aspects in histopathology laboratory - PMC [https://pmc.ncbi.nlm.nih.gov/articles/PMC3927343/]
- 95. Histopathological Considerations for IHC-based Studies [https://waxitinc.com/histopathological-considerations-for-ihc-based-studies/]
- 96. Quantitative comparison of immunohistochemical staining ... [https://diagnosticpathology.biomedcentral.com/articles/10.1186/1746-1596-7-42]
- 97. Immunohistochemistry (IHC) staining and semi-quantitative ... [https://bio-protocol.org/exchange/minidetail?id=16315552&type=30]
- 98. Comparative Analysis of Different Staining Techniques for ... [https://pubmed.ncbi.nlm.nih.gov/40655650/]
- 99. HER2 IHC Testing Updates for mNSCLC [https://www.her2know.com/newsletter/her2-ihc-testing-mnsclc-jan-2025-update.html]
- 100. Overcoming the 4 Key Challenges in Multiplex IHC [https://www.atlasantibodies.com/knowledge-hub/blog/multiplex-ihc-workflow-solutions/]
- 101. Design and Validation of Multiplex Immunofluorescence ... [https://www.leicabiosystems.com/us/life-science-solutions/webinars/design-optimization-and-validation-of-multiplex-immunofluorescence-panels/]
- 102. Analytical validation of automated multiplex chromogenic ... [https://www.sciencedirect.com/science/article/abs/pii/S016950022200037X]
- 103. Analytic Variability in Immunohistochemistry Biomarker Studies [https://pmc.ncbi.nlm.nih.gov/articles/PMC3891912/]
- 104. Integrated protocol for single-cell RNA sequencing ... [https://bmcmethods.biomedcentral.com/articles/10.1186/s44330-025-00035-6]
- 105. Presentation of Quantitative Data [https://ihatepsm.com/blog/presentation-quantitative-data]
- 106. Protocol for integrating tissue clearing and light-sheet ... [https://pmc.ncbi.nlm.nih.gov/articles/PMC11152722/]