From Blueprint to Biocompatibility: Standardizing 3D Bioprinting Protocols for Functional Biomaterials
This article provides a comprehensive guide for researchers, scientists, and drug development professionals on the critical need for and practical steps toward standardizing 3D bioprinting protocols.
From Blueprint to Biocompatibility: Standardizing 3D Bioprinting Protocols for Functional Biomaterials
Abstract
This article provides a comprehensive guide for researchers, scientists, and drug development professionals on the critical need for and practical steps toward standardizing 3D bioprinting protocols. It covers the foundational principles of functional biomaterials and the current lack of standards, details methodological best practices and application-specific protocols, addresses common troubleshooting and optimization strategies, and concludes with frameworks for validation and comparative analysis. The goal is to accelerate the translation of reproducible, high-quality bioprinted constructs from the lab to preclinical and clinical applications.
Defining the Challenge: Why Biomaterial and Bioprinting Standardization is Non-Negotiable
Application Notes
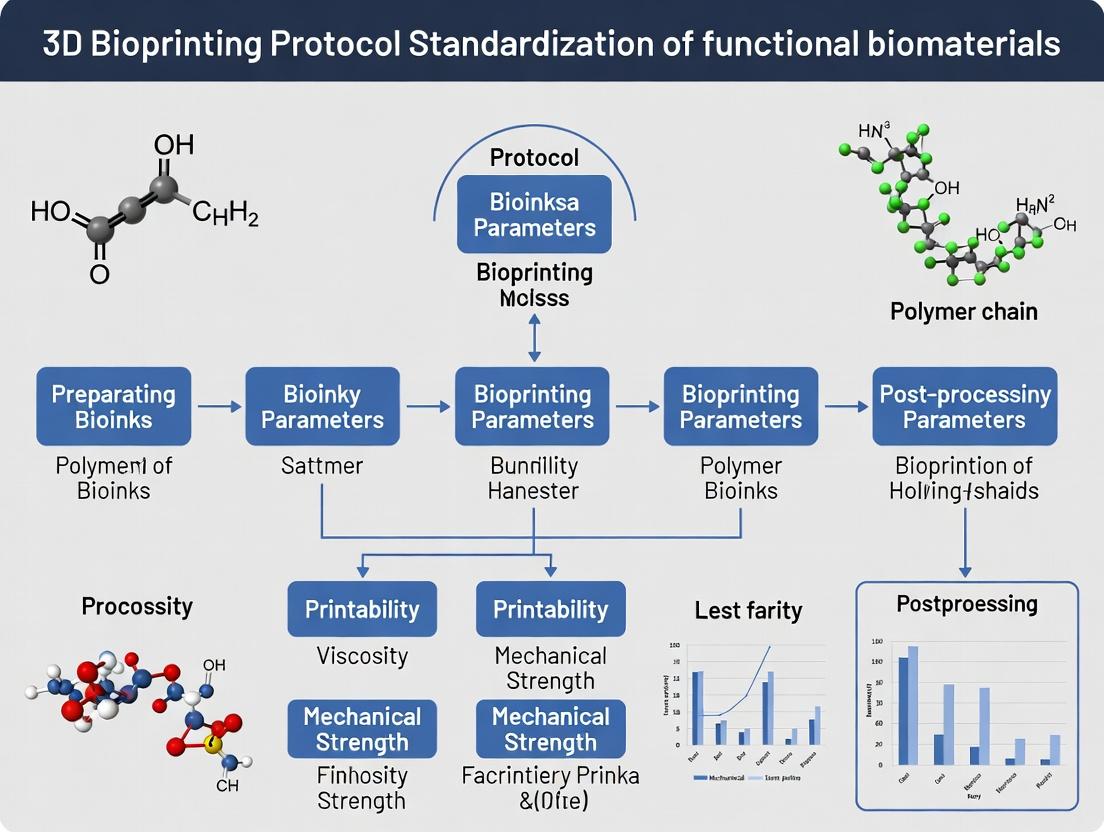
The standardization of 3D bioprinting protocols is critical for advancing functional biomaterials research and ensuring reproducibility in tissue engineering and drug development. This document delineates the interdependent relationship between biomaterial properties, bioink formulation, and printability, establishing a foundational framework for experimental design.
Biomaterial Properties: The intrinsic physicochemical and biological characteristics of the base material(s) form the primary axis. Key properties include mechanical modulus, degradation rate, bioactivity (e.g., presence of cell-adhesive motifs), viscosity, and gelation mechanism (physical, chemical, or photo-crosslinking). These properties dictate cellular response and final construct stability.
Bioink Formulation: This involves the strategic combination of biomaterials, cells, and additives (e.g., growth factors, viscosity modifiers) to create a printable, cell-friendly suspension. The formulation must balance cytocompatibility with printability requirements, often requiring optimization of polymer concentration, crosslinker type, and cell density.
Printability: This functional output encompasses the fidelity, shape retention, and structural integrity of the deposited construct. It is quantitatively assessed via parameters like extrusion uniformity, strand diameter, pore geometry, and the ability to form free-standing structures. Printability is a direct consequence of the formulated bioink's rheological behavior and gelation kinetics.
The triad's interdependence is absolute: modifying a biomaterial property (e.g., polymer molecular weight) alters the bioink's rheology, which directly impacts printability metrics like resolution. Successful protocol standardization requires quantifying each vertex of this triad.
Data Presentation
Table 1: Quantitative Relationships in the Core Triad
| Bioink Component/Property | Typical Value Range | Impact on Viscosity (Pa·s) | Impact on Printability Fidelity | Key Measurement Technique |
|---|---|---|---|---|
| Alginate Concentration | 1–4% (w/v) | 0.1–10 | Increases with concentration up to optimal point, then hinders extrusion | Rotational rheometry |
| Gelatin Methacryloyl (GelMA) Concentration | 5–15% (w/v) | 0.5–50 | Higher conc. improves shape fidelity post-crosslinking | Oscillatory rheometry (G', G'') |
| Cell Density in Bioink | 1–10 x 10^6 cells/mL | Slight increase | High density can clog nozzles; reduces resolution | Hemocytometer / Flow cytometry |
| Printing Temperature | 4–25°C | Decreases with increase | Critical for thermoresponsive inks (e.g., Matrigel, Pluronic) | Temperature-controlled stage |
| Crosslinking Time (UV) | 10–60 seconds | N/A (post-print) | Longer times increase mechanical strength, risk cell viability | Radiometer (for UV dose) |
Table 2: Printability Assessment Metrics
| Metric | Formula/Description | Target Range (for Good Printability) | Standardized Protocol Reference |
|---|---|---|---|
| Strand Diameter Consistency | (Avg. Measured Diameter / Set Diameter) x 100% | 95–105% | Direct imaging & analysis (ImageJ) |
| Pore Area Accuracy | (Measured Pore Area / Designed Pore Area) x 100% | 90–110% | Microscopy of top-down view |
| Shape Fidelity Score | (Area of Printed Construct / Area of Design) x 100 | >85% | Overlay of digital design vs. print image |
| Extrusion Uniformity | Coefficient of Variation of strand width along length | <10% | Line analysis across multiple points |
Experimental Protocols
Protocol 1: Rheological Characterization of Bioink Formulations
Objective: To measure the steady-shear and viscoelastic properties of a bioink, predicting its extrusion behavior and structural integrity post-printing. Materials: See "The Scientist's Toolkit" below. Parallel-plate rheometer (e.g., 25mm diameter, 500μm gap). Procedure:
- Loading: Pre-cool/hear the rheometer stage to printing temperature (e.g., 20°C). Load 200μL of bioink (acellular) onto the center of the lower plate. Lower the upper plate to the set gap.
- Steady-Shear Viscosity: Perform a shear rate sweep from 0.1 to 100 s^-1. This simulates the shear stress experienced during extrusion through the nozzle. Record the apparent viscosity at a shear rate corresponding to your printing parameters (~10-100 s^-1).
- Oscillatory Amplitude Sweep: At a fixed frequency (1 Hz), measure the storage (G') and loss (G'') moduli as a function of shear strain (0.1% to 100%). Identify the linear viscoelastic region (LVR) where G' and G'' are constant.
- Gelation Kinetics: For UV-crosslinkable inks, initiate time sweep with oscillatory strain within LVR and frequency of 1 Hz. After 60s, trigger UV light (e.g., 365 nm, 5 mW/cm²) and monitor the rapid increase in G' for 300s. Analysis: Plot viscosity vs. shear rate (should show shear-thinning). Report G' and G'' at printing-relevant strain. Calculate gelation time (time to reach 90% of plateau G').
Protocol 2: Quantitative Printability Assessment via Grid Structure Printing
Objective: To standardize the evaluation of printing fidelity using a predefined 2D grid test pattern. Materials: Bioprinter, appropriate sterile nozzle (e.g., 22G-27G), substrate (e.g., Petri dish), imaging system (inverted microscope with camera). Procedure:
- Design: Create a 10mm x 10mm grid pattern with 1mm spacing between lines in slicing software.
- Printing: Using optimized pressure and speed parameters, print the grid structure with the test bioink. Use acellular ink for initial assessments. Maintain a constant nozzle height (e.g., 0.2mm) from the substrate.
- Imaging: Allow brief gelation (if applicable). Acquire a high-resolution top-down image of the central 5mm x 5mm area of the grid.
- Image Analysis (using ImageJ/Fiji): a. Strand Diameter: Measure strand width at 10 random points across the image. Calculate average and coefficient of variation. b. Pore Area: Threshold the image to distinguish pores. Use "Analyze Particles" to measure the area of at least 9 central pores. c. Shape Fidelity: Overlay the digital design (scaled to pixels) onto the print image. Calculate the percentage overlap of printed area versus designed area. Analysis: Populate Table 2 with calculated metrics. A bioink with >90% strand consistency, >85% pore accuracy, and >85% shape fidelity is generally considered printable.
Mandatory Visualization
Title: The Interdependent Core Triad of Bioprinting
Title: Standardized Bioink Development and Testing Workflow
The Scientist's Toolkit
Table 3: Essential Research Reagent Solutions for Core Triad Analysis
| Item | Function in Protocol | Example Product/Catalog # (for reference) |
|---|---|---|
| Sodium Alginate, High G-content | Base biomaterial for ionic crosslinking; provides control over viscosity and gel stiffness. | Pronova UP MVG (Novamatrix) |
| Gelatin Methacryloyl (GelMA) | Photocrosslinkable hydrogel base; provides natural cell-adhesive motifs (RGD). | GelMA Kit (Advanced BioMatrix) |
| Photoinitiator (e.g., LAP) | UV-activated catalyst for crosslinking methacrylated polymers (GelMA, PEGDA). | Lithium phenyl-2,4,6-trimethylbenzoylphosphinate (LAP) |
| Calcium Chloride (CaCl₂) Solution | Ionic crosslinker for alginate; used post-print or as a co-axial printing component. | 100mM sterile solution (Sigma-Aldrich, C7902) |
| Rheology Calibration Standard | Validates accuracy of rotational rheometer measurements (e.g., silicone oil). | Silicone Oil, 1000 mPa·s (TA Instruments) |
| Sterile Bioprinting Nozzles | Disposable nozzles for extrusion printing; critical for consistency and avoiding clogs. | 22G-27G conical nozzles (Cellink) |
| UV Light Curing System | Provides controlled-intensity 365nm light for photopolymerization of bioinks. | OmniCure S2000 (Excelitas) |
| Cell Viability Stain (Live/Dead) | Assesses cytocompatibility of the bioink formulation and printing process. | Calcein AM / Ethidium homodimer-1 kit (Thermo Fisher) |
Within 3D bioprinting for functional biomaterials and drug development, the absence of universal standardization hampers reproducibility, data comparison, and clinical translation. This review analyzes existing guidelines from key organizations, summarizes their quantitative parameters, and highlights critical limitations. The context is a broader thesis on developing robust, standardized protocols for 3D bioprinting research.
A review of publicly available guidelines from 2020-2024 reveals a fragmented landscape. Key organizations have published recommendations, but coverage is incomplete.
Table 1: Quantitative Parameters from Selected 3D Bioprinting Guidelines
| Guideline Source (Year) | Scope / Biomaterial Focus | Recommended Bioink Viscosity Range (mPa·s) | Minimum Print Fidelity (µm) | Recommended Cell Viability Threshold (%) | Crosslinking Method Addressed? | Mechanical Test Specified? |
|---|---|---|---|---|---|---|
| ASTM F2944-20 (2022 Update) | General 3D Bioprinting Terminology & Test Methods | 30 - 6x10⁷ | 100 (for extrusion) | >70 (post-printing) | Yes (general) | Yes (compressive) |
| Bioprinting Standards Workshop (NIST) (2023 Report) | Hydrogel-based Bioinks | 10³ - 10⁵ | 50 - 200 | >80 (post-culture) | Yes (detailed) | Yes (rheology) |
| ISO/AWI 20604 (Under Development) | Bioprinting Process Categories | Not specified | Process-dependent | >75 | Yes (categories) | In development |
| TERMIS EU Guidance (2021) | Tissue-Engineered Medical Products | 10² - 10⁶ | Not specified | >90 (for clinical) | Yes (safety) | No |
| Commercial Bioink Provider A (2023) | Propriety Alginate-Gelatin | 45,000 ± 5000 | ~200 | >95 (day 1) | Yes (CaCl₂) | No |
Critical Limitations of Current Guidelines
- Narrow Biomaterial Scope: Most guidelines focus on hydrogel-based systems, neglecting emerging biomaterials like polymer melts, ceramics, or composite suspensions.
- Incomplete Process Chain: Emphasis is on printing parameters, with minimal standardization for pre-processing (biomaterial rheology characterization) and post-processing (maturation, conditioning).
- Lacking Functional Benchmarks: While cell viability is commonly specified, guidelines rarely standardize metrics for functionality (e.g., metabolic activity, contractility, gene expression over time).
- Ambiguous Terminology: Terms like "printability," "fidelity," and "stability" are defined inconsistently across documents.
- Device-Dependency: Parameters are often tied to specific printer types (extrusion, inkjet, SLA), preventing cross-platform comparison.
Application Notes & Detailed Protocols
Application Note 1: Standardized Rheological Profiling for Bioink Qualification
Purpose: To obtain comparable viscosity and shear-thinning data for bioinks prior to printing, addressing a key pre-processing gap. Research Reagent Solutions:
| Item | Function |
|---|---|
| Cone-and-Plate Rheometer | Applies controlled shear stress/strain to measure viscoelastic properties. |
| Parallel Plate Rheometer | Suitable for particle-laden or stiffer inks where gap uniformity is critical. |
| Peltier Temperature Control Unit | Maintains bioink at physiological temperature (e.g., 37°C) during testing. |
| Standard Reference Fluid (e.g., Silicone Oil) | For calibration and validation of rheometer torque/velocity settings. |
Protocol:
- Sample Preparation: Hydrate or prepare bioink as per formulation. Equilibrate to test temperature (e.g., 37°C) for 30 minutes. Load ~500 µL onto rheometer plate, ensuring no air bubbles.
- Flow Ramp Test: Set temperature control to 37°C. Perform a controlled shear rate ramp from 0.1 s⁻¹ to 1000 s⁻¹. Log viscosity (η) versus shear rate.
- Oscillation Amplitude Sweep: At a fixed frequency (1 Hz), apply an oscillatory strain from 0.1% to 100%. Record storage modulus (G') and loss modulus (G''). Identify the linear viscoelastic region (LVR).
- Data Reporting: Report viscosity at shear rates of 0.1 s⁻¹ (resting) and 10 s⁻¹ (approximating extrusion shear). Report the shear-thinning index (viscosity ratio between these points). Report G' and G'' at 1% strain within the LVR.
Application Note 2: Post-Printing Viability & Functional Assessment
Purpose: To standardize the assessment of cell health and early functionality beyond a simple live/dead stain at 24 hours.
Protocol:
- Sample Conditioning: Post-printing/crosslinking, transfer constructs to standard culture conditions (37°C, 5% CO₂). Use a defined medium change schedule (e.g., 50% medium change every 48 hours).
- Viability Quantification (Days 1, 3, 7):
- Rinse constructs with PBS.
- Incubate in working solution of calcein AM (2 µM, stains live cells) and ethidium homodimer-1 (4 µM, stains dead cells) for 45 minutes in the dark.
- Image using confocal microscopy at standardized depths (e.g., z-stacks at 0, 200, 400 µm from top). Use image analysis software (e.g., FIJI) to calculate percentage viability: (Live Cells / (Live+Dead Cells)) * 100.
- Metabolic Activity (AlamarBlue/BrDU Assay on Days 3 & 7):
- Incubate constructs in 10% (v/v) AlamarBlue reagent in culture medium for 3 hours.
- Collect 100 µL of reagent-medium from each sample in triplicate into a 96-well plate.
- Measure fluorescence (Excitation 560 nm, Emission 590 nm). Report as normalized fluorescence units relative to day 1.
Mandatory Visualizations
Title: 3D Bioprinting Workflow & Guideline Gaps
Title: Extrusion Printing Shear Effects on Cells
The drive towards standardized 3D bioprinting protocols is critical for advancing functional biomaterials research. The ultimate thesis—that reproducible, quantitative benchmarks are necessary to translate lab-scale constructs into clinically relevant tissues—hinges on demystifying the core parameters governing cellular viability and function. This document outlines key application notes and experimental protocols to quantify these parameters, providing a framework for cross-laboratory comparison and standardization.
Key Parameters for Viability and Function: Quantitative Benchmarks
Recent literature and live search data indicate that the functionality of 3D-bioprinted constructs is evaluated against a core set of quantitative parameters. The following tables summarize current target benchmarks for common biomaterial systems (e.g., alginate, gelatin methacryloyl (GelMA), hyaluronic acid (HA) derivatives, and composite bioinks).
Table 1: Key Viability & Functional Parameters for Standardized Assessment
| Parameter | Target Benchmark (Day 1-7) | Measurement Technique | Influence on Function |
|---|---|---|---|
| Cell Viability | > 90% (Day 1), > 80% (Day 7) | Live/Dead assay, Calcein AM/PI | Foundation for all tissue function. |
| Metabolic Activity | Continuous increase over 14 days | AlamarBlue, MTT, PrestoBlue | Indicator of proliferative capacity and health. |
| Printability/Fidelity | > 95% shape fidelity | Microscopy, digital analysis | Determines structural integrity for maturation. |
| Compressive Modulus | 2-50 kPa (soft tissue) | Rheometry, uniaxial compression | Mechanical cues direct stem cell differentiation. |
| Degradation Rate | Tuned to tissue growth rate (e.g., 15-30% mass loss in 21 days) | Mass loss, GPC, swelling ratio | Must match extracellular matrix deposition. |
| Oxygen Diffusion | Gradient < 5 kPa/mm in core | Oxygen sensing probes, modeling | Prevents necrotic core formation. |
Table 2: Bioink-Specific Parameter Targets (Current Data)
| Bioink Type | Optimal Crosslinking | Typical Gelation Time | Key Functional Readout |
|---|---|---|---|
| Alginate (Ionic) | 100-200 mM Ca²⁺ | 5-15 minutes | Chondrogenic differentiation (GAG/DNA content). |
| GelMA (Photo) | 0.05-0.1% LAP, 5-20 s UV | 10-60 seconds | Angiogenic sprouting (tube length per node). |
| Fibrin | 10-20 U/mL Thrombin | 1-5 minutes | Cardiomyocyte contractility (beat rate, synchronicity). |
| Hyaluronic Acid-MA | 0.05% LAP, 10-30 s UV | 30-90 seconds | Neurite outgrowth (length, branching). |
| Decellularized ECM | Varies (often thermal) | Minutes to hours | Cell-specific marker expression (qPCR, ICC). |
Detailed Experimental Protocols
Protocol 3.1: Standardized Viability & Metabolic Assessment Post-Bioprinting
Objective: To quantify initial cell health and longitudinal metabolic activity within a 3D-bioprinted construct. Materials:
- Bioprinted construct in 24-well plate.
- Pre-warmed PBS, culture medium.
- Live/Dead Viability/Cytotoxicity Kit (Calcein AM, Ethidium Homodimer-1).
- AlamarBlue Cell Viability Reagent.
- Microplate fluorometer/spectrophotometer.
Procedure:
- Day 1, 3, 7 Post-Print: a. Aspirate medium and gently rinse with 1 mL PBS. b. Live/Dead Staining: Prepare 1 mL of working solution (2 µM Calcein AM, 4 µM Ethidium Homodimer-1 in PBS). Add to construct. Incubate 30 min at 37°C, protected from light. c. Image using confocal microscope (488/515 nm for live; 528/617 nm for dead). Acquire z-stacks from minimum 3 random fields. d. Quantification: Use ImageJ/Fiji with suitable plugins to calculate: % Viability = (Live Cells / (Live+Dead Cells)) * 100.
- Metabolic Assay (Parallel Sample): a. Prepare 10% (v/v) AlamarBlue in culture medium. b. Incubate construct with 500 µL solution for 3 hours at 37°C. c. Transfer 100 µL of supernatant in triplicate to a 96-well black plate. d. Measure fluorescence (Ex 560/Em 590). Subtract background from cell-free bioink control. e. Express data as fold-change relative to Day 1 reading.
Protocol 3.2: Assessing Print Fidelity and Mechanical Properties
Objective: To quantify the accuracy of the printed structure and its compressive modulus. Materials: Stereomicroscope, digital calipers (software-based), uniaxial mechanical tester, PBS. Procedure:
- Shape Fidelity: a. Print a standard test structure (e.g., 10x10 mm grid, 2-layer height). b. Immediately image top-down view with scale. c. Use software (e.g., ImageJ) to measure the area of printed strands vs. designed area. Calculate: % Fidelity = (Actual Area / Designed Area) * 100.
- Compressive Modulus: a. Print cylindrical constructs (e.g., 8 mm diameter x 4 mm height). b. Equilibrate in PBS at 37°C for 24 hours. c. Perform unconfined compression test at a constant strain rate (e.g., 1 mm/min). d. Calculate modulus from the linear elastic region (typically 10-20% strain) of the stress-strain curve.
Signaling Pathways in Biomaterial-Cell Crosstalk
Diagram Title: Biomaterial Signals Directing Cell Function
Experimental Workflow for Functional Biomaterial Screening
Diagram Title: Functional Biomaterial Screening Workflow
The Scientist's Toolkit: Key Research Reagent Solutions
Table 3: Essential Materials for Functional Biomaterial Research
| Item | Function & Rationale | Example Product/Catalog |
|---|---|---|
| Photoinitiator (LAP) | Cytocompatible initiator for UV-crosslinkable bioinks (e.g., GelMA). Enables rapid gelation with low UV dose. | Lithium phenyl-2,4,6-trimethylbenzoylphosphinate (LAP). |
| RGD Peptide | Synthetic integrin-binding ligand. Can be conjugated to inert biomaterials (e.g., alginate) to promote cell adhesion. | GCGYGRGDSPG peptide. |
| MMP-Degradable Crosslinker | Peptide crosslinker cleavable by cell-secreted matrix metalloproteinases (MMPs). Enables cell-mediated remodeling. | Ac-GCRDGPQG↓IWGQDRCG-NH₂ (↓ = cleavage site). |
| Oxygen Sensing Nanoparticles | Enables real-time, non-destructive monitoring of oxygen gradients within 3D constructs to prevent hypoxia. | Pt(II)-porphyrin-based probes (e.g., NanO2-IR). |
| AlamarBlue/ PrestoBlue | Resazurin-based metabolic assay reagents. Used for longitudinal tracking without destroying samples. | Thermo Fisher Scientific, DAL1100. |
| Tunable Stiffness Hydrogel Kit | Pre-formulated kits (e.g., PEG-based) with modular stiffness. Essential for decoupling biochemical from mechanical cues. | Cellendes, BioStiffness Kit. |
| Decellularized ECM Powder | Provides tissue-specific biochemical composition as a bioink additive or base material. | MilliporeSigma, HuBiogel or similar. |
| Viability Stain (LIVE/DEAD) | Two-color fluorescence assay for simultaneous quantification of live and dead cells in 3D. | Thermo Fisher, L3224. |
1. Introduction: Contextualizing Variability within 3D Bioprinting Standardization Achieving reproducibility in 3D bioprinting functional biomaterials is a cornerstone for advancing tissue engineering and drug screening. However, inter-laboratory variability presents a significant barrier, often stemming from poorly controlled parameters in bioink formulation, cell processing, bioprinting, and post-printing maturation. This document details key sources of variability and provides standardized protocols and application notes to mitigate them.
2. Quantitative Summary of Key Variability Sources A review of recent multi-laboratory studies highlights primary contributors to irreproducibility.
Table 1: Major Sources of Variability in 3D Bioprinting Protocols
| Category | Specific Parameter | Reported Impact on Outcome (Variability Range) | Primary Consequence |
|---|---|---|---|
| Bioink Formulation | Gelatin Methacryloyl (GelMA) Degree of Substitution | 60-85% across commercial suppliers | Stiffness variability: ±40% for same concentration |
| Alginate Viscosity (2% w/v) | 200 - 450 mPa·s | Print fidelity diff.: Line width ±25% | |
| Cell Processing | Primary Cell Passage Number | P4 vs. P8 | Gene expression divergence: >50% for key markers |
| Serum Lot Variation in Media | Different lots from same mfr. | Cell proliferation rate: ±15-30% | |
| Bioprinting Process | Nozzle Temperature (for thermoresponsive inks) | 4°C variation (18-22°C) | Filament diameter CV*: increases from 5% to 22% |
| Crosslinking Time (UV for GelMA) | 30s vs. 60s | Compressive modulus: 8 kPa vs. 15 kPa | |
| Post-Printing Culture | Perfusion Bioreactor Flow Rate | 0.5 vs. 2.0 mL/min | Nutrient gradient-induced viability: Core viability 65% vs. 92% |
*CV: Coefficient of Variation
3. Application Notes & Standardized Protocols
Protocol 3.1: Standardized Bioink Rheological Characterization Purpose: To ensure consistent bioink printability by quantifying viscosity and shear-thinning behavior. Materials: See Scientist's Toolkit (Table 3).
- Calibrate the rheometer at 25°C.
- Load 500 µL of bioink onto the plate. Perform a controlled stress sweep (0.1 to 100 Pa) to determine the linear viscoelastic region.
- Conduct a steady-state flow sweep, measuring viscosity (η) over a shear rate (γ̇) range of 0.01 to 100 s⁻¹.
- Fit data to the Power-Law (Ostwald-de Waele) model: η = K * γ̇^(n-1), where K is consistency index and n is flow behavior index. Report K, n, and viscosity at γ̇ = 10 s⁻¹.
- Clean the geometry thoroughly.
Protocol 3.2: Inter-Laboratory Crosslinking Validation for GelMA Constructs Purpose: To standardize mechanical properties of photocrosslinked hydrogels across different UV light sources.
- Prepare a 7% (w/v) GelMA bioink (see Toolkit) with 0.5% (w/v) LAP photoinitiator.
- Using a calibrated digital UV light meter, measure the irradiance (mW/cm²) of your UV curing system at 365 nm at the build plate.
- Print a 10x10x2 mm³ lattice construct. Calculate required exposure time (s) based on target energy dose (J/cm²) = Irradiance (W/cm²) x Time (s). Standardize at 3 J/cm².
- Post-print, incubate in PBS at 37°C for 24 hrs.
- Perform unconfined compression testing. Report compressive modulus at 10-15% strain.
4. Visualizing Key Workflows and Relationships
Diagram 1: Variability Pathway (76 chars)
Diagram 2: Standardized Bioprinting Workflow (71 chars)
5. The Scientist's Toolkit: Essential Reagents & Materials
Table 3: Key Research Reagent Solutions for Standardization
| Item Name | Function & Role in Standardization | Recommended Specification / Note |
|---|---|---|
| Gelatin Methacryloyl (GelMA) | Photo-crosslinkable hydrogel base; provides cell-adhesive motifs. | Request Certificate of Analysis for Degree of Substitution (DoS). Aim for DoS 70-80% for consistency. |
| Lithium Phenyl-2,4,6-trimethylbenzoylphosphinate (LAP) | Cytocompatible photoinitiator for UV/Viscrosslinking. | Use high-purity (>98%). Store desiccated, protected from light. Prepare fresh 5% (w/v) stock in PBS. |
| Rheometer (e.g., cone-plate) | Measures bioink viscosity and viscoelasticity critical for printability. | Must have temperature control (4-37°C) and a small-angle cone geometry for minimal sample volume. |
| UV Curing System (365 nm) | Provides light for photo-crosslinking. Must have uniform irradiance. | Integrate a calibrated radiometer. Standardize on irradiance (mW/cm²) and total energy dose (J/cm²). |
| Serum-Free, Chemically-Defined Cell Culture Medium | Supports cell growth without batch variability from animal sera. | Essential for eliminating serum lot variability. Validate for your specific cell type. |
| Programmable Perfusion Bioreactor | Provides controlled nutrient/waste exchange during construct maturation. | Must have calibrated flow pumps and environmental control (CO₂, temp). |
Building Your Standard Operating Procedure (SOP): A Step-by-Step Framework
Application Notes
Successful 3D bioprinting is contingent upon rigorous, standardized pre-printing phases that define the bioink's functional performance. These notes detail the critical parameters for biomaterial characterization and bioink formulation, establishing a reproducible foundation for functional tissue construct research and drug screening platforms. Standardization at this stage mitigates batch-to-batch variability, a major hurdle in translational biomaterials science.
Protocols & Methodologies
Protocol 1: Rheological Characterization of Hydrogel Precursors
Objective: Quantify the shear-thinning behavior, yield stress, and viscoelastic moduli (G', G'') of the biomaterial precursor to ensure printability and structural fidelity post-deposition.
Materials:
- Rheometer (e.g., cone-plate or parallel plate)
- Temperature control unit
- Biomaterial precursor solution
- Solvent trap (for aqueous solutions)
Procedure:
- Load the precursor solution onto the rheometer plate, ensuring no bubbles.
- Perform a flow sweep: measure viscosity (η) over a shear rate range of 0.01 to 100 s⁻¹ at 25°C.
- Perform an amplitude sweep: at a fixed frequency (1 Hz), measure G' and G'' as a function of oscillatory strain (0.1% to 100%) to determine the linear viscoelastic region (LVR).
- Perform a frequency sweep: within the LVR (e.g., 1% strain), measure G' and G'' over an angular frequency range of 0.1 to 100 rad/s.
- Data Analysis: A printable bioink typically exhibits shear-thinning (decreasing η with increasing shear rate), a yield stress, and a G' > G'' at low frequencies (indicative of solid-like behavior at rest).
Protocol 2: Biochemical Characterization via Gel Permeation Chromatography (GPC)
Objective: Determine the molecular weight distribution (Mw, Mn, PDI) of polymeric biomaterials to ensure batch consistency.
Materials:
- GPC/SEC system with refractive index (RI) detector
- Appropriate column set (e.g., aqueous for hydrogels like alginate, organic for PLGA)
- Matching eluent (e.g., 0.1M NaNO₃, DMF with LiBr)
- Polymer standards for calibration
Procedure:
- Prepare sample solutions at a known concentration (typically 2-5 mg/mL) and filter (0.22 µm).
- Establish a calibration curve using narrow molecular weight polymer standards.
- Inject the sample and run the GPC method with a constant flow rate (e.g., 1.0 mL/min).
- Analyze the chromatogram using dedicated software to calculate weight-average (Mw), number-average (Mn) molecular weights, and polydispersity index (PDI = Mw/Mn).
Protocol 3: Standardized Bioink Preparation with Encapsulated Cells
Objective: Create a homogeneous, sterile, cell-laden bioink with defined cell density and viability.
Materials:
- Sterile biomaterial solution (e.g., methacrylated gelatin (GelMA), alginate)
- Cell suspension (trypsinized and counted)
- Crosslinker/initiator solution (e.g., CaCl₂ for alginate, LAP photoinitiator for GelMA)
- Sterile centrifuge tubes, pipettes, and tips
- Biosafety cabinet
Procedure:
- Centrifuge the cell suspension and resuspend in a small volume of culture medium or crosslinker-free biomaterial solution to create a concentrated cell master mix.
- In a sterile tube, gently mix the concentrated cell suspension with the sterile biomaterial precursor solution to achieve the final target cell density (e.g., 1-10 x 10^6 cells/mL). Mix by slow pipetting or gentle inversion to minimize shear stress.
- For ionic crosslinking (e.g., alginate): The bioink is now ready. Crosslinking occurs during/after printing via exposure to Ca²⁺.
- For photo-crosslinking (e.g., GelMA): Add the photoinitiator (e.g., 0.1-0.3% w/v LAP) to the cell-material mixture and mix gently until fully dissolved. Protect from light.
- Maintain the bioink at appropriate temperature (e.g., on ice for collagen-based inks) and use within a validated time window (typically <30 mins) to maintain viability.
Table 1: Target Rheological Properties for Extrusion Bioprinting
| Parameter | Ideal Range | Significance for Printing |
|---|---|---|
| Shear-thinning Index (n) | 0.1 - 0.5 | Ensures easy extrusion through nozzle and rapid recovery post-shear. |
| Yield Stress (τ₀) | 50 - 500 Pa | Provides shape fidelity by preventing filament collapse after deposition. |
| Storage Modulus, G' (at 1 Hz) | > 100 Pa | Indicates sufficient mechanical integrity of the deposited filament. |
| Loss Modulus, G'' (at 1 Hz) | < G' (at low freq.) | Confirms solid-like, self-supporting behavior of the printed structure. |
Table 2: Acceptable Biochemical Characterization Ranges for Common Biomaterials
| Biomaterial | Target Mw (kDa) | Acceptable PDI Range | Analysis Method |
|---|---|---|---|
| Alginate (High G-content) | 200 - 350 | 1.2 - 1.8 | Aqueous GPC with RI |
| GelMA | 50 - 100 | 1.5 - 2.5 | Aqueous GPC with MALS/RI |
| Hyaluronic Acid | 700 - 1500 | 1.1 - 1.5 | Aqueous GPC with MALS/RI |
| PLGA (50:50) | 50 - 150 | 1.3 - 1.9 | Organic GPC (THF) with RI |
Table 3: Standardized Bioink Formulation Template
| Component | Function | Example Concentration | Critical Notes |
|---|---|---|---|
| Structural Polymer | Provides mechanical framework. | 3-10% (w/v) GelMA | Degree of functionalization must be reported. |
| Cell Suspension | Biological active component. | 1-10 x 10^6 cells/mL | Viability pre-printing must be >95%. |
| Crosslinker/Initiator | Induces gelation. | 0.1% (w/v) LAP (for UV) | Cytotoxicity and gelation kinetics must be characterized. |
| Bioactive Additives | Enhances function (e.g., RGD). | 0.1-1.0 mg/mL | Source and purity must be specified. |
Visualizations
Standardized Bioink Preparation Workflow
Bioink Formulation Process Diagram
The Scientist's Toolkit
| Research Reagent / Material | Function in Pre-Printing Standardization |
|---|---|
| Rotational Rheometer | Measures critical rheological properties (viscosity, G', G'') to quantitatively define printability. |
| Gel Permeation Chromatography (GPC) | Analyzes polymer molecular weight and distribution, essential for batch consistency and biomaterial sourcing. |
| Live/Dead Viability Assay Kit | Assesses cell health before and after bioink preparation to ensure formulation biocompatibility. |
| UV-Vis Spectrophotometer | Quantifies polymer concentration, functional group modification (e.g., methacrylation degree of GelMA), and initiator concentration. |
| Sterile Photoinitiator (e.g., LAP) | Enables controlled, cytocompatible photocrosslinking of bioinks like GelMA or PEGDA upon UV/blue light exposure. |
| Ionic Crosslinker (e.g., CaCl₂) | Used for rapid ionic gelation of bioinks like alginate, often applied as a post-print bath or co-extruded. |
| Cell Counter/Analyzer | Precisely determines cell concentration and viability for accurate, reproducible cell density in bioinks. |
| Methacrylated Gelatin (GelMA) | A widely used, tunable hydrogel biomaterial that supports cell adhesion and allows photocrosslinking. |
| High G-Content Alginate | A biocompatible, ionically crosslinkable polymer valued for its gentle gelation and shape fidelity. |
Within the broader thesis on 3D bioprinting protocol standardization for functional biomaterials research, the standardization of hardware-specific printing parameters is a critical foundation. This document provides Application Notes and Protocols for the three dominant bioprinting modalities—Extrusion, Stereolithography (SLA), and Digital Light Processing (DLP)—focusing on parameter optimization to ensure reproducible fabrication of cell-laden constructs for drug development and tissue research.
Comparative Parameter Tables
Table 1: Core Process Parameter Comparison
| Parameter Category | Extrusion Bioprinting | SLA Bioprinting | DLP Bioprinting |
|---|---|---|---|
| Energy Source | Mechanical pressure (pneumatic/piston/screw) | UV Laser Spot | UV Light Projection |
| Material Form | Viscoelastic Bioink (Filament) | Liquid Photopolymer Resin | Liquid Photopolymer Resin |
| Key Physical Parameters | Pressure (15-100 kPa), Speed (1-10 mm/s), Nozzle Diameter (100-400 µm), Temperature (4-37°C) | Laser Power (10-200 mW), Scan Speed (100-2500 mm/s), Layer Thickness (25-100 µm) | Light Intensity (10-50 mW/cm²), Exposure Time (1-30 s/layer), Pixel Size (10-50 µm), Layer Thickness (25-100 µm) |
| Resolution (Typical) | 100-500 µm | 50-250 µm | 10-100 µm |
| Cell Viability Post-Print (Typical Range) | 70-95% | 80-95% | 85-98% |
| Key Bioink/Resin Properties | Shear-thinning, Storage Modulus (G'>100 Pa), Yield Stress | Photo-initiator Concentration (0.1-1.0% w/v), Viscosity (<5 Pa·s), Absorption Coefficient | Photo-initiator Type & Concentration, Viscosity (<3 Pa·s), Critical Exposure (Ec), Penetration Depth (Dp) |
| Crosslinking Mechanism | Physical (shear-recovery), Chemical (ionic, enzymatic), or Photo (secondary) | Photopolymerization (Layer-by-Laser Scan) | Photopolymerization (Whole-Layer Projection) |
Table 2: Standardized Calibration & Validation Metrics
| Metric | Target for Standardization | Measurement Protocol |
|---|---|---|
| Printing Fidelity | >90% dimensional accuracy vs. CAD model | Microscopic measurement of printed structure (n=5) vs. digital design. |
| Layer Fusion Quality | No delamination; uniform interlayer bonding | SEM imaging of cross-section; tensile test for layer adhesion strength. |
| Curing Depth/Extrusion Consistency | Within ±10% of target layer thickness | Confocal microscopy for SLA/DLP; weight analysis of extruded filament for extrusion. |
| Cell Viability (Immediate) | >85% for all modalities | Live/Dead assay performed 1-hour post-printing (ASTM F3510-21 guide). |
| Photopolymerization Safety | Cytocompatible exposure dose (< 2 J/cm² for 365 nm UV) | Radiometer measurement of energy dose at vat surface; subsequent cell viability assay. |
Detailed Experimental Protocols
Protocol 1: Extrusion Bioprinter Parameter Calibration
Aim: To standardize pressure and speed for a given bioink to achieve consistent filament diameter.
- Bioink Preparation: Prepare 3 mL of sterile, cell-laden bioink (e.g., 3% alginate, 5x10^6 cells/mL). Load into a sterile, temperature-controlled cartridge.
- Nozzle Priming: Attach a 22G conical nozzle (410 µm inner diameter). Extrude 0.5 mL into waste to ensure steady flow.
- Parameter Matrix Test: Using a simple straight-line G-code (30 mm length), print using a full-factorial matrix:
- Pressure: 20, 30, 40 kPa (for pneumatic systems).
- Speed: 3, 5, 7 mm/s.
- n=3 per condition.
- Data Collection: Allow filaments to crosslink. Image under microscope with scale bar. Measure diameter at 5 points per filament using ImageJ.
- Analysis: Calculate coefficient of variation (CV%) for each parameter set. Select the (Pressure, Speed) pair that produces a filament diameter closest to the nozzle inner diameter with CV% < 5%.
Protocol 2: SLA/DLP Bioprinter Exposure Calibration
Aim: To determine the optimal exposure time for a specific photocrosslinkable bioresin.
- Resin Preparation: Prepare 10 mL of cytocompatible resin (e.g., GelMA, 7.5% w/v, 0.1% LAP photoinitiator). Protect from light.
- Printing the "Exposure Test Model": Design a single-layer model containing features from 50 µm to 300 µm. For DLP, ensure model fits within a single projection.
- Exposure Series: Print the model at varying exposure times (e.g., 1, 2, 4, 8, 16 seconds for DLP; scale laser power/speed equivalently for SLA). n=2 per time point.
- Post-Processing: Gently rinse printed layers with PBS.
- Fidelity Assessment: Image under microscope. The optimal time is the minimum exposure that accurately reproduces all designed features without over-curing (feature swelling >10%).
- Calculation of Ec and Dp (Critical for Resin Standardization):
- Print a multi-layer rectangular prism at varying exposures.
- Measure cured thickness (C) vs. Log(Exposure Energy, E).
- Plot C vs. Log(E). Critical Exposure (Ec) is the x-intercept. Penetration Depth (Dp) is the slope of the linear fit. These are material constants for standardization.
Protocol 3: Universal Post-Print Cell Viability Assessment
Aim: To provide a standardized assay for comparing printing outcomes across modalities.
- Sample Preparation: Print a 10x10x2 mm lattice construct for each technology/bioink condition. Include a non-printed bioink/cell mixture as control.
- Incubation: Place all constructs in complete culture medium. Incubate at 37°C, 5% CO2 for 1 hour.
- Staining: Prepare Live/Dead staining solution per manufacturer protocol (e.g., 2 µM Calcein AM, 4 µM Ethidium homodimer-1 in PBS). Incubate constructs for 45 minutes.
- Imaging: Rinse with PBS. Image using confocal microscope with standard FITC and TRITC filters. Acquire z-stacks from 3 random fields per construct.
- Quantification: Use automated image analysis (e.g., CellProfiler) to count live (green) and dead (red) cells. Calculate viability (%) = [Live/(Live+Dead)] * 100.
Signaling Pathways & Workflow Diagrams
Title: Extrusion Bioprinting Parameter Optimization Workflow
Title: SLA/DLP Photopolymerization Chemical Pathway
Title: Logic Chain from Parameters to Functional Data
The Scientist's Toolkit: Research Reagent Solutions
| Item | Function & Rationale | Example Product/Chemical |
|---|---|---|
| Shear-Thinning Hydrogel | Provides cell support during extrusion; minimizes shear stress by thinning at nozzle and recovering in the printed filament. | Gelatin methacryloyl (GelMA), Alginate, Hyaluronic acid derivatives. |
| Cytocompatible Photoinitiator | Absorbs light at a specific wavelength to generate radicals for crosslinking with minimal cytotoxicity. | Lithium phenyl-2,4,6-trimethylbenzoylphosphinate (LAP) for 365-405 nm UV/Violet light. |
| Dynamic Mechanical Analyzer (DMA) | Quantifies storage (G') and loss (G'') moduli of bioinks to ensure printability and structural integrity. | Rheometer with temperature control and plate-plate geometry. |
| Live/Dead Viability/Cytotoxicity Kit | Dual-fluorescence stain for simultaneous quantification of live (calcein-AM, green) and dead (EthD-1, red) cells in 3D constructs. | Thermo Fisher Scientific L3224. |
| Critical Exposure (Ec) Test Model | A standardized digital file for determining the minimum curing energy of a photocurable resin, enabling material comparison. | The "XP" calibration model or a single-layer feature array. |
| Biocompatible UV Absorber | Tunes light penetration depth (Dp) in resins, allowing for higher vertical resolution and prevention of over-curing. | Tartrazine (yellow food dye) or Nigrosin at low concentrations (0.001-0.01% w/v). |
| Sterile, Temperature-Controlled Print Heads | Maintains bioink at physiological or optimized temperature during printing to preserve cell health and material properties. | Disposable, cooled/heated syringe barrels or cartridges. |
Within the broader framework of standardizing 3D bioprinting protocols for functional biomaterials research, post-printing processing is a critical determinant of final construct fidelity, mechanical integrity, and biological functionality. The protocols detailed herein are designed to provide reproducible, quantitative methods for crosslinking, curing, and maturing biofabricated structures, essential for applications in tissue engineering and drug development.
Protocol for UV-Mediated Crosslinking of Methacrylated Hydrogels
Objective: To achieve controlled, reproducible photocrosslinking of bioinks containing gelatin methacryloyl (GelMA) or poly(ethylene glycol) diacrylate (PEGDA).
Materials & Reagents
- Bioink: 5-15% (w/v) GelMA or 10-20% (w/v) PEGDA.
- Photoinitiator: Lithium phenyl-2,4,6-trimethylbenzoylphosphinate (LAP) or Irgacure 2959.
- UV Light Source: 365-405 nm wavelength, calibrated irradiance (e.g., 5-20 mW/cm²).
- Cell Culture Medium (for cell-laden constructs).
Experimental Protocol
- Preparation: Dissolve the photoinitiator in the bioink at a final concentration of 0.05-0.2% (w/v) for LAP or 0.1-0.5% for Irgacure 2959. Filter sterilize if cells are present.
- Printing: Fabricate the 3D construct using predetermined printing parameters.
- Crosslinking: Immediately transfer the printed construct to a stage positioned 5-10 cm from the UV light source aperture.
- Exposure: Irradiate the construct for a defined period (e.g., 30-180 seconds). Time and irradiance are critical variables (see Table 1).
- Post-Processing: Rinse crosslinked constructs twice in sterile PBS or transfer directly to culture medium for maturation.
Table 1: Representative UV Crosslinking Parameters & Outcomes
| Bioink Formulation | Photoinitiator Conc. | UV Irradiance (mW/cm²) | Exposure Time (s) | Resultant Elastic Modulus (kPa) | Cell Viability (24h post-print) |
|---|---|---|---|---|---|
| 10% GelMA | 0.1% LAP | 10 | 60 | 12.5 ± 1.8 | >90% |
| 15% GelMA | 0.2% LAP | 15 | 45 | 28.4 ± 3.2 | 85 ± 5% |
| 20% PEGDA | 0.5% Irgacure | 20 | 30 | 125.0 ± 15.7 | >95%* |
| 5% GelMA / 5% HA-MA | 0.15% LAP | 10 | 90 | 8.2 ± 0.9 | 80 ± 7% |
*PEGDA is typically used for acellular constructs; cell viability data is representative of permissive formulations.
Protocol for Ionic Crosslinking of Alginate-Based Constructs
Objective: To induce hydrogel formation in printed alginate constructs via divalent cation diffusion.
Materials & Reagents
- Bioink: 2-4% (w/v) sodium alginate (high G-content for stronger gels).
- Crosslinking Solution: 100-200 mM Calcium Chloride (CaCl₂) or Calcium Sulfate (CaSO₄) in deionized water or culture medium.
- Optional Chelator: 100 mM Sodium Citrate for gel dissolution (control experiments).
Experimental Protocol
- Printing: Extrude sodium alginate bioink into the desired 3D structure.
- Immersion Crosslinking: Gently submerge the printed construct in the crosslinking solution for 5-15 minutes. Agitation can improve uniformity.
- Diffusion-Limited Crosslinking (for core-shell structures): Use a nebulizer or misting system to apply a fine aerosol of crosslinking solution for 1-5 minutes, creating a thin, stable shell.
- Rinsing: Transfer the crosslinked hydrogel to PBS or culture medium to remove excess ions and halt the crosslinking reaction.
- Maturation: Transfer to a bioreactor or static culture for long-term studies.
Table 2: Ionic Crosslinking Parameters for Alginate Constructs
| Alginate Concentration | Crosslinker (Conc.) | Method | Duration | Gelation Time | Compressive Modulus (kPa) |
|---|---|---|---|---|---|
| 2% (w/v) | CaCl₂ (100 mM) | Immersion | 10 min | ~2 min | 25 ± 4 |
| 3% (w/v) | CaCl₂ (200 mM) | Immersion | 10 min | ~1 min | 55 ± 8 |
| 4% (w/v) | CaSO₄ (150 mM) | Nebulization | 3 min | ~30 s | 15 ± 3 (shell) |
| 3% (w/v) | BaCl₂ (50 mM)* | Immersion | 15 min | ~3 min | 120 ± 20 |
*Note: Barium offers stronger crosslinks but requires toxicity assessment for biological applications.
Protocol for Enzymatic Crosslinking
Objective: To utilize specific enzymes (e.g., Transglutaminase, Tyrosinase, HRP) for biocompatible, biomimetic crosslinking.
Materials & Reagents
- Bioink: Enzyme-substrate containing polymer (e.g., fibrinogen, gelatin-tyramine, chitosan).
- Enzyme: Microbial transglutaminase (mTGase), Horseradish Peroxidase (HRP).
- Cofactor/Trigger: Calcium ions (for mTGase), Hydrogen Peroxide (H₂O₂, for HRP).
Experimental Protocol for HRP/H₂O₂ System
- Bioink Preparation: Prepare a solution containing a phenol-derivatized polymer (e.g., gelatin-tyramine) and HRP (0.1-1.0 U/mL).
- Printing: Deposit the bioink as designed.
- Crosslinking Trigger: Immediately after printing, mist or submerge the construct in a solution containing a low concentration of H₂O₂ (0.03-0.1% v/v).
- Reaction: Allow crosslinking to proceed for 1-5 minutes at room temperature.
- Rinsing & Transfer: Rinse in PBS to remove residual H₂O₂ before culture.
Protocol for Long-Term Construct Maturation in Bioreactors
Objective: To promote cellular remodeling, matrix deposition, and functional maturation of bioprinted tissues under dynamic culture conditions.
Materials & Reagents
- Maturation Medium: Cell-type specific medium, often supplemented with ascorbic acid (50 µg/mL) for collagen synthesis.
- Bioreactor System: Perfusion, compression, or strain-based systems (e.g., spinner flask, stretch bioreactor).
- Assessment Kits: DNA quantification, sGAG/DMMB assay, hydroxyproline assay for collagen.
Experimental Protocol
- Post-Printing Stabilization: Crosslink the printed construct and culture statically for 24-48 hours.
- Bioreactor Loading: Aseptically transfer the construct to the bioreactor chamber.
- Dynamic Conditioning: Apply a defined regime (e.g., 0.5-2 mL/min perfusion flow, 5-10% cyclic strain).
- Medium Changes: Replace 50-70% of the culture medium every 2-3 days.
- Endpoint Analysis: At weekly intervals (1, 2, 3, 4 weeks), harvest samples (n>=3) for biochemical, mechanical, and histological analysis.
Table 3: Maturation Protocol Outcomes for Bioprinted Cartilage Constructs
| Maturation Week | Perfusion Rate (mL/min) | Total Collagen (µg/construct) | sGAG Content (µg/construct) | Elastic Modulus (kPa) |
|---|---|---|---|---|
| 1 (Static) | 0 | 15.2 ± 3.1 | 8.5 ± 1.2 | 22.1 ± 4.5 |
| 2 | 0.5 | 42.8 ± 5.7 | 35.4 ± 4.8 | 45.6 ± 6.2 |
| 3 | 1.0 | 88.9 ± 10.3 | 75.1 ± 8.9 | 89.3 ± 12.1 |
| 4 | 1.5 | 145.6 ± 18.7 | 124.6 ± 14.2 | 152.7 ± 20.8 |
The Scientist's Toolkit: Key Reagent Solutions
| Reagent/Material | Function in Post-Printing | Typical Working Concentration / Notes |
|---|---|---|
| Lithium phenyl-2,4,6-trimethylbenzoylphosphinate (LAP) | Water-soluble photoinitiator for UV/VIS light crosslinking. | 0.05 - 0.2% (w/v). Superior biocompatibility and efficiency at 365-405 nm vs. older initiators. |
| Calcium Chloride (CaCl₂) | Ionic crosslinker for anionic polymers like alginate. | 100 - 200 mM in aqueous solution. Standard for rapid gelation via cation diffusion. |
| Horseradish Peroxidase (HRP) | Enzyme for oxidative crosslinking of phenol-containing polymers (e.g., gelatin-tyramine). | 0.1 - 1.0 U/mL in bioink. Enables gentle, cell-compatible crosslinking triggered by H₂O₂. |
| Microbial Transglutaminase (mTG) | Enzyme that forms ε-(γ-glutamyl)lysine bonds between peptide-bound glutamine and lysine. | 5 - 20 U/g polymer. Crosslinks proteins (e.g., fibrinogen, gelatin) without Ca²⁺ dependency. |
| Ascorbic Acid (Vitamin C) | Essential cofactor for prolyl hydroxylase, promoting collagen synthesis during maturation. | 25 - 50 µg/mL in maturation medium. Critical for ECM deposition in many tissue types. |
| RGD Peptide Motif | Integrin-binding sequence (Arg-Gly-Asp) often grafted into polymers to enhance cell adhesion. | Variable. Can be chemically conjugated to polymers like PEG to impart bioactivity. |
Visualization: Experimental Workflows
Title: Post-Printing Protocol Workflow Map
Title: Mechanotransduction in Bioreactor Maturation
Within the broader thesis of 3D bioprinting protocol standardization for functional biomaterials research, the development of application-specific Standard Operating Procedures (SOPs) is paramount. The one-size-fits-all approach is insufficient for the nuanced requirements of different end-use applications. This document details tailored SOPs, Application Notes, and Protocols for three critical domains: complex tissue models, high-throughput drug screening platforms, and implantable constructs.
Application Note: Vascularized Tissue Models for Disease Modeling
Objective: To standardize the bioprinting of perfusable, vascularized tissue models that accurately mimic human physiology for studying disease mechanisms.
Key Parameters & Quantitative Benchmarks: Successful models must meet the following application-specific criteria:
Table 1: Key Quantitative Benchmarks for Vascularized Tissue Models
| Parameter | Target Benchmark | Measurement Method | Rationale |
|---|---|---|---|
| Vessel Lumen Diameter | 50 - 200 µm | Histology (H&E), Confocal microscopy | Mimics capillary to arteriole scale. |
| Endothelial Barrier Integrity | TEER ≥ 30 Ω·cm² | Transendothelial Electrical Resistance (TEER) | Induces functional, selective barrier. |
| Perfusion Viability | >90% cell viability after 7-day perfusion | Live/Dead assay, metabolic activity | Ensures long-term tissue functionality. |
| Sprintment Diameter | ~100 µm | Histology (H&E), Confocal microscopy | Mimics capillary to arteriole scale. |
| Endothelial Barrier Integrity | TEER ≥ 30 Ω·cm² | Transendothelial Electrical Resistance (TEER) | Indicates functional, selective barrier. |
| Perfusion Viability | >90% cell viability after 7-day perfusion | Live/Dead assay, metabolic activity | Ensures long-term tissue functionality. |
| Sprouting Angiogenesis | ≥ 2-fold increase in sprout length vs. control | Co-culture assay, image analysis | Demonstrates bioactive microenvironment. |
Protocol 2.1: Bioprinting a Perfusable Vasculature Network
Materials: See Scientist's Toolkit (Table 4). Method:
- Bioink Preparation: a. Prepare a 8 mg/mL fibrinogen solution in PBS. b. Prepare a 4% (w/v) gelatin methacryloyl (GelMA) solution in PBS with 0.5% photoinitiator (LAP). c. Mix fibrinogen and GelMA solutions at a 1:1 ratio to create the composite bioink. d. Centrifuge HUVECs at 300 x g for 5 minutes. Resuspend pellet in bioink at a density of 10 x 10⁶ cells/mL.
- Sacrificial Molding: a. Load pluronic F-127 (28% w/v) into a printing cartridge. b. Print the negative mold of the desired vascular network (e.g., a bifurcating tree) into a petri dish cooled to 4°C.
- Embedding and Crosslinking: a. Carefully pour the cell-laden composite bioink over the printed pluronic mold. b. Crosslink the GelMA by exposing to 405 nm light (5 mW/cm²) for 60 seconds. c. Incubate at 37°C for 30 minutes to liquefy and remove the pluronic mold, leaving patent channels.
- Perfusion Culture: a. Connect the construct to a peristaltic pump system using biocompatible tubing. b. Perfuse with endothelial growth medium (EGM-2) at a shear stress of 5-15 dyn/cm². c. Culture for 7-14 days, assessing viability and barrier function periodically.
Title: Workflow for Bioprinting a Perfusable Vasculature
Application Note: High-Throughput Drug Screening Platforms
Objective: To establish SOPs for manufacturing reproducible, miniaturized 3D tissue arrays compatible with automated high-throughput screening (HTS) systems.
Key Parameters & Quantitative Benchmarks: Platforms must be optimized for HTS compatibility and pharmacological relevance.
Table 2: Key Quantitative Benchmarks for HTS Bioprinted Platforms
| Parameter | Target Benchmark | Measurement Method | Rationale |
|---|---|---|---|
| Array Density | 96-, 384-well plate compatibility | Physical measurement | Fits standard HTS automation. |
| Intra-batch CV | <15% (Viability, ATP content) | Statistical analysis (n≥12) | Ensures reproducibility for Z'-factor. |
| Z'-factor | ≥ 0.5 | Calculated from positive/negative controls | Indicates excellent assay robustness. |
| Drug Response Window | IC50 values within 2-fold of in vivo data | Dose-response curves (e.g., AlamarBlue) | Validates physiological relevance. |
| Assay Timepoint | Readout achievable within 7 days | Protocol timing | Aligns with screening timelines. |
Protocol 3.1: Bioprinting a 96-Well Spheroid Array for Toxicity Screening
Materials: See Scientist's Toolkit (Table 4). Method:
- Bioink and Cell Preparation: a. Use a ready-to-print, thermo-reversible bioink (e.g., NAVIGATE). b. Trypsinize and count HepG2 cells. Centrifuge and resuspend in bioink at 5 x 10⁶ cells/mL.
- Non-Contact Bioprinting Setup: a. Load bioink into a piezoelectric or thermal inkjet printhead. b. Position a 96-well U-bottom ultra-low attachment (ULA) plate on the print stage. c. Program the printer to dispense a 50 nL droplet per well.
- Spheroid Formation: a. Execute print run. Each droplet will contain ~250 cells. b. Transfer the 96-well plate to a 37°C, 5% CO₂ incubator. c. Within 24 hours, cells will aggregate into a single spheroid per well.
- Drug Treatment and Readout: a. After 72 hours, use an automated liquid handler to add compound libraries. b. Incubate for 48-72 hours. c. Add AlamarBlue reagent (10% v/v) to each well, incubate 4 hours, and measure fluorescence (Ex/Em: 560/590 nm) using a plate reader.
Title: Workflow for HTS Spheroid Drug Screening
Application Note: Patient-Specific Implantable Constructs
Objective: To define SOPs for the clinical translation of 3D-bioprinted, mechanically robust, and biocompatible implants (e.g., for bone or cartilage repair).
Key Parameters & Quantitative Benchmarks: Implants must satisfy stringent regulatory criteria for safety and functionality.
Table 3: Key Quantitative Benchmarks for Implantable Constructs
| Parameter | Target Benchmark | Measurement Method | Rationale |
|---|---|---|---|
| Compressive Modulus | Match target tissue (e.g., 0.1-1 GPa for bone) | Uniaxial compression test | Provides essential mechanical support. |
| Degradation Rate | ~6 months to 2 years (tuned to application) | Mass loss in simulated fluid | Matches rate of new tissue formation. |
| Sterility Assurance Level (SAL) | 10⁻⁶ | Sterility test (ISO 11737) | Mandatory for clinical implantation. |
| In Vivo Osteointegration | >60% bone-implant contact at 12 weeks | Histomorphometry | Indicates bioactivity and integration. |
| Cell Viability in Core | >80% post-printing & maturation | Live/Dead assay, CLSM | Ensures implant is truly living tissue. |
Protocol 4.1: Bioprinting a Osteogenic Bone Graft
Materials: See Scientist's Toolkit (Table 4). Method:
- Bioink Synthesis and Sterilization: a. Dissolve 5% (w/v) alginate and 4% (w/v) gelatin in PBS. b. Filter sterilize (0.22 µm). Add 2% (w/v) nano-hydroxyapatite (nHA) under aseptic conditions. c. Mix with 0.1M CaCl₂ solution (crosslinker) at a 9:1 ratio to form pre-crosslinked paste.
- Cell Integration and Printing: a. Resuspend human mesenchymal stem cells (hMSCs) in the paste at 10 x 10⁶ cells/mL. b. Load into a syringe-based extrusion printhead (sterilized with 70% ethanol and UV). c. Print the implant geometry (e.g., trabecular bone scaffold) into a sterile CaCl₂ bath (100 mM) for final ionic crosslinking.
- Maturation and Conditioning: a. Transfer constructs to osteogenic medium (DMEM, 10% FBS, β-glycerophosphate, ascorbic acid, dexamethasone). b. Culture in a bioreactor applying cyclic compressive strain (0.5-1 Hz, 5% strain) for 28 days to enhance matrix deposition and mineralization.
- Pre-Implantation Quality Control: a. Perform sterility testing per ISO 11737. b. Conduct micro-CT to verify internal architecture and mineralization.
Title: Manufacturing Workflow for a Bioprinted Bone Implant
The Scientist's Toolkit
Table 4: Essential Research Reagent Solutions for Application-Specific Bioprinting
| Item | Example Product/Catalog # | Function in Application-Specific SOPs |
|---|---|---|
| Gelatin Methacryloyl (GelMA) | Sigma-Aldrich, 900637 | Photocrosslinkable hydrogel base for soft tissue models; provides cell-adhesive motifs. |
| Fibrinogen from human plasma | Sigma-Aldrich, F3879 | Enhances angiogenesis and vascular network maturation in composite bioinks. |
| Pluronic F-127 | Sigma-Aldrich, P2443 | Sacrificial material for printing perfusable channels; liquefies at 37°C. |
| NAVIGATE Biopaper | CELLINK, BPR01001 | Thermo-reversible, ready-to-use bioink for HTS spheroid formation in microplates. |
| Nano-Hydroxyapatite (nHA) | Sigma-Aldrich, 677418 | Ceramic additive for bone bioinks; increases mechanical strength and osteoconductivity. |
| AlamarBlue Cell Viability Reagent | Thermo Fisher, DAL1025 | Non-destructive, fluorescent metabolic assay for HTS endpoint readouts. |
| Osteogenic Supplement | Thermo Fisher, A1007201 | Defined cocktail (ascorbate, β-GP, dexamethasone) to direct hMSC differentiation in implants. |
| Transwell Permeable Supports | Corning, 3470 | Used for TEER measurements to quantify endothelial barrier function in vascular models. |
| Ultra-Low Attachment (ULA) Plate | Corning, 7007 | Prevents cell adhesion, forcing aggregation into spheroids post-printing for HTS. |
Solving Common Pitfalls: Optimizing Print Fidelity and Cell Viability
Within the broader thesis on 3D bioprinting protocol standardization for functional biomaterials research, the reliability and reproducibility of the printing process are paramount. Print failures such as clogging, layer misalignment, and poor shape fidelity directly compromise the structural and functional integrity of engineered tissues and biomaterial scaffolds. This document provides standardized Application Notes and Protocols for diagnosing and correcting these common failure modes, ensuring robust and reproducible research outcomes for scientists in biomaterials and drug development.
Clogging: Diagnosis and Correction
Clogging is a prevalent failure in extrusion-based bioprinting, leading to inconsistent strand deposition, print abortion, and cell viability loss.
Quantitative Data on Clogging Factors
Table 1: Common Causes and Diagnostic Signatures of Nozzle Clogging
| Cause Category | Specific Factor | Typical Particle Size Impact | Diagnostic Signature (Pressure Profile) |
|---|---|---|---|
| Biomaterial Properties | High Viscosity (>10 Pa·s) | N/A | Sustained pressure >120% of baseline |
| Aggregation/Pre-gelation | >80% of nozzle diameter | Sudden, irregular pressure spikes | |
| Cell-Laden Bioinks | High Cell Density (>20M cells/mL) | Cell clusters 100-200 µm | Gradual pressure ramp, then plateau |
| Cell Sedimentation | N/A | Cyclic pressure variation over time | |
| Operational | Nozzle Drying | N/A | Stepwise pressure increase, then blockage |
| Incompatible Temperature | N/A | Viscosity shift, pressure drift |
Experimental Protocol: Clogging Diagnostics and Mitigation
Protocol 1: Real-Time Pressure Monitoring for Clog Prediction
- Objective: To establish a correlation between pressure profile deviations and imminent clogging events.
- Materials: Extrusion bioprinter with in-line pressure sensor (0-250 psi range), bioink of interest, sterile printing nozzles (e.g., 22G-27G).
- Procedure:
- Calibration: Print a calibration line at standard parameters. Record the baseline pressure (P_b).
- Test Print: Initiate the target print job. Log pressure data at ≥10 Hz.
- Diagnosis: Monitor for:
- Spike Detection: A pressure spike >150% of Pb sustained for >0.5s indicates a potential partial clog.
- Trend Analysis: A steady increase in Pb to >120% over 30 seconds indicates viscosity change or aggregation.
- Corrective Action (Automated): Program the printer to execute a corrective routine upon trigger:
- Pause print. Retract plunger/piston slightly to relieve pressure.
- Execute a purge sequence: print a short, fast line away from the construct.
- If pressure remains high, initiate a sterile nozzle wipe or exchange.
Protocol 2: Pre-Print Bioink Filtration and Viability Assessment
- Objective: To reduce clog sources from aggregates and assess post-filtration cell health.
- Materials: Sterile syringe filters (e.g., 100 µm, 200 µm nylon mesh), luer-lock syringes, cell viability assay kit (e.g., Calcein AM/ PI).
- Procedure:
- Load bioink into a syringe. Attach a pre-wetted filter.
- Gently expel bioink through the filter into a sterile container. Do not force.
- Sample filtered bioink. Mix with viability stains and incubate per kit instructions.
- Image using fluorescence microscopy. Viability should remain >90% for standard bioinks.
- Note: Select filter size 2-3x the nozzle diameter. Record any volume loss.
Layer Misalignment: Diagnosis and Correction
Layer misalignment disrupts pore architecture, mechanical properties, and cell guidance cues in scaffolds.
Quantitative Data on Misalignment Causes
Table 2: Root Causes and Tolerances for Layer Misalignment
| Root Cause | Error Type | Typical Magnitude | Detection Method |
|---|---|---|---|
| Mechanical/Hardware | Stepper Motor Skipping | 50-500 µm per event | In-situ video microscopy |
| Z-axis Wobble | 10-100 µm cyclic | Dial indicator measurement | |
| Bed Adhesion Failure | Entire layer shift >1 mm | Visual inspection | |
| Software/G-Code | Slicing Resolution Errors | 5-50 µm | G-code step analysis |
| Incorrect Steps/mm Setting | Systematic error (%) | Calibration cube measurement | |
| Material-Induced | Warping/Contraction | 100-1000 µm over print | Time-lapse imaging |
Experimental Protocol: Systematic Calibration for Layer Alignment
Protocol 3: Dimensional Accuracy and Layer Registration Test
- Objective: To quantify XYZ axis accuracy and layer-to-layer registration.
- Materials: Bioprinter, calibration bioink (e.g., 3% alginate), substrate, calipers, confocal or macro microscope.
- Procedure:
- Print: Design and slice a 10x10x5 mm (LxWxH) hollow cube (single perimeter wall, 2 layers high). Print with fluorescent bioink if possible.
- Measure Physical Dimensions: Allow crosslinking. Use calipers to measure L, W, H at three locations each. Calculate % error vs. design.
- Measure Layer Shift:
- Image each layer sidewall under microscope.
- Use image analysis (e.g., ImageJ) to plot the edge position for each layer.
- Calculate the standard deviation of edge position as the Layer Registration Error (µm).
- Corrective Actions:
- For systematic error: Recalibrate printer steps/mm using measured vs. printed distance.
- For random error: Check mechanical tightness (belts, screws), reduce print speed, and optimize adhesion (e.g., with a sacrificial layer of hydrogel).
Shape Fidelity: Diagnosis and Correction
Shape fidelity refers to the printed construct's conformity to the digital model, critical for reproducing complex anatomical geometries.
Quantitative Fidelity Metrics
Table 3: Key Metrics for Assessing Shape Fidelity
| Metric | Definition | Measurement Technique | Acceptance Threshold (Typical) |
|---|---|---|---|
| Filament Width Consistency | Std. Dev. of printed strand diameter | Optical microscopy + image analysis | CV < 10% |
| Angle Accuracy | Deviation of printed corner from designed (e.g., 90°) | Contact angle tool on top-down image | ± 5° |
| Pore Size Accuracy | (Designed Pore Area - Printed Pore Area) / Designed | Cross-sectional image analysis | ± 15% |
| Circularity of Printed Voids | 4π(Area/Perimeter²) for designed circular pores | Cross-sectional image analysis | > 0.85 |
Experimental Protocol: Shape Fidelity Benchmarking
Protocol 4: Printing and Quantifying a Fidelity Benchmark Construct
- Objective: To standardize the assessment of shape fidelity across different bioinks and printers.
- Materials: Bioprinter, test bioink, fidelity benchmark design (see below), imaging setup.
- Procedure:
- Design: Slice a benchmark model containing: a 20mm straight line, a 10mm diameter single-layer circle, a 10mm square, and a 5x5 grid of 500µm pores.
- Print: Print the model using standard parameters.
- Image: Capture high-resolution top-down images immediately after printing.
- Quantify (using ImageJ/Fiji):
- Line: Measure width at 5 points.
- Circle & Square: Fit to shape, calculate area and perimeter. Compute circularity for the circle.
- Grid: Measure pore dimensions.
- Corrective Actions: Low fidelity often stems from material (e.g., slow gelation causing flow) or parameters (e.g., speed too high). Conduct a Parametric Sweep:
- Print the circle while varying: Print Speed (5-30 mm/s), Pressure/Flow rate (±25%), and Print Temperature (if applicable).
- Identify the parameter set that maximizes circle circularity and pore accuracy.
The Scientist's Toolkit: Research Reagent Solutions
Table 4: Essential Materials for Diagnosing and Correcting Print Failures
| Item | Function/Application | Example Product/Chemical |
|---|---|---|
| In-line Pressure Sensor | Real-time monitoring of extrusion pressure for clog prediction. | Nordson EFD PICO series; Sewoo SLF3S-A. |
| Sterile Syringe Filters (Nylon) | Pre-print removal of aggregates and cell clusters to prevent clogs. | ThermoFisher 100µm, 200µm cell strainer snap-on caps. |
| Fluorescent Microspheres (10-100µm) | Tracer particles for visualizing flow dynamics and strand uniformity. | Fluoro-Max dyed microspheres. |
| High-Speed/Time-Lapse Camera | Visual documentation of printing process for misalignment and fidelity analysis. | Basler acA series; standard lab microscope cameras. |
| Dial Test Indicator | Precise measurement of print head and stage wobble (Z-axis accuracy). | Mitutoyo 0.01mm resolution indicator. |
| Calcein AM / Propidium Iodide (PI) | Live/dead viability assay to check for cell damage from filtration or clog-clearing procedures. | ThermoFisher LIVE/DEAD Viability/Cytotoxicity Kit. |
| Standardized Calibration Bioink | A well-characterized, non-cell-laden hydrogel for isolating printer performance from bioink variability. | 3-4% (w/v) Sodium Alginate in PBS; 20-30 mg/mL Collagen I. |
| Image Analysis Software | Quantifying strand width, layer shift, pore size, and circularity from print images. | FIJI/ImageJ with custom macros; CellProfiler. |
Visualization: Experimental Workflow for Print Failure Diagnosis
Title: Systematic Diagnostic Workflow for 3D Bioprint Failures
Application Notes
The standardization of bioink rheological properties is a cornerstone for advancing 3D bioprinting from exploratory prototyping to reliable biomaterials research and drug development. Achieving consistent extrusion and structural fidelity directly dictates the success of subsequent biological experiments, including cell viability, tissue maturation, and high-content screening. This protocol, framed within a broader thesis on protocol standardization, details the key rheological parameters and their optimization to ensure reproducible fabrication of functional constructs.
1. Critical Rheological Parameters for Extrusion Bioprinting The printability of a bioink is governed by its viscoelastic behavior. Key quantitative targets derived from current literature are summarized below:
Table 1: Target Rheological Parameters for Alginate-Gelatin Based Bioinks
| Parameter | Target Range | Measuring Instrument | Influence on Printing |
|---|---|---|---|
| Zero-shear Viscosity (η₀) | 10 - 100 Pa·s | Rotational Rheometer | Determines flow initiation pressure; too high leads to nozzle clogging, too low leads to poor shape fidelity. |
| Shear-thinning Index (n) | 0.2 - 0.5 | Rotational Rheometer (Flow curve) | Quantifies viscosity drop under shear; lower 'n' indicates stronger shear-thinning, essential for smooth extrusion. |
| Yield Stress (τ_y) | 50 - 500 Pa | Rotational Rheometer (Amplitude sweep) | Defines stress required to initiate flow; prevents sagging and maintains filament shape post-deposition. |
| Storage Modulus (G') | > 100 Pa | Rotational Rheometer (Frequency sweep) | Indicates solid-like elastic behavior; crucial for structural integrity and layer stacking. |
| Loss Tangent (tan δ = G''/G') | < 1.0 at low frequency | Rotational Rheometer | Ratio of viscous to elastic response; tan δ < 1 confirms gel-like dominance for shape retention. |
| Apparent Viscosity at Printing Shear Rate | 1 - 10 Pa·s | Capillary Rheometer / In-line viscometer | Directly correlates to extrusion pressure and filament uniformity during the printing process. |
2. Protocol for Comprehensive Bioink Rheological Characterization
Aim: To systematically measure the rheological properties of a candidate bioink (e.g., 3% alginate, 7% gelatin) and correlate them with printability outcomes.
Materials:
- Candidate bioink (sterile)
- Rotational rheometer with parallel plate geometry (e.g., 20mm diameter)
- Peltier temperature control unit
- Solvent trap to prevent drying
- Bioprinter with pressure-based extrusion system
Procedure:
- Sample Loading: Pre-cool the rheometer plate to 10°C. Load ~150 µL of bioink onto the center of the bottom plate. Lower the upper plate to a 0.5 mm gap. Trim excess and apply a thin layer of silicone oil around the sample edge to prevent dehydration.
- Temperature Ramp Test: Set a temperature ramp from 10°C to 37°C at a rate of 2°C/min. Maintain a constant angular frequency of 1 rad/s and a strain of 1% (within linear viscoelastic region). Record G' and G''. This identifies the gelation temperature.
- Amplitude Sweep: At 20°C, perform an amplitude sweep from 0.1% to 100% strain at a fixed frequency of 1 Hz. Determine the yield stress (τ_y) as the point where G' drops by 10% from its plateau.
- Flow Curve (Shear-thinning): At 20°C, perform a logarithmic shear rate sweep from 0.01 to 100 s⁻¹. Fit the data to the Herschel-Bulkley model (τ = τ_y + K * γ̇ⁿ) to obtain the consistency index (K) and flow behavior index (n).
- Frequency Sweep: At 20°C and within the LVE region (e.g., 1% strain), perform a frequency sweep from 0.1 to 100 rad/s. Record G' and G'' to assess structural stability over timescales.
3. Protocol for Printability Assessment and Correlation
Aim: To quantitatively link rheological parameters to printing outcomes.
Procedure:
- Filament Morphology Test: Print a single filament into air onto a hydrophobic substrate. Capture images and measure filament diameter (D) versus nozzle diameter (Dₙ). Calculate the spreading ratio (D/Dₙ). Optimal range: 1.0 - 1.3.
- Grid Structure Test: Print a 10mm x 10mm, 2-layer grid with a defined strand spacing. After crosslinking, image and calculate the pore area fidelity (Printed pore area / Designed pore area). Target: >85%.
- Stacking Test: Print a multi-layered (≥5 layers) square construct. Measure the height of the construct after printing and after 15 minutes. Calculate the sagging ratio (1 - Final height/Initial height). Target: <10%.
The Scientist's Toolkit: Essential Research Reagents & Materials
Table 2: Key Reagents and Materials for Bioink Rheology Optimization
| Item | Function/Description | Example |
|---|---|---|
| Alginate (High G-content) | Primary biopolymer providing ionic crosslinkability and shear-thinning behavior. | Pronova UP MVG |
| Gelatin or GelMA | Provides thermo-responsive behavior and cell-adhesive motifs (RGD sequences). | Type A gelatin from porcine skin, GelMA (Dojindo) |
| Crosslinking Agent | Ionically crosslinks alginate to stabilize printed structure. | Calcium chloride (CaCl₂) solution |
| Viscometer/Rheometer | Instrument to quantitatively measure viscosity and viscoelastic moduli. | Anton Paar MCR series, TA Instruments DHR |
| Biocompatible Surfactant | Reduces surface tension to improve extrusion consistency and prevent nozzle clogging. | Pluronic F-127 |
| Cell Viability Assay | Quantifies the impact of rheology and printing stress on living cells post-printing. | Live/Dead assay (Calcein AM/EthD-1) |
| Rheology Modifier | Nanocellulose or shear-thinning microparticles to enhance yield stress and shape fidelity. | Tempo-oxidized cellulose nanofibrils (TCNF) |
Visualizations
Title: Bioink Optimization Workflow for Bioprinting
Title: Shear-Thinning Mechanism for Printing
Application Notes
The Central Paradox in Biomaterial Design
In the standardization of 3D bioprinting protocols for functional biomaterials research, the primary challenge is reconciling the need for robust, stable structures with the imperative of maintaining cell viability and function. Crosslinking—the process of forming covalent or physical bonds between polymer chains—is essential for achieving mechanical integrity, shape fidelity, and long-term stability of bioprinted constructs. However, many efficient crosslinking methods employ conditions or chemistries that are cytotoxic. This document outlines current strategies and quantifiable trade-offs, providing a framework for protocol optimization.
Quantitative Landscape of Crosslinking Strategies
The table below summarizes key performance metrics for prevalent crosslinking methods, as reported in recent literature (2023-2024).
Table 1: Comparative Analysis of Crosslinking Modalities for Bioinks
| Crosslinking Method | Typical Gelation Time | Compressive Modulus (kPa) | Reported Cell Viability (Day 1) | Key Cytocompatibility Concern | Primary Use Case |
|---|---|---|---|---|---|
| Ionic (e.g., Ca2+ for Alginate) | Seconds - Minutes | 5 - 50 | 85-95% | Minimal; ion exchange can destabilize gel. | Cell encapsulation, sacrificial structures. |
| Photo-initiated (UV, 365 nm, I2959) | 10 - 60 Seconds | 20 - 200 | 70-90% | UV exposure, radical toxicity, photo-initiator leaching. | High-resolution, shape-fidelity structures. |
| Enzymatic (e.g., HRP/H2O2, Transglutaminase) | 30s - 10 Minutes | 10 - 100 | 90-98% | Enzyme/byproduct activity; reaction kinetics control. | Cell-laden constructs, bioactive hydrogels. |
| Thermal (e.g., Matrigel, Agarose) | Minutes - Hours | 0.5 - 10 | >95% | High temperature during gelling; low mechanical strength. | Cell culture models, drug screening. |
| Schiff Base (e.g., Aldehyde-Gelatin with ε-Polylysine) | Seconds - Minutes | 15 - 80 | 60-85% | Aldehyde group cytotoxicity; network instability. | Adhesive, injectable hydrogels. |
| Click Chemistry (e.g., Tetrazine-Norbornene) | < 60 Seconds | 50 - 500 | 80-95% | Potential catalyst/residue toxicity; reagent cost. | Mechanically tunable, biocompatible networks. |
| Visible Light (405 nm, LAP initiator) | 30 - 120 Seconds | 30 - 150 | 85-95% | Milder than UV but still light/radical exposure. | Improved cytocompatibility for photocrosslinking. |
Mitigation Strategies and Protocol Standardization
Standardized protocols must incorporate pre- and post-crosslinking strategies to mitigate cytotoxicity while preserving function.
Strategy A: Two-Stage (Tandem) Crosslinking. A mild, rapid initial crosslinking (e.g., ionic) provides immediate structural support for handling, followed by a secondary, slower crosslinking (e.g., enzymatic) under full cytocompatible conditions to achieve final mechanics. Strategy B: Radical Scavenger Incorporation. For photo-crosslinking, adding biocompatible radical scavengers (e.g., L-ascorbic acid, tyrosine) competitively consumes excess radicals, protecting cells. Strategy C: Bio-Orthogonal "Click" Chemistry. Using specific, fast, and high-yield reactions that do not interfere with biological processes (e.g., strain-promoted azide-alkyne cycloaddition). Strategy D: Dynamic Crosslink Design. Incorporating reversible bonds (e.g., boronate esters, Diels-Alder adducts) that allow network self-healing and reduce the required crosslink density for stability.
Detailed Experimental Protocols
Protocol 1: Standardized Assessment of Crosslinking Cytocompatibility
Objective: To quantitatively evaluate the impact of a crosslinking process on encapsulated cell viability and metabolic activity within a 3D bioprinted construct.
Materials & Workflow:
Diagram Title: Cytocompatibility Assessment Workflow
The Scientist's Toolkit: Key Reagents for Cytocompatibility Testing
| Reagent/Material | Function | Example Product (Supplier) |
|---|---|---|
| Photo-initiator (LAP) | Generates radicals under 405 nm light for gentle crosslinking. | Lithium phenyl-2,4,6-trimethylbenzoylphosphinate (Sigma-Aldrich). |
| Calcium Chloride (CaCl₂) Solution | Ionic crosslinker for alginate-based bioinks. | 100 mM CaCl₂ in PBS (Thermo Fisher). |
| Horseradish Peroxidase (HRP) / Hydrogen Peroxide (H₂O₂) | Enzymatic crosslinking system for tyrosine-containing polymers. | HRP Type VI (Sigma-Aldrich). |
| Live/Dead Viability/Cytotoxicity Kit | Dual fluorescent staining (Calcein-AM for live, EthD-1 for dead cells). | Thermo Fisher L3224. |
| AlamarBlue Cell Viability Reagent | Resazurin-based metabolic indicator for non-destructive longitudinal tracking. | Invitrogen DAL1100. |
| Gelatin Methacryloyl (GelMA) | A versatile, photocrosslinkable bioink polymer derived from gelatin. | Advanced BioMatrix 5010. |
| PBS (1X), pH 7.4 | For washing and diluting reagents. | Gibco 10010023. |
Procedure:
- Bioink Formulation: Prepare sterile bioink at 4°C. For a 1 mL final volume, mix 850 μL of polymer solution (e.g., 5% w/v GelMA), 100 μL of photo-initiator (0.1% w/v LAP in PBS), and 50 μL of cell suspension (5 x 10^6 cells/mL in culture medium). Keep on ice, protected from light.
- Printing & Crosslinking: Load bioink into a sterile syringe. Print a standardized construct (e.g., 10x10x2 mm grid). Immediately expose to 405 nm visible light (5-10 mW/cm²) for 60 seconds for crosslinking.
- Post-Processing: Transfer construct to a 24-well plate. Wash gently 3 times with 1 mL pre-warmed culture medium to remove unreacted initiator.
- Culture: Add 1 mL of complete culture medium per well. Incubate at 37°C, 5% CO₂.
- Viability Staining (Day 1): Aspirate medium. Add 500 μL of Live/Dead stain (2 μM Calcein-AM, 4 μM Ethidium homodimer-1 in PBS). Incubate 30 minutes at 37°C, protected from light. Image using a confocal microscope (488/515 nm for live, 561/635 nm for dead). Analyze ≥3 fields per construct.
- Metabolic Assay (Day 1, 3, 7): Aspirate medium, add 1 mL of fresh medium containing 10% v/v AlamarBlue reagent. Incubate for 3 hours. Transfer 100 μL of supernatant in triplicate to a 96-well black plate. Measure fluorescence (Ex 560 nm / Em 590 nm). Use a medium-only well as blank.
Protocol 2: Tandem Ionic-Enzymatic Crosslinking for Alginate-Gelatin Hybrid Bioinks
Objective: To achieve high initial shape fidelity via ionic crosslinking followed by a cytocompatible enzymatic reinforcement for long-term culture.
Diagram Title: Tandem Crosslinking Pathway
Procedure:
- Bioink Preparation: Synthesize gelatin-tyramine (Gel-Tyr) conjugate via carbodiimide chemistry. Prepare bioink by mixing 3% w/v sodium alginate (high G-content) and 4% w/v Gel-Tyr in serum-free medium on ice. Add cells to final density of 3 x 10^6 cells/mL.
- Primary Ionic Crosslinking: Extrude bioink directly into a sterile 100 mM CaCl₂ crosslinking bath. Allow constructs to remain submerged for 60 seconds.
- Intermediate Wash: Transfer constructs to a well plate with culture medium. Gently wash twice (5 minutes each) to remove excess Ca²⁺.
- Secondary Enzymatic Crosslinking: Prepare an enzymatic cocktail of Horseradish Peroxidase (HRP, 15 U/mL final) and dilute Hydrogen Peroxide (H₂O₂, 1 mM final) in culture medium. Add this solution to cover the washed constructs. Gelation occurs within 2-5 minutes. Incubate for 30 minutes at 37°C.
- Final Culture: Aspirate the enzymatic solution, wash once gently with fresh medium, and then add complete culture medium for long-term maintenance.
Within the framework of standardizing 3D bioprinting protocols for functional biomaterials, rigorous environmental control is a foundational pillar. The reproducibility and biological fidelity of bioprinted constructs—from simple cell-laden hydrogels to complex, multi-material tissues—are critically dependent on maintaining precise and consistent conditions for temperature, sterility, and humidity. Deviations can alter bioink viscosity, compromise cell viability, induce premature crosslinking, and lead to microbial contamination, thereby invalidating research outcomes and hindering translational progress in drug development and regenerative medicine.
The Critical Parameters: Quantitative Standards
Temperature Control
Temperature stability is vital for handling thermosensitive bioinks (e.g., collagen, Matrigel), maintaining cell health, and controlling crosslinking kinetics.
Table 1: Standardized Temperature Parameters for Key Bioprinting Phases
| Process Phase | Target Temperature (°C) | Acceptable Range (±°C) | Primary Rationale | Typical Equipment |
|---|---|---|---|---|
| Bioink Storage (Short-term) | 4 | 0.5 | Preserve bioink rheology, inhibit gelation | Refrigerated centrifuge, cold block |
| Cell & Bioink Handling | 20-24 (RT) or 37 | 1.0 | Maintain cell viability & metabolic activity | Thermal cycler, heated stage, environmental chamber |
| Bioprinting Deposition | 10-37* | 0.5-1.0 | Control bioink viscosity & extrusion pressure | Temperature-controlled print head, chamber |
| Post-Print Incubation | 37 | 0.2 | Promote cell adhesion, proliferation, function | CO₂ Incubator (with humidity control) |
| *Material dependent |
Humidity Control
Ambient humidity directly affects bioink evaporation, leading to nozzle clogging, dimensional inaccuracies, and increased osmolarity detrimental to cells.
Table 2: Standardized Humidity Parameters for Bioprinting
| Environment | Target Relative Humidity (% RH) | Minimum RH | Critical Impact if Uncontrolled | Control Method |
|---|---|---|---|---|
| Bioink Preparation Hood | 60-80% | >40% | Evaporative loss during mixing | Humidifier in lab space, localized nebulizer |
| Bioprinting Chamber | >90% | 85% | Nozzle drying, bioink dehydration, cell death | Integrated chamber humidifier, reservoir, ultrasonic fogger |
| Post-Print Culture (Incubator) | 95% | 90% | Medium evaporation, construct desiccation | Incubator water reservoir, sealed culture vessels |
Sterility Assurance
Aseptic technique is non-negotiable. Contamination compromises cell cultures, induces inflammatory responses in constructs, and renders data unusable.
Table 3: Sterilization Standards & Validation Methods
| Component | Recommended Sterilization Method | Validation Metric | Frequency |
|---|---|---|---|
| Bioprinter Hardware (non-consumable) | 70% Ethanol wipe, UV-C in chamber | Contact agar plates, ATP swabs | Before/after each print session |
| Print Nozzles & Fluid Paths | Autoclave (121°C, 15 psi, 20 min) or Gamma irradiation | Biological indicators (e.g., Geobacillus stearothermophilus) | Per use, or per batch for disposables |
| Bioink Components (Heat-sensitive) | 0.22 µm Membrane Filtration | Sterility test in broth (14 days) | Per batch preparation |
| Cell Culture & Bioprinting Environment | HEPA-Filtered Laminar Flow Hood | Particle counts, settle plates | Biannual certification |
Application Notes & Protocols
Protocol 2.1: Pre-Print Environmental Qualification
Objective: To validate that the bioprinting environment meets specified standards for temperature, humidity, and sterility prior to initiating a critical print run.
Materials:
- Calibrated, traceable digital thermometer/hygrometer.
- Sterile contact agar plates (TSA, SDA).
- Particle counter (for hood certification).
- Bioprinter with environmental enclosure.
Procedure:
- Temperature/Humidity Mapping: Place calibrated sensors at five key locations: bioink reservoir, print bed, interior chamber corners, and near the nozzle. Log data every minute for 60 minutes with systems active.
- Data Analysis: Calculate mean and standard deviation for each location. Compare to thresholds in Tables 1 & 2. The system is qualified only if all locations are within range.
- Sterility Assessment: Place open contact agar plates in the sterilized printing chamber and on the work surface near the bioink. Expose for 30 minutes of typical activity. Incubate plates at 20-25°C (fungi) and 30-35°C (bacteria) for up to 7 days.
- Acceptance Criteria: Colony-forming units (CFUs) must be <1 per plate for the chamber interior and <5 for the external work surface.
Protocol 2.2: Standardized Aseptic Bioprinting Setup for Cell-Laden Bioinks
Objective: To establish a reproducible workflow for printing viable, sterile tissue constructs.
Materials: See "The Scientist's Toolkit" below.
Procedure:
- Pre-Conditioning (1 hour prior): Activate the bioprinter's chamber humidifier and heater. Set to target conditions (e.g., 37°C, >90% RH). Verify with independent sensors.
- Aseptic Preparation:
- Wipe all external surfaces (printer, tools, vial holders) with 70% ethanol.
- Irradiate the interior print chamber with UV-C for 20 minutes (if equipped).
- Place sterilized (autoclaved/gamma-irradiated) nozzles, print beds, and bioink cartridges into the chamber using sterile forceps within a certified biosafety cabinet.
- Bioink Loading: In the biosafety cabinet, mix the cell-laden bioink gently. Using a sterile Luer-lock syringe, aspirate the bioink. Connect to the sterilized fluidic path or cartridge, avoiding bubbles. Transfer the assembly carefully back into the conditioned print chamber.
- Print Execution: Initiate the print job promptly. Monitor first-layer deposition for signs of drying (e.g., strand tearing). If observed, increase chamber humidity immediately.
- Post-Print Transfer: Post-printing, gently transfer the construct to a pre-equilibrated culture plate/dish within the biosafety cabinet. Move the plate to a humidified CO₂ incubator (37°C, 5% CO₂, 95% RH).
Visualizing the Workflow & Impact
Diagram 1: Environmental Control Workflow in Bioprinting
Diagram 2: Consequences of Parameter Failure
The Scientist's Toolkit: Essential Reagents & Materials
| Item | Function in Environmental Control | Example Product/Category |
|---|---|---|
| Calibrated Hygrometer/Thermometer | Provides accurate, traceable measurement of chamber conditions for qualification (Protocol 2.1). | Traceable digital data loggers. |
| Sterile, Pyrogen-Free Water | Used in humidifier reservoirs to generate mist without introducing contaminants or endotoxins. | USP WFI (Water for Injection) grade. |
| Ultrasonic Piezoelectric Fogger | Creates a fine, cool mist inside the print chamber to maintain >90% RH without raising temperature. | Miniature ultrasonic humidifiers. |
| Pre-sterilized Disposable Nozzles | Eliminates variability and risk from repeated autoclaving of delicate nozzles; ensures sterility. | Sterile, capped nozzles (e.g., 22G-30G). |
| Cell Culture-Tested Mineral Oil | Overlay for bioink in reservoirs or printed constructs to prevent evaporation in non-humidified setup steps. | Light, sterile mineral oil. |
| Rapid Sterility Test Kits | For quick validation of media, bioinks, or surfaces using ATP bioluminescence or enzymatic assays. | ATP swab systems. |
| Temperature-Contractable Bioinks | Materials with gelation points sensitive to small temperature changes (e.g., 4°C to 37°C), requiring precise thermal management. | Collagen type I, Pluronic F-127, Matrigel. |
| HEPA Filter Unit (for custom enclosures) | Allows creation of a sterile air environment around printers lacking integrated biocontainment. | Portable laminar flow units. |
Proving Protocol Efficacy: Benchmarks for Validation and Cross-Study Comparison
Within the broader thesis of standardizing 3D bioprinting protocols for functional biomaterials research, the establishment of robust, quantitative metrics is paramount. Three critical benchmarks for assessing scaffold performance and guiding material selection are porosity (influencing nutrient/waste transport and cell infiltration), mechanical strength (matching target tissue mechanics), and degradation rate (ensuring synchrony with tissue regeneration). This document provides standardized Application Notes and Protocols for measuring these key parameters, ensuring reproducibility and cross-study comparability.
Application Notes & Protocols
Protocol for Porosity Analysis via Micro-Computed Tomography (µCT)
Objective: To non-destructively quantify the total porosity, pore size distribution, and interconnectivity of a 3D-bioprinted scaffold.
Materials & Reagent Solutions:
- Bioprinted Scaffold Sample: Fixed in 4% PFA or dried as per material requirements.
- µCT Imaging System: (e.g., SkyScan, Bruker).
- Calibration Phantoms: For attenuation correlation.
- Image Analysis Software: (e.g., CTAn, ImageJ/Fiji with BoneJ plugin).
- Mounting Apparatus: Sample holder/styrofoam for stable positioning.
Detailed Methodology:
- Sample Preparation: Dry scaffold thoroughly (critical for hydrogel-based materials) or fix in a stabilizing solution. Mount securely on the sample stage to prevent movement.
- Image Acquisition: Set scan parameters. Example: Voltage=45 kV, Current=200 µA, Rotation Step=0.4°, Pixel Resolution=5 µm, Aluminum Filter=0.5 mm. Perform a 180° or 360° scan.
- Image Reconstruction: Use manufacturer software to reconstruct 2D cross-sectional images from projection data, applying beam hardening and ring artifact correction.
- Image Segmentation: Apply a global or local threshold to binarize images, separating scaffold material from pores. Use Otsu's method or a manually defined histogram-based threshold.
- Quantitative Analysis:
- Total Porosity (%): Calculate as (Volume of Pores / Total Volume) * 100.
- Pore Size Distribution: Use sphere-fitting or distance transformation methods.
- Interconnectivity: Analyze using a pore network model or by measuring the accessible porosity after closing "blind pores."
Quantitative Data Summary: Table 1: Typical Porosity Metrics for Common Bioprinted Materials (from recent literature)
| Biomaterial (Bioink) | Printing Method | Total Porosity (%) | Mean Pore Size (µm) | Interconnectivity (%) | Reference Year |
|---|---|---|---|---|---|
| GelMA (10% w/v) | Extrusion | 75.2 ± 3.1 | 152 ± 21 | >99 | 2023 |
| Alginate (3% w/v) | Extrusion | 68.5 ± 4.5 | 85 ± 15 | 92 ± 3 | 2024 |
| PCL | Melt Electrowriting | 88.0 ± 2.0 | 210 ± 35 | 100 | 2023 |
| Silk Fibroin | Digital Light Proc. | 60.1 ± 2.8 | 110 ± 10 | 87 ± 5 | 2024 |
Protocol for Mechanical Strength Testing via Uniaxial Compression/Tensile Testing
Objective: To determine the elastic modulus, ultimate compressive/tensile strength, and yield point of bioprinted constructs.
Materials & Reagent Solutions:
- Universal Testing Machine (UTM): Equipped with 10N-500N load cell.
- PBS at 37°C: For hydrated testing.
- Custom Platens/Grips: Sized appropriately for samples to ensure even force distribution.
- Calipers: For precise sample dimension measurement.
Detailed Methodology:
- Sample Preparation: Print standardized geometries (e.g., cylinders: 8mm dia x 4mm height for compression; dog-bone shapes for tension). Condition in PBS at 37°C for 24h prior to testing.
- Dimension Measurement: Precisely measure sample dimensions (diameter, height, gauge length) with calipers. Calculate cross-sectional area.
- Machine Setup: Mount sample. For compression, ensure perfect parallel alignment between platens. For tension, secure grips without inducing pre-stress. Submerge in PBS bath if testing hydrated.
- Test Execution: Apply a constant strain rate (e.g., 1 mm/min for soft hydrogels, 5 mm/min for polymers). Record force (N) and displacement (mm) until sample failure (≥80% strain or fracture).
- Data Analysis: Convert force-displacement to stress (σ = Force/Area)-strain (ε = ΔL/L₀). Plot stress-strain curve. Calculate Elastic Modulus (E) as the slope of the linear elastic region. Identify Ultimate Strength (max stress) and Yield Stress.
Quantitative Data Summary: Table 2: Representative Mechanical Properties of Bioprinted Constructs
| Biomaterial | Testing Mode | Elastic Modulus (kPa or MPa) | Ultimate Strength (kPa or MPa) | Failure Strain (%) | Reference Year |
|---|---|---|---|---|---|
| Collagen I (5 mg/mL) | Compression | 12.5 ± 2.1 kPa | 45.3 ± 5.6 kPa | >75% | 2023 |
| GelMA (15% w/v) | Compression | 85.4 ± 9.7 kPa | 320 ± 25 kPa | 68 ± 4% | 2024 |
| PCL | Tensile | 250 ± 15 MPa | 32 ± 3 MPa | 22 ± 5% | 2023 |
| Alginate-Cellulose Nanofiber | Tensile | 1.8 ± 0.2 MPa | 0.9 ± 0.1 MPa | 35 ± 3% | 2024 |
Protocol forIn VitroDegradation Rate Measurement
Objective: To quantify mass loss and change in mechanical properties of a scaffold over time under simulated physiological conditions.
Materials & Reagent Solutions:
- Degradation Medium: PBS (pH 7.4) with/without enzymes (e.g., 1 U/mL collagenase, 100 U/mL hyaluronidase) or lipase, depending on material.
- Orbital Shaker Incubator: Set to 37°C, 60 rpm.
- Analytical Balance: Precision ±0.01 mg.
- Lyophilizer (Freeze-Dryer): For dry mass measurement.
- pH Meter: To monitor medium acidity.
Detailed Methodology:
- Baseline Measurement (t=0): Pre-weigh empty vial (Wvial). Lyophilize a minimum of n=5 samples to constant dry mass. Record dry weight (Winitial).
- Degradation Study: Place each sample in a vial with 10x sample volume of degradation medium. Incubate at 37°C with gentle agitation.
- Medium Management: Replace medium entirely every 2-3 days to maintain enzyme activity and pH.
- Timepoint Sampling: At predetermined intervals (e.g., days 1, 3, 7, 14, 28), remove samples (n=3-5 per timepoint). Rinse with DI water.
- Post-Processing & Analysis: Lyophilize samples to constant mass. Record final dry weight (W_final).
- Calculation: Mass Remaining (%) = (Wfinal / Winitial) * 100. Perform parallel mechanical testing on wet samples at key timepoints.
Quantitative Data Summary: Table 3: Degradation Profiles of Representative Biomaterials
| Biomaterial | Degradation Condition | Time to 50% Mass Loss (Days) | Erosion Profile (Surface/Bulk) | Reference Year |
|---|---|---|---|---|
| PLGA (85:15) | PBS (pH 7.4, 37°C) | 42 ± 5 | Bulk (hydrolytic) | 2023 |
| GelMA | PBS + 1 U/mL Collagenase | 14 ± 2 | Surface (enzymatic) | 2024 |
| Alginate (high G) | PBS (no Ca²⁺ chelator) | >120 | Very slow/negligible | 2023 |
| Silk Fibroin | PBS + Protease XIV | 28 ± 4 | Surface (enzymatic) | 2024 |
The Scientist's Toolkit: Essential Research Reagent Solutions
Table 4: Key Reagents and Materials for Standardized Biomaterial Characterization
| Item | Function in Protocols |
|---|---|
| Phosphate-Buffered Saline (PBS), pH 7.4 | Standard hydration, rinsing, and degradation medium for simulating physiological ionic strength and pH. |
| Paraformaldehyde (PFA), 4% | Fixative for stabilizing hydrogel scaffolds prior to µCT imaging to prevent structural collapse during drying. |
| Type I Collagenase | Enzymatic agent used in degradation studies to simulate in vivo breakdown of collagen-based materials (e.g., GelMA, collagen). |
| Lysozyme & Protease XIV | Enzymes for accelerated degradation testing of natural polymers like silk fibroin and certain polyesters. |
| Calcein-AM or Alizarin Red | Viability or mineralization stains sometimes used in correlative studies with mechanical or degradation tests. |
| Sodium (meta)Periodate | Chemical crosslinker/oxidizing agent; its concentration can be varied to tune degradation rates in polysaccharide-based inks. |
Diagrams
Title: µCT Porosity Analysis Workflow
Title: Mechanical Data Analysis Logic
Title: Primary Biomaterial Degradation Pathways
Within the thesis framework of standardizing 3D bioprinting protocols for functional biomaterials, biological validation is the critical, non-negotiable step that translates a printed structure into a biologically relevant model. The transition from 2D to 3D culture fundamentally alters cellular responses, making standardized, reliable, and context-appropriate assays essential. This document provides detailed application notes and protocols for core assays quantifying cell viability, proliferation, and function within 3D bioprinted constructs. These standardized methodologies aim to establish benchmarks for comparing biomaterial formulations, bioink performance, and the functional maturity of engineered tissues, directly supporting reproducible research in drug development and regenerative medicine.
Standardized Assay Portfolio for 3D Constructs
The following table summarizes the recommended suite of assays, their quantitative outputs, and key considerations for 3D bioprinted samples.
Table 1: Standardized Biological Validation Assay Portfolio
| Assay Category | Specific Assay | Quantitative Readout | Key Advantage for 3D | Primary Use Case |
|---|---|---|---|---|
| Viability/Cytotoxicity | Live/Dead Staining | % Viable Cells | Spatial visualization of viability within construct. | Initial biocompatibility screening post-printing. |
| Calcein-AM / EthD-1 | Cells/mm³ (viable & dead) | Quantitative, imaging-based. | Longitudinal health monitoring. | |
| Lactate Dehydrogenase (LDH) Release | % Cytotoxicity | Measures membrane integrity; useful for supernatant. | Assessing acute toxicity from bioink components. | |
| Proliferation | Metabolic Activity (AlamarBlue/Resazurin) | Fluorescence Units; Doubling Time | Non-destructive, longitudinal tracking. | Monitoring growth over days/weeks within hydrogel. |
| DNA Quantification (PicoGreen) | Total DNA (ng/construct) | Direct correlation to cell number. | Endpoint measurement of total cellularity. | |
| EdU Incorporation | % Proliferating Cells | Identifies S-phase cells spatially. | Visualizing proliferation zones within 3D matrix. | |
| Function | Cell-Specific ELISA (e.g., Albumin, Collagen II) | [pg/mL] / µg DNA / day | Quantifies secretory function. | Hepatocyte or chondrocyte functional assessment. |
| Metabolic Function (Urea, Glycosaminoglycan assay) | [mmol] or [µg] / construct / day | Tissue-specific biochemical output. | Liver or cartilage model validation. | |
| Calcium Deposition (Alizarin Red S) | [nmol] or stained area % | Measures mineralization. | Osteogenic differentiation in bone models. | |
| Contractile Stress (Traction Force Microscopy) | Stress (Pa) | Functional readout for cardiac/muscle tissues. | Assessing maturity of contractile tissues. |
Detailed Experimental Protocols
Protocol 2.1: Spatial Viability Assessment via Live/Dead Staining for 3D Bioprinted Constructs
Objective: To visualize and quantify the spatial distribution of live and dead cells within a 3D bioprinted construct at a specified time point post-printing (e.g., Day 1, 3, 7). Principle: Live cells convert non-fluorescent calcein-AM to green-fluorescent calcein (494/517 nm) via intracellular esterases. Dead cells with compromised membranes admit ethidium homodimer-1 (EthD-1), which binds nucleic acids and produces red fluorescence (528/617 nm).
Materials:
- Bioprinted construct in culture medium.
- Phosphate Buffered Saline (PBS), without Ca²⁺/Mg²⁺.
- Live/Dead Viability/Cytotoxicity Kit (e.g., Thermo Fisher, L3224).
- 24-well plate.
- Confocal microscope or high-content imaging system with Z-stack capability.
Procedure:
- Solution Preparation: Prepare a 2 µM calcein-AM and 4 µM EthD-1 working solution in pre-warmed PBS or serum-free culture medium.
- Sample Washing: Gently aspirate culture medium from the well containing the construct. Wash once with 1 mL PBS.
- Staining: Add 300-500 µL of the working solution to completely cover the construct. Incubate for 30-45 minutes at 37°C, protected from light.
- Washing: Carefully aspirate the staining solution. Gently wash the construct twice with 1 mL PBS.
- Imaging: Immediately image using a confocal microscope. For quantification, acquire Z-stacks through the entire thickness of the construct (e.g., 50-200 µm slices). Use consistent laser powers and gain settings across samples.
- Analysis: Use image analysis software (e.g., FIJI/ImageJ, IMARIS) to:
- Create maximum intensity projections.
- Apply thresholding to separate green (live) and red (dead) signals.
- Calculate the percentage of viable cells:
% Viability = (Area of Green Signal / (Area of Green + Area of Red Signal)) * 100. Report as mean ± SD from n≥3 constructs.
Protocol 2.2: Longitudinal Metabolic Activity Monitoring (AlamarBlue)
Objective: To non-destructively track cell proliferation and metabolic health within the same 3D construct over multiple time points. Principle: Resazurin (blue, non-fluorescent) is reduced by metabolically active cells to resorufin (pink, highly fluorescent). The fluorescence intensity is proportional to the number of viable, metabolically active cells.
Materials:
- Bioprinted constructs in a 24- or 48-well plate.
- Pre-warmed culture medium, without phenol red if possible.
- AlamarBlue (Resazurin) reagent (e.g., Thermo Fisher, DAL1025).
- Fluorescence microplate reader (560 nm excitation / 590 nm emission).
- Orbital shaker.
Procedure:
- Baseline Measurement: Perform at 24 hours post-printing to establish Day 1 baseline.
- Reagent Addition: Prepare a 10% (v/v) AlamarBlue solution in pre-warmed, phenol-red-free culture medium. Aspirate the existing medium from each well and replace with the AlamarBlue-medium solution (e.g., 300 µL for a 48-well).
- Incubation: Incubate plates for 2-3 hours at 37°C, 5% CO₂, protected from light. Place on an orbital shaker at low speed (∼60 rpm) to ensure reagent diffusion into the 3D construct.
- Reading: Transfer 100 µL of the supernatant from each well to a black-walled, clear-bottom 96-well plate. Measure fluorescence (Ex/Em: 560/590 nm).
- Sample Recovery: For longitudinal studies, carefully aspirate the AlamarBlue-medium mixture from the original well, rinse the construct once with PBS, and add fresh, complete culture medium. Return constructs to the incubator.
- Data Normalization: Normalize fluorescence readings to the Day 1 baseline reading for each construct. Plot normalized fluorescence vs. time to generate growth/metabolic activity curves. Doubling times can be calculated from the exponential phase.
Protocol 2.3: Functional Secretion Analysis via ELISA
Objective: To quantify the tissue-specific secretory function of cells within a 3D bioprinted construct (e.g., albumin for hepatocytes, collagen type II for chondrocytes). Principle: A sandwich ELISA captures and detects target proteins secreted into the culture medium over a defined period.
Materials:
- Conditioned culture medium collected from constructs over 24-48 hours.
- Cell-specific ELISA kit (e.g., Human Albumin ELISA Kit, Abcam, ab179887).
- Microplate reader capable of 450 nm absorbance.
- PicoGreen dsDNA Quantification Kit (for normalization).
Procedure:
- Medium Collection: At the desired time point, completely aspirate and discard the existing medium. Gently wash constructs with PBS and add fresh, serum-free (or low-serum) medium of a known volume (e.g., 300 µL). Incubate for a precise collection period (e.g., 24 h).
- Harvest Conditioned Medium: Carefully collect the medium and centrifuge at 1000 x g for 10 minutes to remove any cells or debris. Aliquot and store supernatant at -80°C if not used immediately.
- Perform ELISA: Follow the manufacturer's protocol precisely. Typically involves:
- Coating wells with capture antibody.
- Blocking with BSA or proprietary buffer.
- Adding standards and samples.
- Adding detection antibody and enzyme conjugate.
- Adding substrate and measuring absorbance.
- Normalization: Lyse the construct after medium collection using a suitable lysis buffer. Quantify the total DNA content using the PicoGreen assay (Protocol 2.4). This controls for variations in cell number between constructs.
- Calculation: Calculate the concentration of the secreted protein from the standard curve. Express the functional output as
[pg or ng of protein] / [µg of DNA] / [collection period in hours or days].
Protocol 2.4: DNA Quantification for Cell Number Normalization (PicoGreen)
Objective: To quantify the total double-stranded DNA (dsDNA) content of a 3D construct as a proxy for total cell number, enabling normalization of functional assay data. Principle: The PicoGreen dye exhibits >1000-fold fluorescence enhancement upon binding to dsDNA.
Materials:
- Constructs after medium collection.
- Cell lysis buffer (e.g., 0.1% Triton X-100, 10 mM Tris, 1 mM EDTA, pH 7.5).
- Quant-iT PicoGreen dsDNA Assay Kit (Thermo Fisher, P11496).
- Fluorescence microplate reader (480 nm excitation / 520 nm emission).
- Lambda DNA standard (provided in kit).
Procedure:
- Lysis: Add 200-400 µL of lysis buffer to each construct in its well. Freeze-thaw once (-80°C for 20 min, then 37°C for 10 min) or incubate with gentle shaking for 1-2 hours at room temperature.
- Standard Preparation: Prepare dsDNA standards from 0 to 2 µg/mL in lysis buffer.
- Assay Setup: In a black-walled 96-well plate, mix 100 µL of each standard or sample with 100 µL of 1X PicoGreen working solution. Incubate for 5 minutes at room temperature, protected from light.
- Measurement: Read fluorescence (Ex/Em: 480/520 nm).
- Calculation: Generate a standard curve and calculate the DNA concentration in each sample. Multiply by the lysis buffer volume to obtain Total DNA per construct (ng).
Visualization of Assay Workflow and Logic
Title: Biological Validation Workflow for 3D Constructs
Title: Data Normalization Pathway for Functional Assays
The Scientist's Toolkit: Essential Research Reagent Solutions
Table 2: Key Reagents for 3D Bioprinting Biological Validation
| Reagent / Kit | Supplier Examples | Primary Function in Validation | Critical Application Note for 3D |
|---|---|---|---|
| Live/Dead Viability/Cytotoxicity Kit | Thermo Fisher (L3224), Promega (G9241) | Distinguishes live (calcein-AM, green) from dead (EthD-1, red) cells. | Diffusion is key. Incubation times must be extended (30-45 min) and constructs may require gentle agitation for full penetration. Confocal Z-stacking is mandatory. |
| AlamarBlue Cell Viability Reagent | Thermo Fisher (DAL1025), Bio-Rad (BUF012A) | Measures metabolic activity via resazurin reduction. Fluorescence correlates with viable cell number. | Ideal for longitudinal study. Use phenol-red-free medium. Normalize to Day 1 readings. Ensure reagent diffusion by shaking during incubation. |
| Quant-iT PicoGreen dsDNA Assay Kit | Thermo Fisher (P11496) | Ultra-sensitive quantification of double-stranded DNA for cell number determination. | Essential for normalization. Use a robust lysis buffer (e.g., with Triton X-100) and ensure complete construct dissolution via freeze-thaw. |
| Cell Type-Specific ELISA Kits | R&D Systems, Abcam, Thermo Fisher | Quantifies tissue-specific protein secretion (e.g., Albumin, Collagen II, α-fetoprotein). | Collect medium under serum-free conditions to avoid interference. Always normalize to DNA content from the same construct. |
| EdU (5-ethynyl-2’-deoxyuridine) Proliferation Kits | Thermo Fisher (C10337), Click Chemistry Tools | Labels cells actively synthesizing DNA (S-phase) for spatial proliferation analysis. | Click chemistry detection is superior for 3D. Requires optimization of EdU concentration and incubation time for full penetration and labeling. |
| Lactate Dehydrogenase (LDH) Assay Kit | Promega (J2380), Roche (11644793001) | Measures released LDH from cells with compromised membranes, indicating cytotoxicity. | Use construct supernatant. Background from serum-containing media can be high; use low-serum or serum-free during assay incubation. |
Within the broader thesis on 3D bioprinting protocol standardization, this application note establishes a comparative analysis framework for evaluating biomaterials and bioprinters. The objective is to provide researchers, scientists, and drug development professionals with shared, standardized protocols to enable direct, meaningful comparisons between different bioinks, biomaterials, and printing technologies. This framework is critical for advancing functional biomaterials research by mitigating variability introduced by disparate methodologies.
The Scientist's Toolkit: Key Research Reagent Solutions
| Item | Function |
|---|---|
| Gelatin Methacryloyl (GelMA) | A photopolymerizable hydrogel derived from gelatin. Serves as a primary biomaterial scaffold, providing cell-adhesive motifs and tunable mechanical properties. |
| Sodium Alginate | A natural polysaccharide used for its rapid ionic crosslinking with calcium ions. Provides structural integrity and can be blended with other polymers. |
| Polyethylene Glycol Diacrylate (PEGDA) | A synthetic, bioinert hydrogel precursor. Offers high control over mechanical properties and network structure, useful for controlled studies. |
| LAP Photoinitiator | Lithium phenyl-2,4,6-trimethylbenzoylphosphinate. A cytocompatible photoinitiator for UV/VIS light crosslinking of methacryloyl or acrylate-based bioinks. |
| Calcium Chloride (CaCl₂) Solution | Crosslinking agent for ionic crosslinking of alginate-based bioinks, typically used in post-print or coaxial printing stabilization. |
| Human Mesenchymal Stem Cells (hMSCs) | A standard cell type for evaluating bioink cytocompatibility, printability with cells (bioprinting), and post-print biological functionality. |
| Cell Viability/Cytotoxicity Assay Kit | (e.g., Live/Dead, AlamarBlue, MTT). Essential for quantifying the impact of the printing process and material environment on cell health. |
| Rheology Testing Kit | Cone-plate or parallel plate geometry fixtures for a rheometer. Critical for characterizing bioink viscosity, shear-thinning behavior, and viscoelastic properties pre- and post-crosslinking. |
Core Experimental Protocols
Protocol 3.1: Standardized Bioink Rheological Characterization
Objective: To quantitatively assess pre-crosslinking printability parameters. Procedure:
- Sample Preparation: Prepare 3 mL of each bioink (e.g., 5% w/v GelMA, 3% w/v Alginate, 10% w/v PEGDA) under sterile conditions. For cell-laden inks, use a dummy solution of equivalent viscosity.
- Viscosity vs. Shear Rate: Using a rotational rheometer with a cone-plate geometry (gap 0.1 mm), perform a shear rate sweep from 0.1 to 100 s⁻¹ at 25°C.
- Yield Stress Measurement: Perform a stress sweep at a constant frequency (1 Hz) to identify the storage (G') and loss (G'') modulus crossover point.
- Thixotropic Recovery: Apply a high shear rate (50 s⁻¹) for 30s, immediately switch to a low shear rate (0.1 s⁻¹), and monitor viscosity recovery over 60s. Data Analysis: Extract viscosity at 1 s⁻¹ (extrusion viscosity), yield stress, and recovery half-time.
Protocol 3.2: Shared Bioprinting & Crosslinking Protocol
Objective: To fabricate test constructs using different printers under standardized conditions. Procedure:
- Printer Calibration: Calibrate all printers (extrusion-based, DLP, inkjet) using a standardized test file (a 15x15x1 mm grid and a 10 mm diameter circle).
- Printing Parameters (Extrusion):
- Nozzle Diameter: 25G (250 µm).
- Print Speed: 10 mm/s.
- Print Pressure: Optimized to achieve the target speed (record final value).
- Bed Temperature: 15°C for thermoresponsive inks.
- Crosslinking:
- Photocrosslinking: For GelMA/PEGDA, irradiate (365 nm, 5 mW/cm²) for 60s post-print.
- Ionic Crosslinking: For Alginate, immerse in 100 mM CaCl₂ for 5 min post-print.
- Post-processing: Wash constructs 3x in PBS and incubate in standard culture medium.
Protocol 3.3: Post-Print Assessment of Constructs
Objective: To evaluate mechanical and biological outcomes consistently. Procedure:
- Print Fidelity: Image constructs (n=5) via brightfield microscopy. Measure line width and grid pore size using ImageJ. Compare to CAD model.
- Compressive Modulus: Using a uniaxial mechanical tester, compress acellular constructs (10 mm diameter x 2 mm height) at 1 mm/min. Calculate modulus from the linear region (0-15% strain).
- Cell Viability (If Bioprinting):
- Seed cells in bioink at 1x10⁶ cells/mL. Print test grid.
- At 1 and 24 hours post-print, stain with Live/Dead assay (Calcein AM/EthD-1).
- Image 5 random fields per construct (n=3). Calculate viability as (Live Cells / Total Cells)*100.
- Cell Morphology: At day 3, fix, permeabilize, and stain for F-actin (Phalloidin) and nuclei (DAPI). Image via confocal microscopy.
Data Presentation: Quantitative Comparison Tables
Table 1: Rheological Properties of Candidate Bioinks (n=3)
| Bioink Formulation | Viscosity at 1 s⁻¹ (Pa·s) | Yield Stress (Pa) | Thixotropic Recovery Half-time (s) |
|---|---|---|---|
| 5% GelMA, 0.25% LAP | 12.5 ± 1.8 | 45.2 ± 5.1 | 8.3 ± 1.2 |
| 3% Alginate | 8.2 ± 0.9 | 18.7 ± 2.3 | >60 (incomplete) |
| 10% PEGDA, 0.5% LAP | 5.1 ± 0.5 | N/A (Newtonian) | N/A |
| 3% Alginate / 5% GelMA Blend | 15.7 ± 2.1 | 52.8 ± 6.4 | 15.6 ± 2.8 |
Table 2: Print Fidelity and Mechanical Properties (n=5)
| Bioink & Printer Type | Line Width Deviation (%) | Pore Size Deviation (%) | Compressive Modulus (kPa) |
|---|---|---|---|
| GelMA (Extrusion, Printer A) | +12.5 ± 3.1 | -15.2 ± 4.0 | 22.4 ± 3.1 |
| GelMA (DLP, Printer B) | +1.2 ± 0.5 | -2.1 ± 0.8 | 25.8 ± 2.7 |
| Alginate (Extrusion, Printer A) | +18.7 ± 4.5 | -22.4 ± 5.1 | 15.1 ± 2.2 |
| PEGDA (DLP, Printer B) | +0.8 ± 0.3 | -1.8 ± 0.7 | 85.3 ± 7.6 |
Table 3: Cell Viability Outcomes Post-Bioprinting (n=3, hMSCs)
| Bioink & Printer Type | Viability at 1 Hour (%) | Viability at 24 Hours (%) |
|---|---|---|
| GelMA (Extrusion) | 92.1 ± 2.4 | 88.5 ± 3.1 |
| GelMA (DLP) | 94.8 ± 1.9 | 91.2 ± 2.7 |
| Alginate (Extrusion) | 85.3 ± 3.8 | 82.1 ± 4.2 |
Mandatory Visualizations
Title: Standardized Workflow for Biomaterial and Printer Comparison
Title: Key Factors Influencing Bioprinting Outcomes
Title: Framework Context within Broader Thesis Goal
Within the broader thesis on 3D bioprinting protocol standardization for functional biomaterials research, the Minimum Information for Publishing Bioprinting Studies (MIABS) is proposed as a critical reporting framework. The lack of standardized reporting in the literature severely hampers reproducibility, meta-analysis, and the translation of bioprinted constructs from research to preclinical and clinical applications. MIABS aims to provide a checklist of essential information that must be included in any publication to ensure the study can be adequately understood, critically evaluated, and replicated.
Core MIABS Reporting Categories
All manuscripts should explicitly address the following categories in the methods and results sections.
Table 1: Minimum Information for Publishing Bioprinting Studies (MIABS) Checklist
| Category | Sub-item | Description & Required Details |
|---|---|---|
| 1. Bioink Formulation | Constituents | Precise names, sources (vendor, catalog #), concentrations (%, w/v, mg/mL), and lot numbers of all polymers, crosslinkers, and bioactive factors. |
| Physical Properties | Reported rheological data (viscosity, shear-thinning, yield stress), gelation kinetics, and mechanical properties (storage/loss moduli) pre-printing. | |
| Biochemical Properties | Details on incorporation of adhesion motifs (e.g., RGD), degradation profiles, and growth factor release kinetics if applicable. | |
| 2. Cell Source & Preparation | Cell Type & Origin | Species, tissue source, donor characteristics, passage number, and culture conditions prior to bioink incorporation. |
| Viability & Density | Pre-printing viability (%) and final cell density within the bioink (cells/mL). | |
| Characterization | Evidence of phenotype maintenance or differentiation status pre-printing (e.g., flow cytometry, qPCR data). | |
| 3. Bioprinter & Print Process | Printer Specifications | Manufacturer, model, printhead type (pneumatic, piston, microvalve, etc.), and nozzle characteristics (material, diameter). |
| Print Parameters | All critical settings: pressure, speed, layer height, printing temperature (nozzle/build plate), and deposition path pattern. | |
| Post-Print Processing | Crosslinking method (light: wavelength, intensity, duration; chemical: concentration, exposure time), and any immediate transfer to culture. | |
| 4. Construct Design & Evaluation | Digital Design | Software used, 3D model file format, dimensions (CAD model vs. printed), and pore size/geometry. |
| Post-Print Assessment | Quantitative morphological fidelity (e.g., strand diameter, pore size deviation from design), and initial cell viability (%, usually via live/dead assay). | |
| Functional Outcomes | Timeline and metrics for maturation: cell viability/proliferation over time, metabolic activity, histological analysis, gene/protein expression, and construct-specific function (e.g., contraction, albumin secretion, calcium deposition). | |
| 5. Controls & Statistics | Experimental Controls | Description of all controls (e.g., non-printed cell-laden gel, acellular prints, 2D culture). |
| Replication | Number of independent experiments (N), number of technical replicates per experiment (n), and statement of what N and n represent. | |
| Statistical Analysis | Specific tests used, software, and how significance was defined (p-value threshold). |
Detailed Protocol: Standardized Assessment of Bioprinted Construct Viability and Morphology
This protocol operationalizes key reporting requirements under MIABS Categories 4 and 5.
Aim:To quantify the post-printing viability of cells within a bioprinted construct and assess its morphological fidelity to the digital design.
Materials & Reagents (The Scientist's Toolkit)
Table 2: Essential Research Reagent Solutions for Post-Print Assessment
| Item | Function | Example (Vendor, Catalog #) |
|---|---|---|
| Calcein-AM | Live cell stain. Cell-permeable, converted by esterases to green-fluorescent calcein. | Thermo Fisher, C3100MP |
| Ethidium Homodimer-1 (EthD-1) | Dead cell stain. Binds to nucleic acids in membrane-compromised cells, red fluorescence. | Thermo Fisher, E1169 |
| Dulbecco’s Phosphate Buffered Saline (DPBS) | Isotonic washing and dilution buffer. | Sigma-Aldrich, D8537 |
| Hepes-Buffered Culture Medium | Maintains pH during staining outside incubator. | Gibco, 15630080 |
| 4% Paraformaldehyde (PFA) | Fixative for preserving construct architecture for imaging. | Thermo Fisher, J19943.K2 |
| Fluorescence Microscope | High-resolution imaging with FITC and TRITC filters. | e.g., Zeiss LSM 880 |
| Image Analysis Software | For quantifying viability and strand dimensions. | Fiji/ImageJ, Imaris |
Experimental Workflow Protocol
Day 0: Bioprinting
- Prepare bioink according to MIABS Category 1 specifications.
- Load bioink into sterile print cartridge, avoiding bubbles.
- Using parameters documented under MIABS Category 3, bioprint the desired construct (e.g., a 10x10 mm grid, 4 layers high) into a sterile culture dish or plate.
- Apply the documented crosslinking protocol immediately.
- Gently transfer the construct to a well containing pre-warmed culture medium and incubate (37°C, 5% CO₂) for 24 hours.
Day 1: Staining and Imaging
- Prepare Live/Dead Stain: Mix Calcein-AM and EthD-1 in DPBS or Hepes-buffered medium to final concentrations of 2 µM and 4 µM, respectively. Protect from light.
- Wash Construct: Aspirate culture medium and gently rinse the construct with 1 mL of warm DPBS.
- Stain: Add enough staining solution to fully cover the construct (e.g., 300 µL). Incubate in the dark at room temperature for 30-45 minutes.
- Rinse & Image: Gently aspirate the stain, rinse once with DPBS, and add fresh DPBS. Immediately image using a fluorescence microscope.
- Viability: Capture 3-5 representative fields per construct (green channel: Calcein, red channel: EthD-1). Use consistent exposure times across all samples.
- Morphology: Using brightfield or a low-magnification stitch, capture an image of the entire construct for fidelity analysis.
Data Analysis & Reporting
- Viability Calculation:
- In ImageJ, merge the green and red channels.
- Manually threshold or use a particle analysis algorithm to count live (green) and dead (red) cells in each field.
- Calculate viability:
% Viability = [Live Cells / (Live + Dead Cells)] * 100. - Report as mean ± standard deviation across all fields and replicates (N, n as per MIABS 5).
- Morphological Fidelity:
- Using the construct image, measure the average strand diameter at 10 random locations.
- Measure the pore size (center-to-center distance between strands) at 10 random locations.
- Compare these measurements to the designed nozzle diameter and CAD model pore size. Report percentage deviation.
Visualizing the MIABS Framework and Workflow
Diagram 1: MIABS Framework for Reproducible Bioprinting
Diagram 2: Standardized Post-Print Assessment Workflow
Conclusion
The path to reliable and clinically relevant 3D bioprinted tissues hinges on the widespread adoption of standardized protocols. By establishing clear, step-by-step frameworks for material preparation, printing, post-processing, and validation, the field can overcome critical reproducibility challenges. The synthesis of insights from foundational principles, methodological SOPs, troubleshooting guides, and comparative validation creates a robust roadmap. Future directions must involve community-driven consortium efforts to develop and ratify universal standards, enabling meaningful data comparison, accelerating drug discovery pipelines, and ultimately, paving a faster and more predictable route for regenerative medicine and personalized implants. The responsibility lies with researchers to adopt and contribute to these standards, transforming 3D bioprinting from an artisanal craft into a rigorous engineering discipline.