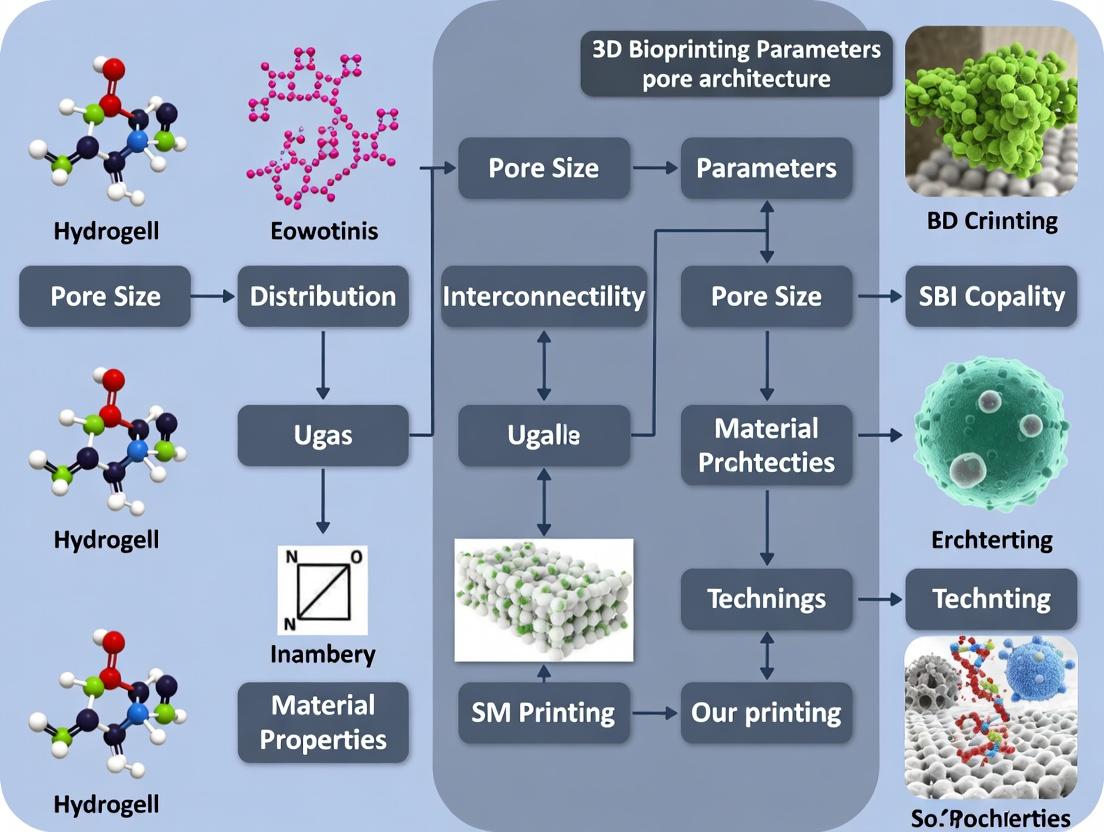
Engineering the Microenvironment: A Comprehensive Guide to 3D Bioprinting Parameters for Precise Pore Architecture
This article provides a detailed, up-to-date analysis of the key process parameters governing pore architecture in 3D bioprinted scaffolds for tissue engineering and drug screening.
Engineering the Microenvironment: A Comprehensive Guide to 3D Bioprinting Parameters for Precise Pore Architecture
Abstract
This article provides a detailed, up-to-date analysis of the key process parameters governing pore architecture in 3D bioprinted scaffolds for tissue engineering and drug screening. Tailored for researchers and industry professionals, we systematically explore the foundational principles of porosity, methodical parameter tuning for specific applications, troubleshooting of common structural defects, and quantitative validation techniques. The content synthesizes current research to offer a practical framework for designing biomimetic, mechanically robust, and biologically functional constructs with controlled pore networks to direct cell behavior, nutrient diffusion, and vascularization.
Why Pore Architecture Matters: The Foundational Principles of Porosity in 3D Bioprinting
Within 3D bioprinting for tissue engineering and drug screening, the precise control of pore architecture is a critical determinant of scaffold functionality. This pore network dictates biological outcomes by influencing cell migration, nutrient/waste diffusion, vascularization, and drug release kinetics. This application note defines and details methodologies for quantifying the five key metrics governing pore architecture: porosity, pore size, pore shape, interconnectivity, and tortuosity, providing essential protocols for researchers aiming to establish reproducible structure-function relationships.
Key Metrics: Definitions and Significance
| Metric | Definition | Bioprinting Relevance & Target Ranges |
|---|---|---|
| Porosity (ε) | The percentage of void (pore) volume in a scaffold relative to its total volume. | Determines space for cell colonization, matrix deposition, and fluid flow. Optimal ranges vary: for bone (50-90%), cartilage (70-90%), vascular ingrowth (>80%). |
| Pore Size (d) | The characteristic diameter of individual pores, often reported as mean ± SD. | Directs cellular infiltration (min. 10-20µm), organization, and phenotypic expression. Bone (100-350µm), angiogenesis (200-500µm), neuron guidance (10-100µm). |
| Pore Shape | The 2D or 3D geometry of pores (e.g., spherical, polygonal, fibrous, channel-like). | Influences local cell alignment, stress distribution, and packing density. Engineered via print path (filament spacing, infill pattern). |
| Interconnectivity (Φ) | The degree to which pores are linked, allowing unimpeded fluid/cell passage. | Critical for uniform cell distribution and prevention of necrotic cores. Often qualified as closed, open, or fully interconnected (>99% open pores). |
| Tortuosity (τ) | A measure of path complexity, defined as the ratio of the actual flow path length to the straight-line distance. | Governs diffusion efficiency and permeability. Low τ (~1-3) enhances mass transport; high τ (>5) creates gradients. |
Experimental Protocols for Quantification
Protocol 2.1: Micro-Computed Tomography (µCT) for 3D Architectural Analysis This is the gold-standard, non-destructive method for comprehensive 3D metric extraction.
- Sample Preparation: Fix scaffold samples (min. 5mm³) in 4% PFA for 2 hours. Wash and dehydrate in graded ethanol series (70%, 90%, 100%). Air-dry in a desiccator.
- Image Acquisition: Mount sample on a rotary stage. Acquire projections (typical settings: 50-90 kV, 100-200 µA, 10-20 µm isotropic voxel size, 0.5-1° rotation step over 360°). Apply beam hardening and ring artifact corrections.
- Image Segmentation (Thresholding): Reconstruct 3D volume. Use Otsu's method or iterative global thresholding in software (e.g., ImageJ, Dragonfly, CTan) to binarize images into solid (white) and pore (black) phases. Validate threshold visually and via histogram.
- Metric Calculation:
- Porosity: Calculate as (Pore Voxels / Total Voxels) * 100%.
- Pore Size/Shape: Apply a 3D sphere-fitting algorithm (e.g., local thickness) to generate a pore size distribution map. Calculate mean, mode, and SD.
- Interconnectivity: Perform a "pore isolation" or "connected components" analysis. Open porosity = (Interconnected Pore Voxels / Total Pore Voxels) * 100%.
- Tortuosity: Use a random walk algorithm (e.g., in TauFactor) or a flow simulation module to compute diffusional tortuosity in x, y, z axes.
Protocol 2.2: Mercury Intrusion Porosimetry (MIP) for Pore Size & Interconnectivity Best for quantifying accessible pore throat diameters and volume distributions.
- Sample Preparation: Pre-dry scaffolds thoroughly (~60°C under vacuum for 24h) to remove moisture.
- Loading: Place sample in a penetrometer (sample holder), evacuate to <50 µmHg.
- Intrusion Run: Incrementally increase hydrostatic pressure (from ~0.5 psia to 60,000 psia), forcing non-wetting mercury into pores. Record intruded volume (V) vs. pressure (P) at each step.
- Data Analysis (Washburn Equation): Calculate pore diameter d = -(4γ cosθ)/P, where γ=485 mN/m (Hg surface tension), θ=130° (Hg contact angle). Plot dV/d(log d) vs. d for differential pore volume distribution. Total intruded volume at max pressure gives interconnected porosity.
Protocol 2.3: Fluid Displacement (Archimedes' Principle) for Bulk Porosity A simple, cost-effective method for overall (open + closed) porosity.
- Dry Weight (W_d): Weigh the dry scaffold.
- Wet Weight (W_w): Immerse sample in a low-surface-tension liquid (e.g., ethanol) under vacuum for 15 mins to fill open pores. Blot surface quickly and weigh.
- Buoyant Weight (W_b): Suspend the ethanol-saturated sample in ethanol and weigh.
- Calculation: Porosity ε = (Ww - Wd) / (Ww - Wb) * (ρfluid / ρscaffold material). Requires knowledge of scaffold material density (ρ_scaffold).
Visualizing Analysis Workflows
Workflow: µCT Analysis for Pore Metrics
Logic: Pore Architecture Dictates Function
The Scientist's Toolkit: Key Research Reagent Solutions
| Item / Solution | Function in Pore Architecture Research |
|---|---|
| Iodine-Based Contrast Agents (e.g., Lugol's Solution) | Enhances X-ray attenuation of hydrogel scaffolds for superior µCT imaging contrast and segmentation accuracy. |
| Low-Viscosity Epoxy Resin (e.g., EpoTek 301) | For scaffold embedding prior to sectioning, preserving delicate pore structure during histological processing. |
| Silicone Oil (Dimethicone) | A non-intrusive fluid for fluid displacement porosity measurements, especially for hydrophobic scaffolds. |
| Porosity Standards (e.g., Certified Glass Filter Discs) | Calibrate and validate measurements from MIP and image analysis systems. |
| 3D Image Analysis Software (e.g., CTan, Dragonfly, ImageJ/Fiji with BoneJ) | Essential suites for 3D volume reconstruction, segmentation, and quantitative morphometric analysis. |
| Degassed, Deionized Water | Critical for Archimedes/principles porosity measurement to prevent air bubbles from skewing wet weight values. |
Within the broader thesis on 3D biopinter parameters for controlled pore architecture, this document establishes the biological rationale for precise pore engineering. Pore architecture (size, shape, interconnectivity, and surface topography) is not merely a scaffold characteristic but a critical regulatory element that dictates cellular behavior and tissue integration. This application note details the quantitative relationships between pore parameters and key biological outcomes—cell infiltration, nutrient/waste diffusion, and vascular network formation—providing protocols for their assessment.
Quantitative Data: Pore Parameters & Biological Outcomes
Live search data (as of May 2023) synthesized from recent literature on hydrogel and polymer scaffolds for soft tissue engineering.
Table 1: Pore Size Influence on Cellular & Vascular Responses
| Pore Size Range (µm) | Primary Cell Type Studied | Key Outcome for Infiltration/Vascularization | Optimal for Capillary Formation? |
|---|---|---|---|
| < 20 | Fibroblasts, Chondrocytes | Limited infiltration, promotes surface cell growth. | No |
| 20 - 100 | Mesenchymal Stem Cells (MSCs), Osteoblasts | Enhanced cell migration, improved nutrient diffusion. Moderate angiogenesis with growth factors. | Partial (sprouting observed) |
| 100 - 250 | MSCs, Endothelial Cells (ECs), Fibroblasts | Optimal for cell infiltration and ECM deposition. Robust formation of prevascular networks. | Yes (most cited range) |
| 250 - 500 | Macrophages, ECs, Smooth Muscle Cells | Rapid cellular infiltration, supports formation of mature, lumenized structures. | Yes (for mature vasculature) |
| > 500 | Various | May compromise structural integrity; allows for rapid perfusion but can hinder cell-scaffold interactions. | Limited (low surface area) |
Table 2: Interconnectivity & Diffusive Transport Metrics
| Parameter | Definition | Measurement Technique | Target Threshold for Effective Transport |
|---|---|---|---|
| Porosity (%) | Void fraction of total volume | Micro-CT analysis, gravimetry | > 90% (for high diffusion scaffolds) |
| Interconnectivity (%) | Percentage of connected pores | Micro-CT analysis (Euler number) | 100% (fully interconnected network) |
| Effective Diffusivity (Deff/D0) | Ratio of scaffold diffusivity to free-water diffusivity | FRAP, modeling | > 0.3 for proteins (e.g., Albumin) |
| Permeability (m²) | Ease of fluid flow through pores | Computational Fluid Dynamics (CFD) | 10^-12 to 10^-10 m² (for capillary flow) |
Experimental Protocols
Protocol 3.1: Quantifying Cell Infiltration in 3D-Printed Porous Scaffolds
- Objective: Measure depth and uniformity of cell migration into scaffolds with varying pore architectures.
- Materials: Sterile 3D-printed scaffolds (e.g., GelMA, PCL), cell suspension (e.g., HUVECs or MSCs), fluorescent cell tracker (e.g., CMFDA), confocal microscope.
- Procedure:
- Scaffold Preparation: Sterilize scaffolds (UV light or 70% ethanol). Pre-wet with culture medium.
- Cell Seeding: Seed a concentrated cell suspension (2x10^6 cells/mL) onto the top surface. Allow 2 hours for attachment.
- Culture: Submerge scaffolds in medium and culture for 1, 3, and 7 days.
- Analysis: At endpoint, stain with Live/Dead assay or nuclear dye (Hoechst). Image using z-stack confocal microscopy (step size 20 µm).
- Quantification: Use ImageJ to create orthogonal projections. Calculate infiltration depth as the maximum z-distance where cell density is >10% of surface density. Report cell distribution in 50 µm depth increments.
Protocol 3.2: Assessing Nutrient Diffusion via Fluorescence Recovery After Photobleaching (FRAP)
- Objective: Determine the effective diffusion coefficient (D_eff) of a fluorescent nutrient analog within the porous network.
- Materials: Scaffold, fluorescent tracer (e.g., 70 kDa FITC-Dextran, simulating albumin), confocal microscope with FRAP module.
- Procedure:
- Equilibration: Incubate scaffold in tracer solution (10 µg/mL) for 24 hours.
- Photobleaching: Select a region of interest (ROI) ~100 µm deep within the scaffold. Apply high-intensity laser to bleach fluorescence.
- Recovery Monitoring: Record fluorescence recovery in the bleached ROI at 5-second intervals for 5-10 minutes.
- Calculation: Fit recovery curve to a diffusion model. Calculate Deff. Normalize to D0 (diffusivity in water) to obtain Deff/D0.
Protocol 3.3: In Vitro Prevascularization Assay
- Objective: Induce and quantify the formation of endothelial cell networks within porous scaffolds.
- Materials: Fibrin or collagen-based porous hydrogel, HUVECs, Human Mesenchymal Stem Cells (hMSCs, as supportive cells), endothelial growth medium (EGM-2).
- Procedure:
- Co-culture Seeding: Mix HUVECs (1x10^6 cells/mL) with hMSCs (0.5x10^6 cells/mL) in hydrogel precursor. Polymerize in a chamber.
- Culture: Maintain in EGM-2 for up to 14 days.
- Staining: Fix and immunostain for CD31 (PECAM-1) and α-SMA.
- Quantification: Acquire 3D confocal images. Analyze using AngioTool or similar: measure total network length, number of junctions, and mesh size.
Signaling Pathways Governing Pore-Mediated Vascularization
Diagram Title: Pore-Driven Angiogenic Signaling Cascade
The Scientist's Toolkit: Research Reagent Solutions
Table 3: Essential Materials for Pore Architecture & Vascularization Research
| Item | Function & Application | Example Product/Catalog |
|---|---|---|
| Methacrylated Gelatin (GelMA) | Photocrosslinkable bioink enabling precise pore printing and cell encapsulation. | GelMA, BioBots; GM-90, AdvanSource |
| Polycaprolactone (PCL) | Thermoplastic for fused deposition modeling (FDM), creating mechanically stable macroporous scaffolds. | PCL, Sigma-Aldrich (440744) |
| FITC-Labeled Dextran (70 kDa) | Fluorescent tracer for quantifying nutrient diffusion and pore interconnectivity. | 46945, Sigma-Aldrich |
| Matrigel or Fibrinogen | Basement membrane extract/protein for 3D angiogenesis assays and capillary network formation. | Corning Matrigel (356231) |
| Human Umbilical Vein Endothelial Cells (HUVECs) | Gold-standard primary cell type for in vitro vascularization studies. | C2519A, Lonza |
| Anti-CD31 (PECAM-1) Antibody | Immunofluorescence staining marker for endothelial cells and nascent vascular networks. | ab9498, Abcam |
| CellTracker Green CMFDA | Cell-permeant fluorescent dye for long-term tracking of cell infiltration and migration. | C7025, Thermo Fisher |
| Y-27632 (ROCK Inhibitor) | Enhances endothelial cell survival and network formation in 3D cultures post-seeding. | 1254, Tocris |
Within the broader thesis on 3D bioprinting parameters for controlled pore architecture, understanding the mechanical trade-off between porosity and structural integrity is paramount. High porosity facilitates nutrient diffusion, waste removal, and cell infiltration, which are critical for tissue regeneration and in vitro modeling. However, increasing porosity inherently compromises the scaffold's load-bearing capacity and mechanical stability, risking structural failure under physiological loads. This application note details protocols and analytical frameworks for quantifying and optimizing this balance, targeting applications in bone tissue engineering and high-throughput drug screening platforms where mechanical cues direct cell fate.
Table 1: Relationship between Porosity, Mechanical Properties, and Biological Outcomes in Bioprinted Scaffolds
| Bioprinting Material | Porosity Range (%) | Avg. Pore Size (µm) | Compressive Modulus (kPa or MPa) | Key Biological Outcome | Reference Year |
|---|---|---|---|---|---|
| GelMA (10% w/v) | 70 - 85 | 150 - 300 | 15 - 45 kPa | Enhanced chondrocyte proliferation & matrix deposition. | 2023 |
| PCL (Polycaprolactone) | 50 - 70 | 350 - 500 | 20 - 85 MPa | Supports osteogenic differentiation under dynamic loading. | 2022 |
| Alginate-Gelatin Composite | 60 - 75 | 200 - 400 | 5 - 25 kPa | Optimal for hepatocyte spheroid formation and function. | 2024 |
| Silk Fibroin-HA | 65 - 80 | 100 - 250 | 100 - 800 kPa | Promotes mesenchymal stem cell osteogenesis. | 2023 |
| PLA (Fused Deposition) | 40 - 60 | 500 - 1000 | 0.5 - 2.0 GPa | Provides critical structural support for segmental bone defects. | 2022 |
Table 2: Impact of Infill Pattern (FDM/DLP Bioprinting) on Mechanical Performance
| Infill Pattern | Porosity (%) | Predicted Compressive Strength (MPa) | Stiffness-to-Weight Ratio | Typical Application |
|---|---|---|---|---|
| Rectilinear | 60 | 12.5 | Medium | General tissue scaffolds |
| Gyroid | 75 | 8.2 | High | Enhanced cell migration & nutrient flow |
| Honeycomb | 50 | 18.7 | Very High | Load-bearing bone grafts |
| Grid | 70 | 7.1 | Low | Soft tissue models |
Experimental Protocols
Protocol 3.1: Quantitative Porosity Measurement via Micro-CT Objective: To accurately determine the total porosity and pore size distribution of a 3D-bioprinted scaffold. Materials: Micro-CT scanner (e.g., SkyScan 1272), image analysis software (CTAn), phosphate-buffered saline (PBS), sample holder. Procedure:
- Sample Preparation: Hydrate scaffold in PBS for 24h. Blot dry and mount securely on sample holder.
- Scanning Parameters: Set voltage to 50 kV, current to 200 µA, pixel size to 5 µm. Use a 0.5 mm Al filter. Perform a 180° rotation with a 0.4° rotation step.
- Image Reconstruction: Use NRecon software with standardized beam hardening (30%) and ring artifact correction (5).
- Analysis: In CTAn, binarize images using a global threshold. Apply a despeckle function to remove noise. Calculate total porosity (%) as (1 - (Object Volume / Total Volume)) * 100. Determine pore size distribution using the sphere-fitting method.
Protocol 3.2: Uniaxial Compression Testing for Bioprinted Scaffolds Objective: To measure the compressive modulus and yield strength of a porous scaffold. Materials: Universal mechanical tester (e.g., Instron 5943), 500 N load cell, compression platens, PBS, calipers. Procedure:
- Sample Conditioning: Measure sample dimensions (diameter, height) using calipers. Soak scaffold in PBS at 37°C for 1h prior to test to mimic physiological conditions.
- Tester Setup: Calibrate load cell. Zero the position. Set compression platen speed to 1 mm/min.
- Testing: Place sample centered on lower platen. Lower upper platen until it just contacts the sample (contact defined at 0.01 N preload). Commence compression to 60% strain.
- Data Analysis: Plot stress (Force/Initial Area) vs. strain (∆Height/Initial Height). Calculate compressive modulus as the slope of the linear elastic region (typically 10-20% strain). Record yield stress at the proportional limit.
Protocol 3.3: Permeability Assessment via Fluid Flow Objective: To quantify the convective permeability of the scaffold pore network. Materials: Custom permeability setup or modified Darcy's law apparatus, PBS, peristaltic pump, pressure sensors, beakers. Procedure:
- Setup: Seal scaffold in a custom chamber to force fluid flow only through its pores. Connect inlet to a pump and outlet to a collection reservoir. Install pressure sensors before and after the scaffold.
- Flow Test: At a constant flow rate (Q), record the pressure drop (∆P) across the scaffold once steady state is reached. Repeat for 5 flow rates.
- Calculation: Using Darcy's Law, K = (Q * µ * L) / (A * ∆P), where K is permeability (m²), µ is fluid viscosity (Pa·s), L is scaffold thickness (m), and A is cross-sectional area (m²). Plot Q vs. ∆P; slope is used to calculate K.
Visualizations
Title: The Core Trade-off in Pore Design
Title: Experimental Workflow for Trade-off Analysis
The Scientist's Toolkit: Key Research Reagent Solutions
| Item / Reagent | Function in Trade-off Research | Example Vendor/Catalog |
|---|---|---|
| Gelatin Methacryloyl (GelMA) | Photocrosslinkable hydrogel allowing tunable stiffness and porosity; model material for soft tissue. | Advanced BioMatrix, 7501-1KG |
| Polycaprolactone (PCL), Medical Grade | Thermoplastic for melt electrowriting (MEW) or FDM; provides high structural integrity for bone studies. | Sigma-Aldrich, 440744 |
| Irgacure 2959 Photoinitiator | Enables UV crosslinking of hydrogels (e.g., GelMA, PEGDA) to set pore architecture post-printing. | Sigma-Aldrich, 410896 |
| AlamarBlue Cell Viability Reagent | Assesses metabolic activity of cells within porous scaffolds, linking architecture to function. | Thermo Fisher, DAL1025 |
| Micro-CT Calibration Phantoms | Essential for quantifying porosity and mineral density accurately from scan data. | Bruker, HA-000-000 |
| Biaxial Mechanical Tester (BioRake) | For assessing local and global mechanical properties of soft, porous scaffolds. | CellScale, BioRake 4 |
| Silk Fibroin, Aqueous Solution | Natural protein for robust yet biocompatible scaffolds with controllable degradation. | SilkTech, ST-SF-1.0 |
Within the broader research on 3D bioprinting parameters for controlled pore architecture, understanding the intrinsic pore-forming capabilities of each bioprinting modality is critical. Pore architecture—encompassing pore size, shape, interconnectivity, and distribution—directly governs nutrient diffusion, cell migration, vascularization, and ultimately, tissue functionality. This application note details the native pore-forming mechanisms, quantitative capabilities, and experimental protocols for four core bioprinting techniques: Extrusion-based, Stereolithography (SLA), Digital Light Processing (DLP), and Jetting (Inkjet/Aerosol). The data is synthesized to guide researchers in selecting and optimizing techniques for specific pore architecture requirements in tissue engineering and drug development.
Bioprinting Techniques: Mechanisms and Native Porosity
Extrusion-Based Bioprinting
Mechanism: A pneumatic, piston, or screw-driven system forces a bioink (often hydrogel-based) through a nozzle, depositing a continuous filament in a layer-by-layer fashion. Native Pore-Forming Capability: Pores are primarily formed extrinsically through the design of the deposition pattern (e.g., filament spacing in grid structures). Intrinsic, stochastic micropores can form within filaments due to polymer mesh size or during crosslinking. Controlled microchannels can be created using sacrificial bioinks (e.g., Pluronic F127, gelatin).
Stereolithography (SLA) Bioprinting
Mechanism: A laser beam, focused by galvanometers, selectively photopolymerizes a vat of liquid bioresin point-by-point within a layer. Native Pore-Forming Capability: Pores are intrinsically limited by laser spot size and resolution, typically creating dense structures. Macro-pores must be explicitly designed into the CAD model. Micro-porosity can be introduced via porogen leaching (e.g., salt crystals) mixed into the bioresin prior to printing, which are later dissolved.
Digital Light Processing (DLP) Bioprinting
Mechanism: A digital micromirror device (DMD) projects a mask of UV/blue light to photopolymerize an entire layer of bioresin simultaneously. Native Pore-Forming Capability: Similar to SLA, DLP creates structures with high feature fidelity but low inherent porosity. Porosity is almost entirely design-dependent. Its superior speed allows for more complex internal lattice designs that define pore architecture.
Jetting Bioprinting (Inkjet & Aerosol)
Mechanism:
- Inkjet: Thermal or piezoelectric actuators generate discrete droplets of bioink deposited onto a substrate.
- Aerosol Jet: A bioink is atomized into a dense mist, which is focused by a sheath gas into a fine stream. Native Pore-Forming Capability: Produces highly controlled, droplet-defined porosity. Inter-droplet spacing and stacking behavior create micro-scale pores. Aerosol jetting can create fine, non-uniform porous morphologies due to droplet splatter and coalescence, useful for graded porosity.
Quantitative Comparison of Pore Architecture Parameters
Table 1: Comparative Analysis of Native Pore-Forming Capabilities (2023-2024 Data)
| Parameter | Extrusion-Based | SLA | DLP | Jetting (Inkjet) |
|---|---|---|---|---|
| Typical Pore Size Range | 100 µm - 2000 µm (designed) | 50 µm - 500 µm (designed) | 25 µm - 300 µm (designed) | 10 µm - 100 µm (droplet-derived) |
| Porosity Range (%) | 20% - 80% | 5% - 70% (with porogens) | 5% - 80% (design-dependent) | 10% - 50% |
| Pore Interconnectivity | High (controlled by pattern) | Medium-High (design-dependent) | High (excellent for complex lattices) | Low-Medium (droplet fusion-dependent) |
| Primary Pore Control | Nozzle diameter, filament spacing, infill pattern, sacrificial materials | Laser spot size (≈30-150 µm), CAD design, porogen leaching | Pixel size (≈10-50 µm), CAD design, grayscale masking | Droplet size (10-100 pL), drop spacing, curing |
| Key Advantage for Porosity | Versatility in creating large, perfusable channels. | High resolution for precise pore geometry. | Fast printing of intricate porous lattices. | Fine, tunable micro-porosity from droplet packing. |
| Key Limitation for Porosity | Limited resolution for sub-100µm pores; shear stress on cells. | Limited inherent porosity; requires post-processing for micropores. | Vat adhesion can limit delicate porous structures. | Low viscosity constraints; limited structural height. |
Experimental Protocols for Pore Architecture Analysis
Protocol 4.1: Micro-Computed Tomography (µCT) for 3D Pore Characterization
Objective: To non-destructively quantify 3D pore architecture parameters (porosity, pore size distribution, interconnectivity, tortuosity). Materials: Bioprinted scaffold, µCT scanner (e.g., SkyScan 1272), analysis software (CTAn, ImageJ/Fiji), mounting glue. Procedure:
- Sample Mounting: Securely mount the dry or fixed scaffold on the sample holder using adhesive. Ensure no movement during rotation.
- Scan Parameters: Set optimal parameters (e.g., voltage=50 kV, current=200 µA, pixel resolution=3-10 µm, rotation step=0.4°, 360° rotation, exposure time=500 ms). Use a 0.5 mm Al filter to reduce beam hardening.
- Image Acquisition & Reconstruction: Acquire projection images. Reconstruct using filtered back-projection (e.g., NRecon) to generate cross-sectional slices. Apply beam hardening and ring artifact correction.
- 3D Analysis (CTAn):
- Binarization: Apply a global threshold to segment pores from scaffold material.
- Region of Interest (ROI): Select a representative cylindrical or cuboidal volume, excluding edges.
- Morphometry: Execute analysis for total porosity (Po(tot)), open/closed porosity, pore size distribution (sphere-fitting method), structure thickness, and degree of anisotropy.
- Visualization: Generate 3D models of the pore network for qualitative assessment.
Protocol 4.2: Mercury Intrusion Porosimetry (MIP)
Objective: To measure pore throat diameter distribution and total pore volume. Materials: Porosimeter (e.g., Micromeritics AutoPore), dried bioprinted scaffold, penetrometer, high-purity mercury. Procedure:
- Sample Preparation: Dry scaffold thoroughly (lyophilization recommended). Weigh accurately (~0.1-0.5g).
- Loading: Place sample into the penetrometer's sample cup. Assemble and seal the penetrometer.
- Evacuation: Load penetrometer into the low-pressure port. Evacuate to <50 µm Hg to remove air from pores.
- Intrusion Run: The instrument automatically fills the penetrometer stem with mercury. Pressure is incrementally increased (from ~0.5 psi to 60,000 psi), forcing mercury into progressively smaller pore throats. The volume intruded at each pressure is recorded.
- Data Analysis: Apply the Washburn equation: D = -(4γ cosθ)/P, where D=pore diameter, γ=mercury surface tension (485 dyn/cm), θ=contact angle (typically 130°), P=applied pressure. Generate plots of cumulative/intrusive volume vs. pore diameter.
Protocol 4.3: Diffusion-Based Interconnectivity Assay
Objective: To functionally assess pore interconnectivity and permeability via dye diffusion. Materials: Bioprinted scaffold, diffusion chamber, PBS, fluorescent dye (e.g., 70 kDa FITC-Dextran), spectrophotometer/plate reader. Procedure:
- Scaffold Hydration: Hydrate scaffolds in PBS for 24h.
- Chamber Setup: Place scaffold as a membrane between donor and receptor chambers. Fill donor chamber with dye solution (1 mg/mL in PBS). Fill receptor chamber with PBS only.
- Sampling: At fixed timepoints (e.g., 15, 30, 60, 120 min), aliquot 100 µL from the receptor chamber and replace with fresh PBS.
- Measurement: Measure fluorescence of each aliquot (Ex/Em: 490/520 nm). Calculate concentration from a standard curve.
- Analysis: Plot cumulative dye mass transferred vs. time. The slope of the linear region represents the diffusion flux, indicative of interconnectivity and effective porosity.
Visualization of Workflows and Relationships
Title: Bioprinted Pore Architecture Research Workflow
Title: Pore Architecture Drives Biological Outcomes
The Scientist's Toolkit: Key Research Reagent Solutions
Table 2: Essential Materials for Bioprinting Porous Scaffolds
| Reagent/Material | Function in Pore Architecture Research | Example Vendor/Product |
|---|---|---|
| Gelatin Methacryloyl (GelMA) | A versatile, photocrosslinkable bioink. Its polymer concentration and degree of functionalization control hydrogel mesh size (micro-porosity) and stability for designed macropores. | Advanced BioMatrix, EFL (Engineerin |
| Poly(ethylene glycol) Diacrylate (PEGDA) | A synthetic, bio-inert hydrogel precursor. Used in SLA/DLP to create highly defined, water-swollen networks. Porosity is exclusively design-led or via porogen addition. | Sigma-Aldrich, Laysan Bio |
| Pluronic F127 | A thermoreversible sacrificial bioink. Printed as a support or co-printed to create perfusable channels, which are liquefied and washed out post-printing. | Sigma-Aldrich, BASF |
| Lithium Phenyl-2,4,6-trimethylbenzoylphosphinate (LAP) | A highly efficient, cytocompatible photoinitiator for UV/blue light crosslinking in SLA/DLP. Enables rapid gelation to preserve designed pore structures. | Sigma-Aldrich, Tokyo Chemical Industry |
| Fluorescein Isothiocyanate–Dextran (FITC-Dextran) | A series of fluorescent polysaccharides of defined molecular weights. Used in diffusion assays to probe pore interconnectivity and effective pore size. | Sigma-Aldrich |
| Sodium Chloride (NaCl) Crystals | A common porogen. Mixed with bioresins/bioinks and leached out post-printing to create stochastic micro-porosity within printed filaments or layers. | Various chemical suppliers |
| Polydimethylsiloxane (PDMS) | Used to create molds or perfusion chambers for bioprinting and subsequent permeability/diffusion testing of porous constructs. | Dow Sylgard 184 |
In the broader thesis on 3D bioprinting parameters for controlled pore architecture, the core material parameters of bioinks are fundamental. Pore size, interconnectivity, and structural fidelity—critical for nutrient diffusion, cell migration, and vascularization—are directly governed by the bioink's viscoelastic behavior during extrusion and its post-printing stabilization. This application note details the protocols for characterizing and leveraging bioink viscosity, shear-thinning, and crosslinking dynamics to achieve predictable and reproducible pore architectures in bioprinted constructs.
Quantitative Parameter Tables
Table 1: Typical Viscosity and Shear-Thinning Parameters of Common Bioink Polymers
| Polymer Base | Zero-Shear Viscosity (Pa·s) | Power-Law Index (n) | Consistency Index (K) (Pa·sⁿ) | Critical Shear Rate (s⁻¹) | Reference Year |
|---|---|---|---|---|---|
| Alginate (3% w/v) | 10 - 15 | 0.2 - 0.3 | 8 - 12 | 1 - 5 | 2023 |
| GelMA (10% w/v) | 25 - 40 | 0.15 - 0.25 | 20 - 35 | 0.5 - 2 | 2024 |
| Collagen I (5 mg/mL) | 0.5 - 1.5 | 0.8 - 0.9 | 0.4 - 1.0 | >100 | 2023 |
| Hyaluronic Acid (2% w/v) | 50 - 80 | 0.1 - 0.2 | 45 - 70 | 0.1 - 1 | 2024 |
| Fibrinogen (25 mg/mL) | 2 - 4 | 0.7 - 0.8 | 1.5 - 3 | 10 - 50 | 2023 |
| Pluronic F127 (25% w/v) | 100 - 200 | 0.05 - 0.1 | 90 - 180 | ~0.1 | 2023 |
Table 2: Crosslinking Dynamics and Pore Architecture Outcomes
| Crosslinking Method | Gelation Time (tgel) | Gelation Mechanism | Typical Pore Size Achieved (µm) | Structural Fidelity (Shape Retention) | Key Influencing Factors |
|---|---|---|---|---|---|
| Ionic (Ca²⁺, Alginate) | 1 s - 5 min | Diffusion/Immersion | 50 - 300 | Moderate to High | [Ca²⁺], diffusion distance, alginate Mw |
| Photo (UV, GelMA) | 5 - 60 s | Radical Polymerization | 20 - 150 | Very High | Photoinitiator type/concentration, UV intensity, wavelength |
| Enzymatic (MTG, Fibrin) | 30 s - 10 min | Covalent Bond Formation | 100 - 400 | Moderate | Enzyme activity, pH, temperature |
| Thermal (Collagen) | 5 - 30 min | Self-assembly | 10 - 100 | Low to Moderate | Temperature, pH, concentration |
| Dual (Photo+Ionic) | Varies (2-step) | Combined | 50 - 200 | Excellent | Sequence and timing of triggers |
Experimental Protocols
Protocol 1: Rheological Characterization of Bioink Shear-Thinning Behavior
Objective: To measure the apparent viscosity as a function of shear rate and fit data to the Power-Law (Ostwald-de Waele) model. Materials: Rotational rheometer (cone-plate or parallel plate), temperature controller, bioink sample (0.5 mL). Procedure:
- Setup: Pre-cool the rheometer plate to 4°C (for cell-laden inks) or set to 20-37°C as required. Load bioink sample onto the bottom plate. Lower the upper geometry (e.g., 40mm cone, 1° angle) with a trim gap of 0.05 mm.
- Equilibration: Allow sample to thermally equilibrate for 2 minutes.
- Flow Ramp Test: Program a logarithmic shear rate ramp from 0.01 s⁻¹ to 1000 s⁻¹. Record the shear stress (τ) and apparent viscosity (η) at each point.
- Data Analysis: Plot viscosity (η) vs. shear rate (γ̇). Fit the data to the Power-Law model: τ = K * γ̇ⁿ, where K is the consistency index and n is the flow behavior index (n<1 indicates shear-thinning). Calculate zero-shear viscosity by extrapolating to the lowest measured shear rate.
- Critical Parameters: Note the critical shear rate where viscosity drops precipitously, indicative of the onset of significant shear-thinning.
Protocol 2: In-Situ Evaluation of Crosslinking Kinetics via Time-Sweep Rheology
Objective: To quantitatively determine the gelation time (tgel) and final gel stiffness (storage modulus G') upon application of a crosslinking trigger. Materials: Rheometer with environmental control (e.g., UV light guide, temperature chamber), crosslinking trigger (e.g., UV light source, ionic crosslinker solution). Procedure:
- Setup: Load pre-gel bioink onto the rheometer plate. For photo-crosslinking, use a quartz bottom plate. Set a constant oscillatory strain (1%) and angular frequency (1 rad/s) within the linear viscoelastic region.
- Baseline Measurement: Monitor storage (G') and loss (G'') moduli for 60 seconds to establish a baseline.
- Trigger Application: Initiate crosslinking:
- Photo: Start UV light exposure (e.g., 365 nm, 5-10 mW/cm²) without interrupting oscillation.
- Ionic: Rapidly pipette a controlled volume of crosslinker solution (e.g., 100mM CaCl₂) to the sample edge using the instrument's solvent trap system.
- Kinetic Monitoring: Continue time-sweep measurement for 15-30 minutes. Record G' and G''.
- Determination of tgel: Identify the gel point as the time where G' intersects and permanently surpasses G'' (crossover point). The plateau G' value indicates final gel stiffness.
Protocol 3: Bioprinting for Controlled Pore Architecture using Core Parameters
Objective: To fabricate a lattice scaffold with defined pore size by optimizing print parameters based on characterized bioink properties. Materials: Extrusion bioprinter, sterile printing cartridge (3-30 mL), conical nozzle (20G-27G), crosslinking setup (e.g., misting system for CaCl₂, UV lamp), substrate. Procedure:
- Parameter Calculation: From Protocol 1, identify the target extrusion shear rate (γ̇ext) within the shear-thinning region that yields a workable viscosity (e.g., 10-50 Pa·s). Calculate the required volumetric flow rate (Q) for your nozzle radius (R): Q = (π * R³ * γ̇ext) / 4 for a Newtonian approximation, then adjust empirically.
- Print Path & Speed: Design a 0/90° lattice with a target strand spacing (S) equal to the desired pore size. Calculate the print head speed (v) from flow rate and strand cross-sectional area (A): v = Q / A. Initial strand diameter (D) can be approximated from nozzle diameter and material swelling factor.
- Printing: Load cartridge, maintain bioink at optimal temperature. Print the lattice structure.
- In-Situ Crosslinking: Apply crosslinking trigger during or immediately after deposition to lock pore architecture.
- Co-axial/Misting: Print into a mist or aerosol of ionic crosslinker.
- Photo: Illuminate each layer immediately after deposition.
- Validation: Image the printed construct (microscopy) and measure actual strand diameter and pore size. Correlate deviations to viscosity recovery time and gelation kinetics from Protocols 1 & 2.
Diagrams and Visualizations
Bioink Processing to Stable Pore Architecture
Parameter Influence on Pore Architecture
The Scientist's Toolkit: Key Research Reagent Solutions
Table 3: Essential Materials for Bioink Parameter Analysis
| Item | Function/Benefit | Example Product/Note |
|---|---|---|
| Rheometer with Peltier & UV accessory | Enables temperature-controlled viscosity measurement and in-situ photo-crosslinking kinetics. | TA Instruments Discovery HR, Anton Paar MCR series. |
| Photo-initiator (Type I) | Generates free radicals under UV light to initiate gelation of methacrylated polymers (e.g., GelMA, HA-MA). | Lithium phenyl-2,4,6-trimethylbenzoylphosphinate (LAP) - lower cytotoxicity than Irgacure 2959. |
| Ionic Crosslinker Solution | Provides divalent cations (e.g., Ca²⁺) to ionically crosslink polysaccharides (e.g., alginate). | Calcium Chloride (CaCl₂) or Calcium Sulfate (CaSO₄) slurries for slower gelation. |
| Cell-Compatible Visible Light Initiator | Enables gelation with cytocompatible visible light (405-450 nm). | Eosin Y with Triethanolamine (TEA) and Vinyl Caprolactam. |
| Enzymatic Crosslinking Agent | Catalyzes covalent bond formation for protein-based inks (e.g., fibrin, collagen). | Microbial Transglutaminase (mTG) or Thrombin (for fibrinogen). |
| Viscoelastic Modifier | Tunes shear-thinning and recovery behavior (e.g., enhances shape fidelity). | Nanocellulose, Laponite nanoplatelets, gellan gum. |
| Fluorescent Microspheres | Tracers for visualizing shear profile and strand fusion during printing. | Carboxylate-modified polystyrene beads (1-10 µm). |
| High-Throughput Printing Cartridge | Allows for consistent, sterile extrusion with precise pressure/flow control. | Nordson EFD barrels with luer-lock connectors. |
| Non-Adherent Printing Substrate | Prevents printed construct from adhering during crosslinking, aiding transfer. | Polycarbonate membrane or PDMS-coated glass. |
The Parameter Toolkit: Methodical Control of Pores for Tissue-Specific and Drug Testing Applications
Within the broader thesis on 3D bioprinting parameters for controlled pore architecture research, the precise manipulation of hardware-driven geometric parameters is critical. Extrusion bioprinting fidelity, which directly dictates the scaffold's pore size, shape, and interconnectivity, is governed by a core set of interdependent variables: nozzle diameter (ND), layer height (LH), print speed (PS), and road/standoff distance (RSD). This document provides detailed application notes and experimental protocols for systematically investigating these parameters to achieve predictable and reproducible pore architectures for tissue engineering and drug screening applications.
Table 1: Parameter Effects on Print Outcome and Pore Architecture
| Parameter | Typical Range | Primary Effect on Strand | Secondary Effect on Pore Architecture | Optimality Condition |
|---|---|---|---|---|
| Nozzle Diameter (ND) | 80 µm - 500 µm | Directly sets strand width minimum. Larger ND increases shear stress on bioink. | Larger ND permits larger pores but reduces feature resolution. Smaller ND increases clogging risk. | ND should be 2-5x larger than largest cell/particle in bioink. |
| Layer Height (LH) | 50% - 80% of ND | Influences strand flattening and interlayer bonding. Lower LH improves resolution. | Affects vertical pore connectivity and mechanical integrity. | LH ≈ 0.7-0.8*ND often provides best interlayer fusion without excessive compression. |
| Print Speed (PS) | 1 mm/s - 30 mm/s | High PS can cause under-extrusion; low PS can cause over-deposition. | Inconsistent PS leads to irregular pore shapes and strand alignment errors. | Must be balanced with extrusion flow rate (Q) to match desired strand width. |
| Road/Standoff Distance (RSD) | 80% - 120% of target strand width | Defines center-to-center strand spacing. RSD < strand width creates fused roads; RSD > strand width creates gaps. | Most direct parameter for controlling pore size and shape in the XY-plane. | For square pores, RSD = strand width. For connected channels, RSD < strand width. |
Table 2: Exemplar Parameter Set for Alginate/Gelatin Bioink
| Parameter | Value Set 1 (High Res) | Value Set 2 (High Porosity) | Target Pore Outcome | |
|---|---|---|---|---|
| Nozzle Diameter | 250 µm | 410 µm | Strand Width Control | |
| Layer Height | 175 µm (0.7*ND) | 328 µm (0.8*ND) | Layer Fusion | |
| Print Speed | 10 mm/s | 8 mm/s | Consistent Deposition | |
| Extrusion Pressure | 18 kPa | 12 kPa | Matched to PS & ND | |
| Road Distance | 220 µm (0.88*SW) | 500 µm (1.22*SW) | Pore Size: ~150 µm | Pore Size: ~300 µm |
Experimental Protocols
Protocol 1: Calibrating Strand Width as a Function of Nozzle Diameter, Print Speed, and Extrusion Rate
Objective: To empirically determine the actual deposited strand width (SW) under various parameter combinations, establishing a predictive model for RSD setting. Materials: See "Scientist's Toolkit" below. Procedure:
- Prepare a sterile, shear-thinning bioink (e.g., 3% alginate, 5% gelatin) and load into a sterile syringe cartridge. Equilibrate to printing temperature (e.g., 18-22°C).
- Mount cartridge onto bioprinter and prime nozzle until smooth extrusion is achieved.
- Set Layer Height to a constant value (e.g., 0.8 * Nozzle Diameter).
- For a fixed Nozzle Diameter (e.g., 250 µm), design a simple test pattern of straight, 20 mm lines.
- Vary Print Speed (PS: 5, 10, 15, 20 mm/s) and extrusion multiplier/flow rate (Q: 90%, 100%, 110%, 120% of baseline) in a full-factorial experiment.
- Print lines onto a sterile petri dish or printing substrate.
- Allow lines to crosslink (e.g., CaCl₂ mist for alginate). Image using a calibrated microscope.
- Measure strand width (SW) at minimum 5 points per line using image analysis software (e.g., ImageJ).
- Plot SW vs. (Q/PS). The slope relates to effective bioink viscosity. Use this model to select Q for a target SW.
Protocol 2: Determining Optimal Layer Height for Interlayer Bonding
Objective: To identify the Layer Height (LH) that maximizes interlayer adhesion without causing excessive deformation of the bottom layer. Materials: As in Protocol 1. Procedure:
- Using calibrated SW from Protocol 1, set RSD equal to SW to aim for a solid wall.
- For a fixed ND (e.g., 250 µm) and optimal PS/Q from Protocol 1, print a series of 10-layer rectangular blocks (e.g., 10mm x 10mm).
- Vary LH as a percentage of ND: 50%, 60%, 70%, 80%, 90%.
- Crosslink the structure fully.
- Assess blocks qualitatively for structural integrity and shape fidelity.
- Perform a mechanical compression test or a simple peel test to quantitatively evaluate interlayer bonding strength for each LH condition.
- The optimal LH is the highest value that maintains strong interlayer bonding and shape fidelity.
Protocol 3: Designing Pore Architecture by Controlling Road/Standoff Distance
Objective: To systematically vary RSD to generate specific pore geometries (square, rectangular, slotted). Materials: As in Protocol 1. Procedure:
- Using a fixed ND, LH, PS, and Q that produce a stable, predictable SW (from Protocols 1 & 2).
- Design a 5mm x 5mm single-layer grid pattern in slicing software.
- Set RSD to the following percentages of the measured SW: 70%, 80%, 90%, 100%, 110%, 120%.
- Print each grid. Crosslink immediately.
- Image grids from a top-down view.
- Measure: a) Actual pore area, b) Pore perimeter, c) Interconnectivity (if RSD < SW, pores will be connected). Use image analysis (thresholding, particle analysis).
- Correlate RSD/SW ratio to resulting pore area and morphology. This calibration curve is essential for designing scaffolds with target pore sizes.
The Scientist's Toolkit: Research Reagent Solutions
Table 3: Essential Materials for Parameter Optimization Studies
| Item | Function & Rationale |
|---|---|
| Sterile, Biocompatible Syringe Cartridges (3-30 mL) | Standardized fluid reservoir for bioink; ensures sterile pathway and compatibility with printer. |
| Precision Nozzles (Gauge 16-27, conical or cylindrical) | Determines initial strand diameter; material (e.g., plastic, metal) affects bioink friction and shear profile. |
| Rheometer (with temperature control) | Critical. Characterizes bioink viscosity, shear-thinning, yield stress, and viscoelasticity to inform parameter ranges. |
| Calcium Chloride (CaCl₂) Crosslinking Solution (50-200 mM) | Ionic crosslinker for alginate-based bioinks; concentration and application method (misting, immersion) affect gelation kinetics and strand shape. |
| Sterile PBS (Phosphate Buffered Saline) | For washing, diluting, and maintaining ionic strength and pH during/post printing. |
| High-Resolution Stereomicroscope with Camera | For non-destructive, quantitative measurement of strand width, layer fusion, and pore morphology. |
| ImageJ/FIJI Software with Particle Analysis Plugins | Open-source tool for quantifying pore size, distribution, and strand dimensions from microscope images. |
| Mechanical Testing System (Micro-tester) | For quantifying the compressive/tensile modulus and interlayer adhesion strength of printed lattices. |
Visualization of Parameter Optimization Workflow
Diagram Title: Bioprinting Parameter Optimization Loop
Core Parameter Interrelationships
Diagram Title: Key Parameter Effects on Strand and Pores
Within the broader thesis on 3D bioprinting parameters for controlled pore architecture research, this document provides detailed application notes and protocols for vat polymerization-based bioprinting, specifically digital light processing (DLP) and laser-based stereolithography (SLA). Precise control over laser power/speed, pixel size, layer exposure time, and resin formulation is critical for fabricating scaffolds with defined pore architecture, which directly influences cell behavior, nutrient diffusion, and ultimate tissue function. These parameters must be optimized in concert to achieve high-fidelity, biocompatible constructs.
Core Parameters: Quantitative Data & Relationships
The interplay between key printing parameters and outcomes is summarized below.
Table 1: Interdependency of Key Bioprinting Parameters and Outcomes
| Parameter | Typical Range/Values | Directly Influences | Impact on Pore Architecture & Construct Properties |
|---|---|---|---|
| Laser Power / Scan Speed | 50-500 mW; 50-2000 mm/s | Curing depth, line width, polymerization fidelity | Power↑/Speed↓: Increased cross-linking, potential over-curing, reduced pore size. Critical for fine feature resolution. |
| Pixel Size (XY Resolution) | 10-100 µm | Feature resolution, surface roughness | Smaller pixels: Higher resolution, smoother surfaces, more accurate pore definition and interconnectivity. |
| Layer Exposure Time | 0.5-30 seconds | Layer thickness, curing homogeneity | Time↑: Thicker layers, potential over-curing. Must be balanced with photoinitiator concentration for consistent z-axis pore definition. |
| Photoinitiator Concentration | 0.1-2.0% (w/v) | Cure kinetics, cytocompatibility | Concentration↑: Faster curing, lower exposure needed; but potential cytotoxicity. Directly affects gelation threshold. |
| Bioink/Resin Formulation | Varies (see Toolkit) | Mechanical properties, cell viability, printability | Modulus, swelling, degradation rate dictate long-term pore stability and cell-material interactions. |
Experimental Protocols
Protocol 1: Determining the Critical Energy Exposure (Ec) for a Bioresin
Objective: To establish the minimum energy per unit area required to gel a specific resin layer, a fundamental parameter for calculating exposure times and laser settings.
Materials: DLP or SLA bioprinter, bioresin, glass slides, spatula, micrometer.
Procedure:
- Prepare the bioresin according to formulation specifications (see Scientist's Toolkit).
- Program the printer to expose a single, flat layer with a range of exposure times (e.g., 0.5, 1, 2, 4, 8, 15 s) at a fixed light intensity.
- For each exposure time, calculate the energy density (E, mJ/cm²): E = Light Intensity (mW/cm²) × Exposure Time (s).
- After exposure, gently rinse the vat with PBS to remove uncured resin.
- Carefully scrape the cured film from the vat floor using a spatula.
- Measure the thickness of each cured film (n=3 per exposure time) using a micrometer.
- Plot cured depth (Cd, μm) against ln(Energy Density). Perform a linear regression.
- Apply the Jacobs equation: Cd = Dp × ln(E / Ec), where Dp is the penetration depth of the resin. The x-intercept (where Cd=0) gives the critical energy exposure (Ec).
Protocol 2: Optimizing Pixel Size and Exposure for Pore Fidelity
Objective: To print a standardized lattice structure (e.g., a gyroid) and assess the deviation from the digital model based on pixel size and exposure.
Materials: Bioprinter with adjustable XY resolution, bioresin, CAD model of gyroid lattice, confocal or micro-CT scanner, imaging software.
Procedure:
- Design a gyroid lattice with a defined pore size (e.g., 300 μm) and strand thickness (e.g., 150 μm).
- Set the printer to a constant, previously determined Ec value (from Protocol 1) for the target layer thickness.
- Print the lattice using three different pixel sizes (e.g., 25 μm, 50 μm, 100 μm). Keep all other parameters constant.
- Post-process prints (rinse, post-cure if required).
- Image the constructs using confocal microscopy (for fluorescent resin) or micro-CT.
- Use image analysis software (e.g., ImageJ, Mimics) to measure the actual printed strand diameter and pore size.
- Calculate the percentage deviation from the designed dimensions. The pixel size/exposure combination with the lowest deviation is optimal for architectural fidelity.
Protocol 3: Evaluating Cell Viability Post-Printing as a Function of Parameters
Objective: To assess the combined impact of resin formulation and printing parameters on encapsulated cell viability.
Materials: Cell-laden bioresin, bioprinter, Live/Dead assay kit, confocal microscope, cell culture incubator.
Procedure:
- Prepare a cytocompatible photoinitiator (e.g., LAP) and mix with hydrogel prepolymer (e.g., GelMA) and cells to create a cell-laden bioresin.
- Print a simple 3D construct (e.g., a disk) using two parameter sets: a) High Ec (long exposure/high power) and b) Optimal Ec (from Protocol 1).
- Culture the printed constructs for 1 and 7 days.
- At each time point, perform a Live/Dead assay according to manufacturer instructions.
- Image multiple z-stacks throughout the construct thickness using confocal microscopy.
- Quantify the percentage of live cells (green fluorescence) relative to total cells. Compare results between parameter sets to identify cytocompatible printing conditions.
Visualizing Parameter Relationships and Workflows
Diagram 1: Bioprinting Parameter Optimization Workflow
Diagram 2: Parameter Effects on Print Outcomes
The Scientist's Toolkit: Key Research Reagent Solutions
Table 2: Essential Materials for Light-Based Bioprinting Research
| Item | Function & Relevance to Pore Architecture Research |
|---|---|
| Gelatin Methacryloyl (GelMA) | Gold-standard photopolymerizable hydrogel; tunable mechanical properties via degree of functionalization and concentration, directly influencing pore stability and cell adhesion. |
| Poly(ethylene glycol) Diacrylate (PEGDA) | Synthetic, bio-inert hydrogel precursor; allows precise control over network density and pore size via molecular weight and concentration. |
| Lithium Phenyl-2,4,6-trimethylbenzoylphosphinate (LAP) | Efficient, cytocompatible photoinitiator for UV/blue light; enables rapid gelation at low concentrations (0.05-0.25% w/v), reducing potential toxicity and allowing finer feature resolution. |
| Food Dye (e.g., Tartrazine) or UV Absorbers | Used as photoabsorbers to control light penetration depth (Dp), improving axial resolution and preventing over-curing, which is crucial for defining layers in a porous stack. |
| Dynamic Mechanical Analyzer (DMA) | Characterizes the viscoelastic properties (storage/loss modulus) of printed hydrogels, correlating print parameters and resin formulation to the mechanical stability of the pore network. |
| Micro-Computed Tomography (Micro-CT) Scanner | Non-destructive 3D imaging for quantitative analysis of printed pore architecture, including pore size distribution, interconnectivity, and strut thickness. |
This application note is framed within a broader thesis investigating 3D bioprinting parameters for controlled pore architecture. The strategic creation of large, interconnected channels is paramount for engineering vascular networks that support nutrient diffusion, waste removal, and cellular integration in thick, functional tissue constructs. This document details the application of sacrificial and fugitive bioinks as a core strategy to achieve this architectural goal.
Core Principles and Recent Advancements
Sacrificial (or fugitive) bioinks are printed to form a transient template within a surrounding hydrogel matrix. Subsequent removal of this template—via dissolution, melting, or enzymatic digestion—leaves behind patent, interconnected channels.
Table 1: Comparison of Sacrificial Bioink Strategies
| Bioink Material | Removal Mechanism | Channel Resolution (µm) | Crosslinking Temp | Key Advantage | Key Limitation |
|---|---|---|---|---|---|
| Pluronic F127 | Low-Temp Liquefaction & Washout | 50 - 500 | 4-10°C | Excellent printability, rapid removal | Lack of bioactivity, low viscosity at RT |
| Carbohydrate Glass (e.g., Sucrose) | Aqueous Dissolution | 150 - 1000 | Ambient | High structural rigidity, excellent interconnectivity | Brittleness, requires high temp extrusion |
| Gelatin | Thermal Melting (37°C) | 100 - 400 | 4-15°C | Natural polymer, mild removal | Slow removal, potential residual material |
| Alginate | Ionic Chelation (e.g., Citrate) | 200 - 1000 | Ambient | Biocompatible, can be cell-laden | Removal requires specific chelators |
| PEG-based (8-arm PEG-Acrylate) | Photodegradation (UV light) | 20 - 200 | UV Light | Spatiotemporally controlled removal | Requires photoinitiators, potential cytotoxicity |
Recent search data highlights the trend towards multi-material coaxial printing and the use of shear-thinning hydrogels as supportive bulk matrices to prevent channel collapse during fugitive ink removal.
Detailed Experimental Protocols
Protocol 3.1: Pluronic F127 Sacrificial Templating for Macrochannels
Objective: To create a branched vascular network within a collagen-I hydrogel. Materials:
- Sacrificial Ink: 35% (w/v) Pluronic F127 in DMEM on ice.
- Support Bath/Matrix: 5 mg/mL Rat Tail Collagen-I, neutralized on ice.
- Equipment: Extrusion bioprinter with temperature-controlled stage (4°C) and printhead.
Procedure:
- Bioink Preparation: Dissolve Pluronic F127 powder in cold culture medium overnight at 4°C. Centrifuge to remove bubbles.
- Printing Setup: Cool printer stage to 10°C. Load sacrificial ink into a cooled syringe.
- Embedded Printing: Deposit Pluronic ink directly into the collagen support bath (held at 10°C) in a designed branched pattern.
- Crosslinking: Incubate the entire construct at 37°C for 30 minutes to gel the collagen matrix.
- Sacrificial Removal: Cool the construct to 4°C for 15 minutes to liquefy Pluronic. Gently perfuse cold PBS or culture medium through the inlet to evacuate the liquefied ink, leaving open channels.
- Cell Seeding: Introduce endothelial cell suspension (e.g., HUVECs) into the channels via perfusion and allow adhesion.
Protocol 3.2: Carbohydrate Glass Templating for High-Fidelity Networks
Objective: To fabricate rigid, highly interconnected networks for high-pressure perfusion. Materials:
- Sacrificial Ink: 70:30 mixture of sucrose and glucose, with 5% (w/v) dextran for toughness.
- Matrix Hydrogel: 2% (w/v) alginate, 4% (w/v) gelatin (GelMA) pre-gel solution.
- Equipment: High-temperature extrusion head (>130°C), glass substrate.
Procedure:
- Ink Preparation: Melt sucrose-glucose-dextran mixture at 130°C.
- Printing: Extrude molten carbohydrate onto a room-temperature glass plate in the desired network pattern. It solidifies instantly.
- Encapsulation: Cast the alginate-GelMA pre-gel solution over the carbohydrate scaffold. Crosslink alginate with CaCl₂ mist and photocrosslink GelMA (405 nm, 5 mW/cm²).
- Dissolution: Immerse the cured construct in sterile, cell-compatible PBS or media. The carbohydrate template dissolves within minutes, revealing the channel network.
- Sterilization: Perfuse channels with 70% ethanol, followed by extensive PBS washing.
Visualization of Workflows
Title: Sacrificial Bioprinting Workflow
Title: Channel Maturation & Signaling Pathways
The Scientist's Toolkit: Key Research Reagent Solutions
Table 2: Essential Materials for Sacrificial Bioprinting
| Reagent/Material | Supplier Examples | Function in Protocol |
|---|---|---|
| Pluronic F127 | Sigma-Aldrich, BASF | Thermo-reversible sacrificial ink for creating lumen structures. |
| Rat Tail Collagen I, High Concentration | Corning, Thermo Fisher | Native ECM support bath for embedded printing and cell adhesion. |
| GelMA (Gelatin Methacryloyl) | Advanced BioMatrix, Cellink | Photocrosslinkable bulk matrix providing RGD sites for cells. |
| Alginate (High G-content) | NovaMatrix, FMC Biopolymer | Ionic-crosslinkable polymer for structural support in composite inks. |
| LAP Photoinitiator | Sigma-Aldrich, TCI Chemicals | Biocompatible photoinitiator for visible light crosslinking of GelMA/PEGDA. |
| HUVECs (Primary Human Umbilical Vein Endothelial Cells) | Lonza, PromoCell | Primary cells for lining channels to form endothelial barriers. |
| VEGF-165 (Recombinant Human) | PeproTech, R&D Systems | Key growth factor to promote endothelial cell survival and proliferation. |
| Microfluidic Perfusion System (e.g., Ibidi Pump) | Ibidi, Elveflow | Provides physiological shear stress to seeded channels for maturation. |
This document provides detailed Application Notes and Protocols for integrating in-situ pore-forming techniques with 3D bioprinting. The content is framed within a broader thesis on the precise modulation of 3D bioprinting parameters—such as bioink formulation, printing pressure, temperature, and crosslinking strategy—to achieve controlled, hierarchical pore architectures. The goal is to engineer scaffolds that precisely mimic native tissue extracellular matrix (ECM) for advanced applications in tissue engineering, disease modeling, and drug development.
Application Notes
Integrated Gas Foaming with Extrusion Bioprinting
Principle: Incorporation of chemical foaming agents (CFAs) like ammonium bicarbonate (AB) or sodium bicarbonate (SB) into bioinks, which decompose upon exposure to heat or acidic crosslinkers to release CO₂/NH₃, creating pores during/after printing. Key Parameters:
- Bioink Viscosity: Must be optimized (typically 10-30 Pa·s) to retain gas bubbles. Higher viscosity limits bubble growth, creating smaller pores.
- CFA Concentration & Particle Size: Directly influences pore size and interconnectivity. Fine powders (< 50 µm) yield smaller, more uniform pores.
- Acidified Crosslinker (e.g., CaCl₂ in acetic acid): Triggers decomposition and solidifies the matrix simultaneously. Primary Outcome: Creates macroporous structures (100-500 µm) with improved cell infiltration but can lead to partially closed pores if not carefully controlled.
Synchronized Porogen Leaching with Embedded Bioprinting
Principle: Dispersion of leachable porogens (e.g., sacrificial particles, fibers) within a support bath or directly into the bioink. The porogen is dissolved post-printing, leaving behind a designed porous network. Key Parameters:
- Porogen Type & Geometry: Gelatin microparticles (37°C leaching), carbohydrate glass networks (aqueous leaching), or PLGA spheres (organic solvent leaching). Geometry defines pore shape.
- Porogen Fraction (v/v): Determines final porosity and mechanical stability. Volumes > 60% risk structural collapse.
- Support Bath Rheology: A yield-stress fluid (e.g., Carbopol, Laponite) must securely hold porogen-laden strands during printing. Primary Outcome: Enables precise design of pore shape, size (50-1000 µm), and anisotropy, offering high interconnectivity.
Cryogenic- Assisted Bioprinting
Principle: Deposition of bioink onto a sub-zero temperature stage, causing controlled ice crystal formation. Subsequent freeze-drying (lyophilization) sublimes the ice, leaving a microporous structure. Key Parameters:
- Stage Temperature & Printing Speed: Lower temperatures (-20°C to -80°C) and faster printing promote smaller ice crystals (10-100 µm).
- Bioink Solvent Composition: Addition of cryoprotectants (e.g., DMSO, sucrose) or solvents (e.g., dioxane) modulates ice crystal morphology.
- Freeze-Drying Cycle: Primary drying (sublimation) temperature and vacuum pressure control final pore integrity. Primary Outcome: Generates highly interconnected micro-to-macro pores with high surface-area-to-volume ratios, ideal for nutrient diffusion.
Table 1: Comparative Analysis of Integrated Pore-Forming Techniques
| Technique | Typical Pore Size Range (µm) | Porosity Range (%) | Key Influencing Bioprinting Parameters | Interconnectivity | Typical Bioink Systems |
|---|---|---|---|---|---|
| Gas Foaming | 100 - 500 | 70 - 85 | CFA particle size, concentration, crosslinker pH, print temp. | Moderate to High | Alginate, GelMA, Collagen |
| Porogen Leaching | 50 - 1000 (design-dependent) | 50 - 90 | Porogen vol. fraction, geometry, leaching time/temp. | Very High | Alginate, HA, PEGDA, Pluronic F127 |
| Cryogenic | 10 - 200 (ice crystal size) | 80 - 95 | Stage temp., print speed, solvent composition, lyophilization cycle | Excellent | Collagen, Chitosan, Silk Fibroin, Alginate |
Table 2: Effect of Key Parameters on Pore Architecture
| Parameter | Target Metric | Gas Foaming Effect | Porogen Leaching Effect | Cryogenic Effect |
|---|---|---|---|---|
| Additive Conc. (CFA/Porogen) | Mean Pore Diameter | Positive correlation (↑ conc. = ↑ size) | Positive correlation | N/A |
| Additive Particle Size | Pore Uniformity | Positive correlation (↑ size = ↑ variance) | Direct determination of pore size | N/A |
| Printing/Stage Temp. | Pore Size | Mild effect (↑ temp = ↑ gas diffusion) | Minimal direct effect | Strong inverse correlation (↓ temp = ↓ crystal size) |
| Crosslinking Rate | Pore Wall Stability | Fast rate traps smaller pores | Affects porogen retention | N/A |
| Post-Process Time | Interconnectivity | Longer reaction = more open pores | Longer leaching = higher interconnectivity | Longer primary drying = better structure |
Detailed Experimental Protocols
Protocol 1: Gas Foaming in Alginate/GelMA Bioink for Cartilage Scaffolds
Objective: To fabricate a bioprinted, porous scaffold using in-situ gas foaming. Materials:
- Bioink: 3% (w/v) Alginate, 5% (w/v) GelMA, 0.25% (w/v) LAP photoinitiator.
- Porogen: Ammonium Bicarbonate (AB), sieved to 45-63 µm.
- Crosslinker: 100mM CaCl₂ in 0.1M acetic acid (pH ~4.5).
- Equipment: Extrusion bioprinter, UV light source (405 nm, 10 mW/cm²).
Methodology:
- Bioink Preparation: Dissolve Alginate and GelMA in PBS at 37°C. Mix in LAP. Gently blend 40% (v/v) AB powder into the bioink to avoid premature gas release.
- Printing: Load bioink into a syringe. Print lattice structure (e.g., 10x10x2 mm, 0°/90° infill) directly into a reservoir containing the acidified CaCl₂ crosslinker.
- In-Situ Foaming & Crosslinking: The acidic environment triggers AB decomposition (CO₂/NH₃). Ionic crosslinking of alginate occurs simultaneously. Allow reaction to proceed for 15 min.
- Secondary Crosslinking: Rinse scaffold with PBS and expose to UV light for 60 sec for complete GelMA photocrosslinking.
- Post-Processing: Wash in PBS for 24h (changing solution 4x) to remove residues and equilibrate pH.
Protocol 2: Gelatin Microparticle Porogen Leaching in a Support Bath
Objective: To create a channeled porous network using sacrificial gelatin microparticles. Materials:
- Bioink: 8% (w/v) Pluronic F127, 2% (w/v) Alginate.
- Porogen: Gelatin Microparticles (GMPs, 100-150 µm), dyed with food color for visualization.
- Support Bath: 3% (w/v) Carbopol 940, neutralized to pH 7.4 with NaOH to form a yield-stress gel.
- Crosslinker: 100mM CaCl₂.
Methodology:
- Support Bath Preparation: Disperse Carbopol in DI water. Neutralize under stirring to form a transparent gel. Autoclave and store at 4°C.
- Bioink-Porogen Mix: Gently mix 50% (v/v) GMPs into the Pluronic/Alginate bioink at 4°C to prevent GMP melting.
- Embedded Printing: Fill a printing dish with the Carbopol bath. Print the GMP-laden bioink directly into the bath to form a 3D structure.
- In-Bath Crosslinking: Gently perfuse CaCl₂ solution over the bath surface for 30 min to ionically crosslink the alginate phase.
- Porogen Leaching: Carefully extract the printed structure and incubate in PBS at 37°C for 48h. Change PBS every 12h to dissolve GMPs.
- Critical Point Drying: Dehydrate scaffold through ethanol series and perform critical point drying for SEM analysis.
Protocol 3: Cryogenic Plotting of Collagen Scaffolds
Objective: To fabricate a collagen scaffold with lamellar microporosity via controlled freezing. Materials:
- Bioink: 3% (w/v) Bovine Collagen Type I in 0.1% acetic acid, kept at 4°C.
- Cryogenic Stage: Peltier-cooled or liquid nitrogen-cooled stage.
- Equipment: Extrusion bioprinter in a humidity-controlled environment, freeze-dryer.
Methodology:
- Stage Preparation: Pre-cool the aluminum printing stage to -40°C. Ensure chamber humidity is < 30% to prevent frost.
- Printing: Load collagen bioink into a temperature-controlled syringe (4°C). Print a grid structure directly onto the cold stage. The bioink freezes immediately upon deposition.
- Neutralization & Crosslinking: Immediately after printing, expose the frozen construct to ammonia vapor for 30 min in a closed container to neutralize and induce self-assembly.
- Freeze-Drying: Transfer the frozen, neutralized construct to a pre-cooled (-80°C) freeze-dryer shelf. Lyophilize for 48h (primary drying at -40°C, 0.1 mBar; secondary drying at 25°C).
- Dehydrothermal (DHT) Crosslinking: For enhanced stability, perform DHT crosslinking under vacuum at 105°C for 24h.
- Rehydration: Sterilize under UV and rehydrate in sterile PBS or culture medium prior to cell seeding.
Visualizations
Workflow for Integrating Pore-Forming with Bioprinting
Cell Mechanosensing in Porous Scaffolds
The Scientist's Toolkit: Research Reagent Solutions
Table 3: Essential Materials for Integrated Pore-Forming Bioprinting
| Item | Function & Rationale | Example Product/Catalog |
|---|---|---|
| Ammonium Bicarbonate (AB) | Chemical foaming agent. Decomposes in acid/heat to release CO₂/NH₃, creating pores in situ. Sieve for size control. | Sigma-Aldrich, 09830 |
| Gelatin Microparticles (GMPs) | Sacrificial porogen. Biocompatible, melts at 37°C for gentle leaching. Size defines pore diameter. | microParticles GmbH, 01-020 |
| Carbopol 940 | Rheological modifier. Forms yield-stress support bath for embedded printing of porogen-laden inks. | Lubrizol, Carbopol 940 |
| Lithium Phenyl-2,4,6- trimethylbenzoylphosphinate (LAP) | Efficient, water-soluble photoinitiator for visible light crosslinking (405 nm). Low cytotoxicity. | Tokyo Chemical Industry, L0041 |
| Methacrylated Gelatin (GelMA) | Photocrosslinkable bioink base. Provides cell-adhesive motifs and tunable mechanical properties. | Advanced BioMatrix, 5116-50ML |
| D-(+)-Sucrose | Cryoprotectant & porogen. Modulates ice crystal size in cryogenic printing; can be leached to add porosity. | Sigma-Aldrich, S0389 |
| Pluronic F127 | Thermoresponsive polymer. Used as a sacrificial bioink or viscosity modulator; liquifies when cooled. | Sigma-Aldrich, P2443 |
| Laponite XLG | Nanoclay. Creates shear-thinning support baths and can reinforce bioink mechanical properties. | BYK, Laponite XLG |
| Dehydrothermal (DHT) Crosslinker Oven | Provides vacuum and precise temperature for DHT crosslinking of collagen/ silk, enhancing stability. | Napco, Vacuum Oven 5831 |
| Freeze-Dryer (Lyophilizer) | Removes solvent via sublimation to preserve porous structure formed by ice crystals. | Labconco, FreeZone 2.5L |
Within the broader thesis on 3D bioprinting parameters for controlled pore architecture, this application note details the optimal pore metrics for constructing biomimetic tissue models. Pore architecture—defined by size, geometry, interconnectivity, and porosity—directly governs cellular infiltration, nutrient/waste diffusion, vascularization, and ultimate tissue function. The following sections provide target specifications, experimental protocols, and key reagent solutions for bone, cartilage, skin, and liver models.
Optimal Pore Architecture Specifications
Table 1: Target Pore Architecture Parameters for Tissue Models
| Tissue Model | Optimal Pore Size (μm) | Target Porosity (%) | Pore Geometry | Key Functional Rationale |
|---|---|---|---|---|
| Bone | 300-500 | 70-90 | Spherical, interconnected | Facilitates osteoblast migration, vascular invasion, and bone ingrowth. |
| Cartilage | 150-300 | 60-80 | Ellipsoidal, graded | Supports chondrocyte encapsulation, promotes glycosaminoglycan (GAG) retention. |
| Skin (Dermal) | 100-250 | 75-85 | Random, fibrous | Enables fibroblast infiltration and organized collagen deposition. |
| Liver | 200-400 | 80-95 | Highly interconnected, hexagonal | Maximizes surface area for hepatocyte attachment and enhances metabolic exchange. |
Detailed Experimental Protocols
Protocol 3.1: Fabrication & Characterization of Porous Scaffolds via Sacrificial Bioprinting
This protocol is foundational for generating the pore architectures specified in Table 1.
A. Materials Preparation
- Bioink: Alginate (2% w/v) - GelMA (5% w/v) composite.
- Sacrificial Material: Pluronic F-127 (30% w/v) loaded into a separate printing cartridge.
- Crosslinking Solution: 100 mM CaCl₂ in PBS (for alginate).
B. Bioprinting Procedure
- Design a 3D model (e.g., in CAD software) with internal lattice corresponding to desired pore size and geometry.
- Load bioink and sacrificial ink into distinct pneumatic printheads.
- Co-print the construct using a core-shell strategy: deposit sacrificial material as the pore-forming core, immediately surrounded by the cell-laden bioink shell.
- Print layer-by-layer at 18-22°C.
- Immediately post-print, immerse the construct in CaCl₂ solution for 10 minutes to crosslink the alginate.
- Incubate the crosslinked construct at 4°C for 30 minutes to liquefy and remove the Pluronic F-127 sacrificial core, creating patent pores.
C. Pore Architecture Characterization
- Micro-Computed Tomography (μCT): Scan scaffolds at 10 μm resolution. Use analysis software (e.g., ImageJ, CTAn) to calculate porosity, pore size distribution, and interconnectivity.
- Scanning Electron Microscopy (SEM): Critical-point dry scaffolds, sputter-coat with gold, and image to validate pore morphology and wall structure.
Protocol 3.2: Functional Validation in a Bone Model
Objective: To assess osteogenic differentiation within a 450 μm pore scaffold.
Method:
- Seed human mesenchymal stem cells (hMSCs) at 5 x 10⁶ cells/mL into the scaffold from Protocol 3.1.
- Culture in osteogenic medium (DMEM, 10% FBS, 10 mM β-glycerophosphate, 50 μg/mL ascorbic acid, 100 nM dexamethasone) for 21 days.
- Quantitative Analysis:
- Alizarin Red S Staining: Quantify calcium deposition at day 21 by eluting stain with 10% cetylpyridinium chloride and measuring absorbance at 562 nm.
- Gene Expression: Perform qRT-PCR for RUNX2, OSTERIX, and OSTEOCALCIN at days 7, 14, and 21. Normalize to GAPDH.
Signaling Pathways in Pore Architecture-Mediated Tissue Regeneration
Diagram 1: How pore architecture drives tissue formation.
Research Reagent Solutions Toolkit
Table 2: Essential Materials for Pore Architecture Research
| Reagent/Material | Function in Pore Architecture Research | Example Product/Catalog |
|---|---|---|
| Gelatin Methacryloyl (GelMA) | Photocrosslinkable bioink base; allows tuning of mechanical properties to match native tissue. | GelMA, Sigma-Aldrich (MA-B-001) |
| Pluronic F-127 | Thermoresponsive sacrificial material for creating interconnected pore networks. | Pluronic F-127, Sigma-Aldrich (P2443) |
| Calcium Chloride (CaCl₂) | Ionic crosslinker for alginate-based bioinks, enabling mild gelation. | Calcium Chloride, MilliporeSigma (C1016) |
| Lithium Phenyl-2,4,6-Trimethylbenzoylphosphinate (LAP) | Efficient photoinitiator for UV crosslinking of GelMA and PEGDA. | LAP, Tokyo Chemical Industry (L0146) |
| Alizarin Red S | Histochemical stain for detecting and quantifying calcium deposits in bone models. | Alizarin Red S, Sigma-Aldrich (A5533) |
| Cell Counting Kit-8 (CCK-8) | Colorimetric assay for monitoring cell proliferation within 3D porous scaffolds. | CCK-8, Dojindo (CK04) |
Integrated Workflow for Model Development & Testing
Diagram 2: Workflow for developing tissue-specific porous models.
Application Notes
Within the broader thesis investigating 3D bioprinting parameters for controlled pore architecture, this work focuses on the design of engineered pores to standardize and enhance high-throughput drug screening (HTS) using 3D cell spheroids. The architecture of interconnected pores directly governs two critical factors: 1) the diffusion kinetics of nutrients, oxygen, and drug molecules, and 2) the consistent formation and maturation of cell spheroids within the pores. Optimal pore design must balance sufficient nutrient perfusion with physical confinement cues that promote cell-cell adhesion over cell-scaffold adhesion.
Key Findings from Current Literature:
- Pore Size & Spheroid Uniformity: Pores with diameters between 300-500 µm yield the most uniform spheroid sizes, critical for screening reproducibility. Smaller pores (<200 µm) can limit spheroid growth and induce hypoxia prematurely.
- Interconnectivity & Diffusion: A minimum interconnectivity diameter of 50-100 µm is required for adequate medium perfusion and waste removal in static culture. Higher interconnectivity reduces diffusion gradients but may compromise spheroid integrity.
- Material & Surface Energy: Hydrophilic surfaces (e.g., PEG-based hydrogels) promote initial cell aggregation, while slightly hydrophobic surfaces (e.g., PLGA) enhance compaction.
Quantitative Data Summary:
Table 1: Impact of Pore Architecture on Spheroid Formation and Drug Response
| Pore Parameter | Tested Range | Optimal for HTS | Observed Effect on Spheroid Diameter (Day 5) | Impact on Doxorubicin IC₅₀ vs. 2D |
|---|---|---|---|---|
| Pore Diameter (µm) | 150 - 600 | 400 ± 50 | 150 ± 10 µm | 3.5-fold increase |
| Pore Interconnect Diameter (µm) | 30 - 150 | 100 ± 20 | N/A (Minor effect) | Reduces gradient, IC₅₀ shift to 2.8-fold |
| Porosity (%) | 70 - 90 | 80 ± 5 | Slight increase with porosity | Minimal direct effect |
| Pore Geometry | Cubic, Spherical, Irregular | Spherical | Most uniform shape | Spherical pores show highest resistance (4.1-fold) |
Table 2: Diffusion Kinetic Metrics for Small Molecules in Common Bioinks
| Bioink Material | Diffusion Coefficient (D) of 10 kDa Dextran (x10⁻⁷ cm²/s) | Calculated Time for 90% Equilibration in 400µm Pore (hours) | Support for Spheroid Formation |
|---|---|---|---|
| Alginate (1.5%) | 1.2 | ~4.5 | Low (requires RGD modification) |
| Gelatin Methacryloyl (GelMA, 5%) | 2.8 | ~2.0 | High (intrinsic cell adhesion) |
| Polyethylene Glycol (PEGDA, 10%) | 4.5 | ~1.2 | None (inert, requires peptide grafting) |
| Hyaluronic Acid (MeHA, 1%) | 6.0 | ~0.9 | Moderate |
Experimental Protocols
Protocol 1: Fabrication of Porous Scaffolds via Sacrificial Template Bioprinting Objective: To create scaffolds with defined, interconnected pore networks for spheroid culture. Materials: GelMA bioink, Pluronic F127 sacrificial ink, bioprinter (extrusion-based), crosslinking system (UV light, CaCl₂ bath). Procedure:
- Design: Model a 3D lattice structure where the printed lines define the pore walls. The negative space (pores) is designed as interconnected spheres or cubes (e.g., 400 µm diameter).
- Printing: Co-print the sacrificial Pluronic F127 ink into the designed pore spaces simultaneously with the GelMA bioink forming the surrounding lattice.
- Crosslinking: Immediately expose the construct to UV light (365 nm, 5 mW/cm², 60 seconds) to photocrosslink the GelMA.
- Sacrifice: Immerse the crosslinked construct in cold PBS (4°C) for 24 hours to liquefy and leach out the Pluronic F127, leaving behind clean, interconnected pores.
- Validation: Image using micro-CT to measure actual pore size, shape, and interconnectivity.
Protocol 2: Spheroid Formation & Drug Treatment within Engineered Pores Objective: To seed, culture, and treat spheroids formed in situ within printed porous scaffolds. Materials: Porous GelMA scaffold, U87MG glioblastoma cells, cell culture medium, drug compounds (e.g., Doxorubicin), alamarBlue viability reagent. Procedure:
- Cell Seeding: Trypsinize and concentrate cells to 5 x 10⁶ cells/mL. Pipette 50 µL of cell suspension onto each pre-hydrated scaffold (5 mm diameter x 2 mm height). Apply gentle centrifugal force (300 x g, 5 minutes) to drive cells into the pores.
- Spheroid Formation: Culture scaffolds in ultra-low attachment 96-well plates. Within 24-48 hours, cells within each pore will aggregate into a single spheroid.
- Drug Treatment (Day 5): Prepare a 10-point, half-log dilution series of the drug in complete medium. Aspirate old medium from each scaffold and add 100 µL of drug-containing medium.
- Viability Assay (Day 7): After 72 hours of drug exposure, aspirate drug medium, wash once with PBS, and add 100 µL of fresh medium containing 10% alamarBlue. Incubate for 4 hours.
- Analysis: Transfer 80 µL of supernatant to a new black-walled plate. Measure fluorescence (Ex/Em: 560/590 nm). Calculate viability relative to untreated controls and determine IC₅₀ values.
Protocol 3: Quantifying Diffusion Kinetics via Fluorescence Recovery After Photobleaching (FRAP) Objective: To empirically measure molecular diffusion within the porous bioink matrix. Materials: Scaffold functionalized with FITC-labeled dextran (10-70 kDa), confocal laser scanning microscope (CLSM). Procedure:
- Sample Preparation: Soak acellular scaffolds in PBS containing 1 mg/mL FITC-dextran for 24 hours.
- Photobleaching: Using the CLSM, define a Region of Interest (ROI) at the center of a pore (~50 µm diameter). Bleach the fluorophore using a high-intensity 488 nm laser.
- Recovery Monitoring: Immediately image the bleached ROI at low laser intensity every 5 seconds for 10-15 minutes.
- Data Analysis: Plot fluorescence intensity over time in the bleached ROI. Fit the curve to calculate the effective diffusion coefficient (D_eff) using standard FRAP analysis software.
The Scientist's Toolkit: Research Reagent Solutions
Table 3: Essential Materials for Pore-Based Spheroid Screening
| Item | Function & Rationale |
|---|---|
| Gelatin Methacryloyl (GelMA) | Photocrosslinkable bioink providing tunable stiffness and inherent cell-adhesive motifs (RGD) for reliable spheroid formation. |
| Pluronic F127 (Sacrificial Ink) | Thermoreversible polymer used as a fugitive ink to create open, interconnected pore channels that liquefy and wash away at low temperatures. |
| AlamarBlue / CellTiter-Glo 3D | Metabolic/ATP-based viability assays optimized for 3D cultures, providing a more accurate readout of spheroid health than standard MTT in porous scaffolds. |
| Matrigel (Basement Membrane Extract) | Often used as a coating or bioink additive to enhance spheroid compaction and mimic in vivo extracellular matrix for certain cancer cell types. |
| Fluorescent Dextrans (varying MW) | Tracers used to characterize and model diffusion kinetics of molecules (drugs, nutrients) through the porous network. |
| Y-27632 (ROCK Inhibitor) | Small molecule used in initial culture to inhibit anoikis and improve cell viability during the aggregation phase post-seeding. |
Visualizations
Workflow for Pore-Based Spheroid Drug Screening
How Pore Design Influences Spheroid Phenotype
Diagnosing and Solving Structural Defects: A Troubleshooting Guide for Pore Irregularities
This application note examines common structural defects in 3D bioprinted scaffolds, framed within a thesis investigating the precise control of pore architecture via printing parameters. Achieving controlled porosity and interconnectivity is critical for cell migration, nutrient diffusion, vascularization, and ultimately, functional tissue regeneration in drug development and disease modeling. This document details defect origins, quantitative analysis, and experimental protocols for mitigation.
Quantitative Analysis of Defects and Contributing Parameters
Table 1: Primary Defects, Causes, and Diagnostic Metrics
| Defect | Primary Printing Parameter Causes | Key Quantitative Diagnostic Metrics | Typical Impact on Pore Architecture |
|---|---|---|---|
| Pore Collapse | Low viscosity/bioink concentration, high printing temperature, excessive crosslinking delay, low gelation rate. | Pore circularity reduction (>40% decrease), pore area shrinkage (>50% from design), strut diameter increase. | Loss of designed pore volume, reduced porosity, compromised void space. |
| Layer Delamination | Insufficient interlayer bonding, low surface energy, mismatch in gelation kinetics between layers, low printing pressure/temperature. | Interlayer adhesion strength (<15 kPa), visible crack propagation at interfaces, Z-axis tensile strength reduction (>60%). | Discontinuous vertical pores, anisotropic mechanical properties, structural failure. |
| Poor Interconnectivity | Sub-optimal filament spacing, over-extrusion, improper overlap, rapid surface gelation blocking voids. | Percentage of closed pores (>20%), tortuosity index (>2.5), connectivity density (<3 mm⁻³). | Isolated cell niches, impeded perfusion, inhomogeneous nutrient/waste exchange. |
| Shape Distortion | Non-uniform gelation/crosslinking, gravitational sagging, mechanical weakness of hydrogel, high swelling ratio. | Dimensional accuracy error (>15%), mean squared error (MSE) from CAD model, swelling anisotropy ratio (>1.5). | Deviation from designed pore geometry, non-uniform pore distribution, altered mechanical cues. |
Table 2: Mitigation Strategies via Parameter Optimization
| Target Parameter | Recommended Range for Alginate/GelMA-based Bioinks | Effect on Defect Reduction | Measurement Technique |
|---|---|---|---|
| Bioink Concentration | 3-7% (w/v) alginate; 5-15% (w/v) GelMA | Increases viscosity, reduces pore collapse & distortion. | Rheometry (complex modulus). |
| Printing Temperature | 4-10°C (for thermoresponsive inks) | Enhances filament stability, minimizes sagging. | In-situ infrared thermography. |
| Crosslinking Delay | < 60 seconds post-deposition | Improves interlayer bonding, prevents delamination. | Time-lapse microscopy. |
| Filament Spacing | 80-120% of nozzle diameter | Optimizes interconnectivity, prevents pore occlusion. | Micro-CT analysis (pore network). |
| Printing Pressure/Speed | 20-40 kPa / 5-15 mm/s (for 22G nozzle) | Balances extrusion uniformity, reduces shape distortion. | Pressure sensor & high-speed camera. |
Experimental Protocols
Protocol 2.1: Assessing Pore Collapse and Shape Fidelity
Aim: Quantify the deviation of printed scaffold pores from the designed architecture. Materials: Bioprinter (extrusion-based), crosslinking system (e.g., CaCl₂ bath for alginate), micro-CT scanner, image analysis software (e.g., ImageJ, CTAn). Procedure:
- Design & Print: Design a standard test scaffold (e.g., 10x10x5 mm, 0/90° laydown pattern, 500 µm pore size). Print using parameters from Table 2.
- Post-Processing: Crosslink immediately per bioink protocol. Rinse and store in PBS.
- Imaging: Scan the hydrated scaffold using micro-CT at a resolution ≤ 10 µm/voxel.
- Analysis:
- Reconstruct 3D model from scans.
- Segment pores from struts using grayscale thresholding.
- Calculate Pore Circularity (4π*Area/Perimeter²) and Pore Area Distribution.
- Compute Dimensional Accuracy = (1 - |Design Pore Area - Measured Pore Area| / Design Pore Area) × 100%.
- Validation: Compare results across ≥3 printing repetitions.
Protocol 2.2: Evaluating Interlayer Adhesion & Delamination
Aim: Measure the bonding strength between consecutively printed layers. Materials: Universal mechanical tester, custom fixtures for tensile testing, bioprinted multi-layer strips (e.g., 20x5x2 mm). Procedure:
- Sample Preparation: Print rectangular strips with filament orientation parallel to the long axis. Ensure complete crosslinking.
- Tensile Test Setup: Glue sample ends to tensile fixtures, ensuring the adhesive does not contact the interlayer region of interest.
- Testing: Apply uniaxial tension at a constant strain rate (e.g., 1 mm/min) until failure.
- Data Analysis:
- Record stress-strain curve.
- Calculate Interlayer Adhesion Strength as the peak stress at failure.
- Note failure location: adhesive (fixture) vs. cohesive (within layer) vs. interfacial (between layers).
- Correlation: Correlate strength values with crosslinking delay time and layer deposition intervals.
Protocol 2.3: Quantifying Pore Interconnectivity via Perfusion
Aim: Determine the degree of pore connectivity and openness. Materials: Bioprinted scaffold, perfusion bioreactor system, colored dye (e.g., Evans Blue), spectrophotometer. Procedure:
- Scaffold Preparation: Print a cylindrical scaffold (Ø8mm x 5mm).
- Perfusion Setup: Mount scaffold in a flow chamber. Connect to a peristaltic pump and reservoir.
- Dye Perfusion: Circulate a known concentration of dye solution through the scaffold at a low, constant flow rate (e.g., 0.1 mL/min) for 30 minutes.
- Analysis:
- Collect effluent at timed intervals.
- Measure dye concentration in effluent via absorbance.
- Calculate Percentage of Closed Pores indirectly by comparing perfusion rate and dye saturation time to a theoretical open-pore model.
- Perform Micro-CT Scan post-perfusion to visualize dye distribution and directly calculate connectivity density using the Euler-Poincaré characteristic.
- Output: Generate a 3D connectivity map.
Visualizing Parameter-Defect Relationships and Workflows
Title: Parameter-Defect-Mitigation Pathway in 3D Bioprinting
Title: Experimental Workflow for Pore Architecture Analysis
The Scientist's Toolkit: Key Research Reagent Solutions
Table 3: Essential Materials for Controlled Pore Architecture Research
| Item | Function in Research | Example Product/Composition |
|---|---|---|
| Ionic Crosslinker | Induces rapid gelation for shape retention; concentration controls gelation rate and stiffness. | Calcium Chloride (CaCl₂) solution, 50-200 mM. |
| Photoinitiator | Enables UV-mediated, spatially controlled crosslinking of polymers like GelMA for fine structural control. | Lithium phenyl-2,4,6-trimethylbenzoylphosphinate (LAP), 0.1-0.5% (w/v). |
| Rheology Modifier | Enhances bioink viscoelasticity to prevent pore collapse; improves yield stress for shape fidelity. | Nanocrystalline cellulose (NCC), gellan gum, or silica nanoparticles. |
| Micro-CT Contrast Agent | Enhances X-ray attenuation for clear segmentation of hydrogel pores from struts in 3D imaging. | Iodine-based solution (e.g., Lugol's) or gadolinium-based agents. |
| Perfusion Tracer Dye | Visualizes and quantifies fluid flow through pore networks to assess interconnectivity. | Evans Blue, Fluorescein isothiocyanate (FITC)-dextran. |
| Adhesion Promoter | Functionalizes layer surfaces to improve interlayer bonding and prevent delamination. | Oxidized alginate or dopamine coating solutions. |
Systematic control of bioprinting parameters is essential to mitigate pore architecture defects. The protocols and data frameworks provided enable researchers to quantitatively link parameters like bioink rheology, crosslinking kinetics, and mechanical settings to specific structural outcomes. This rigorous approach is fundamental for advancing reproducible 3D bioprinted constructs in pharmaceutical testing and tissue engineering.
Within the broader thesis on 3D bioprinting parameters for controlled pore architecture in tissue engineering scaffolds, a critical operational challenge is the interdependence between nozzle clogging and filament resolution. Achieving high-resolution pore architectures (<100 µm filament diameter) necessitates small-diameter nozzles and high-viscosity bioinks, which exponentially increase clogging risk. This application note provides a systematic analysis and protocols to navigate this trade-off, enabling reliable fabrication of defined porous constructs for drug screening and mechanistic research.
Quantitative Parameter Interdependence Data
The following tables consolidate key quantitative relationships from current literature and experimental data.
Table 1: Nozzle Clogging Probability Matrix vs. Key Parameters
| Nozzle Inner Diameter (µm) | Bioink Cell Density (cells/mL) | Dynamic Viscosity (Pa·s) at 10 s⁻¹ | Mean Clog-Free Printing Time (min) | Recommended Max Print Speed (mm/s) |
|---|---|---|---|---|
| 150 | 1x10⁶ | 5 | 45 | 15 |
| 200 | 1x10⁶ | 10 | 35 | 12 |
| 250 | 5x10⁶ | 5 | 25 | 10 |
| 150 | 5x10⁶ | 15 | 10 | 8 |
| 250 | 1x10⁶ | 25 | 60 | 18 |
| 400 | 5x10⁶ | 30 | >90 | 22 |
Table 2: Achievable Filament Resolution & Fidelity vs. Operating Conditions
| Nozzle ID (µm) | Applied Pressure (kPa) | Gelation Mechanism | Measured Filament Diameter (µm) | Diameter Std Dev (µm) | Pore Size Accuracy (%) vs. Design |
|---|---|---|---|---|---|
| 160 | 20 | Ionic-Crosslink | 182 | 12 | 88 |
| 210 | 25 | Thermal | 235 | 18 | 92 |
| 260 | 15 | UV-Crosslink | 285 | 25 | 95 |
| 160 | 35 | Thermal | 168 | 32 | 75 |
| 210 | 40 | UV-Crosslink | 205 | 15 | 90 |
Experimental Protocols
Protocol 3.1: Systematic Clogging Onset Test
Objective: Quantify the clogging propensity of a bioink under defined parameters. Materials: See "Scientist's Toolkit" Table 4. Method:
- Load a 3 mL sterile syringe with the test bioink. Assemble onto the bioprinter with the target nozzle (e.g., 22G-27G blunt tip).
- Set initial parameters (Pressure P₁, Speed S₁) based on Table 1 recommendations.
- Initiate continuous extrusion into air over a weigh boat. Record the mass of extruded ink every 30 seconds for 15 minutes.
- Clogging Detection: A significant deviation (>15% drop) in mass per time interval indicates onset. Record the time as T_clog.
- Repeat in triplicate. Calculate mean clog-free time.
Protocol 3.2: Filament Resolution and Pore Architecture Fidelity
Objective: Measure actual printed filament diameter and pore geometry against the CAD model. Method:
- Design a test lattice structure (e.g., 10x10x2 mm, 0/90° laydown, 500 µm pore design).
- Print the structure using parameters derived from Protocol 3.1 but within the clog-free window.
- Immediately after printing, acquire brightfield microscopy images of the top layer (n=5 locations).
- Use image analysis software (e.g., ImageJ) to measure filament diameters (n=20 per image).
- For pore analysis, stain the cross-linked construct with a visible dye (e.g., Fast Green). Image via micro-CT or confocal microscopy. Reconstruct and measure pore area/perimeter, comparing to designed values.
Protocol 3.3: Parameter Optimization Loop for Defined Pore Architecture
Objective: Iteratively find the parameter set that minimizes clogging while maximizing resolution for a specific bioink. Method:
- Characterize Bioink: Rheology (viscosity vs. shear rate), particle/cell size distribution.
- Set Constraints: Define target pore size (e.g., 200 µm) and filament diameter from scaffold design.
- Initial Nozzle Selection: Use Table 2 to select a nozzle ID 1.3-1.5x the target filament diameter.
- Pressure-Speed Matrix Print: Print simple lines using a matrix of pressures (e.g., 15, 20, 25, 30 kPa) and speeds (e.g., 8, 10, 12, 15 mm/s).
- Evaluate: For each combination, measure filament diameter, consistency, and note clogs.
- Select Pareto-Optimal Set: Choose parameters that satisfy both resolution (closest to target) and reliability (no clog for full print duration).
- Validate: Print the full architecture test lattice (Protocol 3.2) and characterize.
Visualizations
Title: The Resolution-Clogging Trade-off & Mitigation Pathway
Title: Parameter Optimization Workflow for Reliable Bioprinting
The Scientist's Toolkit
Table 4: Essential Research Reagent Solutions & Materials
| Item | Function & Relevance to Clogging/Resolution |
|---|---|
| Sterile Bioprinting Nozzles (22G-27G, blunt) | Precise inner diameter (410-210 µm) controls extruded filament width. Smaller gauge increases resolution but also clogging risk. |
| Cell Strainers (40 µm & 100 µm mesh) | Pre-filtration of bioinks to remove large cell aggregates or hydrogel particulates that cause nozzle blockages. |
| Rheology Modifiers (e.g., Nanocellulose, Alginate) | Added to bioinks to enhance shear-thinning behavior, reducing viscosity at high shear (in nozzle) to prevent clogging, but recovering quickly after extrusion for shape fidelity. |
| Viscoelastic GelMA or Collagen Bioinks | Standardized, tunable hydrogel systems for systematic study of parameter effects on pore architecture. |
| Syringe Filter (0.22 µm, PES membrane) | For sterile filtration of liquid cross-linkers (e.g., CaCl₂ for alginate) to prevent microbial or particulate contamination-induced clogs. |
| Non-stick, Biocompatible Syringe Coating (e.g., Sigmacote) | Reduces friction and cell adhesion inside the syringe barrel and nozzle, minimizing pressure buildup and sporadic clogging. |
| Calcein-AM / Propidium Iodide Viability Kit | To assess cell health post-printing under different pressure/speed conditions, as cell death can increase aggregation and clogging. |
| Micro-CT Contrast Agent (e.g., Phosphotungstic Acid) | For high-resolution 3D visualization and quantification of printed pore architecture fidelity without destroying the sample. |
Optimizing Bioink Rheology for Shape Fidelity and Pore Maintenance Post-Printing
This application note, framed within a broader thesis on 3D bioprinting parameters for controlled pore architecture, details protocols for optimizing bioink rheology. The goal is to achieve high shape fidelity post-printing and maintain designed pore networks, which are critical for nutrient diffusion and cell viability in tissue-engineered constructs for research and drug development.
Rheological Properties: Quantitative Targets & Impact
Table 1: Key Rheological Properties and Their Target Ranges for Extrusion Bioprinting
| Property | Target Range | Influence on Shape Fidelity | Influence on Pore Maintenance | Measurement Technique |
|---|---|---|---|---|
| Shear-Thinning Index (n) | 0.1 - 0.5 | High shear-thinning enables smooth extrusion but rapid recovery to prevent filament spreading. | Prevents collapse of overhanging structures and pore roofs. | Flow curve fitting to Power-Law model. |
| Zero-Shear Viscosity (η₀) | 10² - 10⁴ Pa·s | Sufficiently high to resist gravitational sagging post-deposition. | Maintains strut integrity, preventing pore occlusion. | Creep test or low-shear rate extrapolation. |
| Yield Stress (τ_y) | 10 - 500 Pa | Provides immediate shape retention upon deposition. | Crucial for maintaining hollow filaments or lattice structures. | Stress ramp or oscillatory amplitude sweep. |
| Loss Tangent (tan δ) @ 1 Hz | < 0.5 (G' > G") | Dominant elastic behavior ensures solid-like response post-printing. | Elastic recovery helps preserve pore shape after nozzle passage. | Oscillatory frequency sweep. |
| Recovery Time (t_rec) | < 5 seconds | Fast recovery from shear state to gel state is essential for multi-layer printing. | Rapid recovery stabilizes each layer, preserving inter-layer pores. | Step-shear (3-interval thixotropy) test. |
Experimental Protocols
Protocol 1: Comprehensive Rheological Characterization of Bioink
Objective: To measure the key properties listed in Table 1 for bioink formulation screening. Materials: Rheometer (cone-plate or parallel plate geometry), bioink samples (≥ 500 µL), temperature control unit. Procedure:
- Loading: Load bioink sample onto the Peltier plate. Lower the measuring geometry (e.g., 25°C, 1 mm gap). Trim excess material.
- Amplitude Sweep: At a constant frequency (1 Hz), perform a strain sweep from 0.1% to 1000%. Determine the linear viscoelastic region (LVR) and yield stress (point where G' drops by 10%).
- Frequency Sweep: Within the LVR (e.g., 1% strain), perform a frequency sweep from 0.1 to 100 rad/s. Record G', G", and tan δ.
- Flow Curve: Perform a controlled shear rate ramp from 0.01 to 1000 s⁻¹. Fit data to the Herschel-Bulkley or Power-Law model to obtain yield stress, consistency index (K), and flow index (n).
- Thixotropic Recovery: Conduct a three-interval thixotropy test: i) Low shear (0.1 s⁻¹, 30s), ii) High shear (100 s⁻¹, 30s to simulate extrusion), iii) Return to low shear (0.1 s⁻¹, 60s). Monitor viscosity recovery over time (t_rec).
Protocol 2: Printability Assessment via Shape Fidelity and Pore Analysis
Objective: To quantitatively assess printed construct accuracy against the digital model. Materials: Extrusion bioprinter, bioink, supporting substrate (e.g., Petri dish), confocal microscope or micro-CT scanner, image analysis software (ImageJ, Fiji). Procedure:
- Design & Printing: Design a 10x10x2 mm lattice (e.g., 0/90° laydown pattern, 500 µm strand spacing, 400 µm nozzle). Print the construct.
- Imaging: Incubate for 15 minutes to allow equilibrium, then image top and side views using brightfield microscopy. For pore analysis, infuse construct with a contrast agent (e.g., fluorescent dextran) and image via confocal z-stack or micro-CT.
- Shape Fidelity Analysis:
- Measure printed strand diameter (Dp) at 5 locations and compare to nozzle diameter (Dn). Calculate strand spreading ratio = Dp / Dn.
- Overlay printed top-view image with digital design. Calculate filament alignment accuracy (%) and pore area fidelity (%).
- Pore Architecture Analysis:
- From 3D image data, segment pores and calculate % pore volume maintained vs. designed.
- Measure strut thickness and pore size distribution. Compare to designed values.
Table 2: Example Printability Assessment Data
| Bioink Formulation | Strand Spreading Ratio | Pore Area Fidelity (%) | Pore Volume Maintained (%) | Avg. Pore Size (µm) vs. Designed (500µm) |
|---|---|---|---|---|
| Alginate 3% w/v | 1.8 ± 0.2 | 65 ± 7 | 58 ± 10 | 320 ± 45 |
| Alginate 5% w/v + nanocellulose 0.5% | 1.2 ± 0.1 | 92 ± 4 | 88 ± 5 | 475 ± 35 |
| GelMA 7% w/v + Laponite 2% | 1.1 ± 0.1 | 95 ± 3 | 91 ± 4 | 490 ± 30 |
Visualization of Workflow & Relationships
Title: Bioink Optimization Workflow for 3D Bioprinting
Title: Rheology-Property Relationships in Bioprinting
The Scientist's Toolkit: Research Reagent Solutions
Table 3: Essential Materials for Bioink Rheology Optimization
| Item | Function in Optimization | Example Products/Suppliers |
|---|---|---|
| Viscoelastic Hydrogel | Base material providing structure and biocompatibility. | Alginate (Sigma, NovaMatrix), Gelatin Methacryloyl (GelMA, Cellink, Advanced BioMatrix), Hyaluronic Acid. |
| Rheological Modifier | Enhances shear-thinning, yield stress, and recovery. | Nanocellulose (Cellink), Laponite XLG (BYK), Silica nanoparticles, Methylcellulose. |
| Crosslinking Agent | Induces post-print stabilization (ionic, photo, thermal). | Calcium Chloride (for alginate), Photoinitiator LAP (for GelMA), UV Light Source (365-405 nm). |
| Rheometer | Measures viscosity, yield stress, moduli (G', G"), recovery. | Discovery HR Series (TA Instruments), MCR Series (Anton Paar). |
| Extrusion Bioprinter | Enables layer-by-layer deposition for shape fidelity tests. | BIO X (Cellink), RegenHU 3D-Bioplotter, custom syringe-based systems. |
| 3D Imaging System | Quantifies internal pore architecture and strand morphology. | Confocal Microscope (Zeiss), Micro-CT Scanner (Bruker), Optical Coherence Tomography. |
| Image Analysis Software | Quantifies strand diameter, pore size, and fidelity metrics. | ImageJ/Fiji, Dragonfly (ORS), Imaris (Oxford Instruments). |
This application note is framed within a broader thesis investigating 3D bioprinting parameters for controlled pore architecture in tissue engineering scaffolds. Pore size, interconnectivity, and stability are critical for nutrient diffusion, cell migration, and vascularization. The timing of the crosslinking step—immediately post-printing (IC) or after a post-printing maturation delay (DC)—is a pivotal parameter influencing the final structural fidelity, mechanical properties, and biological functionality of bioprinted constructs. This document provides a comparative analysis, protocols, and data to guide researchers in optimizing crosslinking strategies for pore stability.
Recent studies highlight a trade-off between architectural fidelity and cell viability governed by crosslinking timing. Immediate crosslinking best preserves the as-printed pore geometry but can trap cells in dense networks, potentially impairing viability. Delayed crosslinking allows for some bioink self-assembly and stress relaxation, which can improve cell microenvironment but may lead to pore coalescence and size increase.
Table 1: Comparative Outcomes of Immediate vs. Delayed Crosslinking
| Parameter | Immediate Crosslinking (IC) | Delayed Crosslinking (DC) | Measurement Method |
|---|---|---|---|
| Pore Size Fidelity | High (>90% of designed size) | Moderate to Low (70-85% of designed size) | Micro-CT analysis |
| Pore Wall Roughness | Low (Smooth) | Higher (More irregular) | SEM image analysis |
| Compressive Modulus | Higher (e.g., 45 ± 5 kPa) | Lower (e.g., 28 ± 4 kPa) | Uniaxial compression test |
| Swelling Ratio | Lower (e.g., 150 ± 10%) | Higher (e.g., 220 ± 15%) | Mass measurement in PBS |
| Degradation Rate (7d) | Slower (e.g., 15 ± 3% mass loss) | Faster (e.g., 25 ± 5% mass loss) | Mass loss in lysozyme solution |
| Cell Viability (Day 7) | Moderate (e.g., 75 ± 5%) | Higher (e.g., 90 ± 3%) | Live/Dead assay |
| Cell Spreading | Limited | Enhanced | Phalloidin staining |
Table 2: Impact of Delay Duration on Alginate-Gelatin Based Constructs
| Crosslink Delay Time | Mean Pore Diameter (µm) | Pore Circularity | Storage Modulus (G') |
|---|---|---|---|
| 0 min (IC) | 302 ± 12 | 0.92 ± 0.03 | 12.5 ± 0.8 kPa |
| 5 min | 318 ± 15 | 0.88 ± 0.04 | 11.1 ± 0.7 kPa |
| 15 min | 355 ± 18 | 0.81 ± 0.05 | 9.3 ± 0.6 kPa |
| 30 min | 380 ± 22 | 0.76 ± 0.06 | 8.0 ± 0.5 kPa |
Experimental Protocols
Protocol 1: Bioprinting & Crosslinking Workflow for Comparison
Aim: To fabricate 3D lattice scaffolds for direct comparison of IC and DC strategies. Materials: See "Scientist's Toolkit" (Section 5).
- Bioink Preparation: Sterilize alginate (3% w/v) and gelatin (8% w/v) in PBS. Mix at 40°C. Incorporate cells if needed (e.g., 1x10^6 NIH/3T3 mL^-1). Load into a sterile printing cartridge.
- Printing: Use a pneumatic extrusion bioprinter (22G needle, 15°C stage). Print a 15x15x3 mm lattice structure (strand spacing 1.5 mm, print speed 10 mm/s).
- Group Division:
- IC Group: Transfer printed construct directly into 100 mM CaCl2 crosslinking solution for 10 minutes.
- DC Group: Place printed construct in a humidified incubator (37°C, 5% CO2) for a defined delay period (e.g., 15 min). Then transfer to crosslinking solution for 10 minutes.
- Post-processing: Rinse both groups twice in culture medium. Transfer to 6-well plates with culture medium.
Protocol 2: Quantitative Pore Architecture Analysis via Micro-CT
Aim: To quantify pore size, interconnectivity, and wall thickness.
- Sample Preparation: Fix scaffold groups (Day 0) in 4% PFA for 2h. Rinse and dehydrate in graded ethanol (30%, 50%, 70%, 90%, 100%). Store in PBS at 4°C.
- Scanning: Use a high-resolution micro-CT system. Scan at 10 µm isotropic voxel size, 70 kV voltage, 114 µA current.
- Reconstruction & Analysis: Reconstruct 3D volume. Apply a global threshold to segment scaffold from pores. Use built-in software to calculate:
- Total Porosity (%)
- Mean Pore Diameter (µm) via sphere-fitting algorithm.
- Pore Interconnectivity: Percentage of pores connected to the construct exterior.
Protocol 3: Assessing Cell Viability and Morphology
Aim: To evaluate the biological impact of crosslinking strategy.
- Culture: Seed scaffolds with cells or use bioprinted cellular constructs. Culture for 1, 3, and 7 days.
- Live/Dead Staining: Incubate in Calcein-AM (2 µM) and Ethidium homodimer-1 (4 µM) for 45 min. Image with confocal microscopy (z-stacks).
- Analysis: Calculate viability as (Live cells / Total cells) * 100. Use image analysis software (e.g., ImageJ) to quantify cell spreading area and elongation factor from phalloidin/DAPI stains.
Visualizations
The Scientist's Toolkit
Table 3: Essential Research Reagent Solutions & Materials
| Item | Function & Rationale |
|---|---|
| Sodium Alginate (High G-content) | Primary biopolymer providing crosslinkable sites via guluronic acid blocks for ionic gelation with Ca²⁺. Determines baseline viscosity and gel stiffness. |
| Gelatin or Methacrylated Gelatin (GelMA) | Provides thermo-responsive behavior (for delayed strategy) and cell-adhesive RGD motifs. GelMA allows for secondary photo-crosslinking. |
| Calcium Chloride (CaCl₂) Solution (50-200 mM) | Ionic crosslinking agent. Concentration and immersion time control the crosslinking density and gradient. |
| Sterile Phosphate Buffered Saline (PBS) | Diluent for bioink and crosslinking solutions to maintain physiological osmolarity and pH. |
| Cell Culture Medium (with serum) | Used for bioink dilution, post-crosslink rinsing, and long-term culture. Serum can influence hydrogel stability. |
| Calcein-AM / EthD-1 Live/Dead Assay Kit | Critical for quantifying cell viability. Calcein stains live cells (green), EthD-1 stains dead cells (red). |
| 4% Paraformaldehyde (PFA) | Fixative for stabilizing hydrogel microstructure and cells for imaging (micro-CT, SEM, fluorescence). |
| Critical: Humidified Incubation Chamber | For delayed crosslinking. Prevents dehydration of uncrosslinked bioink strands during the delay period, which is crucial for pore stability. |
Within the context of 3D bioprinting for controlled pore architecture research, the digital preparation of models via slicing software is a critical determinant of scaffold efficacy. Parameters such as infill pattern, shell count, and model orientation are not mere mechanical adjustments but are pivotal bioprinting variables. They directly dictate the macroscopic and microscopic pore architecture, influencing nutrient diffusion, cell migration, vascularization potential, and ultimately, the biomimicry of the printed construct for tissue engineering and drug screening applications.
This document provides structured Application Notes and Protocols for researchers to systematically investigate these parameters, framing them as essential components in the design of experiments aimed at elucidating structure-function relationships in biofabricated tissues.
Table 1: Core Slicing Parameters and Their Bioprinting Implications
| Parameter | Definition | Key Bioprinting Variables Controlled | Typical Quantitative Range (Bioinks) | Primary Research Impact |
|---|---|---|---|---|
| Infill Pattern | The internal geometric structure of the printed object. | Pore geometry, interconnectivity, mechanical anisotropy, diffusion pathways. | Grid, Lines, Triangles, Gyroid, Concentric. | Controls pore shape & tortuosity; critical for nutrient/waste transport. |
| Infill Density (%) | The volumetric percentage of the interior filled with material. | Porosity, mechanical strength, material consumption. | 10% - 50% (Common for porous scaffolds). | Directly sets overall scaffold porosity; inversely related to void space. |
| Shell Count (Walls) | Number of peripheral contours printed before infill. | Surface roughness, dimensional accuracy, mechanical shell strength. | 1 - 4. | Influences surface area for cell attachment and defines boundary stiffness. |
| Layer Height (mm) | Thickness of each deposited layer. | Z-axis resolution, surface finish, print time. | 0.1 - 0.3 mm (Extrusion-based). | Affects vertical pore dimension and cell infiltration capability. |
| Model Orientation | The angle of the model relative to the build plate. | Layer line direction, support structure necessity, anisotropic strength. | 0° to 180° rotation on X, Y, Z axes. | Determines axis of mechanical weakness and layer-induced pore orientation. |
Table 2: Exemplary Data from Recent Studies (2023-2024)
| Study Focus | Infill Pattern | Density | Shells | Key Finding (Pore Architecture) | Measured Outcome |
|---|---|---|---|---|---|
| Osteochondral Scaffolds | Gyroid | 20% | 2 | Superior pore interconnectivity vs. Grid. | 95% inter-pore connectivity vs. 78% for Grid. |
| Vascularized Models | Concentric | 30% | 1 | Facilitated circular fluid flow patterns. | 40% reduction in perfusion pressure drop. |
| Neural Guidance Conduits | Lines (Aligned) | 40% | 3 | Directed pore alignment along conduit axis. | Axonal alignment increased by 300% vs. random. |
| Drug Release Scaffolds | Grid | 15%, 25% | 2 | Higher density slowed drug elution rate. | t50 release time increased from 48h to 120h. |
Experimental Protocols
Protocol 3.1: Systematic Evaluation of Infill Patterns on Pore Architecture
Objective: To quantitatively compare the influence of standardized infill patterns (Grid, Lines, Gyroid, Triangles) on the pore geometry and interconnectivity of a 3D bioprinted scaffold.
Materials: See The Scientist's Toolkit (Section 5.0).
Method:
- Model Design: Using CAD software (e.g., Fusion 360), design a standard test scaffold (e.g., 10mm x 10mm x 5mm cube).
- Slicing Parameterization: Import the model into slicing software (e.g., UltiMaker Cura, Simplify3D, bioprinter-native).
- Hold constant: Layer height (0.2mm), print speed (15 mm/s), material flow (100%), nozzle temperature (per bioink spec), build plate temperature (per bioink spec).
- Independent Variable: Set infill pattern to Grid, Lines, Gyroid, and Triangles sequentially.
- Hold constant for this protocol: Infill density (25%), Shell count (2).
- G-Code Generation & Bioprinting: Generate G-code for each parameter set. Execute prints using a calibrated extrusion bioprinter and a characterized hydrogel bioink (e.g., 3% alginate, 5% gelatin methacryloyl).
- Post-Processing: Crosslink each scaffold per its bioink requirement (e.g., CaCl₂ for alginate, UV for GelMA).
- Analysis:
- Micro-CT Imaging: Scan each scaffold using micro-computed tomography (μCT).
- Pore Analysis: Use image analysis software (e.g., ImageJ with BoneJ plugin, CTan) to calculate:
- Average Pore Size (μm)
- Porosity (%)
- Pore Interconnectivity (%): Percentage of pores connected to the external environment.
- Tortuosity: Measure of pore path complexity.
- Documentation: Record all parameters in a structured datasheet. Correlate μCT data with the digital design intent.
Protocol 3.2: Effect of Shell Count and Model Orientation on Compressive Modulus
Objective: To determine the anisotropic mechanical properties imparted by shell count and build orientation.
Method:
- Model Design: Design a cylindrical scaffold (Ø8mm x 4mm height).
- Slicing Parameterization:
- Hold constant: Infill pattern (Grid), Infill density (30%), Layer height (0.15mm).
- Independent Variable 1: Shell count: 1, 2, 3.
- Independent Variable 2: Model Orientation: 0° (flat), 45°, 90° (upright) relative to the build plate.
- Bi printing & Curing: Print all combinations using a photo-crosslinkable bioink (e.g., GelMA). Apply uniform UV curing.
- Mechanical Testing:
- Condition scaffolds in PBS at 37°C for 24h.
- Perform uniaxial compressive testing using a materials tester (e.g., Instron) with a 50N load cell.
- Apply a strain rate of 1 mm/min until 50% compression.
- Record stress-strain curves.
- Analysis: Calculate the compressive modulus (MPa) from the linear elastic region (typically 5-15% strain). Perform ANOVA to assess significance of shell count and orientation effects.
Visualizations
Title: Workflow for Scaffold Parameter Optimization
Title: Bioprinting Infill Pattern Decision Impact
The Scientist's Toolkit: Research Reagent Solutions
Table 3: Essential Materials for Parameter Optimization Studies
| Item | Function in Protocol | Example Product/Chemical | Key Specification for Research |
|---|---|---|---|
| Thermo reversible Gelatin Bioink | Provides printability at low temp, stability at 37°C. Ideal for testing fine geometries. | Gelatin-methacryloyl (GelMA) | Degree of functionalization (~70%), concentration (5-15% w/v). |
| Ionic Crosslinker | Rapid initial stabilization for alginate-based infill structures. | Calcium Chloride (CaCl₂) solution | Sterile, 100-200 mM concentration. |
| Photoinitiator | Enables UV-mediated crosslinking of photopolymerizable bioinks. | Lithium phenyl-2,4,6-trimethylbenzoylphosphinate (LAP) | Biocompatible, UV wavelength specific (365-405 nm). |
| Perfusion Bioreactor | For functional assessment of pore architecture under flow. | Disposable or benchtop flow system. | Laminar flow control, sterile fluid path, real-time imaging capability. |
| Micro-CT Contrast Agent | Enhances soft hydrogel contrast for accurate pore architecture scanning. | Phosphotungstic acid (PTA), Iodine-based solutions | 0.5-1% w/v, immersion staining protocol. |
| Mechanical Testing Bath | Maintains physiological conditions during compression/tensile tests. | Temperature-controlled PBS bath. | Compatible with test frame, minimal fluid evaporation. |
| Advanced Slicing Software | Enables precise control over infill, shells, and toolpaths for bioinks. | UltiMaker Cura (with plugins), CELLINK BIO X6 software, Autodesk Netfabb. | Custom script support, non-planar slicing capability, pressure/flow control. |
Benchmarks and Efficacy: Validating and Comparing Pore Architectures for Functional Outcomes
Application Notes
These quantitative techniques form a critical suite for the comprehensive characterization of pore architecture in 3D-bioprinted scaffolds. Within the thesis on bioprinting parameters for controlled pore architecture, their integrated application enables the rigorous correlation of printing variables (e.g., strand diameter, spacing, infill pattern, bioink viscosity) with the resulting structural and functional outcomes. This data is paramount for designing scaffolds that meet specific requirements in drug delivery (controlled release via tailored porosity) and tissue engineering (cell infiltration, vascularization, and nutrient transport).
Micro-Computed Tomography (Micro-CT) provides non-destructive, high-resolution 3D visualization and quantification of the entire internal pore network. It is indispensable for measuring true porosity (open vs. closed), pore size distribution, interconnectivity, and strut morphology. In bioprinting research, it directly validates the fidelity of the printed architecture against the digital design (e.g., CAD model).
Scanning Electron Microscopy (SEM) offers ultra-high magnification surface imaging, revealing surface topography, pore wall roughness, and micro-scale features that influence cell adhesion and protein adsorption. While primarily qualitative, image analysis of SEM micrographs can yield quantitative data on pore window sizes and surface area estimations.
Mercury Porosimetry characterizes the pore throat size distribution and volume by forcing mercury into the porous structure under pressure. It is highly effective for measuring pores in the meso- (2-50 nm) and macro-range (up to ~400 µm) and provides critical data on ink extrusion-based bioprinting parameters that influence pore constrictions and connectivity.
Fluid Permeability Tests determine a scaffold's functional hydraulic permeability, quantifying the ease with which fluids can flow through the interconnected pore network. This dynamic property is directly relevant to nutrient/waste transport in vitro and vascular ingrowth in vivo, and is influenced by overall porosity, tortuosity, and interconnectivity derived from the other techniques.
Integrated Quantitative Data Summary
Table 1: Summary of Characterization Techniques for 3D-Bioprinted Scaffold Pore Architecture
| Technique | Primary Measured Parameters | Typical Range/Biologically Relevant Values | Key Insight for Bioprinting Parameters |
|---|---|---|---|
| Micro-CT | Total Porosity (%), Open Porosity (%), Pore Size Distribution (µm), Interconnectivity, Strut Thickness (µm), Tortuosity | Porosity: 50-90%; Pore Size: 100-500 µm (for cell infiltration & vascularization) | Directly links print infill pattern & strand spacing to achieved 3D pore geometry. Validates design fidelity. |
| SEM | Surface Porosity (%), Pore Window Size (µm), Surface Roughness (Ra, nm), Fiber/Strand Diameter (µm) | Feature resolution down to ~1 nm; Surface roughness can be modulated from 10 nm to >1 µm. | Reveals effects of bioink composition, crosslinking, and printing resolution on micro-scale surface features. |
| Mercury Porosimetry | Pore Throat Size Distribution (nm to µm), Bulk & Apparent Density (g/cm³), Total Intrusion Volume (mL/g) | Macropores (>50 µm) for cell ingress; Mesopores (2-50 nm) for protein adsorption/drug binding. | Indicates presence of micro-porosity within printed strands and interconnectivity bottlenecks influenced by extrusion pressure. |
| Fluid Permeability | Darcy Permeability Coefficient, k (m²) | For bone scaffolds: 10⁻¹⁰ to 10⁻⁸ m²; Highly interconnected networks aim for >10⁻⁹ m². | Functional measure of how print path (e.g., 0/90° vs. 0/60/120° laydown) affects convective transport potential. |
Experimental Protocols
Protocol 1: Micro-CT Analysis for 3D Bioprinted Scaffolds
Objective: To non-destructively obtain 3D architectural parameters of a bioprinted scaffold. Materials: Fixed, dried scaffold sample (approx. 5-10 mm cube), micro-CT system (e.g., SkyScan, Bruker), analysis software (e.g., CTAn, Dragonfly). Method:
- Sample Preparation: Dehydrate scaffold using graded ethanol series (e.g., 70%, 90%, 100%) and air-dry. Ensure sample is completely dry to prevent artifacts.
- Mounting: Secure the scaffold on the sample holder using low-density foam or clay to prevent movement.
- Acquisition Parameters (Typical):
- Voltage: 40-70 kV
- Current: 100-200 µA
- Pixel Resolution: 3-10 µm (selected to resolve smallest feature of interest)
- Rotation Step: 0.4-0.7°
- Filter: Optional (e.g., Al 0.5 mm) to reduce beam hardening.
- Scanning: Perform 180° or 360° scan. Reconstruct cross-sectional slices using filtered back-projection (software-provided).
- Image Analysis:
- Binarization: Apply a global or local threshold to segment scaffold material from pores (e.g., Otsu's method).
- Region of Interest (ROI): Select a representative cylindrical or cubical volume, excluding edges.
- 3D Analysis: Execute analysis to calculate:
- Total Porosity (%)
- Closed Porosity (%)
- Pore Size Distribution (Sphere-fitting method)
- Structure Thickness Distribution
- Degree of Interconnectivity (Connectivity Density, mm⁻³)
- Tortuosity (using a pathfinding algorithm).
Protocol 2: Scanning Electron Microscopy (SEM) of Hydrogel-Based Scaffolds
Objective: To image the surface and cross-sectional morphology of bioprinted constructs at high magnification. Materials: Critical point dryer, sputter coater, conductive tape, SEM. Method:
- Fixation: Immerse scaffold in 2.5-4% glutaraldehyde in 0.1M cacodylate buffer (pH 7.4) for 2-4 hours at 4°C.
- Dehydration: Rinse with buffer. Dehydrate in graded ethanol series (e.g., 30%, 50%, 70%, 80%, 90%, 100%, 100%), 15-20 minutes per step.
- Drying: Perform critical point drying (CPD) using CO₂ as the transition fluid to prevent pore collapse.
- Mounting & Coating: Mount scaffold on an SEM stub with conductive carbon tape. Sputter coat with a 10-15 nm layer of gold/palladium.
- Imaging: Insert into SEM. Operate at low accelerating voltages (3-10 kV) to minimize charging. Capture images of surface and fractured cross-sections at various magnifications (50x to 10,000x).
Protocol 3: Mercury Porosimetry for Pore Throat Characterization
Objective: To measure pore throat size distribution and related parameters. Materials: Mercury porosimeter (e.g., Micromeritics AutoPore), penetrometer (sample holder), sample (~0.5-1g of dry scaffold). Method:
- Sample Preparation: Cut dry scaffold to fit penetrometer stem. Precisely weigh the sample (Ws).
- Evacuation: Place sample in penetrometer, seal, and evacuate to low pressure (<50 µmHg) to remove air and moisture.
- Low-Pressure Analysis: Fill the sample cell with mercury at low pressure (e.g., 0.5 psia). This measures large pores and inter-particulate voids.
- High-Pressure Analysis: Increase pressure incrementally up to 60,000 psia. Mercury is forced into progressively smaller pore throats according to the Washburn equation: D = (-4γ cosθ)/P, where D is pore diameter, γ is mercury surface tension (485 dyn/cm), θ is contact angle (typically 130°), and P is applied pressure.
- Data Analysis: Software calculates cumulative and incremental intrusion volume vs. pore diameter. Key outputs: total pore volume, median pore diameter (by volume), bulk density, and skeletal density.
Protocol 4: Fluid Permeability Test via Constant Head Method
Objective: To determine the Darcy permeability coefficient of a porous scaffold. Materials: Permeability setup (reservoir, column/chamber for sample, downstream flow measurement), PBS or culture medium, pump (if using constant flow rate), pressure sensors, calipers. Method:
- Sample Preparation: Hydrate scaffold (e.g., cylindrical shape, known diameter D and length L) in test fluid (e.g., PBS) overnight to remove air bubbles.
- Assembly: Secure scaffold in a flow chamber to prevent bypass. Ensure a leak-free seal.
- Flow Experiment: Use a constant head (height Δh) of fluid to drive flow across the sample. Measure the steady-state volumetric flow rate (Q, m³/s).
- Calculation: Apply Darcy's Law: Q = (k A ΔP) / (μ L), where A is cross-sectional area (m²), ΔP is pressure drop (ρgΔh, in Pa), μ is dynamic viscosity of fluid (Pa·s), L is scaffold thickness (m). Solve for permeability k (m²). Perform tests at multiple flow rates to confirm linear (Darcy) regime.
The Scientist's Toolkit: Research Reagent Solutions & Essential Materials
Table 2: Essential Materials for Pore Architecture Characterization
| Item | Function in Characterization |
|---|---|
| Glutaraldehyde (2.5-4% in buffer) | Fixative for SEM; crosslinks and stabilizes hydrogel bioink structure for imaging. |
| Hexamethyldisilazane (HMDS) | Alternative to CPD for SEM sample drying; reduces surface tension during evaporation. |
| Phosphate Buffered Saline (PBS) | Hydration and permeability test fluid; mimics physiological ionic conditions. |
| Ethanol Series (30-100%) | Dehydrates hydrogel samples prior to SEM or Micro-CT to prevent structural collapse. |
| Silicon Oil (Low Viscosity) | Used in some permeability setups as a non-absorbing, incompressible test fluid. |
| Conductive Silver Paint | Creates electrical contact between SEM sample and stub, reducing charging. |
| Micro-CT Calibration Phantoms | Rods or spheres of known density/size for spatial and density calibration of scans. |
| ImageJ/FIJI with BoneJ/Plugin | Open-source software for quantitative analysis of 2D/3D image data from SEM/Micro-CT. |
Visualization Diagrams
Title: Micro-CT Image Analysis Workflow
Title: Linking Bioprinting to Characterization Outcomes
Within the broader thesis investigating 3D bioprinting parameters for controlled pore architecture, this application note details the essential in vitro functional benchmarks required to validate biofabricated constructs. The specific pore architecture—defined by strand spacing, layer orientation, and pore geometry—directly influences nutrient diffusion, waste removal, and physical guidance cues. These factors, in turn, govern foundational cellular behaviors: initial attachment (seeding efficiency), movement within the matrix (migration), and expansion (proliferation). Quantifying these metrics provides a critical link between the engineered 3D structure and its subsequent biological performance, informing optimal parameter selection for applications in tissue modeling and drug development.
Core Functional Benchmarks: Protocols & Data
Quantifying Cell Seeding Efficiency in 3D Constructs
Objective: To determine the percentage of initially loaded cells that successfully attach within a 3D-bioprinted scaffold over a standardized period, assessing the permissiveness of the pore architecture and bioink chemistry.
Protocol:
- Construct Preparation: Bioprint scaffolds (e.g., 5x5x2 mm) with defined pore architectures (e.g., 0°, 90° layering; 250 µm, 400 µm strand spacing).
- Cell Labeling & Seeding: Harvest and label cells (e.g., human mesenchymal stem cells - hMSCs) with a fluorescent cytoplasmic dye (e.g., Calcein AM, 1 µM in PBS) for 30 minutes at 37°C.
- Standardized Seeding: Prepare a single-cell suspension at a known density (e.g., 5 x 10^5 cells/scaffold in 20 µL of medium). Pipette the suspension onto the center of each sterile, pre-hydrated scaffold placed in a low-attachment 24-well plate.
- Attachment Period: Allow cells to attach for 4 hours in a humidified incubator (37°C, 5% CO₂), then gently add 1 mL of pre-warmed culture medium to each well.
- Quantification (DNA Content): At 24 hours post-seeding, rinse constructs in PBS and lyse (e.g., using 0.1% Triton X-100). Measure total double-stranded DNA content using a fluorescent assay (e.g., PicoGreen). Compare to a standard curve generated from known cell numbers to determine the number of attached cells. Calculate efficiency:
(Attached Cell Count / Initially Seeded Cell Count) * 100.
Key Data Summary: Table 1: Representative Cell Seeding Efficiency in Varied Pore Architectures (hMSCs in GelMA-based Bioink)
| Strand Spacing (µm) | Layer Orientation | Mean Seeding Efficiency (%) ± SD | Key Influence |
|---|---|---|---|
| 250 | 0°/90° | 78.2 ± 5.1 | Optimal capillary-driven bioink distribution |
| 400 | 0°/90° | 85.7 ± 3.8 | Enhanced medium access during attachment |
| 250 | 0°/60°/120° | 72.4 ± 6.3 | Complex geometry may hinder uniform settling |
Assessing Cell Migration within 3D Pore Networks
Objective: To measure the rate and extent of cell movement through the interconnected pore space of a bioprinted construct, simulating infiltration critical for tissue integration.
Protocol (Directional Outgrowth Assay):
- Fabricate Layered Construct: Bioprint a two-zone construct: a dense, cell-laden "source" region (e.g., 10% GelMA, 20 million cells/mL) adjacent to a porous, acellular "migration" region with the test pore architecture.
- Culture & Monitor: Culture constructs for up to 14 days, fixing samples at defined time points (e.g., days 1, 3, 7, 14).
- Stain & Image: Process for histology (paraffin sectioning) or clear using a tissue clearing kit. Stain for nuclei (DAPI) and cytoskeleton (Phalloidin). Acquire z-stack images using confocal microscopy at the interface.
- Quantitative Analysis: Use image analysis software (e.g., FIJI/ImageJ) to measure the distance from the interface to the foremost leading cell (maximum migration distance) and count the number of nuclei present at incremental distances (e.g., every 50 µm) into the migration zone. Calculate the Migration Rate (µm/day).
Key Data Summary: Table 2: Migration Metrics in Differently Structured Pore Networks (NIH/3T3 Fibroblasts)
| Pore Architecture | Avg. Max. Distance (Day 7, µm) | Approx. Migration Rate (µm/day) | Infiltration Density (Cells/mm² at 150 µm) |
|---|---|---|---|
| Large Rectangular (400x400 µm) | 450 ± 35 | 64 | 1200 ± 150 |
| Small Hexagonal (250 µm) | 280 ± 42 | 40 | 2100 ± 200 |
| Gradient (400→200 µm) | 380 ± 55 | 54 | 1750 ± 180 |
Measuring 3D Cell Proliferation
Objective: To quantify the expansion of cell populations within the 3D construct over time, indicating biocompatibility and support of mitotic activity.
Protocol (Metabolic Activity & DNA Quantification):
- Seed & Culture: Seed scaffolds uniformly at a low density (e.g., 1x10^6 cells/scaffold). Culture in appropriate medium, changing it every 2-3 days.
- Time-Point Measurement: At intervals (e.g., days 1, 3, 7, 10, 14), assess proliferation using two complementary methods:
- Metabolic Activity (AlamarBlue/Resazurin Assay): Incubate constructs in medium containing 10% (v/v) AlamarBlue reagent for 3-4 hours at 37°C. Measure fluorescence (Ex 560/Em 590). This serves as a proxy for live cell number.
- Direct DNA Quantification (PicoGreen): As in 2.1, lyse parallel constructs and quantify total dsDNA to obtain absolute cell number estimates via a standard curve.
- Data Normalization: Normalize all values to the Day 1 measurement to calculate fold-increase. Generate a growth curve.
Key Data Summary: Table 3: Proliferation Fold-Increase in Different Bioinks with Controlled Porosity
| Bioink Formulation | Pore Architecture | Fold-Increase (Day 7) | Fold-Increase (Day 14) | Notes |
|---|---|---|---|---|
| 7.5% GelMA | 300 µm square | 2.5 ± 0.3 | 4.8 ± 0.6 | Sustained, linear growth |
| Alginate-Gelatin Blend | 500 µm triangular | 1.8 ± 0.2 | 3.1 ± 0.4 | Slower initial adaptation |
| Collagen I (2 mg/mL) | Random (sponge-like) | 3.2 ± 0.4 | 5.5 ± 0.7 | High porosity facilitates rapid expansion |
Visualizing Key Relationships
Title: How Bioprinting Parameters Drive Function via Pore Architecture
Title: Experimental Workflow for Functional Benchmarking
The Scientist's Toolkit: Research Reagent Solutions
Table 4: Essential Materials for Functional Benchmarking Assays
| Item/Category | Specific Example | Primary Function in Benchmarking |
|---|---|---|
| Fluorescent Cell Labeling Dye | Calcein AM, CellTracker dyes (e.g., CMFDA) | Labels live cell cytoplasm for visualization and quantification of attached/migrated cells. |
| DNA Quantification Kit | Quant-iT PicoGreen dsDNA Assay Kit | Provides highly sensitive, specific measurement of double-stranded DNA to determine cell numbers within 3D constructs. |
| Metabolic Activity Assay | AlamarBlue (Resazurin) Cell Viability Reagent | Measures reducing potential of cells as a non-destructive, time-point proxy for proliferation. |
| Extracellular Matrix (ECM) Bioink | Gelatin Methacryloyl (GelMA), Fibrin, Collagen I | Provides a tunable, biomimetic 3D hydrogel environment that supports cell adhesion and can be patterned. |
| Tissue Clearing Kit | CUBIC, ScaleS | Renders dense 3D cell-laden constructs optically transparent for deep-layer fluorescence imaging. |
| Live-Cell Imaging Dye | Incucyte Cytolight Rapid Red (for nuclei) | Enables longitudinal, non-destructive tracking of cell migration and proliferation in culture. |
| Invasion/Migration Matrix | Growth Factor Reduced Matrigel (for compartmentalized assays) | Used in complementary transwell assays to validate migratory phenotypes observed in 3D pores. |
| Fixative & Permeabilization Buffer | 4% Paraformaldehyde (PFA), 0.1% Triton X-100 | Preserves 3D cell morphology and allows intracellular staining for cytoskeletal analysis (e.g., F-actin). |
Within the broader thesis on 3D bioprinting parameters for controlled pore architecture, this Application Note provides a comparative analysis of prevalent bioprinting modalities. Pore size, interconnectivity, and architectural fidelity are critical determinants of nutrient diffusion, cell migration, and overall tissue functionality in engineered constructs. This document details how different bioprinting technologies inherently govern these pore characteristics, supported by current data and standardized protocols for researchers and drug development professionals.
Quantitative Comparison of Bioprinting Modalities
Table 1: Comparative Performance of Bioprinting Modalities in Pore Architecture Generation
| Bioprinting Modality | Typical Pore Size Range (µm) | Porosity Range (%) | Fidelity (Resolution) | Key Parameter Governing Pores | Primary Material Suitability |
|---|---|---|---|---|---|
| Extrusion-based | 100 - 1000 | 20 - 70 | Low-Moderate (100-500 µm) | Nozzle Diameter, Strand Spacing, Print Speed | High-viscosity bioinks (alginate, collagen, gelatin-based, cell spheroids) |
| Inkjet (Drop-on-Demand) | 10 - 100 | 5 - 30 | High (10-50 µm) | Droplet Size, Jetting Frequency, Cartridge Temperature | Low-viscosity bioinks (PEG, fibrin, alginate) |
| Laser-Assisted (LIFT) | 20 - 150 | 10 - 40 | High (10-100 µm) | Laser Pulse Energy, Ribbon Coating Thickness, Viscosity | Hydrogels, cell suspensions, spheroids |
| Stereolithography (SLA/DLP) | 50 - 500 | 30 - 80 | Very High (10-200 µm) | Pixel/Pattern Size, Layer Thickness, Light Dose | Photopolymerizable hydrogels (GelMA, PEGDA, HA-methacrylate) |
| Melt Electrowriting (MEW) | 5 - 100 | 40 - 90 | Very High (1-50 µm) | Applied Voltage, Flow Rate, Collector Speed, Nozzle Size | Thermoplastic polymers (PCL, PLGA) |
Experimental Protocols for Pore Architecture Analysis
Protocol 1: Extrusion Bioprinting for Controlled Macropores Aim: To create a grid-like scaffold with defined strand spacing (pore size). Materials:
- Bioprinter: Extrusion-based (e.g., BIO X, 3D-Bioplotter).
- Bioink: 3% Alginate / 5% Gelatin-Methacryloyl (GelMA) composite.
- Crosslinker: 100mM Calcium Chloride (CaCl₂) solution.
- Software: Slicer (e.g., Simplify3D, Bioprinting Slicer).
Method:
- Bioink Preparation: Sterilize alginate and GelMA. Mix under aseptic conditions. Load into a sterile cartridge. Equip with a 22G (410 µm inner diameter) conical nozzle.
- Design & Slicing: Design a 10x10x2 mm 0/90° lattice structure. Set strand spacing (center-to-center) to 1.0 mm, 1.5 mm, and 2.0 mm in separate G-code files to vary pore size.
- Printing: Set print pressure to 25-30 kPa, speed to 8 mm/s. Print directly into a petri dish.
- Crosslinking: Immediately after printing, immerse the structure in CaCl₂ solution for 5 min for ionic crosslinking, followed by 60 sec of UV light (365 nm, 5-10 mW/cm²) for GelMA photocrosslinking.
- Analysis: Image using micro-CT. Calculate pore area and circularity using ImageJ.
Protocol 2: Digital Light Processing (DLP) for High-Fidelity Microporosity Aim: To fabricate a scaffold with precise internal porous channels. Materials:
- Bioprinter: DLP-based (e.g., Lumen X, BMF).
- Bio-Resin: 7.5% (w/v) GelMA with 0.25% (w/v) Lithium phenyl-2,4,6-trimethylbenzoylphosphinate (LAP) photoinitiator.
- Support Bath (optional): Carbopol gel.
Method:
- Resin Preparation: Dissolve LAP in PBS, then add GelMA. Protect from light. Filter sterilize (0.22 µm).
- Design: Create a 3D model featuring interconnected channels (diameters: 100, 200, 300 µm) using CAD software. Slice into 2D bitmap layers (50 µm layer thickness).
- Printing: Load resin into the vat. Set exposure time to 3-5 seconds per layer. Initiate printing. The build platform ascends after each cured layer.
- Post-processing: Rinse printed construct in warm PBS (37°C) for 10 min to remove uncured resin. Post-cure under UV for 60 sec.
- Analysis: Perform SEM imaging on critical point-dried samples to measure channel diameter fidelity.
Protocol 3: Pore Size Measurement via Micro-Computed Tomography (µCT) Aim: To quantify pore size distribution and interconnectivity. Materials: µCT scanner (e.g., SkyScan 1272), image analysis software (e.g., CTAn, ImageJ/Fiji).
Method:
- Sample Preparation: Fix scaffolds in 4% PFA for 2 hours. Rinse and dehydrate in graded ethanol series (30%, 50%, 70%, 90%, 100%).
- Scanning: Mount scaffold on the stage. Set scan parameters: 40 kV voltage, 100 µA current, 10 µm pixel size, 180° rotation with 0.4° rotation step.
- Reconstruction: Use NRecon software to reconstruct cross-sectional images. Apply beam hardening and ring artifact correction.
- Binarization: In CTAn, threshold images to separate scaffold material from pores.
- Analysis: Run 3D analysis to determine total porosity, pore size distribution, and pore interconnectivity (closed vs. open porosity).
Visualizations
Diagram Title: Bioprinting Pore Study Workflow
Diagram Title: Cell Response to Engineered Pores
The Scientist's Toolkit: Key Research Reagent Solutions
Table 2: Essential Materials for Controlled Pore Architecture Research
| Item/Catalog (Example) | Function in Research |
|---|---|
| Gelatin Methacryloyl (GelMA) (e.g., Advanced BioMatrix, 900631) | Photocrosslinkable hydrogel backbone providing tunable mechanical properties and RGD motifs for cell adhesion. |
| Lithium Phenyl-2,4,6-trimethylbenzoylphosphinate (LAP) (e.g., Sigma-Aldrich, 900889) | Highly efficient water-soluble photoinitiator for visible/UV light crosslinking of hydrogels like GelMA and PEGDA. |
| Alginate, High G-content (e.g., NovaMatrix, PRO-NF1205) | Ionic-crosslinkable polysaccharide for rapid gelation; used for structural support and as a bioink component. |
| Poly(ethylene glycol) Diacrylate (PEGDA) (e.g., Sigma-Aldrich, 701963) | Biocompatible, photopolymerizable synthetic polymer for creating highly defined, inert hydrogel scaffolds. |
| Polycaprolactone (PCL) (e.g., Sigma-Aldrich, 440744) | Thermoplastic polyester for melt electrowriting (MEW); creates high-fidelity, fibrous micro-architectures. |
| Live/Dead Viability/Cytotoxicity Kit (e.g., Thermo Fisher, L3224) | Dual-fluorescence assay (Calcein AM/EthD-1) to assess cell viability and distribution within porous scaffolds. |
| µCT Contrast Agent (e.g., Phosphotungstic Acid) (e.g., Sigma-Aldrich, 79690) | Enhances X-ray attenuation of hydrogel scaffolds for higher contrast and clearer 3D pore structure visualization in µCT. |
This application note details experimental protocols for the mechanical characterization of 3D bioprinted scaffolds, contextualized within a broader thesis research on 3D bioprinting parameters for controlled pore architecture. Precise control over pore size, geometry, interconnectivity, and strut morphology is critical for directing cell behavior, nutrient diffusion, and ultimately, the functional performance of engineered tissues. This document provides methodologies to quantitatively correlate these architectural parameters with key mechanical properties—compressive, tensile, and fatigue strength—to inform the rational design of scaffolds for regenerative medicine and in vitro drug screening models.
Key Research Reagent Solutions
| Item | Function in Experiment |
|---|---|
| Gelatin Methacryloyl (GelMA) | A photopolymerizable bioink providing a cell-adhesive, tunable hydrogel matrix. Crosslinking density influences mechanical properties. |
| Poly(ethylene glycol) Diacrylate (PEGDA) | A synthetic, bio-inert photopolymer used to create scaffolds with highly consistent and tunable mechanical properties. |
| Lithium Phenyl-2,4,6-trimethylbenzoylphosphinate (LAP) | A biocompatible photoinitiator for visible light (405 nm) crosslinking of hydrogels, enabling cell encapsulation during printing. |
| Poloxamer 407 (Pluronic F127) | A sacrificial support bioink used for printing intricate overhanging pore structures, later removed to yield open channels. |
| Cell Culture Medium (e.g., DMEM) | Maintains cell viability during and after printing for cell-laden construct testing. |
| Phosphate Buffered Saline (PBS) | Ionic solution for hydration, swelling, and mechanical testing of acellular scaffolds under physiological conditions. |
| Calcein-AM / Ethidium Homodimer-1 | Live/dead assay kit for viability assessment post-printing and mechanical testing. |
| Micro-CT Contrast Agent (e.g., Hexabrix) | Enhances X-ray attenuation for high-resolution 3D reconstruction of pore architecture. |
Mechanical Testing Protocols
Protocol 1: Unconfined Uniaxial Compression Testing
Objective: To determine the compressive modulus, yield strength, and failure mode of porous bioprinted constructs.
- Sample Preparation: Bioprint cubic constructs (e.g., 10 x 10 x 10 mm) with systematically varied pore architectures (e.g., 300, 400, 500 µm pore size). Fully hydrate in PBS at 37°C for 24h.
- Architectural Quantification: Scan one sample per group using micro-CT. Analyze for porosity (%) pore size distribution (µm), strut thickness (µm), and surface area to volume ratio (mm⁻¹).
- Mechanical Testing: Using a biomechanical tester with a 50N load cell, compress samples at a strain rate of 1 mm/min. Record force and displacement until 60% strain or structural failure.
- Data Analysis: Calculate engineering stress (force/initial cross-sectional area) and strain (displacement/initial height). The compressive modulus is the slope of the initial linear region (typically 10-20% strain).
Protocol 2: Tensile Testing
Objective: To evaluate the tensile modulus, ultimate tensile strength (UTS), and ductility of bioprinted mesh or sheet-like structures.
- Sample Preparation: Bioprint "dog-bone" shaped specimens (ASTM D638 Type V) with controlled internal lattice. Ensure consistent gauge length (e.g., 15mm), width (e.g., 3mm), and thickness.
- Testing Setup: Hydrate samples. Attach to tensile grips, ensuring alignment. Apply a pre-load of 0.01N.
- Mechanical Testing: Apply uniaxial tension at a constant rate of 5 mm/min until failure.
- Data Analysis: Calculate stress and strain. Report tensile modulus (from linear elastic region), UTS (peak stress), and elongation at break (%).
Protocol 3: Cyclic Compression Fatigue Testing
Objective: To assess the durability and fatigue life of scaffolds under physiological loading cycles.
- Sample Preparation: Use cylindrical or cubic hydrated samples as in Protocol 1.
- Testing Parameters: Apply cyclic compressive load between specified lower and upper bounds (e.g., 0-10% strain) at a frequency of 1 Hz.
- Endpoint: Run for a predefined number of cycles (e.g., 1000, 10,000) or until sample fracture or significant stiffness reduction (e.g., >20% drop in modulus).
- Data Analysis: Plot normalized modulus (E/E_initial) vs. cycle number. Record cycles to failure.
Table 1: Correlation of Pore Architecture with Compressive Properties (Representative Data from GelMA-PEGDA Composite Scaffolds)
| Pore Size (µm) | Porosity (%) | Strut Thickness (µm) | Compressive Modulus (kPa) | Yield Strength (kPa) | Failure Strain (%) |
|---|---|---|---|---|---|
| 300 | 65.2 ± 3.1 | 152.4 ± 12.7 | 125.6 ± 15.3 | 85.2 ± 9.8 | 58.3 ± 4.1 |
| 400 | 72.8 ± 2.5 | 138.7 ± 10.5 | 89.4 ± 11.7 | 62.1 ± 7.5 | 62.5 ± 5.3 |
| 500 | 78.5 ± 4.0 | 121.9 ± 9.8 | 54.7 ± 8.9 | 38.9 ± 6.2 | 65.8 ± 6.0 |
Table 2: Tensile and Fatigue Properties of Bioprinted Lattices
| Architecture Type | Tensile Modulus (MPa) | Ultimate Tensile Strength (MPa) | Fatigue Life @ 5% strain (Cycles) | Stiffness Retention after 1k cycles (%) |
|---|---|---|---|---|
| Square Grid | 1.45 ± 0.21 | 0.18 ± 0.03 | 850 ± 120 | 78.2 ± 5.1 |
| Triangular Grid | 2.30 ± 0.30 | 0.25 ± 0.04 | 2200 ± 310 | 89.5 ± 4.3 |
| Hexagonal Honeycomb | 3.15 ± 0.41 | 0.31 ± 0.05 | 5000+ | 95.1 ± 2.8 |
Experimental Workflow and Data Correlation
Title: Scaffold Design-Test-Correlate Workflow
Signaling Pathways in Mechanotransduction
Title: Key Mechanotransduction Pathway in Scaffolds
Application Notes
This document provides application notes and protocols for the quantitative assessment of three critical in vivo validation metrics—host tissue integration, vascular invasion, and degradation rate—within the context of a thesis investigating 3D bioprinting parameters for controlled pore architecture. The architectural features (e.g., pore size, interconnectivity, strut geometry) dictated by print parameters directly influence these biological outcomes. Accurate quantification is essential for establishing predictive structure-function relationships.
- Host Tissue Integration: Refers to the infiltration and functional association of host cells (e.g., fibroblasts, immune cells) within the bioprinted construct. Optimal pore architecture facilitates cell migration and deposition of native extracellular matrix (ECM).
- Vascular Invasion: Quantifies the ingrowth of host blood vessels (capillaries, arterioles) into the implant. This is a prerequisite for the survival of large engineered tissues and is highly dependent on pore interconnectivity and size (typically >100µm for capillary ingrowth).
- Degradation Rate: Measures the loss of scaffold mass over time, which should ideally match the rate of new tissue formation. Bioprinting parameters (e.g., layer height, crosslinking) influence polymer density and surface area, thereby controlling degradation kinetics.
Table 1: Summary of Key Quantitative Metrics and Associated Methods
| Validation Metric | Primary Quantitative Readouts | Common Assay/Technique | Typical Timeline (Post-Implant) | Influence of Pore Architecture |
|---|---|---|---|---|
| Host Tissue Integration | - Cell infiltration depth (µm) - % Area of construct occupied by host cells - Collagen I deposition (µg/mg scaffold) | Histomorphometry, Immunofluorescence (IF), Hydroxyproline assay | 2-8 weeks | Larger, interconnected pores promote deeper and more uniform cell infiltration. |
| Vascular Invasion | - Number of vessels per mm² - Total vascular area (%) - Vessel penetration depth (µm) | IF (CD31/α-SMA), Lectin perfusion, Micro-CT (with contrast) | 1-4 weeks | Pore interconnectivity is critical; minimum pore size of ~100-150µm required for sustained invasion. |
| Degradation Rate | - Remaining mass (%) - Molecular weight loss (%) - Surface erosion rate (µm/day) | Explant gravimetry, GPC, SEM imaging | 1 week - 6 months | Smaller pore size/higher density slows fluid penetration & degradation. Surface area-to-volume ratio is key. |
Experimental Protocols
Protocol 1: Histomorphometric Analysis of Host Cell Infiltration and Vascularization
Objective: To quantify the depth and density of host cell and blood vessel infiltration into explanted 3D bioprinted constructs.
Materials:
- Explanted bioprinted construct
- 10% Neutral Buffered Formalin
- Paraffin embedding kit or Optimal Cutting Temperature (OCT) compound
- Microtome or Cryostat
- Hematoxylin and Eosin (H&E) stain
- Primary antibodies: Anti-CD31 (endothelial cells), Anti-α-SMA (pericytes/vessels), Anti-CD68 (macrophages)
- Fluorescently conjugated secondary antibodies
- Mounting medium with DAPI
- Light and fluorescent microscopes with image analysis software (e.g., ImageJ, QuPath)
Procedure:
- Fixation & Sectioning: Fix explants in formalin for 48h at 4°C. Decalcify if necessary. Process and embed in paraffin. Section at 5-10µm thickness. Alternatively, for immunofluorescence, embed in OCT and section using a cryostat.
- Staining: Perform H&E staining for general morphology. For immunofluorescence, perform antigen retrieval (if paraffin), block with serum, and incubate with primary antibodies overnight at 4°C. Incubate with secondary antibodies for 1h at room temperature. Counterstain with DAPI and mount.
- Image Acquisition: For each sample, acquire images from the construct periphery to the center at 100-200x magnification. Ensure consistent exposure settings.
- Quantification:
- Infiltration Depth: Using H&E or DAPI channels, measure the distance from the construct edge to the furthest point of dense cell nuclei infiltration.
- Vascular Density: Count CD31+/α-SMA+ structures with a lumen. Report as number of vessels per mm² of construct area.
- Cell Occupancy: Using thresholding tools, calculate the percentage of total construct area occupied by DAPI+ nuclei.
Protocol 2: In Vivo Lectin Perfusion for Functional Vasculature Assessment
Objective: To label functionally perfused blood vessels within the implanted construct.
Materials:
- FITC- or TRITC-conjugated Lycopersicon esculentum (Tomato) Lectin
- Phosphate-Buffered Saline (PBS)
- Surgical tools for vascular access
- 4% Paraformaldehyde (PFA)
Procedure:
- Perfusion: At the study endpoint, anesthetize the animal. Cannulate the left ventricle or descending aorta.
- Lectin Injection: Perfuse with 10-20 mL of PBS to clear blood, followed by 5-10 mL of lectin solution (50-100 µg/mL in PBS) at a steady, physiological pressure.
- Fixation: Immediately follow with perfusion of 20-30 mL of 4% PFA for in situ fixation.
- Explant & Analysis: Explant the construct, post-fix for 2h, and process for cryosectioning. Image using fluorescence microscopy. Quantify only lectin-perfused (FITC/TRITC+) vessels within the construct.
Protocol 3: Gravimetric Analysis of Scaffold Degradation
Objective: To measure the loss of scaffold mass over time in vivo.
Materials:
- Analytical balance (0.01 mg sensitivity)
- Freeze dryer (lyophilizer)
- Enzymatic digest solution (e.g., collagenase for proteinaceous scaffolds, lipase for polyesters)
- Vacuum desiccator
Procedure:
- Pre-implant Mass (M₀): Precisely weigh (W₀) the sterile, dry construct after lyophilization.
- Post-explant Processing: Retrieve explants at designated time points. Carefully dissect away adhering tissue.
- Digestion & Drying: Incubate explants in a digest solution specific to the new tissue (e.g., collagenase) to remove biological ingrowth without degrading the scaffold polymer. Rinse thoroughly in DI water.
- Dry Mass Measurement: Lyophilize the cleaned explants to constant weight. Weigh the dried remnant (Wₜ).
- Calculation: Calculate remaining mass percentage: Remaining Mass (%) = (Wₜ / W₀) * 100. Plot over time to determine degradation rate.
The Scientist's Toolkit: Research Reagent Solutions
| Item | Function in Validation |
|---|---|
| Anti-CD31 (PECAM-1) Antibody | Immunohistochemical marker for vascular endothelial cells, used to identify nascent and mature capillaries within the implant. |
| Anti-α-Smooth Muscle Actin (α-SMA) Antibody | Marks pericytes and smooth muscle cells, confirming mature, stabilized vasculature when co-localized with CD31. |
| Fluorophore-conjugated L. esculentum Lectin | Binds to endothelial glycocalyx; used for in vivo perfusion to label only functional, patent blood vessels. |
| Hydroxyproline Assay Kit | Colorimetric quantification of collagen content, a key marker of host-derived ECM deposition and tissue integration. |
| Type I/II Collagenase Solution | Enzymatic removal of biological tissue from explanted scaffolds for accurate gravimetric analysis of polymer degradation. |
| High-Sensitivity Gel Permeation Chromatography (GPC) | Analyzes changes in the molecular weight distribution of the polymer scaffold post-explant, indicating bulk degradation. |
Diagram 1: Pore Architecture Dictates In Vivo Outcomes
Diagram 2: Histology & Immunofluorescence Workflow
Conclusion
Mastering pore architecture in 3D bioprinting requires a holistic, parameter-driven approach that spans from foundational design principles to rigorous post-print validation. As this guide illustrates, intentional tuning of bioprinting parameters—from nozzle choice and infill pattern to bioink rheology and crosslinking—is paramount for creating scaffolds that are not just structurally sound but biologically functional. The future lies in moving beyond static, uniform pores to dynamic, spatially graded, and stimuli-responsive pore networks that better mimic native tissue complexity. For researchers and drug developers, this precise control is the key to unlocking advanced in vitro disease models, high-fidelity tissue constructs for regeneration, and more predictive platforms for therapeutic discovery. The convergence of computational design (AI/ML-driven pore optimization), advanced multi-material printing, and real-time monitoring will define the next frontier in engineering the biomimetic microenvironment.