Bridging the Gap: A Comprehensive Guide to 3D-Printed Biomaterial Scaffolds for Next-Generation Bone Regeneration
This article provides a detailed exploration of 3D printing for biomaterial scaffolds in bone tissue engineering, tailored for researchers, scientists, and drug development professionals.
Bridging the Gap: A Comprehensive Guide to 3D-Printed Biomaterial Scaffolds for Next-Generation Bone Regeneration
Abstract
This article provides a detailed exploration of 3D printing for biomaterial scaffolds in bone tissue engineering, tailored for researchers, scientists, and drug development professionals. It begins by establishing the fundamental requirements for an ideal scaffold and the rationale for employing 3D printing. The core sections then delve into the methodologies of major printing technologies (e.g., extrusion-based, vat photopolymerization, powder-based) and their compatible biomaterial inks, including polymers, ceramics, and composites. Critical challenges such as resolution limitations, mechanical integrity, and biocompatibility are addressed with current optimization strategies. Finally, the article systematically reviews the validation pipeline, from in vitro cytocompatibility and osteogenic differentiation assays to preclinical in vivo models and comparative analyses against clinical standards. This holistic overview aims to inform the design, fabrication, and translation of advanced 3D-printed constructs for bone repair.
The Blueprint for Regeneration: Core Principles and Biomaterial Choices for Bone Scaffolds
Critical-sized bone defects (CSBDs), defined as those that will not heal spontaneously over a patient's lifetime, represent a significant orthopedic and reconstructive challenge. Current standard-of-care treatments, including autografts, allografts, and synthetic substitutes, possess substantial limitations that drive the need for advanced tissue engineering strategies, such as 3D-printed biomaterial scaffolds.
Table 1: Quantitative Comparison of Current Bone Graft Options
| Graft Type | Key Advantages | Key Limitations | Approximate Annual Procedures (US) | Estimated Failure/Complication Rate |
|---|---|---|---|---|
| Autograft (Gold Standard) | Osteogenic, osteoinductive, osteoconductive; no immunogenicity. | Limited supply; donor site morbidity (pain, infection ~20%); increased operative time. | ~500,000 | Donor site morbidity: 8-20% |
| Allograft | Readily available; various forms (demineralized, structural). | Variable resorption rates; risk of immunogenicity/disease transmission; lower osteogenic potential. | ~900,000 | Non-union/infection: 10-25% for large defects |
| Synthetic Ceramics (e.g., HA, β-TCP) | Tunable composition/architecture; osteoconductive. | Brittle; slow/degradation; lack osteoinductivity. | N/A (widely used) | Fragmentation/limited integration in large defects |
| Growth Factor-based (e.g., rhBMP-2) | Potent osteoinduction. | High cost; supraphysiologic doses; risk of ectopic bone formation, swelling. | N/A | Complications (swelling, ectopic bone): up to 20% |
Application Notes: 3D-Printed Scaffolds as a Strategic Solution
3D printing enables the fabrication of patient-specific scaffolds that address the limitations of traditional grafts through:
- Architectural Control: Precise modulation of pore size (recommended 300-600 µm for vascularization), porosity (>70%), and interconnectivity to facilitate cell migration, vascular ingrowth, and nutrient diffusion.
- Material Innovation: Use of biocompatible and bioactive polymers (e.g., PCL, PLGA), ceramics (HA, β-TCP), and composites that mimic bone's mechanical and chemical properties.
- Functionalization: Incorporation of growth factors (BMP-2, VEGF), drugs (antibiotics, osteogenic small molecules), or cells (MSCs) in a spatially controlled manner (bio-printing).
Table 2: Key Design Parameters for 3D-Printed Bone Scaffolds
| Parameter | Optimal Range | Rationale | Measurement Technique |
|---|---|---|---|
| Pore Size | 300 - 600 µm | Facilitates osteogenesis and capillary formation. | Micro-CT analysis, SEM. |
| Porosity | 60 - 80% | Balances mechanical strength with bone ingrowth. | Archimedes' principle, micro-CT. |
| Compressive Modulus | 0.5 - 5 GPa (Cortical); 0.1 - 0.5 GPa (Cancellous) | Matches host bone to prevent stress shielding. | Mechanical testing (ASTM F451). |
| Degradation Rate | 6 - 24 months | Should match rate of new bone formation. | Mass loss in simulated body fluid (SBF). |
| Surface Roughness (Ra) | 1 - 5 µm | Enhances cell adhesion and protein adsorption. | Atomic force microscopy (AFM). |
Experimental Protocols
Protocol 3.1: Fabrication of a Composite PCL/β-TCP Scaffold via Fused Deposition Modeling (FDM)
Objective: To fabricate a mechanically robust, osteoconductive scaffold for CSBD repair. Materials:
- PCL filament with 20% w/w β-TCP nanoparticles.
- Commercial FDM 3D printer (e.g., BIO X, 3D-Bioplotter).
- Slicing software (e.g., Simplify3D).
- 70% Ethanol for sterilization.
Procedure:
- Design: Create a 3D model (STL file) of a cylindrical scaffold (Ø5mm x 3mm) with a 0/90° lay-down pattern using CAD software.
- Slicing: Import STL into slicing software. Set parameters: Nozzle diameter = 250 µm, Layer height = 200 µm, Printing speed = 5 mm/s, Nozzle temperature = 110°C, Bed temperature = 40°C. Generate G-code.
- Printing: Load composite filament. Calibrate build plate. Execute print.
- Post-processing: Remove scaffold. Immerse in 70% ethanol for 30 min for sterilization, then rinse 3x with sterile PBS. Air dry under UV in laminar flow hood.
- Characterization: Image via SEM to confirm architecture. Perform compressive testing per ASTM F451.
Protocol 3.2: In Vitro Osteogenic Differentiation Study on 3D-Printed Scaffolds
Objective: To assess the scaffold's biocompatibility and ability to support osteogenesis. Materials:
- Human mesenchymal stem cells (hMSCs, passage 3-5).
- Osteogenic medium: α-MEM, 10% FBS, 10 mM β-glycerophosphate, 50 µg/mL ascorbic acid, 100 nM dexamethasone.
- Cell viability assay kit (e.g., AlamarBlue).
- Osteogenic assay kits: Alkaline Phosphatase (ALP), Osteocalcin (OCN) ELISA.
- 4% Paraformaldehyde (PFA).
Procedure:
- Seeding: Sterilize scaffolds (Protocol 3.1). Pre-wet with medium. Seed hMSCs at a density of 5 x 10^4 cells/scaffold in a low-attachment plate. Allow 2h for attachment, then add medium.
- Culture: Maintain one group in basal growth medium and another in osteogenic medium. Change medium every 3 days.
- Analysis:
- Day 3, 7: Perform AlamarBlue assay per manufacturer's instructions to assess metabolic activity.
- Day 7, 14: Fix samples in 4% PFA for 20 min. Perform ALP activity assay (colorimetric) on lysates.
- Day 21: Fix samples for SEM or extract protein for OCN ELISA. Perform Von Kossa staining for mineralized matrix visualization.
Protocol 3.3: In Vivo Evaluation in a Rat Critical-Sized Femoral Defect Model
Objective: To evaluate scaffold performance in bone regeneration within a CSBD. Materials:
- 12-week-old male Sprague-Dawley rats (n=8/group).
- Sterile surgical tools, drill, external fixator.
- Isoflurane anesthesia, buprenorphine analgesia.
- 3D-printed PCL/β-TCP scaffold (Ø3mm x 4mm).
- Micro-CT scanner, histology supplies.
Procedure:
- Pre-op: Obtain IACUC approval. Administer pre-operative analgesia.
- Surgery: Anesthetize rat. Surgically expose femoral midshaft. Stabilize bone with external fixator. Create a 4mm segmental defect using a oscillating saw. Implant scaffold into defect (test group) or leave empty (control). Close wound in layers.
- Post-op: Monitor daily, provide analgesia. Euthanize at 8 and 12 weeks.
- Analysis:
- Micro-CT: Scan explanted femurs at 12 µm resolution. Analyze bone volume/total volume (BV/TV) and trabecular number within defect.
- Histology: Decalcify, paraffin-embed, section. Perform H&E, Masson's Trichrome, and immunohistochemistry for OCN. Score new bone formation.
Visualizations
The Scientist's Toolkit: Research Reagent Solutions
Table 3: Essential Materials for Bone Tissue Engineering Research
| Item | Function/Application | Example Product/Catalog # (Representative) |
|---|---|---|
| Polycaprolactone (PCL) Filament | Biocompatible, slow-degrading polymer for FDM printing; provides structural integrity. | (Sigma-Aldrich, 440752) |
| Beta-Tricalcium Phosphate (β-TCP) Nanopowder | Osteoconductive ceramic; enhances bioactivity and compressive modulus of composites. | (Sigma-Aldrich, 642636) |
| Human Bone Marrow-derived MSCs | Gold-standard primary cell for in vitro osteogenic differentiation assays. | (Lonza, PT-2501) |
| Osteogenic Differentiation Media Kit | Contains supplements (dexamethasone, ascorbate, β-glycerophosphate) to induce osteogenesis. | (StemPro, ThermoFisher, A1007201) |
| AlamarBlue Cell Viability Reagent | Resazurin-based assay for non-destructive, quantitative monitoring of cell proliferation on scaffolds. | (ThermoFisher, DAL1025) |
| Paraformaldehyde (4%), Aqueous | Fixative for preserving cell morphology on scaffolds prior to SEM or histology. | (Electron Microscopy Sciences, 15710) |
| Alkaline Phosphatase (ALP) Detection Kit | Colorimetric assay for early-stage osteogenic differentiation marker activity. | (Sigma-Aldrich, 86R-1KT) |
| Osteocalcin (OCN) ELISA Kit | Quantifies late-stage osteogenic differentiation marker (bone Gla protein) secretion. | (ThermoFisher, EHOSTEOCALCIN) |
| Micro-CT Calibration Phantom | For quantitative mineralization analysis and calibration of bone density measurements in vivo. | (Scanco, HA Phantom) |
| Masson's Trichrome Stain Kit | Histological stain to differentiate collagen (blue) from mineralized bone/muscle (red). | (Sigma-Aldrich, HT15) |
The pursuit of an ideal bone scaffold is foundational to advancing regenerative medicine. Within the context of 3D-printed biomaterials for bone tissue engineering, this ideal is benchmarked against the OSTEO principles: Osteoconduction, Steogenesis (and its precursor, T osteoinduction), E (mechanical support), and O (the integrated outcome). This document provides application notes and detailed protocols for the quantitative evaluation of these principles in next-generation 3D-printed scaffolds, synthesizing current research data and methodologies.
Table 1: Key Performance Metrics for 3D-Printed Bone Scaffolds (Current Benchmark Ranges)
| Principle | Key Metric | Ideal/Target Range | Common Measurement Techniques | Representative Materials (Current) |
|---|---|---|---|---|
| Osteoconduction | Porosity | 60-80% | Micro-CT analysis | β-Tricalcium Phosphate (β-TCP), Hydroxyapatite (HA) |
| Pore Size | 100-500 μm | SEM imaging | Bioglass 45S5, Polycaprolactone (PCL)-HA composites | |
| Surface Area/Volume | >5 mm²/mm³ | BET/ Micro-CT | Mesoporous Bioactive Glass (MBG) | |
| Osteoinduction | BMP-2 Release (if loaded) | Sustained over 14-28 days | ELISA | Collagen-BMP-2, PLGA microspheres in PCL |
| Ectopic Bone Formation (in vivo) | Score ≥3 (0-4 scale) | Histology (ectopic model) | Biphasic Calcium Phosphate (BCP), silicate bioceramics | |
| Osteogenesis | Cell Viability (Day 7) | >90% | Live/Dead assay | PCL-TCP, GelMA-HA |
| Alkaline Phosphatase Activity (Day 14) | 2-3 fold increase vs. control | ALP assay | Stromal cell-seeded silk fibroin scaffolds | |
| Mineral Deposition (Day 21) | ≥2x control | Alizarin Red S quantification | PEGDA-nHA, chitosan-β-TCP | |
| Mechanical Support | Compressive Modulus (Trabecular Bone) | 0.1-2 GPa | Uniaxial compression test | PEEK, Ti-6Al-4V lattice |
| Compressive Strength | 2-12 MPa (for porous scaffolds) | ISO 13314:2011 | 3D-printed β-TCP, ZrO2 toughened HA |
Application Notes & Detailed Protocols
Protocol 3.1: Micro-CT Analysis for Osteoconductive Architecture (Porosity & Pore Interconnectivity)
- Objective: Quantify the 3D porous architecture of a printed scaffold.
- Materials: Scaffold sample (dry), SkyScan 1272 or equivalent micro-CT scanner, NRecon/CTAn software.
- Procedure:
- Mount sample on stage. Set scanning parameters: 8-10 μm voxel size, 70 kV voltage, 142 μA current, 0.5 mm Al filter, 180° rotation with 0.4° step.
- Reconstruct cross-sections using NRecon (apply beam hardening correction, typically 30-40%).
- Import reconstructed slices into CTAn. Binarize images using consistent global thresholding (e.g., Otsu method).
- Analyze for total porosity (Po(tot)), open porosity (Po(op)), closed porosity (Po(cl)), pore size distribution (Sphere Fitting method), and interconnectivity (ratio of Po(op) to Po(tot)).
- Data Interpretation: Po(op) > 95% of Po(tot) indicates excellent interconnectivity, crucial for cell migration and vascularization.
Protocol 3.2: In Vitro Osteogenic Differentiation Assay (Quantifying Osteogenesis)
- Objective: Assess the osteoinductive and osteogenic potential of a scaffold using human mesenchymal stem cells (hMSCs).
- Materials: Sterile 3D-printed scaffold, hMSCs (e.g., Lonza), Osteogenic media (α-MEM, 10% FBS, 10 mM β-glycerophosphate, 50 μg/mL ascorbic acid, 100 nM dexamethasone), ALP staining kit (Sigma), Alizarin Red S (ARS, Sigma), cetylpyridinium chloride (CPC).
- Procedure:
- Cell Seeding: Sterilize scaffold (70% ethanol, UV). Seed hMSCs at 5x10^4 cells/scaffold in a low-attachment plate. Allow 2 hrs for attachment before adding osteogenic or control media.
- ALP Activity (Day 7/14): Lyse cells in 0.1% Triton X-100. Mix lysate with pNPP substrate. Measure absorbance at 405 nm. Normalize to total protein (BCA assay).
- Mineralization (Day 21/28): Fix cells in 4% PFA for 15 min. Stain with 2% ARS (pH 4.2) for 20 min. For quantification, destain with 10% CPC for 1 hr. Measure absorbance of eluent at 562 nm.
- Data Interpretation: A scaffold with inherent osteoinductivity will show elevated ALP and mineralization in basal media. Osteoconductive scaffolds require osteogenic media for significant differentiation.
Protocol 3.3: Quasi-Static Uniaxial Compression Test for Mechanical Support
- Objective: Determine the compressive elastic modulus and strength of a porous scaffold.
- Materials: Cylindrical scaffold sample (aspect ratio ~2:1, e.g., Ø6mm x 12mm), Universal Testing Machine (e.g., Instron 5944), 1 kN load cell, flat-plate compression fixtures.
- Procedure:
- Measure sample dimensions precisely with calipers.
- Pre-load sample to 0.5 N to ensure contact.
- Compress at a constant strain rate of 0.5 mm/min until sample failure (strain >50% or force drop >20%).
- Calculate Compressive Stress (σ = Force / Initial Cross-sectional Area) and Strain (ε = Displacement / Initial Height).
- Determine Elastic Modulus (E) as the slope of the linear-elastic region (typically 0-10% strain) of the stress-strain curve. Identify Compressive Strength as the first local maximum stress before a significant drop.
- Note: Test in a wet state (PBS, 37°C) for physiologically relevant data.
Signaling Pathways & Experimental Workflows
Diagram Title: OSTEO Principles Signaling Cascade
Diagram Title: Scaffold Evaluation Workflow
The Scientist's Toolkit: Key Research Reagent Solutions
Table 2: Essential Materials for Bone Scaffold Evaluation
| Item | Function & Relevance | Example Product/Catalog |
|---|---|---|
| Human Mesenchymal Stem Cells (hMSCs) | Primary cell model for evaluating osteoconduction, induction, and genesis. | Lonza PT-2501; ATCC PCS-500-012 |
| Osteogenic Differentiation BulletKit | Standardized media supplements for controlled osteogenesis assays. | Lonza PT-3002 |
| Recombinant Human BMP-2 | Gold-standard osteoinductive protein for positive controls or scaffold loading. | PeproTech 120-02 |
| AlamarBlue or MTS Reagent | Colorimetric assays for quantifying cell viability/proliferation on scaffolds. | Thermo Fisher Scientific DAL1100 |
| SensoLyte pNPP Alkaline Phosphatase Assay Kit | Sensitive, quantitative colorimetric assay for ALP activity. | AnaSpec AS-72146 |
| Alizarin Red S Solution | Stains calcium deposits in mineralized extracellular matrix for quantification. | Sigma-Aldrich A5533 |
| Micro-CT Calibration Phantom | Essential for calibrating grayscale values to mineral density for bone/scaffold analysis. | Bruker 06070-1000 (HA Phantom) |
| Simulated Body Fluid (SBF) | Evaluates scaffold bioactivity and apatite-forming ability (osteoconduction). | Prepared per Kokubo protocol |
| Polycaprolactone (PCL) | Common, FDA-approved thermoplastic for fused deposition modeling (FDM) of scaffolds. | Sigma-Aldrich 440744 |
| β-Tricalcium Phosphate (β-TCP) Powder | Osteoconductive ceramic for composite printing or coating. | Sigma-Aldrich 21218 |
This document provides a detailed overview of key biomaterials and associated protocols, framed within a broader thesis focused on the 3D printing of biomaterial scaffolds for bone tissue engineering (BTE). The selection and processing of polymers, ceramics, and composites directly influence scaffold architecture, mechanical properties, degradation kinetics, and bioactivity—all critical for mimicking native bone extracellular matrix (ECM) and promoting osteogenesis.
Synthetic Polymers
Application Note: Ideal for creating structurally robust, reproducible scaffolds via melt-based 3D printing (e.g., Fused Deposition Modeling - FDM). Their degradation time and mechanical properties can be tuned via molecular weight and copolymer ratios.
- Poly(ε-caprolactone) (PCL):
- Role in BTE: Provides long-term structural support (degradation >24 months). Excellent viscoelasticity for FDM. Often combined with osteoconductive ceramics (HA, TCP) to improve bioactivity.
- Key Property: High ductility and slow degradation.
- Poly(lactic-co-glycolic acid) (PLGA):
- Role in BTE: Degradation time (weeks to months) tunable by LA:GA ratio. Used for drug/protein delivery within scaffolds. Can be printed via extrusion-based methods using solvent-based inks.
- Key Property: Tunable degradation and drug release kinetics.
Natural Polymers
Application Note: Offer inherent bioactivity and cell-interactive motifs. Often used in hydrogel forms for bioprinting or as coatings on synthetic scaffolds to enhance cell adhesion. Mechanical weakness necessitates composite formation for load-bearing applications.
- Alginate:
- Role in BTE: Rapid ionic crosslinking (with Ca²⁺) enables gentle cell encapsulation for bioprinting. Often blended with stiffer polymers or ceramics for bone applications.
- Key Property: Rapid gelation and biocompatibility.
- Collagen (Type I):
- Role in BTE: Major component of bone ECM. Promotes excellent osteoblast adhesion and mineralization. Used as a bioink or as a coating on 3D-printed scaffolds to enhance biointegration.
- Key Property: Native ECM mimic, high cell affinity.
Ceramics
Application Note: Provide osteoconductivity and bone-bonding ability. Brittle nature limits standalone use; typically incorporated as particles within polymer matrices (composites) for 3D printing to create bone-like mineral phases.
- Hydroxyapatite (HA):
- Role in BTE: Chemical similarity to bone mineral. Slow degradation. Enhances scaffold compressive strength and protein adsorption.
- Key Property: Osteoconduction and bioactivity.
- Tricalcium Phosphate (TCP) (β-TCP):
- Role in BTE: More soluble than HA, undergoing bioactive degradation and releasing Ca²⁺ and PO₄³⁻ ions that stimulate osteogenic differentiation.
- Key Property: Biodegradable and osteoconductive.
Composites
Application Note: Combine the processability and toughness of polymers with the bioactivity and stiffness of ceramics. The optimal choice for 3D-printed BTE scaffolds, allowing synergistic control of mechanical and biological properties (e.g., PCL/HA, PLGA/TCP, Alginate/nHA).
- Example System: PCL-HA Composite:
- Role in BTE: PCL provides the continuous, printable matrix and structural integrity, while HA particles confer osteoconductivity and increase modulus.
Table 1: Key Properties of Featured Biomaterials for BTE Scaffolds
| Material | Category | Degradation Time | Compressive Modulus (Approx.) | Key Advantages for 3D Printing/BTE | Primary Limitations |
|---|---|---|---|---|---|
| PCL | Syn. Polymer | >24 months | 0.2-0.5 GPa | Excellent printability via FDM; ductile | Hydrophobic, bioinert, slow degradation |
| PLGA (50:50) | Syn. Polymer | 1-2 months | 1.5-2.5 GPa | Tunable degradation/drug release | Acidic degradation products |
| Alginate | Nat. Polymer | Minutes-weeks (ionically crosslinked) | 10-100 kPa | Rapid gelation for bioprinting | Low mechanical strength, no cell adhesion motifs |
| Collagen I | Nat. Polymer | Weeks (enzymatic) | 0.5-5 MPa (gel) | Excellent cell adhesion & bioactivity | Low viscosity, fast degradation, poor shape fidelity |
| HA | Ceramic | Very slow (>years) | 70-120 GPa | Highly osteoconductive | Brittle, non-printable alone |
| β-TCP | Ceramic | 6-18 months | 80-110 GPa | Bioactive degradation | Brittle, faster resorption than bone ingrowth |
| PCL-20%HA | Composite | ~24-36 months | 0.4-0.8 GPa | Enhanced stiffness & bioactivity; printable | Potential particle aggregation during printing |
Detailed Experimental Protocols
Protocol 4.1: Fabrication of PCL/HA Composite Filament for FDM
Objective: Prepare a homogeneous composite filament (1.75 mm diameter) containing 20% w/w HA in PCL for FDM 3D printing.
Materials: PCL pellets (Mw ~50,000), Nano-hydroxyapatite powder (<200 nm), Dichloromethane (DCM), Magnetic stirrer, Ultrasonic bath, Teflon tray, Vacuum oven, Single-screw extruder with filament die.
Procedure:
- Solution Mixing: Dissolve 80g PCL pellets in 500 mL DCM with stirring. Gradually add 20g HA powder to the solution while stirring vigorously.
- Dispersion: Sonicate the mixture for 30 minutes (pulse mode, 50% amplitude) to break HA agglomerates.
- Precipitate Formation: Slowly pour the suspension into 2 L of cold methanol under vigorous stirring to precipitate the composite. A white fibrous precipitate will form.
- Drying: Collect the precipitate by filtration and transfer to a Teflon tray. Dry in a fume hood for 24h, then in a vacuum oven at 40°C for 48h to remove residual solvents.
- Extrusion: Feed the dried composite granules into a pre-heated single-screw extruder. Set temperature zones: Hopper 80°C, Barrel 100-120°C, Die 110°C. Collect the extruded filament (1.75 mm) on a spool.
- Quality Control: Measure filament diameter at 5 points using calipers (target: 1.75 ± 0.05 mm). Test for consistent feeding in the FDM printer.
Protocol 4.2: 3D Printing & Post-Processing of a PLGA/TCP Scaffold
Objective: Fabricate a porous scaffold via solvent-based extrusion 3D printing using a PLGA/TCP composite ink.
Materials: PLGA (75:25), β-TCP powder (<100 µm), N-Methyl-2-pyrrolidone (NMP), 3D Bioplotter or similar extrusion printer, Syringe (5 mL), Nozzle (Gauge 22), Ethanol (70%), PBS.
Procedure:
- Ink Preparation: Mix 3g PLGA and 1g β-TCP powder. Gradually add 6 mL NMP and mix in a planetary centrifugal mixer for 5 minutes at 2000 rpm. Transfer to a printing syringe.
- Printing Parameters: Load syringe into printer. Set parameters: Nozzle: 22G, Pressure: 2.5-3.5 bar, Print Speed: 8 mm/s, Layer Height: 0.25 mm, Pattern: 0/90° lattice, Strut Spacing: 1 mm.
- Printing: Execute print on a chilled build plate (4°C) to improve viscosity and shape fidelity.
- Solvent Removal: Immediately post-print, immerse scaffolds in 70% ethanol for 2h to coagulate the polymer and extract NMP. Replace ethanol once.
- Hydration & Storage: Rinse scaffolds 3x in sterile PBS for 1h each. Store in fresh PBS at 4°C until use (for in vitro) or sterilize (e.g., ethanol immersion, gamma irradiation) for in vivo studies.
Protocol 4.3: Osteogenic Differentiation Assessment on Scaffolds
Objective: Evaluate the osteoinductive potential of a biomaterial scaffold using human mesenchymal stem cells (hMSCs).
Materials: Sterile 3D-printed scaffolds, hMSCs, Expansion medium (α-MEM, 10% FBS, 1% P/S), Osteogenic medium (OM: Expansion medium + 10 mM β-glycerophosphate, 50 µM ascorbic acid, 100 nM dexamethasone), AlamarBlue assay reagent, 4% Paraformaldehyde (PFA), Alkaline Phosphatase (ALP) staining kit, OsteoImage mineralization assay kit.
Procedure:
- Cell Seeding: Pre-wet scaffolds in medium. Seed hMSCs at a density of 50,000 cells/scaffold in a low-attachment plate. Allow 2h for attachment before adding medium.
- Culture: Maintain scaffolds in Expansion medium for 24h, then switch half to OM. Culture for up to 21 days, changing medium twice weekly.
- Metabolic Activity (Day 3,7,14): Incubate scaffolds in 10% AlamarBlue/medium for 3h at 37°C. Measure fluorescence (Ex560/Em590). Normalize to day 3 values.
- Early Osteogenic Marker (Day 7,14): Fix samples in 4% PFA for 15 min. Perform ALP staining (BCIP/NBT) following kit instructions. Quantify by eluting dye and measuring absorbance at 405 nm.
- Mineralization (Day 21): Fix samples. Perform OsteoImage staining per protocol to label hydroxyapatite deposits. Image via fluorescence microscopy (Ex492/Em520). Quantify fluorescence intensity.
Visualizations
Title: Biomaterial-Induced Osteogenic Signaling Pathway
Title: Workflow for 3D-Printed BTE Scaffold R&D
The Scientist's Toolkit
Table 2: Essential Research Reagent Solutions for BTE Scaffold Studies
| Item | Function in BTE Research | Example/Note |
|---|---|---|
| N-Methyl-2-pyrrolidone (NMP) | Solvent for creating printable pastes of polymers like PLGA/PU. | Good solvent power, but must be fully removed post-printing (cytotoxic). |
| Calcium Chloride (CaCl₂) Solution | Crosslinking agent for ionic hydrogels (e.g., alginate). | Typical concentration: 100-200 mM. Defines gelation speed and hydrogel stiffness. |
| Osteogenic Induction Supplement | Provides necessary components (dexamethasone, AA, β-GP) to direct hMSC differentiation. | Commercial kits (e.g., StemPro) ensure reproducibility. Critical for positive controls. |
| AlamarBlue / Cell Counting Kit-8 (CCK-8) | Colorimetric/fluorometric assays for non-destructive monitoring of metabolic activity/cell number on scaffolds. | Allows longitudinal tracking of the same sample. |
| Phalloidin (e.g., Alexa Fluor 488) | Stains F-actin cytoskeleton to visualize cell morphology and adhesion within 3D scaffolds via confocal microscopy. | Crucial for assessing cell-scaffold interaction quality. |
| OsteoImage Staining Reagent | Fluorescently labels hydroxyapatite deposits, specifically quantifying in vitro mineralization. | More specific than Von Kossa or Alizarin Red. |
| RIPA Lysis Buffer | Extracts total protein from cells cultured on scaffolds for downstream analysis (e.g., ALP activity assay, Western Blot). | Must include protocols for efficient extraction from 3D structures. |
Why 3D Printing? The Paradigm Shift from Traditional Fabrication to Additive Manufacturing.
The fabrication of biomaterial scaffolds for bone tissue engineering (BTE) represents a critical challenge in regenerative medicine. Traditional fabrication techniques (e.g., solvent casting, gas foaming, freeze-drying) offer limited control over scaffold architecture, pore interconnectivity, and spatial distribution of bioactive cues. This document details the application of additive manufacturing (AM), or 3D printing, as a paradigm-shifting approach, enabling the precise, layer-by-layer fabrication of patient-specific, functionally graded scaffolds that mimic the complex hierarchical structure of native bone.
Application Notes: Comparing Fabrication Paradigms
The shift from traditional methods to AM is defined by fundamental differences in design freedom, reproducibility, and functional outcomes.
Table 1: Quantitative Comparison of Scaffold Fabrication Techniques for BTE
| Parameter | Traditional Techniques (e.g., Freeze-Drying, Salt Leaching) | Additive Manufacturing (e.g., Extrusion-based, SLA/DLP) |
|---|---|---|
| Porosity Control (%) | 50-90 (Random, Stochastic) | 20-80 (Designed, Pre-defined) |
| Pore Size Range (µm) | 50-500 (Broad Distribution) | 100-1000 (Precise, Narrow Distribution) |
| Pore Interconnectivity | Variable, often incomplete | Guaranteed by design |
| Spatial Resolution (µm) | Not applicable (Non-patterned) | 50-250 (Extrusion), 10-100 (Vat Polymerization) |
| Mechanical Property Control | Isotropic, limited tailoring | Anisotropic, tunable via infill pattern & density |
| Incorporation of Bioactives | Homogeneous distribution only | Potential for gradient/multi-material deposition |
| Batch-to-Batch Reproducibility | Low to Moderate | High |
| Design Complexity/Customization | Very Low | Very High (Patient-specific from CT/MRI) |
| Typical Materials | PLGA, Collagen, Chitosan | Hydrogels (GelMA, Alginate), PCL, PLA, TCP-based ceramics, Bioinks |
Experimental Protocols for 3D-Printed BTE Scaffolds
Protocol 3.1: Digital Design and Slicing of a Trabecular Bone-Mimetic Scaffold
Objective: To create a printable file of a porous scaffold mimicking cancellous bone architecture.
- Acquisition: Obtain a 3D model of a bone defect region from patient CT data (DICOM format).
- Segmentation: Use medical imaging software (e.g., 3D Slicer, Mimics) to segment the bone region and export as an STL file.
- Porous Structure Design: Import STL into CAD (e.g., SolidWorks) or dedicated scaffold design software (e.g., nTopology).
- Boolean Operation: Create a porous lattice (e.g., gyroid, diamond unit cell) within the defect volume boundary.
- Slicing: Import the final scaffold STL into the printer's slicing software (e.g., Ultimaker Cura, PreForm). Set layer height (e.g., 100 µm), infill density (e.g., 50%), print speed (e.g., 15 mm/s), and generate G-code.
Protocol 3.2: Extrusion-based 3D Printing of a Cell-Laden Hydrogel Scaffold
Objective: To fabricate a biocompatible, cell-laden scaffold using a pneumatic extrusion bioprinter. Materials: GelMA hydrogel (10% w/v, photo-crosslinkable), LAP photoinitiator (0.25% w/v), human mesenchymal stem cells (hMSCs, 1x10^6 cells/mL).
- Bioink Preparation: Sterilize GelMA and LAP via 0.22 µm filtration. Mix to final concentrations. Gently resuspend hMSCs in the pre-cooled (4°C) GelMA-LAP solution to create the cell-laden bioink. Keep on ice.
- Printer Setup: Sterilize printing stage and syringe barrel/needle (22G, 410 µm inner diameter) with 70% ethanol and UV light. Load bioink into syringe, attach to printhead.
- Printing Parameters: Set stage temperature to 15°C. Pressure: 25-35 kPa. Print speed: 8-12 mm/s. Layer height: 80% of filament diameter.
- Printing & Crosslinking: Print scaffold layer-by-layer according to G-code. After each layer, expose to 405 nm blue light (5-10 mW/cm², 30 seconds) for partial crosslinking.
- Post-Processing: After final layer, perform a final crosslink (60 seconds). Transfer scaffold to cell culture medium and incubate (37°C, 5% CO2).
Protocol 3.3: In Vitro Osteogenic Differentiation Assessment on 3D-Printed Scaffolds
Objective: To evaluate the osteoinductive potential of a 3D-printed, bioactive material scaffold.
- Seeding (For Acellular Scaffolds): Sterilize scaffolds (EtOH or UV). Seed hMSCs at a density of 50,000 cells/scaffold in a low-attachment plate.
- Osteogenic Induction: After 24h, replace growth medium with osteogenic differentiation medium (DMEM, 10% FBS, 50 µM ascorbic acid, 10 mM β-glycerophosphate, 100 nM dexamethasone). Refresh every 2-3 days.
- Analysis (Day 7, 14, 21):
- ALP Activity (Day 7/14): Lyse cells in Triton X-100. Incubate lysate with pNPP substrate. Measure absorbance at 405 nm. Normalize to total protein (BCA assay).
- Alizarin Red S Staining (Day 21): Fix scaffolds in 4% PFA. Stain with 2% Alizarin Red S (pH 4.2) for 20 min. Quantify calcium deposition by eluting stain with 10% cetylpyridinium chloride and measuring absorbance at 562 nm.
- Gene Expression (qRT-PCR): Extract RNA (TRIzol), synthesize cDNA. Analyze expression of Runx2, ALPL, OPN, OCN vs. housekeeping gene (GAPDH).
Signaling Pathways in 3D-Printed Scaffold-Mediated Osteogenesis
Diagram Title: Signaling Pathways in 3D Scaffold-Mediated Osteogenesis.
Experimental Workflow for 3D-Printed BTE Scaffold Evaluation
Diagram Title: BTE Scaffold Development & Evaluation Workflow.
The Scientist's Toolkit: Key Research Reagent Solutions
Table 2: Essential Materials for 3D Printing Biomaterial Scaffolds for BTE
| Item Name | Function/Application | Example Vendor/Product |
|---|---|---|
| Gelatin Methacryloyl (GelMA) | Photo-crosslinkable hydrogel bioink; provides cell-adhesive RGD motifs and tunable mechanical properties. | Advanced BioMatrix, Methacrylated Gelatin |
| Polycaprolactone (PCL) | Biodegradable, thermoplastic polyester for melt extrusion; provides structural integrity for load-bearing applications. | Sigma-Aldrich, PCL (MW 45k-100k) |
| Beta-Tricalcium Phosphate (β-TCP) Powder | Osteoconductive ceramic material; often blended with polymers (e.g., PCL) to enhance bioactivity and bone bonding. | Merck, β-TCP, <100 nm particle size |
| Lithium Phenyl-2,4,6-Trimethylbenzoylphosphinate (LAP) | Highly efficient, water-soluble photoinitiator for UV/visible light crosslinking of hydrogels (e.g., GelMA). | Tokyo Chemical Industry (TCI) |
| hMSCs, Human Mesenchymal Stem Cells | Primary cell model for assessing osteogenic differentiation potential on scaffolds. | Lonza, Poietics hMSCs |
| Osteogenic Differentiation BulletKit | Standardized medium supplements (ASC, β-GP, Dex) for inducing and maintaining osteogenesis in vitro. | Lonza |
| AlamarBlue Cell Viability Reagent | Resazurin-based assay for non-destructive, quantitative monitoring of cell proliferation on 3D scaffolds over time. | Thermo Fisher Scientific |
| Quant-iT PicoGreen dsDNA Assay Kit | Fluorometric quantification of double-stranded DNA, used to precisely determine cell numbers within 3D scaffolds. | Thermo Fisher Scientific |
| TRIzol Reagent | For simultaneous isolation of high-quality RNA, DNA, and protein from cell-seeded scaffolds for downstream multi-omics analysis. | Thermo Fisher Scientific |
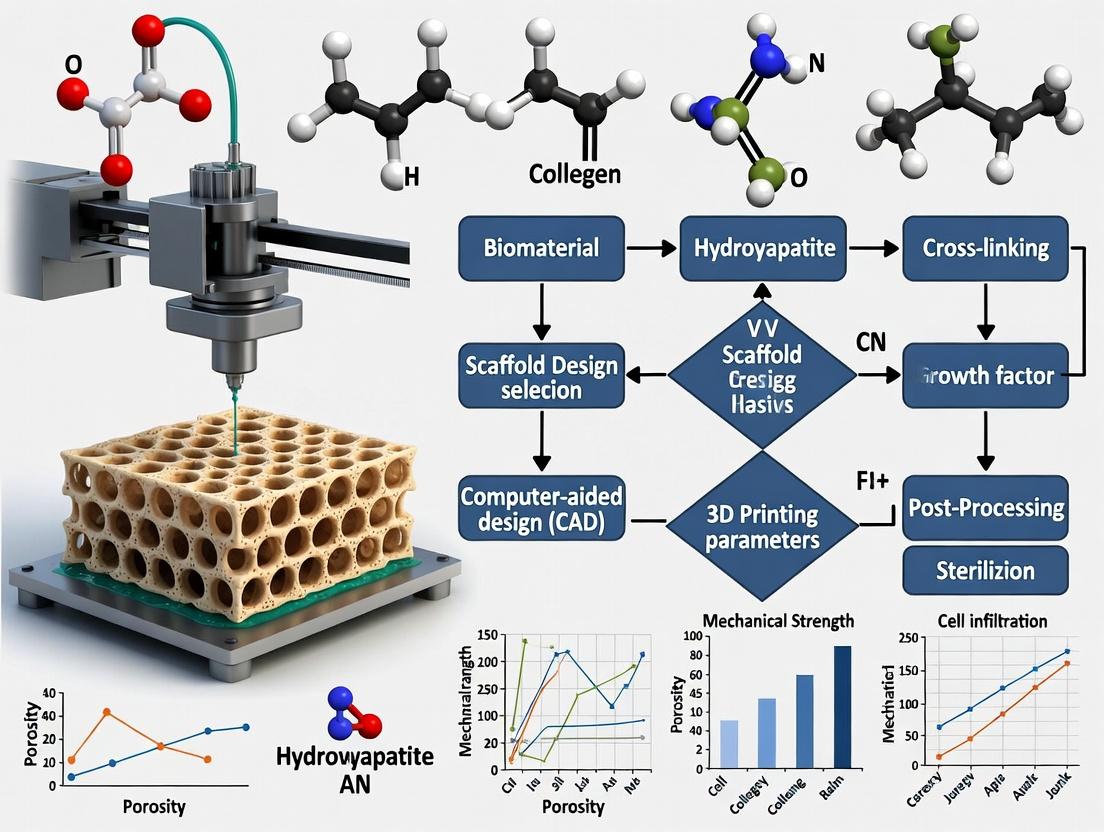
From Digital Design to Physical Scaffold: 3D Printing Technologies and Material Processing
Within bone tissue engineering (BTE) research, the precise fabrication of patient-specific, biomaterial scaffolds via 3D printing is paramount. This digital workflow translates clinical anatomical data into printable instructions, enabling the creation of scaffolds with controlled macro-architecture (mimicking bone defect geometry) and micro-architecture (influencing porosity, pore size, and mechanical properties). Key applications include: creating critical-sized defect models for in vivo studies, developing in vitro bioreactor models that replicate trabecular structure, and prototyping implants for pre-surgical planning. The fidelity of this translation directly impacts subsequent biological outcomes, such as cell seeding efficiency, vascularization, and ultimately, osteointegration.
Core Digital Workflow Protocol
Protocol 2.1: Image Acquisition & Segmentation
Objective: To obtain a high-fidelity 3D volumetric model of the target bone anatomy from medical DICOM (Digital Imaging and Communications in Medicine) data.
Materials & Software:
- Source: Clinical-grade CT or μCT scan data (DICOM format). For BTE, μCT of trabecular bone samples is common for capturing micro-architecture.
- Software: Open-source (3D Slicer, ITK-SNAP) or commercial (Mimics, Simpleware).
Procedure:
- Import DICOM Series: Load the complete image stack into segmentation software. Ensure consistent orientation.
- Thresholding: Apply a global Hounsfield Unit (HU) threshold to isolate bone tissue from soft tissue and background. Optimal thresholds vary by scan type and bone density.
- Typical CT HU for cortical bone: 300–2000.
- Typical μCT Greyscale for bone: Determined empirically from histogram.
- Region of Interest (ROI) Selection: Manually define the anatomical boundaries of the defect or region to be scaffolded.
- Segmentation Refinement: Use manual editing tools (brush, erase) and morphological operations (opening, closing) to correct artifacts and smooth surfaces.
- 3D Model Generation: Execute the "Create 3D Model from Mask" function. Export the model as an STL (Standard Tessellation Language) or OBJ file.
Quantitative Data from Segmentation:
Table 1: Impact of Segmentation Threshold on Model Geometry
| Threshold (HU) | Resulting Volume (mm³) | Surface Area (mm²) | Model Fidelity (vs. μCT gold standard) |
|---|---|---|---|
| 250 | 1250 ± 45 | 850 ± 30 | Overestimated, includes noise |
| 500 (Optimal) | 980 ± 20 | 720 ± 15 | High correlation (R² > 0.95) |
| 750 | 810 ± 25 | 650 ± 20 | Underestimated, loss of trabeculae |
Protocol 2.2: Design & Integration of Scaffold Micro-Architecture
Objective: To integrate a periodic, porous lattice within the anatomical shell to create a biomimetic scaffold design.
Materials & Software:
- Input: Anatomical STL from Protocol 2.1.
- Software: CAD (Computer-Aided Design) software (e.g., Rhinoceros 3D with Grasshopper, Autodesk Fusion 360, nTopology).
Procedure:
- Shell Creation: Offset the inner surface of the anatomical model to define a scaffold wall thickness (typically 0.5-1.0 mm for bioceramics like hydroxyapatite).
- Lattice Design:
- Define unit cell type (e.g., gyroid, diamond, cubic).
- Set unit cell size (500-1000 μm for osteoconduction) and strut thickness (300-500 μm for mechanical integrity).
- Boolean Operations: Perform a Boolean intersection between the periodic lattice and the internal volume of the anatomical shell. This creates the final porous scaffold core housed within the patient-specific outer shape.
- Export: Save the final combined model as a new, watertight STL file.
Protocol 2.3: Slicing & G-Code Generation for 3D Printing
Objective: To translate the 3D scaffold model into machine instructions (G-code) for layer-by-layer fabrication.
Materials & Software:
- Input: Final scaffold STL from Protocol 2.2.
- Software: Slicer software (e.g., Ultimaker Cura for extrusion, CHITUBOX for vat polymerization, proprietary printer software).
- Printer: Relevant to BTE (e.g., extrusion-based for biopolymers, SLA/DLP for photopolymerizable resins, binder jetting for ceramics).
Procedure:
- Import & Orientation: Import the STL. Orient the model to minimize overhangs and optimize build plate adhesion. A 45-degree tilt is often used for SLA.
- Support Structure Generation: Auto-generate or manually design soluble/breakaway supports for overhanging features.
- Slice Parameter Configuration: Set parameters critical for scaffold fidelity and biomaterial processing.
- Extrusion-based: Nozzle temp, bed temp, layer height (50-200 μm), print speed, infill density/pattern.
- Vat Polymerization: Layer height (25-100 μm), exposure time, lift speed.
- Slicing & Preview: Execute slicing and visually inspect each layer for errors.
- G-code Export: Save the toolpath instructions in machine-readable G-code format.
Quantitative Slicing Parameters for Common BTE Biomaterials:
Table 2: Representative Slicing Parameters for Biomaterial Printing
| Biomaterial | Print Tech | Layer Height (μm) | Key Parameter 1 | Key Parameter 2 | Outcome |
|---|---|---|---|---|---|
| PLA/PCL | Fused Deposition | 100-200 | Nozzle Temp: 200-220°C | Bed Temp: 60°C | Good mechanical scaffold |
| Hydroxyapatite Slurry | Direct Ink Writing | 150-300 | Pressure: 400-600 kPa | Cure Temp: 60°C post-print | Green body for sintering |
| GelMA-based Bioink | Extrusion Bioprinting | 50-100 | Pressure: 80-120 kPa | UV Crosslink: 365nm, 10-20s | Cell-laden hydrogel scaffold |
| Photopolymer Resin | SLA/DLP | 25-50 | Exposure: 2-8 s/layer | Lift Speed: 2-5 mm/s | High-resolution mold |
Visualized Workflows and Pathways
Digital Workflow from Scan to Print for BTE Scaffolds
How Slicing Parameters Dictate Scaffold Function
The Scientist's Toolkit: Key Research Reagent Solutions
Table 3: Essential Materials for the Digital to Physical Scaffold Pipeline
| Item Name | Function & Relevance in BTE Workflow |
|---|---|
| Polylactic Acid (PLA) | Biocompatible thermoplastic for printing anatomical models or sacrificial molds for composite scaffolds. |
| Polycaprolactone (PCL) | Biodegradable polyester with tunable degradation rate; common for extrusion-printed osteoconductive scaffolds. |
| Hydroxyapatite (HA) Powder | Primary ceramic component for biomimetic bone scaffolds. Used in slurries for direct ink writing or binder jetting. |
| Gelatin Methacryloyl (GelMA) | Photocrosslinkable bioink allowing cell encapsulation for bioprinting of living bone tissue constructs. |
| Medical-Grade Silicone | For creating negative molds from 3D-printed positives, used in indirect scaffolding techniques. |
| DICOM Image Dataset | Raw anatomical data. μCT scans of human trabecular bone are critical for designing biomimetic porosity. |
| ITK-SNAP / 3D Slicer | Open-source software for medical image segmentation, essential for converting DICOM to 3D models. |
| Rhino3D with Grasshopper | CAD/algorithmic modeling platform for designing and parametrically controlling scaffold lattice architectures. |
| Ultimaker Cura / CHITUBOX | Slicing engines to generate G-code for specific 3D printing technologies (FDM, SLA/DLP respectively). |
| 70% Ethanol / Isopropanol | For sterilizing or cleaning 3D-printed polymer scaffolds prior to cell culture. |
| Alginate Support Bath | Enables freeform printing of soft bioinks (e.g., GelMA, collagen) by providing temporary buoyant support. |
Within the broader thesis on 3D printing of biomaterial scaffolds for bone tissue engineering, extrusion-based techniques, specifically Fused Deposition Modeling (FDM) and Direct Ink Writing (DIW), are pivotal. FDM utilizes thermoplastic filaments, melted and extruded layer-by-layer. DIW, alternatively, deposits viscous inks or pastes (often termed "bioinks") under ambient conditions, enabling the incorporation of sensitive biological components. Both techniques offer distinct advantages for creating porous, patient-specific scaffolds that promote osteoconduction, osteoinduction, and osseointegration.
Material Considerations for Bone Tissue Engineering
Material selection is critical for scaffold success. Key parameters include biocompatibility, biodegradability, mechanical strength (matching trabecular bone: 2-12 MPa compressive strength), porosity (>60% for vascularization), and surface chemistry for cell attachment.
Table 1: Common Materials in FDM and DIW for Bone Scaffolds
| Material Class | Specific Material (Trade Name) | Technique | Key Properties | Rationale for Bone TE |
|---|---|---|---|---|
| Thermoplastics | Polycaprolactone (PCL) | FDM | Biodegradable (slow), Low melting point (~60°C), Ductile | Excellent printability, provides structural support. Often blended with ceramics. |
| Polylactic Acid (PLA) | FDM | Biodegradable, Rigid, Higher strength than PCL | Good mechanical properties, but acidic degradation products. | |
| Bioceramics | Tricalcium Phosphate (TCP) | FDM (as composite filament), DIW (as paste) | Osteoconductive, Resorbable, Brittle | Mimics bone mineral, enhances bioactivity and osteogenesis. |
| Hydroxyapatite (HA) | FDM (as composite), DIW | Osteoconductive, Slow resorption, Brittle | Chemical similarity to bone mineral. Improves scaffold-cell interaction. | |
| Hydrogels | Alginate | DIW | Biocompatible, Ionic/UV crosslinkable, Low mechanical strength | Cell encapsulation capability, good for incorporating growth factors (e.g., BMP-2). |
| Gelatin Methacryloyl (GelMA) | DIW | Cell-adhesive, Photocrosslinkable, Tunable stiffness | Supports cell proliferation and differentiation. Can be combined with ceramics. | |
| Composites | PCL/HA or PCL/TCP | FDM | Improved compressive strength (5-15 MPa) and bioactivity vs. pure polymer | Combines structural integrity of polymer with bioactivity of ceramic. |
| GelMA-silicate nanoplatelets (e.g., Laponite) | DIW | Enhanced shear-thinning, improved shape fidelity, increased osteogenic potential | Reinforces hydrogel; ions released from silicate can promote osteogenesis. |
Table 2: Quantitative Comparison of FDM vs. DIW
| Parameter | Fused Deposition Modeling (FDM) | Direct Ink Writing (DIW) |
|---|---|---|
| Typical Resolution | 50 - 400 µm | 1 - 500 µm |
| Print Temperature | High (Nozzle: 100-250°C; Bed: 40-120°C) | Ambient or Low (often < 37°C) |
| Print Speed | Medium-High (5-100 mm/s) | Low-Medium (1-20 mm/s) |
| Key Material Requirement | Thermoplasticity, Melt Stability | Shear-thinning, Yield-stress behavior, Post-deposition curing |
| Cell Encapsulation | Not feasible (high temp) | Feasible & Common |
| Typical Compressive Strength | 2-80 MPa (material dependent) | 0.1-5 MPa (hydrogel-based) |
| Post-processing | Support removal, Surface treatment | Crosslinking (Ionic, UV, Thermal), Sintering (ceramic greens) |
Experimental Protocols
Protocol 1: FDM of PCL/β-TCP Composite Scaffold for Osteogenesis
Objective: Fabricate a bioactive, porous scaffold to support human mesenchymal stem cell (hMSC) adhesion and osteogenic differentiation.
Materials:
- Commercially available PCL/β-TCP composite filament (e.g., 70/30 wt%).
- FDM 3D printer with a stainless steel nozzle (diameter: 0.25-0.4 mm).
- Slicing software (e.g., Cura, Simplify3D).
- 70% Ethanol for sterilization.
- Scaffold Design: Design a 10x10x3 mm cube with a 0/90° laydown pattern, 60% porosity, 0.25 mm filament spacing (center-to-center), and 0.2 mm layer height.
Methodology:
- Printer Setup: Load filament. Set nozzle temperature to 110-130°C (optimize based on filament). Set build plate temperature to 40-50°C. Level the build plate.
- Slicing: Import scaffold design (STL file) into slicing software. Apply parameters: layer height=0.2mm, print speed=15mm/s, infill density=40%, rectilinear pattern. Generate G-code.
- Printing: Execute print on a clean build surface. Allow scaffold to cool to room temperature before removal.
- Post-processing: Remove any support structures or skirts. Immerse scaffold in 70% ethanol for 30 minutes for sterilization. Rinse 3x with sterile phosphate-buffered saline (PBS).
- Characterization: Perform SEM imaging for pore morphology, micro-CT for porosity analysis, and compression testing for mechanical properties (ASTM D695).
Protocol 2: DIW of Cell-Laden GelMA-HA Bioink for Bone Regeneration
Objective: Print a living construct encapsulating osteoprogenitor cells (e.g., pre-osteoblasts) in a mineral-reinforced hydrogel.
Materials:
- GelMA macromer (5-10% w/v in PBS).
- Photoinitiator (Lithium phenyl-2,4,6-trimethylbenzoylphosphinate, LAP, 0.25% w/v).
- Nano-hydroxyapatite (nHA) particles (2-5% w/v).
- DIW 3D bioprinter (e.g., EnvisionTEC 3D-Bioplotter, or custom) equipped with a temperature-controlled stage and a UV light source (365 nm, 5-10 mW/cm²).
- Sterile, conical nozzles (22-27G).
- Cell culture media (e.g., α-MEM).
Methodology:
- Bioink Preparation: Under sterile conditions, dissolve GelMA and LAP in PBS at 37°C. Gently mix in nHA particles using a vortex mixer. Keep the bioink solution at 37°C to prevent gelation. Note: For cell-laden printing, complete steps 1-3 in a laminar flow hood.
- Cell Harvesting: Trypsinize and centrifuge pre-osteoblasts (e.g., MC3T3-E1). Resuspend cell pellet in a small volume of media.
- Bioink-Cell Mixing: Gently mix the cell suspension with the warm GelMA-nHA bioink to a final density of 1-5 x 10^6 cells/mL. Avoid bubble formation. Load into a sterile printing cartridge.
- Printer Setup: Mount cartridge on printer. Set pneumatic pressure or piston speed. Set printing stage temperature to 15-20°C to aid gelation upon deposition. Calibrate nozzle height.
- Printing: Print a 10x10x1 mm grid structure (0/90° pattern) directly into a petri dish or multi-well plate. Apply UV light (365 nm) for 15-30 seconds after each layer to partially crosslink.
- Post-printing Crosslinking: After final layer, expose the entire construct to UV light for 60-90 seconds for full crosslinking.
- Cell Culture: Gently add warm cell culture media to submerge the construct. Culture under standard conditions (37°C, 5% CO2). Assess cell viability (Live/Dead assay), proliferation (DNA content), and osteogenic differentiation (ALP activity, calcium deposition) over time.
The Scientist's Toolkit: Key Research Reagent Solutions
Table 3: Essential Materials and Reagents
| Item | Function/Description | Example Vendor/Product |
|---|---|---|
| PCL/β-TCP Composite Filament | Standardized feedstock for FDM printing of osteoconductive scaffolds. | 3D4MAKERS (PCL-TCP), ColorFabb (BoneTrue) |
| GelMA Kit | Methacrylated gelatin, the gold-standard photocrosslinkable bioink base material. | Advanced BioMatrix (GelMA Kit), Engineering for Life (GelMA) |
| Lithium Phenyl-2,4,6-Trimethylbenzoylphosphinate (LAP) | Cytocompatible photoinitiator for visible/UV light crosslinking of hydrogels like GelMA. | Sigma-Aldrich, Tokyo Chemical Industry |
| Nano-Hydroxyapatite (nHA) Suspension | Aqueous suspension of nanoparticles for reinforcing bioinks and enhancing osteogenesis. | Sigma-Aldrich, Fluidinova (nanoXIM) |
| Osteogenic Differentiation Media Supplement | Defined cocktail (Ascorbic acid, β-glycerophosphate, Dexamethasone) to induce osteoblast differentiation in vitro. | Sigma-Aldrich (Osteogenic Supplement), STEMCELL Technologies |
| AlamarBlue Cell Viability Reagent | Resazurin-based assay for quantitative, non-destructive monitoring of cell proliferation in 3D scaffolds. | Thermo Fisher Scientific, Bio-Rad |
| Quant-iT PicoGreen dsDNA Assay | Highly sensitive fluorescent assay for quantifying cell number/DNA content in lysed 3D constructs. | Thermo Fisher Scientific |
Visualizations
Workflow Comparison: FDM vs. DIW for Bone Scaffolds
Scaffold-Cell Interaction Signaling in Osteogenesis
DIW Bioink Development & Validation Workflow
Within the broader thesis on 3D printing of biomaterials for bone tissue engineering, vat photopolymerization (VP) techniques, specifically Stereolithography (SLA) and Digital Light Processing (DLP), are pivotal for fabricating scaffolds with the high resolution and architectural precision required to mimic the native bone extracellular matrix (ECM). These technologies enable the layer-by-layer solidification of photoreactive bioresins, producing structures with feature sizes typically ranging from 10 to 200 µm. This capability is critical for influencing fundamental cellular processes such as adhesion, proliferation, differentiation, and ultimately, new bone tissue formation (osteogenesis). The following application notes and protocols provide a detailed framework for utilizing SLA and DLP in a bone tissue engineering research context.
Comparative Analysis of SLA & DLP for Bone Scaffold Fabrication
Table 1: Technical Specifications and Performance Metrics of SLA vs. DLP
| Parameter | Stereolithography (SLA) | Digital Light Processing (DLP) | Implication for Bone Scaffold Engineering |
|---|---|---|---|
| Light Source | Single UV laser spot (e.g., 355 nm). | UV or blue light projector (e.g., 385, 405 nm). | DLP typically offers faster print times per layer. |
| Curing Pattern | Point-by-point scanning. | Whole-layer projection. | DLP speed is independent of part complexity; SLA allows for variable laser power within a layer. |
| Typical XY Resolution | 25 - 150 µm (laser spot size). | 10 - 100 µm (pixel size). | DLP can achieve finer features, beneficial for micro-architecture mimicking bone trabeculae. |
| Z-Axis Resolution (Layer Height) | 10 - 100 µm. | 10 - 100 µm. | Comparable; affects surface roughness and stair-stepping artifacts. |
| Print Speed | Slower (scanning process). | Faster (simultaneous layer curing). | DLP advantageous for high-throughput scaffold prototyping. |
| Material Viscosity | Low to medium viscosity resins. | Low viscosity resins (to facilitate resin recoating). | Influences bioresin formulation (polymer content, ceramic loading). |
| Common Bioceramic Load | Up to ~40-50 wt% (e.g., HA, β-TCP). | Up to ~30-40 wt% (due to light scattering). | SLA may be more suitable for highly filled ceramic resins for enhanced osteoconductivity. |
| Key Advantage | Excellent surface finish, high accuracy. | High speed and fine XY resolution. | Choice depends on priority: detail vs. throughput. |
| Post-Processing | Required (solvent rinse, post-cure). | Required (solvent rinse, post-cure). | Critical for biocompatibility and final material properties. |
Table 2: Quantitative Outcomes of SLA/DLP-Fabricated Bone Scaffolds from Recent Studies
| Study Focus | Material System (VP Method) | Scaffold Feature Size | Key Biological/Mechanical Result |
|---|---|---|---|
| Osteogenesis & Angiogenesis | PEGDA/GelMA + nHA (DLP) | Pore: 400 µm; Strut: 150 µm | ~3.2x increase in ALP activity vs. control; ~2.5x more VEGF secretion at day 7. |
| Mechanical Mimicry | PCL-based resin + 20% β-TCP (SLA) | Pore: 500 µm | Compressive modulus: 120-150 MPa, within range of cancellous bone. |
| Drug Delivery Integration | Methacrylated Silk Fibroin + BMP-2 (DLP) | Channel: 200 µm | Sustained BMP-2 release over 28 days; >90% cell viability; significant mineralization at week 4. |
| High-Resolution Architecture | Hydroxyapatite Nano-rod / Polymer Composite (SLA) | Truss width: 50 µm | Feature accuracy ± 5 µm; cell alignment and enhanced early osteogenic marker expression. |
Experimental Protocols
Protocol 3.1: Formulation of a Photocurable Bioresin for DLP/SLA
Aim: To synthesize a biocompatible, osteoconductive resin suitable for high-resolution VP. Materials: Methacrylated gelatin (GelMA, 8-12% w/v), Poly(ethylene glycol) diacrylate (PEGDA, Mn 700), Nano-hydroxyapatite (nHA, <200 nm), Photoinitiator (Lithium phenyl-2,4,6-trimethylbenzoylphosphinate, LAP, 0.5% w/v), Phosphate Buffered Saline (PBS). Procedure:
- Dissolution: Dissolve LAP in PBS at 60°C with stirring to create a 2% (w/v) stock solution. Cool to room temperature.
- Polymer Prep: Add GelMA powder to the LAP/PBS solution to the target concentration (e.g., 10% w/v). Stir at 37°C for 2 hours until fully dissolved.
- Ceramic Dispersion: Separately, disperse nHA powder (e.g., 5% w/v) in a small volume of PBS via probe sonication (30% amplitude, 2 min, pulse 5s on/2s off).
- Mixing: Combine the GelMA solution, nHA dispersion, and PEGDA (e.g., 5% v/v) in a sterile container. Mix thoroughly via vortexing and planetary centrifugal mixing (5 min, 2000 rpm) to ensure homogeneity and degassing.
- Sterilization: Filter the final resin through a 0.22 µm syringe filter (for low-viscosity resins) or expose to UV light for 30 minutes under sterile conditions. Store at 4°C in the dark for up to 1 week.
Protocol 3.2: DLP Printing of a Lattice Scaffold for Osteoblast Culture
Aim: To fabricate a 3D lattice scaffold with defined architecture for in vitro bone formation studies. Pre-print: Design a 3D model (e.g., CAD) of a gyroid or rectangular lattice (pore size: 400 µm, strut diameter: 200 µm, overall dimensions: 8x8x3 mm). Slice with 50 µm layer height using printer manufacturer's software. Printing:
- Printer Setup: Preheat resin vat to 25°C. Calibrate the build platform. Load the sliced file.
- Print Parameters: Set exposure time per layer (e.g., 8-12 seconds for 405 nm light at 10 mW/cm²). Set base/lift/retract speeds to ensure proper resin flow.
- Initiate Print: Start the print. The DLP projector will cure each full layer sequentially.
- Post-print Retrieval: After completion, carefully raise the build platform. Use a soft scraper to detach the scaffold into a tray containing 80% ethanol.
Protocol 3.3: Post-Processing and Sterilization of Printed Scaffolds
Aim: To remove uncured resin and achieve sterility without compromising scaffold structure or bioactivity. Procedure:
- Rinsing: Immerse the scaffold in 80% ethanol (or the relevant solvent, e.g., PBS for aqueous resins) and agitate gently on an orbital shaker (100 rpm) for 5 minutes. Repeat with fresh solvent twice.
- Post-Curing: Place the rinsed scaffold under a broad-spectrum UV light source (e.g., 365 nm, 10-15 mW/cm²) in a PBS-filled quartz cuvette for 20-30 minutes to ensure complete polymerization.
- Final Sterilization: Rinse three times with sterile PBS under a biosafety cabinet. Perform a final sterilization via immersion in 70% ethanol for 30 minutes, followed by three 15-minute washes in sterile PBS.
- Pre-culture Conditioning: Immerse scaffolds in osteogenic culture medium (e.g., α-MEM, 10% FBS, 50 µg/mL ascorbic acid, 10 mM β-glycerophosphate) and incubate at 37°C for 1 hour prior to cell seeding.
Protocol 3.4:In VitroAssessment of Osteogenic Differentiation on Printed Scaffolds
Aim: To evaluate the osteoinductive potential of SLA/DLP-fabricated scaffolds using human mesenchymal stem cells (hMSCs). Cell Seeding:
- Seed hMSCs at a density of 50,000 cells/scaffold in a minimal volume (20-50 µL). Allow 2 hours for attachment in an incubator.
- Gently add osteogenic medium. Culture for up to 28 days, changing medium every 2-3 days. Analysis:
- Metabolic Activity (Weekly): Use AlamarBlue assay (10% v/v in medium, incubate 3-4 hours). Measure fluorescence (Ex/Em: 560/590 nm).
- Early Osteogenesis (Day 7,14): Quantify Alkaline Phosphatase (ALP) activity via pNPP assay. Normalize to total DNA content (PicoGreen assay).
- Matrix Mineralization (Day 21,28): Fix scaffolds (4% PFA), stain with 2% Alizarin Red S (ARS, pH 4.2) for 20 min. Quantify by eluting stained calcium with 10% cetylpyridinium chloride and measuring absorbance at 562 nm.
- Gene Expression (Day 7,14): Extract RNA (TRIzol), synthesize cDNA. Perform qPCR for RUNX2, SPP1 (Osteopontin), BGLAP (Osteocalcin). Normalize to GAPDH.
Visualization: Diagrams and Workflows
Title: SLA vs. DLP Scaffold Fabrication Workflow
Title: Scaffold-Induced Osteogenic Signaling Pathway
The Scientist's Toolkit
Table 3: Essential Research Reagent Solutions for VP Bone Scaffold Research
| Item | Function & Rationale |
|---|---|
| Methacrylated Gelatin (GelMA) | Provides a photocrosslinkable, cell-adhesive hydrogel matrix mimicking the natural ECM. Crucial for cell encapsulation and viability. |
| Lithium Phenyl-2,4,6-trimethylbenzoylphosphinate (LAP) | A water-soluble, cytocompatible photoinitiator with high absorption at 365-405 nm. Enables rapid crosslinking under low light intensity. |
| Nano-Hydroxyapatite (nHA) | Osteoconductive ceramic mimicking bone mineral. Enhances scaffold stiffness, protein adsorption, and osteogenic differentiation. |
| Poly(ethylene glycol) diacrylate (PEGDA) | A bioinert, hydrophilic crosslinker used to tune mechanical properties (stiffness, swelling) and network density of the bioresin. |
| Osteogenic Induction Media Supplements (β-Glycerophosphate, Ascorbic Acid, Dexamethasone) | Provides the biochemical cues (phosphate source, collagen synthesis co-factor, steroid) necessary to drive hMSCs down the osteoblastic lineage in vitro. |
| AlamarBlue Cell Viability Reagent | A non-toxic, resazurin-based dye used for longitudinal monitoring of metabolic activity on 3D scaffolds without destroying samples. |
| Alizarin Red S (ARS) | An anthraquinone dye that selectively binds to calcium deposits, used for semi-quantitative and quantitative assessment of in vitro mineralization. |
Within a thesis focused on 3D printing biomaterial scaffolds for bone tissue engineering, the selection of fabrication technology is paramount. Powder-based techniques, namely Selective Laser Sintering (SLS) and Binder Jetting, offer distinct pathways for creating porous, three-dimensional structures. SLS employs a laser to selectively fuse powdered biomaterial particles, while Binder Jetting uses a liquid binding agent deposited onto a powder bed to consolidate layers. These methods enable the production of complex geometries with tailored porosity, crucial for mimicking the extracellular matrix of bone and facilitating cell attachment, proliferation, and differentiation.
Application Notes
Selective Laser Sintering (SLS) for Bone Scaffolds
SLS is valued for creating scaffolds with excellent mechanical properties and interconnected porosity without the need for support structures. Recent research focuses on processing biocompatible polymers (e.g., PCL, PLLA), composites (e.g., PCL/HA, PLLA/β-TCP), and novel formulations like bioactive glass-polymer blends. Key application notes include:
- Material Considerations: SLS requires powders with specific thermal and rheological properties (e.g., melt viscosity, particle size distribution) for optimal sintering.
- Parameter Optimization: Laser power, scan speed, hatch distance, and bed temperature critically influence scaffold density, mechanical strength, and surface roughness, which in turn affect cell behavior.
- Bioactivity Enhancement: SLS-fabricated scaffolds often require post-processing, such as surface functionalization or infiltration with bioactive molecules, to improve cell affinity and osteoconductivity.
Binder Jetting for Bone Scaffolds
Binder Jetting offers advantages in processing temperature-sensitive materials, including drugs and growth factors, and a wider range of ceramic powders (e.g., calcium phosphate, calcium sulfate). Key application notes include:
- Multi-Material Potential: The technology allows for the local deposition of different binders or binder-loaded substances, enabling the creation of scaffolds with spatially controlled composition.
- Drug Delivery Integration: Therapeutics can be incorporated into the binder solution, facilitating the fabrication of drug-eluting scaffolds for controlled release.
- Post-Processing Necessity: "Green" parts require post-processing, typically through curing and infiltration (e.g., with a polymer or secondary binder), to achieve adequate mechanical strength for handling and implantation.
Table 1: Comparison of SLS and Binder Jetting for Bone Scaffold Fabrication
| Parameter | Selective Laser Sintering (SLS) | Binder Jetting |
|---|---|---|
| Typical Materials | Thermoplastics (PCL, PLLA), Polymer-Ceramic Composites | Ceramics (TCP, HA), Polymers, Composites |
| Processing Temperature | High (Near/above polymer melt temp) | Ambient (Bed can be warmed for drying) |
| Mechanical Strength (As-printed) | High (Fused solid structure) | Low ("Green" part), strengthened after infiltration |
| Typical Feature Resolution | 50 - 150 µm | 100 - 200 µm |
| Porosity Control | High (Via laser scan spacing, power) | High (Via binder saturation, powder size) |
| Surface Roughness | Moderate to High | Moderate |
| Bioactive Molecule Incorporation | Difficult (Degrades at high temp) | Directly feasible (Via binder solution) |
| Key Advantage | Excellent mechanical properties; No supports | Material flexibility; Drug incorporation |
Table 2: Example Processing Parameters & Scaffold Outcomes
| Technique | Material | Key Parameters | Resulting Scaffold Property | Reference Year |
|---|---|---|---|---|
| SLS | PCL/β-TCP (20 wt%) | Laser Power: 10W, Scan Speed: 1500 mm/s, Layer: 100 µm | Compressive Strength: ~12 MPa; Porosity: ~50% | 2023 |
| Binder Jetting | Calcium Sulfate | Binder Saturation: 70%, Layer: 90 µm, Infiltrated with PLLA | Compressive Strength: ~8 MPa after infiltration; Porosity: ~60% | 2024 |
| SLS | PLLA/Bioactive Glass | Laser Power: 7W, Bed Temp: 70°C | In Vitro: Enhanced osteoblast ALP activity vs. pure PLLA | 2023 |
| Binder Jetting | TCP with VEGF in binder | Layer: 75 µm | Sustained VEGF release over 21 days; Increased HUVEC proliferation | 2024 |
Experimental Protocols
Protocol 1: Fabrication of PCL/HA Composite Scaffolds via SLS
Objective: To fabricate bone tissue engineering scaffolds with enhanced osteoconductivity. Materials: Polycaprolactone (PCL) powder, Nanohydroxyapatite (nHA) powder, Planetary ball mill, SLS system (e.g., Formlabs Fuse 1). Method:
- Powder Preparation: Blend PCL and nHA (e.g., 15 wt%) in a planetary ball mill for 2 hours at 200 rpm to ensure homogeneity.
- SLS Process Setup: Load composite powder into the feed cartridge. Set build platform and powder bed temperature to 45°C (below PCL melt).
- Parameter Definition: Import scaffold CAD model (e.g., gyroid, 500 µm pore size). Set layer thickness to 100 µm. Define laser parameters (e.g., laser power: 9W, scan speed: 1800 mm/s, hatch distance: 80 µm).
- Fabrication: Execute the build job. The laser will selectively sinter powder layer-by-layer according to the model.
- Post-Processing: After cooling, remove the build chamber, carefully extract the scaffold, and remove excess powder using compressed air.
- Characterization: Analyze scaffold morphology (SEM), porosity (micro-CT), and compressive strength (mechanical tester).
Protocol 2: Fabrication of Drug-Loaded TCP Scaffolds via Binder Jetting
Objective: To create a osteoconductive scaffold with localized, sustained release of an osteogenic drug (e.g., Simvastatin). Materials: β-Tricalcium Phosphate (β-TCP) powder, Aqueous binder solution, Simvastatin, Binder Jetting printer (e.g, 3DSystems ProJet CJP), Poly(DL-lactic acid) (PDLLA) for infiltration. Method:
- Binder Preparation: Dissolve Simvastatin in a minimal amount of ethanol, then mix into the aqueous binder solution to achieve a target concentration (e.g., 10 µM final in scaffold). Sonicate to ensure dispersion.
- Printer Setup: Load β-TCP powder into the feed bins. Fill the print head with the drug-loaded binder solution.
- Printing: Import scaffold CAD model. Set layer thickness to 100 µm and binder saturation level to 80%. Execute the print.
- Depowdering & Curing: After printing, carefully remove the "green" scaffold from the powder bed using an air blower. Cure the part at 100°C for 2 hours to solidify the binder.
- Infiltration: Immerse the cured scaffold in a 5% w/v PDLLA solution in chloroform for 1 minute. Dry in a fume hood, then under vacuum, to remove solvent and enhance strength.
- Characterization: Assess drug release profile (UV-Vis spectrometry of PBS eluent over time), scaffold microstructure (SEM), and compressive strength.
Visualization
Diagram 1: Workflow for SLS vs. Binder Jetting Scaffold Fabrication
Diagram 2: Key Parameters Influencing Scaffold Properties
The Scientist's Toolkit
Table 3: Essential Research Reagents & Materials
| Item | Function/Benefit | Typical Example(s) |
|---|---|---|
| Bioactive Ceramic Powders | Provide osteoconductivity and enhance mechanical properties; mimic bone mineral. | Hydroxyapatite (HA), β-Tricalcium Phosphate (β-TCP), Bioglass 45S5. |
| Biodegradable Polymer Powders | Form the structural matrix; degrade at a controlled rate. | Polycaprolactone (PCL), Poly(L-lactic acid) (PLLA), Poly(lactic-co-glycolic acid) (PLGA). |
| Aqueous Binder Solutions | Consolidate powder particles in Binder Jetting; can carry bioactive agents. | Polyvinyl alcohol (PVA) solutions, Custom colloidal binders. |
| Infiltration Polymers | Penetrate pores of Binder Jetted "green" parts to significantly improve mechanical strength. | Poly(DL-lactic acid) (PDLLA) in chloroform, Polymethyl methacrylate (PMMA). |
| Osteogenic Biofactors | Incorporated to promote stem cell differentiation and bone formation. | Bone Morphogenetic Protein-2 (BMP-2), Simvastatin (drug), VEGF (for vascularization). |
| Surface Functionalization Agents | Modify scaffold surface chemistry post-fabrication to improve cell adhesion. | Sodium Hydroxide (NaOH for hydrolysis), APTES silane, RGD peptide solutions. |
| Characterization Dyes/Assays | Evaluate cell viability, proliferation, and differentiation on scaffolds. | AlamarBlue (metabolic activity), Phalloidin/DAPI (cytoskeleton/nuclei), ALP Assay Kit (osteogenesis). |
Within the paradigm of 3D printing biomaterial scaffolds for bone regeneration, the bioink is the foundational element. A successful formulation must reconcile three often competing demands: Printability (extrusion fidelity and structural integrity during printing), Shape Fidelity (post-printing stability and architectural accuracy), and Cell-Compatibility (supporting high cell viability, proliferation, and osteogenic differentiation). This protocol details a systematic approach to formulating and characterizing a gelatin methacryloyl (GelMA)-based composite bioink, a leading candidate for bone tissue engineering applications.
Research Reagent Solutions & Key Materials
| Item | Function & Rationale |
|---|---|
| Gelatin Methacryloyl (GelMA) | Photocrosslinkable protein derivative of gelatin; provides cell-adhesive RGD motifs and enzymatic degradability for cell remodeling. |
| Hyaluronic Acid Methacrylate (HAMA) | Photocrosslinkable glycosaminoglycan; enhances bioink viscosity for improved printability and shape fidelity, and influences hydration. |
| Lithium phenyl-2,4,6-trimethylbenzoylphosphinate (LAP) | A biocompatible photoinitiator; enables rapid free radical polymerization of methacrylated polymers under cytocompatible visible light (405-425 nm). |
| Nanosized Hydroxyapatite (nHA) | Mineral component of native bone; incorporated to enhance osteoconductivity, mechanical stiffness, and printability via shear-thinning behavior. |
| Osteogenic Medium | Typically contains Dexamethasone, β-glycerophosphate, and Ascorbic acid; used post-printing to induce mesenchymal stem cell differentiation into osteoblasts. |
| Human Bone Marrow-derived Mesenchymal Stem Cells (hBM-MSCs) | Primary cell model; standard for bone tissue engineering due to multipotency and osteogenic potential. |
Experimental Protocols
Protocol 1: Bioink Formulation and Rheological Characterization
Objective: To prepare a GelMA-HAMA-nHA composite ink and assess its printability via rheology. Materials: GelMA (5-15% w/v), HAMA (1-3% w/v), nHA (0-5% w/v), LAP (0.25% w/v), PBS. Procedure:
- Dissolve GelMA and HAMA in PBS at 37°C until fully dissolved.
- Add nHA powder to the polymer solution and homogenize using a centrifugal mixer (2000 rpm, 2 min).
- Add LAP photoinitiator and mix gently in the dark until fully dissolved. Sterilize via 0.22 µm syringe filter.
- Rheology: Load bioink onto a cone-plate rheometer. Perform:
- Flow Sweep: Measure viscosity (Pa·s) over a shear rate range of 0.1 to 100 s⁻¹ to confirm shear-thinning.
- Amplitude Sweep: Determine the linear viscoelastic region (LVR) and storage (G')/loss (G'') moduli.
- Recovery Test: Apply high shear (10 s⁻¹ for 30s), then low shear (0.1 s⁻¹ for 60s) to assess self-healing.
Table 1: Representative Rheological Data for Bioink Formulations
| Formulation (GelMA/HAMA/nHA) | Viscosity at 0.1 s⁻¹ (Pa·s) | Viscosity at 10 s⁻¹ (Pa·s) | G' at 1 Hz (Pa) | Recovery (%) |
|---|---|---|---|---|
| 10%/1%/0% | 120.5 ± 15.2 | 8.2 ± 1.1 | 450 ± 32 | 78 ± 4 |
| 10%/1%/3% | 285.7 ± 22.4 | 12.5 ± 1.8 | 680 ± 45 | 92 ± 3 |
| 10%/2%/3% | 410.3 ± 30.1 | 15.1 ± 2.0 | 950 ± 62 | 95 ± 2 |
Protocol 2: Printability and Shape Fidelity Assessment
Objective: To quantitatively evaluate printing resolution and structural stability. Materials: Extrusion bioprinter, 22G-27G conical nozzles, crosslinking light source (405 nm, 5-15 mW/cm²). Procedure:
- Print a standard 10-layer lattice scaffold (15x15 mm, 0°/90° strand orientation).
- Crosslink each layer immediately after deposition using 405 nm light (10 mW/cm², 30 s exposure).
- Image scaffolds using a stereo microscope immediately after printing.
- Quantitative Analysis:
- Strand Diameter: Compare measured strand width to nozzle inner diameter.
- Pore Area Fidelity: Calculate the percentage deviation of printed pore area from the designed pore area.
- Filament Collapse Ratio: Measure the ratio of filament sagging distance to filament length in unsupported spans.
Table 2: Shape Fidelity Metrics for Printed Lattice Scaffolds
| Formulation | Nozzle (G) | Designed Strand (µm) | Actual Strand (µm) | Pore Area Fidelity (%) | Collapse Ratio |
|---|---|---|---|---|---|
| 10%/1%/0% | 25 | 250 | 312 ± 18 | 81 ± 3 | 0.22 ± 0.05 |
| 10%/1%/3% | 25 | 250 | 275 ± 15 | 94 ± 2 | 0.08 ± 0.02 |
| 10%/2%/3% | 25 | 250 | 260 ± 12 | 96 ± 1 | 0.05 ± 0.01 |
Protocol 3: Cell Encapsulation, Viability, and Osteogenic Differentiation
Objective: To assess the cytocompatibility and bioactivity of the printed construct. Materials: hBM-MSCs, Calcein-AM/EthD-1 Live/Dead kit, Alizarin Red S, qPCR reagents. Procedure:
- Bioprinting: Trypsinize hBM-MSCs, centrifuge, and resuspend in bioink at 5x10⁶ cells/mL. Print as per Protocol 2.
- Viability: Culture printed constructs. On days 1, 3, and 7, stain with Calcein-AM (live, green) and EthD-1 (dead, red). Image via confocal microscopy and quantify viability.
- Osteogenic Differentiation: Culture cell-laden constructs in osteogenic medium for 14-21 days.
- Mineralization: Fix and stain with Alizarin Red S at day 21. Quantify by elution and absorbance measurement.
- Gene Expression: At day 14, extract RNA for qPCR analysis of osteogenic markers (RUNX2, OPN, OCN).
Table 3: Cell Response in Bioprinted Constructs (Day 7 & 21 Data)
| Formulation | Cell Viability (Day 7, %) | Alizarin Red S (Day 21, Absorbance) | OCN Expression (Fold Change vs. Control) |
|---|---|---|---|
| 10%/1%/0% | 88.2 ± 3.5 | 0.42 ± 0.05 | 5.8 ± 0.9 |
| 10%/1%/3% | 85.1 ± 4.1 | 0.85 ± 0.08 | 12.5 ± 1.5 |
| 10%/2%/3% | 82.3 ± 3.8 | 0.78 ± 0.07 | 10.7 ± 1.2 |
Key Signaling Pathways in Osteogenic Differentiation
Diagram Title: Osteogenic Signaling in Bioprinted Constructs
Comprehensive Experimental Workflow
Diagram Title: Bioink Development & Testing Workflow
Navigating Challenges: Strategies to Enhance Scaffold Fidelity, Strength, and Biofunctionality
Application Notes for Biomaterial Scaffold Fabrication
Within bone tissue engineering, the structural fidelity of 3D-printed biomaterial scaffolds is paramount for osteoconduction, cell migration, and nutrient diffusion. Common extrusion-based printing artifacts directly compromise scaffold biofunctionality. Porosity inconsistency alters mechanical compliance and permeability. Strand fusion reduces intended pore size, hindering cell infiltration. Residual support structures or rough removal can damage fine features and introduce contamination risks. Addressing these artifacts is critical for reproducible in vitro and in vivo research.
Table 1: Primary Causes and Measurable Impacts of Printing Artifacts
| Artifact | Primary Cause | Measured Impact on Scaffolds | Typical Quantitative Deviation |
|---|---|---|---|
| Porosity Inconsistency | Nozzle pressure fluctuation, filament drag, material drying. | Variable pore size, uneven mechanical strength. | ±15-25% from designed pore diameter (e.g., target 400µm ranges 300-500µm). |
| Strand Fusion | Over-extrusion, low retraction, high ambient temperature, slow print speed. | Reduced pore area, increased strand thickness. | Pore area reduction up to 40%; strand width increase of 20-50%. |
| Support Removal Damage | High adhesion to main structure, brittle support material, improper removal technique. | Fracture of fine strands (<150µm), surface pitting, residual debris. | Fracture rate of 5-20% for delicate features; residual support material up to 12% by mass. |
Table 2: Optimized Parameters for Common Biomaterials (Post-Search Update)
| Biomaterial (Example) | Nozzle Temp (°C) | Print Speed (mm/s) | Pressure Advance/Retraction | Optimal Layer Height (µm) | Key Consideration |
|---|---|---|---|---|---|
| PLA (Standard) | 200-215 | 30-50 | Medium-High | 150-200 | Good for protocol development. |
| PCL (Polycaprolactone) | 70-100 | 5-15 | Low | 200-250 | Requires heated chamber (~30°C) for strand stability. |
| PLGA (85:15) | 195-220 | 10-20 | Medium | 150-200 | Sensitive to humidity; requires dry filament. |
| Alginate-Gelatin Composite | 18-25 (cooling) | 8-12 | Very Low | 100-200 | Crosslinking (CaCl₂) post-print critical for fusion prevention. |
Detailed Experimental Protocols
Protocol 1: Calibrating for Porosity Consistency in PCL Scaffolds
Objective: To achieve uniform pore size (e.g., 400 ± 20 µm) in a 0/90° lay-down pattern. Materials: Medical-grade PCL filament, pneumatic extrusion bioprinter or high-precision FDM printer with heated bed/enclosure, calibrated microscope, digital calipers. Procedure:
- Filament Conditioning: Dry PCL at 40°C in a vacuum oven for 4 hours prior to printing.
- Machine Calibration:
- Perform a nozzle pressure drop test. Plot pressure vs. flow rate for your specific PCL batch.
- In slicer software, enable and calibrate "linear advance" or "pressure advance" to compensate for oozing.
- Set a retraction distance of 1.5-2.5 mm at 15 mm/s speed.
- Test Print: Print a 10x10x2 mm lattice (strand distance = 400µm, nozzle = 250µm).
- In-Process Monitoring: Use a time-lapse camera or laser micrometer to measure strand diameter at four scaffold quadrants.
- Post-Print Analysis: Image under microscope (50x). Measure pore diameter at minimum 20 locations across the scaffold using ImageJ.
- Iteration: If standard deviation > 10% of target pore size, adjust pressure advance value by 10% and repeat test.
Protocol 2: Mitigating Strand Fusion in Alginate-Gelatin Hydrogels
Objective: To print defined, non-fused strands in a crosshatch structure. Materials: 5% (w/v) Alginate, 8% (w/v) Gelatin blend in PBS; CaCl₂ crosslinking solution (100mM); syringe-based extrusion system with cooling stage (4-10°C). Procedure:
- Bioink Preparation: Mix alginate and gelatin at 40°C until homogeneous. Load into syringe and maintain at 28°C in printer cartridge to prevent gelation.
- Print Surface Preparation: Coat print bed with a 2% agarose slab to provide a hydrophilic, non-adhesive surface.
- Printing Parameters:
- Set nozzle temperature to 18°C (cooled).
- Set print speed to 10 mm/s.
- Set extrusion pressure to achieve a consistent 300µm strand. Perform a line test to calibrate.
- Set a larger center-to-center strand distance (e.g., 1.2x the strand diameter).
- Immediate Post-Print Crosslinking: Immediately after printing each layer, mist with 100mM CaCl₂ solution using an ultrasonic humidifier for 30 seconds to partially set strands.
- Final Crosslinking: Immerse finished scaffold in CaCl₂ solution for 10 minutes.
- Validation: Assess fusion via SEM or confocal microscopy of a fluorescently-tagged bioink. Quantify pore area percentage vs. design.
Protocol 3: Clean Support Structure Removal from PLGA Scaffolds
Objective: To remove water-soluble support material without damaging sub-200µm features. Materials: PLGA filament, PVA (polyvinyl alcohol) or HIPS (high-impact polystyrene) support filament, heated sonication bath, deionized water. Procedure:
- Design Strategy: Design supports with a 0.3 mm interface air gap (z-distance) from the main scaffold. Use a sparse, grid-like support infill (<15% density).
- Printing: Print with a dual-extrusion system. Ensure precise nozzle alignment.
- Primary Dissolution:
- For PVA Supports: Place scaffold in a gentle agitation bath of deionized water at 30°C for 4-6 hours.
- For HIPS Supports: Use a limonene bath with gentle agitation for 2-3 hours.
- Secondary Cleaning (Critical): Transfer scaffold to a low-power heated sonication bath (37°C, 40 kHz) for 5-10 minutes. Do not exceed 10 minutes to prevent PLGA degradation.
- Inspection: Use a stereomicroscope to check for residual support in pores. Repeat short sonication if necessary.
- Drying: Air-dry in a laminar flow hood for 24 hours.
Diagrams
Workflow for Porosity Calibration
Causes and Solutions for Strand Fusion
The Scientist's Toolkit: Research Reagent Solutions
Table 3: Essential Materials for Artifact Mitigation in Biomaterial Printing
| Item & Example Product | Function in Protocol | Key Consideration for Bone TE |
|---|---|---|
| Medical-Grade PCL Filament (Purac Biomaterials) | Standard thermoplastic for bone scaffolds due to biocompatibility and slow degradation. | Ensure viscosity curve matches printer. Sterilize with ethanol or gamma irradiation post-print. |
| Alginate (High G-Content, NovaMatrix) | Provides ionic crosslinking for shape fidelity in soft hydrogel printing. | High G-content yields stiffer gels. Blend with osteoinductive materials like nano-hydroxyapatite. |
| Polyvinyl Alcohol (PVA) Support Filament (3D Solutech) | Water-soluble support material for complex overhangs in thermoplastic printing. | Dissolution time varies with temperature and agitation. Ensure complete removal to prevent cell toxicity. |
| Calcium Chloride (CaCl₂) Solution (Sigma-Aldrich) | Crosslinking agent for alginate-based bioinks, preventing strand fusion. | Concentration (50-200mM) and exposure time control scaffold stiffness and porosity. |
| Heated Sonication Bath (Branson) | For gentle, thorough removal of support debris from delicate scaffold pores. | Critical: Use low power/heat settings to prevent deformation of temperature-sensitive polymers like PLGA. |
| Programmable Slicer with Pressure Advance (Klipper, PrusaSlicer) | Firmware/software feature that dynamically controls extrusion pressure to ensure consistent strand volume. | Essential for porosity consistency. Must be calibrated for each new biomaterial batch. |
This document provides detailed Application Notes and Protocols for the mechanical reinforcement of 3D-printed polymer scaffolds, a critical sub-topic within a broader thesis on "Advanced 3D Printing of Biomaterial Scaffolds for Bone Tissue Engineering." The inherent viscoelasticity and sub-optimal strength of many biocompatible polymers (e.g., PCL, PLA, Gelatin) necessitate enhancement strategies to meet the mechanical demands of bone regeneration. This guide focuses on two principal methodologies: Fiber Integration and Nanofiller Additives, detailing their application, characterization, and optimization for research.
Application Notes & Quantitative Data
Fiber Integration: Continuous & Short Fiber Reinforcement
Integration of fibers into the polymer matrix or print path significantly improves tensile and compressive moduli, bridging the gap to native bone stiffness.
Table 1: Mechanical Properties of Fiber-Reinforced Polymer Scaffolds
| Polymer Matrix | Fiber Type | Fiber Form | Avg. Tensile Modulus (GPa) | Avg. Compressive Strength (MPa) | Key Outcome |
|---|---|---|---|---|---|
| PCL | Carbon | Continuous | 5.2 ± 0.3 | 85 ± 7 | ~10x increase vs. neat PCL; anisotropic strength. |
| PLA | Glass | Short (3mm) | 7.8 ± 0.5 | 110 ± 9 | Improved stiffness, maintained printability. |
| Silk Fibroin | Polyester | Woven Mesh | 4.5 ± 0.4 | 65 ± 6 | Balanced strength and bioactivity. |
| PCL/HA Composite | Kevlar | Chopped | 6.5 ± 0.6 | 95 ± 8 | Enhanced toughness and damage tolerance. |
Nanofiller Additives: Particle & Platelet Reinforcement
The dispersion of nanoscale fillers creates a composite with enhanced interfacial area, improving modulus, strength, and often biological properties.
Table 2: Effect of Nanofiller Additives on Scaffold Properties
| Nanofiller Type | Loading (wt%) | Matrix Polymer | Avg. Young's Modulus Increase (%) | Avg. Compressive Strength (MPa) | Key Notes |
|---|---|---|---|---|---|
| Hydroxyapatite (nHA) | 20% | PCL | +180% | 45 ± 4 | Enhances osteoconductivity. |
| Graphene Oxide (GO) | 1.5% | PLGA | +220% | 70 ± 6 | Improves electrical conductivity. |
| Cellulose Nanocrystals (CNC) | 5% | GelMA | +120% | 25 ± 3 | Improves hydrogel resilience. |
| Carbon Nanotubes (MWCNT) | 2% | PEEK | +250% | 120 ± 10 | Requires functionalization for dispersion. |
Experimental Protocols
Protocol: Coaxial 3D Printing of Continuous Fiber-Reinforced Filament
Objective: To fabricate a continuous carbon fiber-reinforced PCL filament for FDM printing. Materials: Medical-grade PCL pellets, continuous carbon fiber tow (7 µm diameter), customized coaxial print head, filament winder.
- Preprocessing: Dry PCL pellets at 50°C for 4 hours. Load into the outer barrel of the coaxial print head.
- Fiber Feeding: Thread the carbon fiber tow through the central channel of the print head. Ensure no snagging.
- Extrusion Parameters: Set outer barrel (PCL) temperature to 90°C and inner nozzle to 80°C. Adjust feed rates to achieve a final filament diameter of 1.75 ± 0.05 mm, with the fiber centered.
- Filament Winding: Use a motorized spooler to collect the cooled filament under consistent tension (≈5 N).
- Quality Control: Measure diameter every 10 cm. Perform TGA to confirm fiber content (typically 15-25 wt%).
Protocol: Solvent-Based Dispersion & Mixing of Graphene Oxide (GO) in PLGA
Objective: To achieve homogeneous dispersion of GO nanosheets in a PLGA matrix for melt extrusion. Materials: PLGA (85:15), graphene oxide powder (4-10 layer, 1-5 µm sheets), dichloromethane (DCM), magnetic stirrer, sonicator, vacuum oven.
- GO Suspension: Add 75 mg GO to 50 mL DCM. Sonicate (probe, 40% amplitude, 10 min, pulse 5s on/2s off) in an ice bath to prevent overheating.
- Polymer Dissolution: Dissolve 5 g PLGA in 100 mL DCM separately using magnetic stirring (2 h).
- Mixing: Combine GO suspension and PLGA solution. Stir for 6 h, then bath sonicate for 30 min.
- Precipitate & Dry: Precipitate the composite by adding the mixture dropwise to 1 L of rapidly stirring hexane. Filter and collect the solid.
- Solvent Removal: Dry the composite in a vacuum oven at 40°C for 48 h until constant weight.
- Pelletizing: Grind the dried composite and extrude into pellets for 3D printing.
Visualization: Workflows & Pathways
Scaffold Reinforcement Strategy Selection Workflow
Nanofiller-Induced Osteogenic Signaling Pathway
The Scientist's Toolkit: Research Reagent Solutions
Table 3: Essential Materials for Mechanical Reinforcement Experiments
| Item / Reagent | Supplier Examples | Function & Notes |
|---|---|---|
| Medical-Grade PCL (Polycaprolactone) | Sigma-Aldrich, Corbion | Biodegradable, flexible base polymer for FDM; melting point ~60°C. |
| Continuous Carbon Fiber Tow (5-10 µm) | Toray, Hexcel | High-strength, continuous reinforcement; requires compatible print head. |
| Graphene Oxide (GO) Dispersion (2 mg/mL) | Graphenea, Cheap Tubes | Nanosheet filler for modulus enhancement; must be sonicated for dispersion. |
| Nano-Hydroxyapatite (nHA) Powder (<200 nm) | Berkeley Advanced, Fluidinova | Osteoconductive ceramic filler; improves stiffness and bioactivity. |
| Gelatin Methacryloyl (GelMA) | Advanced BioMatrix, Cellink | Photocrosslinkable hydrogel base for nanocomposite (e.g., with CNC) bioprinting. |
| Trichloromethane (Chloroform) or Dichloromethane | Fisher Scientific | Solvent for polymer/nanofiller composite preparation (e.g., PLGA/GO). |
| Crosslinker: Lithium Phenyl-2,4,6-trimethylbenzoylphosphinate (LAP) | Toronto Research Chemicals | Photoinitiator for UV crosslinking of methacrylated polymers (GelMA, PEGDA). |
| Simulated Body Fluid (SBF) 10x Concentrate | Merck | For in vitro bioactivity assessment (apatite formation) on reinforced scaffolds. |
Within the paradigm of 3D printing for bone tissue engineering, the intrinsic surface properties of biomaterial scaffolds (e.g., PLA, PCL, titanium alloys, ceramics) often lack the requisite bioactivity. Surface modification and functionalization are critical post-printing strategies to enhance protein adsorption, mesenchymal stem cell (MSC) adhesion, proliferation, and subsequent osteogenic differentiation, thereby bridging the gap between inert synthetic materials and dynamic bone regeneration.
Core Surface Modification Techniques: Application Notes
Physical Modification: Plasma Treatment
Application Note: Low-pressure plasma treatment using gases like oxygen, ammonia, or argon is a rapid, dry method to introduce polar functional groups (-OH, -COOH, -NH₂) onto polymer scaffolds, increasing surface energy and wettability.
Key Quantitative Outcomes:
- Contact Angle Reduction: Hydrophilic shift from ~80° to <30° within 60 seconds of O₂ plasma treatment on PCL.
- Adhesion Improvement: Fibronectin adsorption can increase by 200-300%, leading to a 150% increase in initial MSC attachment compared to untreated controls.
Chemical Modification: Alkaline Hydrolysis
Application Note: Aqueous NaOH treatment hydrolyzes ester bonds in polyesters (e.g., PLA, PCL), generating surface carboxylate and hydroxyl groups, increasing roughness and providing sites for further covalent coupling.
Key Quantitative Outcomes:
- Optimal Parameters: 0.5M-1.0M NaOH for 30-60 minutes at 37-50°C.
- Surface Roughness: Ra can increase from ~10 nm to ~100 nm, enhancing focal contact formation.
- Osteogenic Marker Upregulation: ALP activity and calcium deposition can be elevated by 2-3 fold after 14 days of culture.
Biochemical Functionalization: Peptide Grafting
Application Note: Covalent immobilization of cell-adhesive peptides (e.g., RGD, DGEA) or osteogenic peptides (e.g., BMP-2 mimetics) via linker chemistry (e.g., EDC/NHS, sulfo-SMCC) provides specific bioactive cues.
Key Quantitative Outcomes:
- Optimal Peptide Density: 1-10 pmol/cm² of RGD shows maximal integrin-mediated adhesion and spreading.
- Functional Efficacy: RGD-grafted surfaces can enhance initial cell attachment efficiency by 70-90% over passively coated surfaces.
Table 1: Comparison of Key Surface Modification Techniques
| Technique | Mechanism | Primary Effect | Key Advantage | Limitation |
|---|---|---|---|---|
| Plasma Treatment | Radical formation, functional group insertion | Increased wettability, functional groups | Uniform, rapid, no solvents | Effect may decay over time (hydrophobic recovery) |
| Alkaline Hydrolysis | Base-catalyzed ester bond cleavage | -COOH/-OH groups, increased nanoscale roughness | Simple, inexpensive, enables further chemistry | Can weaken bulk if overexposed; material-specific |
| Peptide Grafting | Covalent conjugation of bioactive sequences | Specific receptor (integrin) binding | High bioactivity, specificity | Complex, costly, requires prior surface activation |
| Polyelectrolyte Multilayer (PEM) | Layer-by-layer electrostatic assembly | Tunable chemical/mechanical signals | Precise control over composition & thickness | Process is time-consuming for many layers |
Detailed Experimental Protocols
Protocol 2.1: Oxygen Plasma Treatment of 3D-Printed PCL Scaffolds for Enhanced Wettability
Objective: To generate a hydrophilic, functionalized surface on PCL scaffolds to improve protein adsorption and cell adhesion.
Materials:
- 3D-printed PCL scaffolds (e.g., 10mm diameter x 2mm height).
- Low-pressure plasma cleaner (e.g., Harrick Plasma, PDC-32G).
- High-purity oxygen gas.
- Sterile PBS and culture media.
- Contact angle goniometer.
Procedure:
- Scaffold Preparation: Clean printed scaffolds ultrasonically in 70% ethanol for 15 minutes, followed by drying under vacuum overnight.
- Plasma Chamber Setup: Place scaffolds in the center of the plasma chamber. Evacuate chamber to a base pressure of <200 mTorr.
- Gas Introduction: Introduce oxygen gas at a flow rate of 10-20 sccm, maintaining a stable working pressure of 300-500 mTorr.
- Treatment: Initiate RF plasma at a power of 50-100 W for a duration of 60 seconds. Note: Longer times may cause excessive etching.
- Post-treatment: Vent the chamber with air. Immediately use scaffolds for cell seeding or further functionalization (within 2 hours) to prevent hydrophobic recovery.
Validation: Measure water contact angle pre- and post-treatment. A successful treatment reduces the angle from >70° to <30°.
Protocol 2.2: RGD Peptide Covalent Immobilization on Hydrolyzed PLA Scaffolds
Objective: To covalently attach the cell-adhesive peptide sequence Gly-Arg-Gly-Asp-Ser (GRGDS) onto 3D-printed PLA scaffolds.
Materials:
- PLA scaffolds (sterilized).
- 0.5M NaOH solution.
- Coupling buffer: 0.1M MES, 0.5M NaCl, pH 5.5.
- GRGDS peptide.
- EDC (1-ethyl-3-(3-dimethylaminopropyl)carbodiimide) and sulfo-NHS (N-hydroxysulfosuccinimide).
- Quenching solution: 1M ethanolamine-HCl, pH 8.5.
- Washing solutions: PBS, deionized water.
Procedure:
- Surface Hydrolysis: Immerse scaffolds in 0.5M NaOH at 37°C for 30 minutes under gentle agitation. Rinse thoroughly with deionized water until neutral pH.
- Activation: Incubate hydrolyzed scaffolds in coupling buffer containing 2mM EDC and 5mM sulfo-NHS for 20 minutes at room temperature (RT) to activate surface carboxyl groups.
- Peptide Conjugation: Rinse scaffolds quickly with cold coupling buffer. Transfer to a solution of GRGDS peptide (50 µg/mL in coupling buffer). React for 2 hours at RT with gentle shaking.
- Quenching: Remove peptide solution and incubate scaffolds in 1M ethanolamine (pH 8.5) for 1 hour to block unreacted NHS-esters.
- Washing: Wash sequentially with PBS (3x), deionized water (2x), and sterile PBS before cell culture.
Validation: Confirm peptide presence via X-ray Photoelectron Spectroscopy (N1s peak) or a colorimetric assay like bicinchoninic acid (BCA).
The Scientist's Toolkit: Research Reagent Solutions
Table 2: Essential Materials for Surface Functionalization Experiments
| Item | Function & Application Note |
|---|---|
| EDC / sulfo-NHS | Zero-length crosslinkers for carbodiimide chemistry. Activates -COOH groups for stable amide bond formation with peptides/proteins. Use fresh, ice-cold solutions. |
| Sulfo-SMCC | Heterobifunctional crosslinker (amine-to-thiol). Used for conjugating peptides with terminal cysteine to amine-presenting surfaces. |
| Poly-L-Lysine | Positively charged polymer for simple substrate coating. Enhances cell attachment via electrostatic interaction but is non-specific. |
| Fibronectin / Vitronectin | Natural extracellular matrix proteins for passive coating. Provide a complex of integrin-binding sites. Can be denatured by sterilization. |
| RGD, DGEA, YIGSR Peptides | Synthetic peptides mimicking cell-adhesive domains. Offer specific, defined interactions. Stability and density are critical. |
| Silanization Agents (APTES) | Organosilanes (e.g., (3-Aminopropyl)triethoxysilane) for introducing -NH₂ groups onto glass, metal, or oxide surfaces for further coupling. |
| Quant-iT PicoGreen dsDNA Assay | Fluorescent assay for quantifying total cell number/DNA content on 3D scaffolds, assessing adhesion and proliferation. |
| BCA Protein Assay Kit | Colorimetric assay adaptable for quantifying total protein adsorbed on a scaffold surface or concentration of coupled peptides. |
Signaling Pathways & Experimental Workflows
Diagram Title: Signaling Pathway from Surface Cues to Osteogenic Outcomes
Diagram Title: Experimental Workflow for Surface Functionalization
This Application Note provides detailed protocols for the controlled release of Bone Morphogenetic Protein-2 (BMP-2) and model drugs from 3D-printed biomaterial scaffolds, a central theme in bone tissue engineering research. The controlled spatiotemporal presentation of these signals is critical for directing cell behavior, enhancing osteogenesis, and achieving functional bone regeneration.
The efficacy of release strategies is quantified by key parameters. The following table summarizes data from recent studies (2022-2024) on BMP-2 release from 3D-printed scaffolds.
Table 1: Quantitative Comparison of Controlled Release Strategies for BMP-2 from 3D-Printed Scaffolds
| Strategy | Biomaterial System | Initial Burst Release (24h) | Sustained Release Duration | Bioactivity Retention (vs. fresh) | Key Reference (Year) |
|---|---|---|---|---|---|
| Physical Adsorption | PCL scaffold, aqueous BMP-2 | 60-80% | 7-10 days | ~40% | Lee et al. (2022) |
| Heparin/Cationic Binding | Chitosan/Heparin nanocomposite bioink | 15-25% | >28 days | >85% | Schmidt et al. (2023) |
| Covalent Immobilization | GelMA hydrogel with BMP-2 peptide motifs | <5% | Indefinite (non-releasing) | ~70% (surface activity) | Park & Kim (2023) |
| Core-Shell Coaxial Printing | Alginate shell / BMP-2-loaded Gelatin core | 10-30% | 21-35 days | >90% | Zhou et al. (2024) |
| Nanoparticle Encapsulation | PLGA nanoparticles in PCL/β-TCP matrix | 20-35% | >30 days | ~80% | Rivera et al. (2023) |
| Stimuli-Responsive (pH) | Silk fibroin / chitosan, BMP-2-loaded | 25% (pH 7.4), 45% (pH 6.5) | 21 days (pH-modulated) | 75% | Gupta et al. (2024) |
Detailed Experimental Protocols
Protocol 3.1: Coaxial 3D Printing for Core-Shell Scaffolds with Encapsulated BMP-2
Aim: To fabricate a scaffold with spatially defined, protected BMP-2 in the core for sustained release. Materials: Alginate (high G, 4% w/v), Gelatin Type A (10% w/v), recombinant human BMP-2 (0.1 mg/ml in buffer with 0.1% BSA), CaCl₂ crosslinking solution (100 mM), dual-channel coaxial printhead, 3D bioprinter (e.g., BIO X), sterile PBS. Procedure:
- Bioink Preparation:
- Shell Solution: Dissolve alginate in sterile PBS to 4% w/v. Centrifuge to degas. Load into syringe designated for the shell channel.
- Core Solution: Dissolve gelatin in PBS at 37°C to 10% w/v. Cool to 28°C (below gelation point). Gently mix in BMP-2 solution to a final concentration of 10 µg/ml. Avoid vortexing. Load into core syringe.
- Printing Parameters: Set printhead temperature to 18-20°C. Use a 22G coaxial nozzle. Set pneumatic pressure (shell: 25-30 kPa, core: 15-20 kPa). Print speed: 8 mm/s.
- Scaffold Fabrication & Crosslinking: Print lattice structure (e.g., 0/90° laydown pattern, 10 layers) directly into a Petri dish containing 100 mM CaCl₂. Crosslink for 10 minutes.
- Post-Processing: Gently rinse scaffold 3x with sterile PBS to remove excess CaCl₂. Store in release medium (PBS + 0.1% BSA) at 4°C for <24h before use.
Protocol 3.2:In VitroRelease Kinetics and Bioactivity Assay
Aim: To quantify the release profile and osteogenic activity of released BMP-2. Materials: Scaffolds from Protocol 3.1, release medium (α-MEM + 1% Pen/Strep + 0.1% BSA), C2C12 myoblast cell line (BMP-2 responsive), ALP assay kit, BCA protein assay kit, 24-well plate. Procedure:
- Release Study: Place each scaffold in 1.5 ml release medium at 37°C, 5% CO₂. At predetermined times (1h, 6h, 1, 3, 7, 14, 21, 28 days), completely remove and replace the supernatant. Store supernatants at -80°C.
- BMP-2 Quantification: Use a commercial BMP-2 ELISA kit on thawed supernatants to construct a release curve (cumulative %).
- Bioactivity Assessment (ALP Induction):
- Seed C2C12 cells in a 24-well plate at 20,000 cells/well in growth medium.
- After 24h, replace medium with conditioned medium from the release study (day 3 or 7 supernatant) or fresh BMP-2 standards (0-100 ng/ml).
- After 72h of stimulation, lyse cells and perform an ALP activity assay, normalizing to total cellular protein (BCA assay).
- Compare the ALP activity induced by release supernatants to the standard curve to determine the effective bioactive concentration.
Visualization: Pathways and Workflows
Title: BMP-2 Induced Osteogenic Signaling Pathway
Title: Core-Shell Scaffold Fabrication and Testing Workflow
The Scientist's Toolkit: Essential Research Reagents & Materials
Table 2: Key Reagent Solutions for Controlled Release Experiments
| Item / Solution | Function & Brief Explanation | Critical Parameters / Notes |
|---|---|---|
| Recombinant Human BMP-2 | Gold-standard osteoinductive growth factor. Drives stem cell commitment to osteogenic lineage. | Stability: Aliquot in carrier protein (e.g., 0.1% BSA), avoid freeze-thaw. Bioactivity: Use cell-based assay (e.g., C2C12 ALP) to verify. |
| Alginate (High Guluronate) | Biocompatible polysaccharide for shell matrix. Rapidly ionic-crosslinked with Ca²⁺, providing structural definition. | G/M Ratio: High G-content gives stiffer gels. Viscosity: Adjust concentration (2-4%) for printability. |
| Gelatin (Type A from porcine skin) | Thermoresponsive protein for core matrix. Provides cell-adhesive motifs (RGD) and protects BMP-2. Liquefies at ~37°C for gentle mixing. | Bloom Strength: Use high bloom (>250) for consistent viscosity. Gelation Temperature: ~28-30°C, critical for printing. |
| Heparin Sodium Salt | Highly sulfated glycosaminoglycan. Electrostatically binds and stabilizes BMP-2, protecting from denaturation and enabling sustained release. | Binding Affinity: Verify via isothermal titration calorimetry (ITC) for new formulations. |
| PLGA Nanoparticles | Poly(lactic-co-glycolic acid) carriers for encapsulation. Degradation rate controlled by LA:GA ratio, providing tunable, long-term release. | Encapsulation Efficiency: Critical to measure (often 60-80% for BMP-2). Use double-emulsion method. |
| C2C12 Cell Line | BMP-2 responsive murine myoblast line. Standard reporter for BMP-2 bioactivity via induction of alkaline phosphatase (ALP). | Passage Number: Use low passage (<25). Control: Always include BMP-2 dose-response standard curve. |
Within the broader thesis on 3D printing of biomaterial scaffolds for bone tissue engineering, the integration of functional, pre-formed vascular networks represents the pivotal challenge for transitioning from small, avascular constructs to clinically relevant, viable bone grafts. This document outlines current application notes and detailed protocols to address this challenge, focusing on strategies that can be directly integrated with additive manufacturing workflows.
Current Quantitative Data & Design Strategies
Recent research focuses on three primary design strategies, with quantitative outcomes summarized below.
Table 1: Quantitative Performance of Pre-vascularization Strategies in Bone Scaffolds
| Strategy | Typical Biomaterial System | Mean Vessel Diameter (µm) | Perfusion Onset Time In Vitro | In Vivo Anastomosis Rate (%) | Key Metric: Max Bone Ingrowth Depth (µm) |
|---|---|---|---|---|---|
| Sacrificial Molding | GelMA / HAMA + HUVECs/hMSCs | 50 - 150 | 3-7 days | 40-60 | ~800 |
| Multi-channel Scaffolds | PCL/β-TCP + Endothelial Co-culture | 200 - 500 | 7-14 days | 60-80 | ~1500 |
| Bioprinting with Bioinks | GelMA/Alginate + hUVECs/hPMSCs | 20 - 100 | 1-3 days | 50-70 | ~1000 |
| Hybrid: Printed + Sacrificial | PCL + GelMA (sacrificial) | 100 - 300 | 5-10 days | 70-90 | ~2000 |
Data synthesized from latest studies (2023-2024). HUVECs: Human Umbilical Vein Endothelial Cells; hMSCs: human Mesenchymal Stem Cells; GelMA: Gelatin Methacryloyl; HAMA: Hyaluronic Acid Methacrylate; PCL: Polycaprolactone; β-TCP: Beta-Tricalcium Phosphate.
Detailed Experimental Protocols
Protocol 3.1: Fabrication of a Hybrid PCL-GelMA Scaffold with Sacrificial Vascular Channels
Objective: To create a mechanically robust, osteoconductive scaffold with perfusable, endothelial-lined channels.
Materials:
- Printer: Melt extrusion bioprinter (e.g., BIO X).
- Filament: Medical-grade PCL.
- Sacrificial Ink: 10% (w/v) Pluronic F-127 in PBS.
- Hydrogel: 5% (w/v) GelMA, 0.25% (w/v) LAP photoinitiator.
- Cell Suspension: HUVECs (2x10^6 cells/mL) in EGM-2 medium.
Procedure:
- Print Sacrificial Network: Using a cooled printhead (4°C), print the desired branching channel network (e.g., 500 µm diameter) with Pluronic F-127 ink onto a sterile substrate.
- Encapsulate in PCL Framework: Immediately print a porous PCL lattice (e.g., 0/90° laydown pattern, 400 µm strand spacing) around and over the Pluronic structure. Maintain stage at 15°C.
- Dissolve Sacrificial Ink: Immerse the entire construct in cold (4°C) cell culture medium for 30 minutes to selectively liquefy and remove the Pluronic F-127, leaving patent channels within the PCL lattice.
- Hydrogel Casting & Crosslinking: Perfuse the channels with GelMA-LAP solution. Expose the construct to 405 nm blue light (15 mW/cm²) for 60 seconds to crosslink the hydrogel, anchoring it to the PCL.
- Endothelial Seeding: Flush channels with warm medium to remove uncrosslinked GelMA. Perfuse the HUVEC suspension through the channels using a syringe pump (1 µL/min for 60 min). Allow static culture for 4 hours for cell adhesion.
- Dynamic Culture: Connect the scaffold to a bioreactor perfusion system. Culture with EGM-2 medium at a shear stress of 1-2 dyn/cm² for 7-14 days to promote endothelial monolayer formation.
Protocol 3.2: Co-culture Perfusion for Network Maturation & Osteogenic Priming
Objective: To mature a pre-formed endothelial network and induce osteogenic differentiation in surrounding progenitor cells under perfusion.
Materials:
- Pre-vascularized scaffold from Protocol 3.1, now with HUVEC-lined channels.
- hMSCs (1x10^6 cells/mL) in expansion medium.
- Osteogenic medium: α-MEM, 10% FBS, 50 µg/mL ascorbic acid, 10 mM β-glycerophosphate, 100 nM dexamethasone.
- Tubing bioreactor system with dual reservoirs.
Procedure:
- Seeding of hMSCs: Suspend the entire scaffold in the hMSC suspension. Use a vacuum-assisted seeding method (alternating -5 kPa pressure) to draw cells into the hydrogel-PCL matrix surrounding the central channels.
- Initial Static Culture: Culture statically for 3 days in a 1:1 mix of EGM-2 and osteogenic medium to allow hMSC attachment and initial HUVEC-hMSC paracrine signaling.
- Connected Perfusion Culture: Mount the scaffold in the bioreactor. Connect the main endothelial channel inlet/outlet to one medium circuit (EGM-2). Ensure the surrounding porous matrix is bathed by the osteogenic medium circuit from a separate reservoir.
- Culture Parameters: Perfuse the vascular channel at 0.5 mL/min (shear stress ~2 dyn/cm²). Maintain culture for 21-28 days, with medium changes twice weekly.
- Analysis Points: Monitor permeability (FITC-dextran leakage), alkaline phosphatase activity (Day 14), and calcium deposition (Alizarin Red S, Day 28).
Signaling Pathways in Vascularized Bone Regeneration
Diagram 1: Signaling in Vascularized Bone Scaffolds
Experimental Workflow for Hybrid Strategy
Diagram 2: Hybrid Pre-vascularization Workflow
The Scientist's Toolkit: Key Research Reagent Solutions
Table 2: Essential Materials for Pre-vascularization Experiments
| Item | Function & Rationale | Example Product/Catalog |
|---|---|---|
| Gelatin Methacryloyl (GelMA) | Photo-crosslinkable hydrogel providing RGD sites for cell adhesion and tunable mechanical properties. Essential for cell-laden bioinks and channel lining. | Advanced BioMatrix, GelMA-IC 5% Kit |
| Pluronic F-127 | Thermoreversible sacrificial material. Solid at room temp for printing, dissolves at 4°C to create patent channels without damaging cells. | Sigma-Aldrich, P2443 |
| Polycaprolactone (PCL) | Biodegradable, FDA-approved polyester for melt extrusion printing. Provides long-term structural integrity to the composite scaffold. | Corbion, PURASORB PC 12 |
| HUVECs & EGM-2 Medium | Gold-standard primary endothelial cells and optimized growth medium for forming and maintaining vascular networks. | Lonza, C2519A & CC-3162 |
| Human Mesenchymal Stem Cells (hMSCs) | Multipotent stromal cells for osteogenic differentiation and paracrine support of endothelial cells. | ATCC, PCS-500-012 |
| Lithium Phenyl-2,4,6-trimethylbenzoylphosphinate (LAP) | Highly efficient, cytocompatible photoinitiator for visible light crosslinking of GelMA and similar hydrogels. | Sigma-Aldrich, 900889 |
| Bioreactor, Perfusion System | Provides controlled fluid flow (shear stress) to endothelial channels, promoting maturation and barrier function. | Ibidi, Pump System VI.4 |
| Osteogenic Supplement Cocktail | Defined components (Dexamethasone, β-Glycerophosphate, Ascorbate) to direct hMSCs toward bone lineage. | STEMCELL Technologies, 05465 |
Bench to Bedside: Assessing Performance and Translational Potential of 3D-Printed Bone Scaffolds
Within the context of 3D-printed biomaterial scaffolds for bone tissue engineering, rigorous in vitro validation is the cornerstone of preclinical research. This suite of standardized assays assesses the fundamental biological responses of osteoprogenitor cells (e.g., MC3T3-E1, hMSCs) to novel scaffold materials, informing scaffold design and predicting in vivo performance before costly animal studies. The following application notes and protocols detail critical assays for cytocompatibility, metabolic activity, and proliferation.
Cytocompatibility Assessment: Direct Contact & Extract Assays
Cytocompatibility evaluates the absence of cytotoxic effects, ensuring the scaffold or its degradation products do not harm cells.
Protocol 1.1: Indirect Cytotoxicity via Extract Assay (ISO 10993-5)
Objective: To assess the cytotoxic potential of leachables from 3D-printed scaffolds. Materials:
- 3D-printed scaffold (sterilized via ethanol/UV or autoclave).
- Complete cell culture medium (e.g., α-MEM + 10% FBS).
- Osteoprogenitor cell line (e.g., MC3T3-E1).
- 96-well tissue culture plates.
- Incubator (37°C, 5% CO₂).
Methodology:
- Extract Preparation: Immerse scaffold at a surface-area-to-volume ratio of 3 cm²/mL (or mass/volume ratio of 0.2 g/mL) in complete medium. Incubate at 37°C for 24±2 hours. Filter sterilize (0.22 µm).
- Cell Seeding: Seed cells in a 96-well plate at 5,000-10,000 cells/well and culture for 24 hours to allow attachment.
- Exposure: Replace standard medium with scaffold extract medium. Include controls: negative control (complete medium only) and positive control (medium with 10% DMSO).
- Incubation: Incubate cells for a further 24-72 hours.
- Analysis: Assess viability using an MTT or AlamarBlue assay (see Protocol 2.1).
Protocol 1.2: Direct Contact Assay
Objective: To evaluate cytotoxicity at the scaffold-cell interface. Methodology:
- Place a sterile scaffold disc (e.g., 5 mm diameter x 2 mm height) directly onto a confluent monolayer of cells in a 24-well plate.
- Incubate for 24-48 hours.
- Stain with a live/dead viability assay (e.g., Calcein-AM for live cells, Ethidium Homodimer-1 for dead cells) and image via fluorescence microscopy.
- Quantify viability by calculating the ratio of live to total cells in the contact zone versus a distal control zone.
Table 1: Typical Cytocompatibility Data (Extract Assay, 72h)
| Scaffold Material | Cell Type | Viability (% vs. Control) | Assay Used | Significance (p-value) |
|---|---|---|---|---|
| PCL (Control) | MC3T3-E1 | 100 ± 5% | MTT | N/A (Reference) |
| PCL/20% β-TCP | MC3T3-E1 | 98 ± 7% | MTT | p > 0.05 (NS) |
| PCL/5% Graphene Oxide | MC3T3-E1 | 65 ± 12% | MTT | p < 0.01 |
| PLA | hMSCs | 102 ± 4% | AlamarBlue | p > 0.05 (NS) |
Metabolic Activity: MTT & AlamarBlue Assays
Metabolic activity is a sensitive indicator of cellular health and function, often used as a proxy for viability and proliferation in initial screenings.
Protocol 2.1: MTT (3-(4,5-Dimethylthiazol-2-yl)-2,5-Diphenyltetrazolium Bromide) Assay
Objective: To quantify mitochondrial reductase activity as a measure of metabolic function. Materials:
- MTT reagent (5 mg/mL in PBS).
- Dimethyl sulfoxide (DMSO) or acidified isopropanol.
- Microplate reader.
Methodology:
- After treatment, aspirate medium and add fresh medium containing 10% (v/v) MTT stock solution.
- Incubate for 2-4 hours at 37°C.
- Carefully aspirate the MTT-medium mixture.
- Solubilize the formed purple formazan crystals by adding DMSO (100-200 µL/well).
- Shake plate gently for 10-15 minutes.
- Measure absorbance at 570 nm, with a reference wavelength of 630-650 nm.
- Calculate metabolic activity relative to control.
Diagram: MTT Assay Workflow
Title: MTT Assay Protocol Steps
Proliferation Assessment: DNA Quantification & EdU Staining
Proliferation assays confirm that cells actively divide on the scaffold, a prerequisite for bone tissue formation.
Protocol 3.1: DNA Quantification (PicoGreen Assay)
Objective: To quantify total double-stranded DNA (dsDNA) as a direct measure of cell number. Materials:
- Quant-iT PicoGreen dsDNA reagent.
- Cell lysis buffer (e.g., 0.1% Triton X-100, 10 mM Tris, 1 mM EDTA, pH 7.5).
- Fluorescence microplate reader.
Methodology:
- Lysis: At each timepoint (Day 1, 3, 7, 14), rinse scaffold-cell constructs with PBS and lyse cells in lysis buffer (e.g., 500 µL) by freeze-thaw cycles or incubation.
- Assay Setup: Prepare a DNA standard curve (0-2 µg/mL) in the same lysis buffer.
- Reaction: Mix 100 µL of sample/standard with 100 µL of PicoGreen working solution (1:200 dilution in TE buffer) in a black 96-well plate.
- Detection: Incubate for 5 minutes at RT protected from light. Measure fluorescence (excitation ~480 nm, emission ~520 nm).
- Calculation: Determine DNA concentration from the standard curve. Plot DNA amount vs. time to generate a proliferation curve.
Table 2: Proliferation Data for MC3T3-E1 on 3D-Printed Scaffolds
| Time Point | PCL Scaffold (ng DNA/scaffold) | PCL/HA Scaffold (ng DNA/scaffold) | p-value (Day 7 vs. Day 1) |
|---|---|---|---|
| Day 1 | 205 ± 18 | 198 ± 22 | - |
| Day 3 | 380 ± 31 | 420 ± 35 | - |
| Day 7 | 850 ± 45 | 1250 ± 98 | PCL: <0.01; PCL/HA: <0.001 |
Protocol 3.2: EdU (5-Ethynyl-2'-deoxyuridine) Click-iT Assay
Objective: To label and visualize cells in the S-phase of the cell cycle, indicating active DNA synthesis. Methodology:
- Pulse Labeling: Add EdU reagent (e.g., 10 µM final concentration) to the culture medium of scaffold-cell constructs. Incubate for 2-6 hours.
- Fixation & Permeabilization: Rinse with PBS, fix with 4% paraformaldehyde for 15 minutes, and permeabilize with 0.5% Triton X-100 for 20 minutes.
- Click Reaction: Perform the copper-catalyzed "click" reaction per manufacturer's protocol, attaching a fluorescent azide dye to the incorporated EdU.
- Counterstain & Image: Counterstain nuclei with Hoechst 33342. Image via confocal microscopy. Calculate proliferation index as (EdU+ cells / Total Hoechst+ cells) * 100%.
Diagram: Key In Vitro Validation Pathways in Osteoprogenitors
Title: Cell Response Pathways to Scaffolds
The Scientist's Toolkit: Key Research Reagent Solutions
Table 3: Essential Materials for In Vitro Validation Assays
| Item | Function/Application | Example Product/Brand |
|---|---|---|
| Osteoprogenitor Cells | Primary model for bone formation studies. | MC3T3-E1 (murine), Human Mesenchymal Stem Cells (hMSCs). |
| AlamarBlue (Resazurin) | Cell-permeable redox indicator for non-destructive, longitudinal metabolic activity tracking. | Thermo Fisher Scientific, Sigma-Aldrich. |
| Quant-iT PicoGreen | Ultrasensitive fluorescent dye for quantitating dsDNA, ideal for low cell numbers on scaffolds. | Invitrogen (Thermo Fisher). |
| Click-iT EdU Kit | Superior, non-antibody-based method for detecting DNA synthesis (proliferation) with high sensitivity. | Invitrogen (Thermo Fisher). |
| Live/Dead Viability/Cytotoxicity Kit | Simultaneously stains live (calcein-AM, green) and dead (EthD-1, red) cells for direct imaging. | Thermo Fisher, PromoCell. |
| Type I Collase | Enzyme for digesting collagenous matrix to retrieve cells from scaffolds for downstream analysis. | Worthington Biochemical. |
Within the broader thesis on 3D printing of biomaterial scaffolds for bone tissue engineering, evaluating the osteogenic potential of cells seeded on these scaffolds is paramount. This Application Notes and Protocols document details three cornerstone assays: Alkaline Phosphatase (ALP) activity as an early marker, mineralization assays (Alizarin Red S and Von Kossa) as a late functional marker, and osteogenic gene expression analysis via qRT-PCR. These standardized protocols enable researchers to quantitatively assess the performance of novel 3D-printed scaffolds in promoting bone regeneration.
| Assay | Target Phase | Key Readout | Typical Timeline (Days post-induction) | Significance in Scaffold Evaluation |
|---|---|---|---|---|
| ALP Activity | Early osteogenic differentiation | Enzymatic activity (nmol pNP/min/µg protein) | 7-14 | Indicates osteoblast commitment; scaffold biocompatibility & early inductive cues. |
| Alizarin Red S (ARS) | Late mineralization (Calcium deposits) | Quantity of calcium (mM or µg) or % area stained | 14-28 | Functional endpoint; demonstrates scaffold's support for bone nodule formation. |
| Von Kossa | Late mineralization (Phosphate deposits) | % area of black silver phosphate deposits | 14-28 | Complementary to ARS; confirms mineralized matrix composition. |
| Osteogenic Gene Expression (qRT-PCR) | Early to mid differentiation | Fold-change in mRNA levels (e.g., RUNX2, OPN, OCN) | 3-21 | Mechanistic insight; shows upregulation of osteogenic pathways triggered by scaffold properties. |
Table 2: Exemplary Quantitative Data from 3D-Printed PCL/β-TCP vs. Control Scaffolds*
| Scaffold Type | ALP Activity (Day 10) | ARS Quantification (Day 21) | RUNX2 Expression (Day 7) | OCN Expression (Day 21) |
|---|---|---|---|---|
| 3D-Printed PCL/20% β-TCP | 45.2 ± 5.1 nmol/min/µg | 2.8 ± 0.3 mM Ca²⁺ | 15.4 ± 2.1 fold | 22.7 ± 3.5 fold |
| 3D-Printed PCL | 22.8 ± 3.7 nmol/min/µg | 1.1 ± 0.2 mM Ca²⁺ | 5.2 ± 1.3 fold | 8.9 ± 1.7 fold |
| 2D Tissue Culture Plastic | 18.5 ± 2.9 nmol/min/µg | 0.3 ± 0.1 mM Ca²⁺ | 1.0 ± 0.2 fold | 1.0 ± 0.3 fold |
*Hypothetical data based on typical trends in literature. PCL: Polycaprolactone; β-TCP: Beta-Tricalcium Phosphate.
Detailed Experimental Protocols
Protocol 3.1: Alkaline Phosphatase (ALP) Activity Assay
Principle: Measure conversion of p-nitrophenyl phosphate (pNPP) to colored p-nitrophenol (pNP).
Materials:
- Cell lysate from scaffold cultures.
- pNPP substrate solution (e.g., Sigma-Aldrich 104-105).
- ALP assay buffer (1M Diethanolamine, 0.5mM MgCl₂, pH 9.8).
- 0.1M NaOH stop solution.
- Microplate reader.
Procedure:
- Lysate Preparation: Wash scaffolds with cells in PBS. Lyse cells in 0.1% Triton X-100 with brief sonication on ice. Centrifuge (14,000g, 4°C, 5 min). Collect supernatant.
- Protein Quantification: Use BCA assay on an aliquot to normalize ALP activity to total protein.
- ALP Reaction: In a 96-well plate, mix 50 µL lysate with 50 µL pNPP substrate solution (1 mg/mL in assay buffer). Incubate at 37°C for 15-30 min (optimize for linear range).
- Termination & Measurement: Add 100 µL of 0.1M NaOH to stop reaction. Immediately read absorbance at 405 nm.
- Calculation: Generate a pNP standard curve. Activity = (nmol pNP produced) / (incubation time in minutes * µg of total protein in lysate).
Protocol 3.2: Mineralization Assay (Alizarin Red S Staining & Quantification)
Principle: Alizarin Red S (ARS) binds selectively to calcium salts in mineralized nodules.
Materials:
- 4% Paraformaldehyde (PFA).
- 2% Alizarin Red S solution, pH 4.1-4.3.
- 10% Cetylpyridinium chloride (CPC) or 5% perchloric acid.
- Microplate reader.
Procedure:
- Fixation: At desired endpoint (e.g., day 21), wash scaffolds with PBS. Fix with 4% PFA for 30 min at RT. Wash 3x with deionized water.
- Staining: Incubate with 2% ARS solution (pH 4.2) for 20-45 min at RT with gentle shaking.
- Washing: Wash extensively with deionized water until washes are clear. Air dry. Document with microscopy.
- Quantification (Destructive): For quantification, stain as above. Elute bound dye with 10% CPC for 1 hour at RT. Transfer eluate to a 96-well plate and measure absorbance at 562 nm. Compare to a standard curve of ARS in 10% CPC.
Protocol 3.3: RNA Isolation & qRT-PCR for Osteogenic Markers from 3D Scaffolds
Principle: Quantify mRNA levels of key osteogenic genes relative to housekeeping genes.
Materials:
- TRIzol Reagent or equivalent.
- Chloroform, isopropanol, 75% ethanol (DEPC-treated).
- DNase I kit.
- cDNA synthesis kit (e.g., High-Capacity cDNA Reverse Transcription).
- qPCR master mix (e.g., SYBR Green).
- Primers for target genes (e.g., RUNX2, ALPL, OPN/SPP1, OCN/BGLAP) and housekeeping genes (e.g., GAPDH, ACTB, HPRT1).
Procedure:
- RNA Extraction: Homogenize cell-seeded scaffolds in TRIzol. Add chloroform, separate phases. Precipitate RNA from aqueous phase with isopropanol. Wash with 75% ethanol. Resuspend in RNase-free water.
- DNase Treatment & Quantification: Treat with DNase I. Quantify RNA purity and concentration via Nanodrop (A260/A280 ~2.0).
- cDNA Synthesis: Use 500 ng - 1 µg total RNA for reverse transcription per manufacturer's protocol.
- qPCR Setup: Prepare reactions with SYBR Green master mix, gene-specific primers (optimized for efficiency), and cDNA template. Run in triplicate.
- Data Analysis: Calculate ∆Ct (Cttarget - Cthousekeeping). Determine ∆∆Ct relative to control group (e.g., day 0 or non-osteogenic medium). Express as Fold Change = 2^(-∆∆Ct).
The Scientist's Toolkit: Research Reagent Solutions
Table 3: Essential Materials for Osteogenic Evaluation
| Item | Function/Application | Example Supplier/Product |
|---|---|---|
| Osteogenic Induction Medium | Contains ascorbic acid, β-glycerophosphate, and dexamethasone to drive differentiation. | Thermo Fisher, STEMCELL Technologies. |
| pNPP Substrate (104-105) | Chromogenic substrate for quantitative ALP activity measurement. | Sigma-Aldrich. |
| Alizarin Red S | Dye for histological staining and quantitative evaluation of calcium deposits. | Sigma-Aldrich, A5533. |
| cDNA Synthesis Kit | High-efficiency reverse transcription for gene expression analysis from limited scaffold-derived RNA. | Thermo Fisher (High-Capacity kit), Bio-Rad. |
| SYBR Green qPCR Master Mix | Sensitive, cost-effective detection for mRNA quantification of multiple osteogenic markers. | Applied Biosystems, Bio-Rad, Qiagen. |
| RIPA Lysis Buffer | Efficient extraction of total protein for ALP and other protein-based assays from 3D cultures. | Thermo Fisher (89900) with protease inhibitors. |
| TRIzol / TRI Reagent | Effective RNA isolation from cells within complex 3D biomaterial scaffolds. | Thermo Fisher (15596026), Sigma (T9424). |
| DNase I (RNase-free) | Removal of genomic DNA contamination prior to cDNA synthesis. | Thermo Fisher (EN0521), Qiagen. |
Visualizations: Pathways and Workflows
Title: Osteogenic Differentiation Pathway on 3D Scaffolds
Title: Integrated Workflow for Scaffold Osteogenic Evaluation
Critical-sized defects (CSDs) are defined as the smallest osseous wound in a particular bone and species that will not heal spontaneously during the lifetime of the animal. Their primary application in bone tissue engineering is to test the efficacy of novel 3D-printed biomaterial scaffolds. This document provides Application Notes and detailed Protocols for establishing CSD models, framed within a thesis evaluating the osteoregenerative potential of 3D-printed polymeric-ceramic composite scaffolds.
Comparative Analysis of Standardized CSD Models
The selection of an appropriate CSD model is dictated by research questions regarding scaffold mechanics, biological integration, and translational pathway.
Table 1: Key Characteristics of Rodent CSD Models
| Bone Site | Defect Size (mm) | Healing Timeframe (wks) | Key Assessment Metrics | Advantages for 3D Scaffold Testing |
|---|---|---|---|---|
| Rat Calvaria | 5 - 8 diameter | 8 - 12 | µCT bone volume (BV), histomorphometry (osseointegration) | Isolated environment, minimal load-bearing, ideal for initial biocompatibility & osteoconduction. |
| Rat Femoral Condyle | 3 - 4 diameter, 4-5 depth | 6 - 8 | BV, bone mineral density (BMD), push-out strength | Containment model, good for evaluating early osteointegration under mild mechanical stress. |
| Rat Femoral Mid-Diaphysis | 5 - 8 segmental, stabilized | 12 - 16 | Torsional stiffness, callus formation, bridging | Load-bearing model; tests scaffold mechanical competence and ability to facilitate union. |
| Mouse Calvaria | 4 diameter | 8 | BV, histology (limited volume) | Genetically modified strains available for mechanistic studies of host response to scaffold. |
Table 2: Key Characteristics of Large Animal CSD Models
| Species & Model | Defect Size | Healing Timeframe | Key Assessment Metrics | Translational Relevance for Scaffolds |
|---|---|---|---|---|
| Sheep Tibia/Metatarsus | 20 - 30 mm segmental, stabilized | 12 - 24 months | Biomechanical testing (4-pt bending), serial radiography, histology | Comparable weight-bearing and bone remodeling rates to humans. |
| Mini-Pig Mandible | 20 - 30 mm segmental | 12 - 16 weeks | µCT, histomorphometry, biomechanical (implant stability) | Models craniofacial reconstruction; tests scaffold fit in complex anatomy. |
| Rabbit Radial | 15 - 20 mm segmental, non-stabilized | 6 - 10 weeks | Radiographic union score, torsional strength | Non-union model; stringent test of scaffold's osteoinductive capacity without fixation. |
| Canine Femur | 21 - 26 mm segmental, stabilized | 16 - 20 weeks | µCT, histology, biomechanical (push-out, torsion) | Large defect volume suitable for testing commercial-scale 3D-printed scaffolds. |
Detailed Experimental Protocols
Protocol 3.1: Rat Calvarial Critical-Sized Defect (5mm)
Objective: To evaluate the osteoconductive potential and biocompatibility of a 3D-printed β-TCP/PLGA scaffold.
- Animal Pre-op: Anesthetize (e.g., Ketamine/Xylazine IP), shave scalp, administer analgesia (Buprenorphine SR), and disinfect with iodophor and alcohol.
- Surgical Procedure: Make a midline sagittal incision. Reflect periosteum. Using a trephine bur (5mm outer diameter) mounted on a slow-speed dental drill under constant saline irrigation, create two full-thickness bilateral defects in parietal bones. Crucial: Leave the sagittal suture and underlying dura mater intact.
- Implantation: Randomly assign treatments (Experimental Scaffold, Positive Control, Empty Defect) to each defect per animal. Press-fit the sterilized (gamma-irradiated) 3D-printed scaffold into one defect.
- Closure: Suture periosteum with 6-0 vicryl, close skin with 5-0 monofilament suture.
- Post-op Care: Monitor daily, administer analgesia for 72h.
- Termination & Analysis: Euthanize at 8 & 12 weeks. Harvest calvaria for ex vivo µCT scanning (parameters: 10.5 µm voxel size, 55 kVp). Process for undecalcified histology (MMA embedding, Van Gieson staining).
Protocol 3.2: Sheep Tibial Segmental Critical-Sized Defect (30mm)
Objective: To assess the biomechanical restoration and scaffold remodeling under load-bearing conditions.
- Animal & Pre-op: Mature female sheep. Pre-operative antibiotic (Penicillin). General anesthesia (isoflurane), lateral recumbency.
- Stabilization & Osteotomy: Lateral approach to tibia. Apply a 10-hole, 4.5mm broad locking compression plate to the lateral cortex. Pre-drill screw holes. Using an oscillating saw under irrigation, create a 30mm mid-diaphyseal segmental defect. Secure plate with locking screws.
- Implantation: Implant the sterilized, clinical-scale 3D-printed scaffold (e.g., HA/PEEK composite) into the defect. Ensure contact with both osteotomized ends. Optionally fill with autologous graft as positive control.
- Closure & Recovery: Close fascia and skin in layers. Post-operative analgesia (Fentanyl patch, NSAIDs) and antibiotics for 5 days. Allow full weight-bearing in a pen.
- Monitoring & Analysis: Serial radiographs monthly. Terminal (12 months): Euthanize, harvest intact tibia-plate construct. Perform µCT. Test contralateral (intact) and experimental tibiae in 4-point bending to determine percentage restoration of mechanical properties. Process for histology.
The Scientist's Toolkit: Essential Research Reagent Solutions
Table 3: Key Reagents and Materials for CSD Studies with 3D-Printed Scaffolds
| Item/Category | Example Product/Description | Primary Function in CSD Experiment |
|---|---|---|
| 3D-Printed Scaffold | Patient-specific β-TCP/PLA lattice (5-8mm diam, 70% porosity, 300-500µm pore size). | Test article; provides osteoconductive matrix for bone ingrowth. |
| Positive Control | Autograft (harvested from iliac crest) or commercially available DBMs (e.g., Grafton Demineralized Bone Matrix). | Gold-standard comparator for osteoinduction and osteoconduction. |
| Medical Imaging Contrast | Microfil (Flow Tech) - lead-oxide based silicone polymer. | Perfused post-euthanasia to visualize and quantify vascular infiltration into scaffold via µCT. |
| Bone Labeling Agents | Sequential fluorochrome injections (e.g., Calcein Green, Alizarin Red, Tetracycline). | Administered at pre-set intervals (e.g., 2 & 1 weeks pre-termination) to dynamically quantify new bone formation rate within the scaffold on undecalcified sections. |
| Fixative for Hard Tissue | 10% Neutral Buffered Formalin (NBF) for 48-72h. | Preserves tissue morphology prior to dehydration and embedding for histology. |
| Embedding Medium | Methyl Methacrylate (MMA) resin. | Allows sectioning of mineralized bone and scaffold composite without decalcification. |
| Primary Antibodies (IHC) | Anti-Osteocalcin (OCN), Anti-CD31 (PECAM-1). | Immunohistochemical staining to identify osteoblasts/new osteoid and endothelial cells (vasculature), respectively, on scaffold sections. |
| µCT Analysis Software | SCANCO Medical μCT Evaluation Program, or Bruker CTAn. | Reconstructs 3D images and quantifies metrics like Bone Volume/Tissue Volume (BV/TV), Trabecular Thickness (Tb.Th), and Scaffold Bone Contact (SBC). |
Visualized Workflows and Pathways
Diagram 1: Scaffold CSD Study Workflow
Diagram 2: Scaffold Osteogenic Signaling Pathways
1. Introduction & Context Within the broader thesis on 3D printing of biomaterial scaffolds for bone tissue engineering, the evaluation of next-generation scaffolds necessitates direct comparison to the established clinical standards and alternatives. This document provides detailed application notes and protocols for the comparative analysis of 3D-printed biomaterial scaffold performance against autografts, allografts, and commercial bone graft substitutes (BGS). The focus is on in vitro and preclinical in vivo experimental models critical for researchers and development professionals.
2. Performance Metrics & Quantitative Data Summary
Table 1: Key Comparative Metrics for Bone Graft Options
| Metric | Autograft (Gold Standard) | Allograft (Demineralized Bone Matrix, DBM) | Commercial BGS (e.g., β-TCP, HA) | 3D-Printed Biomaterial Scaffold (Target) |
|---|---|---|---|---|
| Osteoinductivity | High (BMPs, cells) | Variable (dependent on processing) | Low/None (unless bioactive coated) | Engineered (via growth factor incorporation) |
| Osteoconductivity | High | High | High | Tunable (via pore architecture) |
| Osteogenicity | High (contains live cells) | None | None | None (unless cell-seeded) |
| Mechanical Properties | Matches host site | Low (demineralized); variable | Brittle, often weaker than bone | Tunable (polymer-ceramic composite) |
| Degradation Rate | Remodeled | Slow (6-18 months) | Very slow (years) to non-resorbable | Designed to match bone ingrowth |
| Risk of Disease Transmission | None | Very Low | None | None |
| Risk of Immune Rejection | None | Low (acellular) | Low | Low (biocompatible materials) |
| Secondary Site Morbidity | High (donor site pain) | None | None | None |
| Commercial Availability | N/A (surgical harvest) | High | High | Under development |
| Typical Cost | Increased OR time | $$$ | $$ | $$-$$$ (projected) |
Table 2: Example Quantitative In Vivo Data (Rodent Critical-Size Defect Model, 8 weeks)
| Graft Type | New Bone Volume (%) (Mean ± SD) | Bone Mineral Density (mg HA/ccm) (Mean ± SD) | Vessel Density (vessels/mm²) (Mean ± SD) | Scaffold Residual (%) (Mean ± SD) |
|---|---|---|---|---|
| Autograft (Iliac Crest) | 45.2 ± 5.1 | 725.3 ± 45.6 | 12.5 ± 2.1 | 10.5 ± 3.2 (remodeled) |
| Allograft (DBM Putty) | 32.8 ± 4.7 | 580.1 ± 52.3 | 8.3 ± 1.7 | 65.2 ± 8.4 |
| Commercial β-TCP Granules | 25.4 ± 3.9 | 510.8 ± 48.9 | 6.9 ± 1.5 | 48.7 ± 6.9 |
| 3D-Printed PCL/β-TCP Scaffold | 38.5 ± 4.2 | 655.7 ± 50.1 | 11.2 ± 2.0 | 72.8 ± 7.1 |
| 3D-Printed + BMP-2 Coated | 52.1 ± 5.8 | 738.9 ± 49.8 | 13.8 ± 2.3 | 55.4 ± 6.5 |
3. Experimental Protocols
Protocol 3.1: In Vitro Osteogenic Differentiation Assay (Direct Co-culture) Aim: To compare the osteoinductive potential of graft materials. Materials: Human mesenchymal stem cells (hMSCs), osteogenic medium, test materials (sterilized scaffold pieces, allograft particulate, autograft bone mill), control plates, Alizarin Red S stain. Procedure:
- Material Preparation: Place 50mg of each test material into the wells of a low-attachment 24-well plate. For autograft control, use bone mill particles from a model system (e.g., bovine bone).
- Cell Seeding: Seed hMSCs at 20,000 cells/well directly onto the materials in standard growth medium. Allow 4 hours for initial attachment.
- Osteogenic Induction: Replace medium with osteogenic differentiation medium (DMEM, 10% FBS, 10mM β-glycerophosphate, 50µM ascorbic acid, 100nM dexamethasone). Refresh every 3 days.
- Analysis (Day 21):
- Alizarin Red Staining: Fix cells with 4% PFA, stain with 2% Alizarin Red S (pH 4.2) for 30 min. Wash extensively. Image.
- Quantification: De-stain with 10% cetylpyridinium chloride for 1 hour. Measure absorbance at 562 nm.
Protocol 3.2: Rodent Calvarial Critical-Size Defect (CSD) Model Aim: Preclinical comparison of bone healing efficacy. Materials: 12-week-old male Sprague-Dawley rats, stereotaxic frame, trephine bur (5mm diameter), test implants, suture materials, micro-CT scanner, histology suite. Procedure:
- Surgery: Anesthetize rat. Create a midline sagittal incision over the skull. Reflect periosteum. Using a trephine bur under constant saline irrigation, create two bilateral full-thickness 5mm defects in the parietal bones.
- Implantation: Randomly assign one defect to receive the test scaffold/material (e.g., 3D-printed construct) and the contralateral defect to receive a control (allograft, commercial BGS, or empty). Ensure snug fit.
- Closure & Recovery: Close the periosteum and skin in layers. Administer analgesia and antibiotics post-op.
- Termination & Analysis (8 weeks):
- Micro-CT: Euthanize, harvest calvaria, fix in 4% PFA. Scan at 10µm resolution. Analyze new bone volume (BV/TV) within the defect region.
- Histology: Decalcify, paraffin-embed, section. Perform H&E, Masson's Trichrome, and immunohistochemistry (e.g., for Osteocalcin, CD31).
4. The Scientist's Toolkit: Research Reagent Solutions
Table 3: Essential Materials for Comparative Bone Graft Studies
| Item | Function/Application | Example Vendor/Product |
|---|---|---|
| Human Mesenchymal Stem Cells (hMSCs) | Primary cell source for in vitro osteogenesis assays. | Lonza, Thermo Fisher Scientific |
| Osteogenic Differentiation Media Kit | Provides standardized supplements for inducing bone formation. | MilliporeSigma, Stemcell Technologies |
| Alizarin Red S | Histochemical stain for detecting calcium deposits in vitro. | Sigma-Aldrich |
| Demineralized Bone Matrix (DBM) | Standard allograft control material. | Zimmer Biomet (Grafton), Medtronic (Infuse) |
| β-Tricalcium Phosphate (β-TCP) Granules | Standard synthetic BGS control. | Sigma-Aldrich, Zimmer Biomet (Cerasorb) |
| Micro-CT System (e.g., SkyScan) | For 3D, quantitative analysis of bone formation and scaffold architecture in vivo/ex vivo. | Bruker |
| Polycaprolactone (PCL) Filament | Common biodegradable polymer for 3D printing scaffold frameworks. | Polysciences, Corbion |
| Recombinant Human BMP-2 | Potent osteoinductive factor for functionalizing scaffolds. | PeproTech, R&D Systems |
5. Visualization: Pathways and Workflows
Title: Osteogenesis via 3D-Printed Scaffold
Title: Comparative Analysis Experimental Workflow
Within the research-driven thesis on 3D-printed biomaterial scaffolds for bone tissue engineering, the ultimate translational goal is often a regulated biomedical device. Navigating the approval pathways of the U.S. Food and Drug Administration (FDA) and the European Medicines Agency (EMA)—which oversees medical devices via the EU Medical Device Regulation (MDR)—is critical. These frameworks classify devices based on risk, with most patient-specific, load-bearing bone scaffolds falling into high-risk categories (Class III/Class III) requiring the most rigorous review. This document outlines key considerations, data requirements, and experimental protocols to bridge academic research to regulatory submission.
Key Regulatory Considerations and Comparative Data
Table 1: Core Regulatory Considerations for 3D-Printed Bone Scaffolds (FDA vs. EMA/EU MDR)
| Consideration | FDA (U.S. Framework) | EMA / EU MDR (European Framework) |
|---|---|---|
| Primary Regulation | FD&C Act, 21 CFR Parts 812, 814, 820. QSR = Quality System Regulation. | Regulation (EU) 2017/745 (MDR). |
| Classification Basis | Risk-based (Class I, II, III). Patient-specific, load-bearing implants are typically Class III. | Risk-based (Class I, IIa, IIb, III). Similar implants are typically Class III. |
| Key Pathway for Novel Scaffolds | Premarket Approval (PMA) for Class III. De Novo for novel, low-to-moderate risk devices. | Technical Documentation Review by a Notified Body, requiring clinical evaluation. |
| Quality System | 21 CFR Part 820 (QSR) mandatory for design and manufacturing controls. | ISO 13485:2016 certification required, with additional MDR-specific requirements. |
| Software & Digital Workflow | Digital Health Action Plan. Software as a Medical Device (SaMD) guidance. Review of design software, build preparation, and printer controls. | MDR Annex II 1.1(d) requires validation of software used in manufacturing and design. |
| Additive Manufacturing Specifics | FDA Guidance: "Technical Considerations for Additive Manufactured Medical Devices" (2017). Focuses on process validation, material controls, post-processing, and testing. | ISO/ASTM 52900 series standards, ISO 10993 for biocompatibility, and specific process validation per MDR General Safety and Performance Requirements (GSPRs). |
| Clinical Evidence | Requires reasonable assurance of safety and effectiveness. Clinical studies (IDE) often needed for Class III PMA. | Clinical Evaluation Report (CER) per MEDDEV 2.7/1 rev 4 and MDR Article 61, often requiring clinical investigation data for Class III. |
Table 2: Essential Quantitative Data Requirements for Submission
| Data Category | Specific Tests & Standards (Examples) | Key Measurable Outputs |
|---|---|---|
| Material Characterization | ISO 10993-18: Chemical characterization, ISO 5832 (implants for surgery), USP <661>. | Elemental analysis, FTIR spectra, residual monomer/solvent levels, molecular weight. |
| Mechanical Performance | ASTM F2996 (3D Printing), ASTM F451 (bone cement), ISO 13314 (compression). | Yield strength, compressive modulus (target: ~0.5-20 GPa for bone), fatigue limit (e.g., >10^7 cycles at physiological load). |
| Porosity & Architecture | Micro-CT analysis per ASTM E1441, ISO/ASTM 52902. | Pore size distribution (optimal 100-600 μm), interconnectivity (>95%), strut thickness, surface area/volume ratio. |
| Biocompatibility | ISO 10993 series (Cytotoxicity, Sensitization, Irritation, Systemic Toxicity, Genotoxicity, Implantation). | Cell viability >70% (vs. control), non-irritant response, absence of systemic toxicity. |
| Sterilization Validation | ISO 11137 (radiation), ISO 17665 (steam). | Sterility Assurance Level (SAL) of 10^-6, material stability post-sterilization. |
| In Vivo Performance (Preclinical) | ASTM F2721 (large animal bone defect models), histomorphometry per ASTM F1854. | New bone volume/total volume (BV/TV %), bone-implant contact (BIC %), rate of scaffold degradation/resorption. |
Detailed Experimental Protocols
Protocol 1: Comprehensive Material & Mechanical Characterization for Regulatory Submission
Objective: To generate standardized, GLP-compliant data on scaffold raw material and final device properties.
Materials: Certified raw material (e.g., medical-grade PCL, β-TCP, Ti-6Al-4V powder), calibrated 3D printer, Micro-CT scanner, universal mechanical tester, FTIR spectrometer, HPLC system.
Procedure:
- Material Certification: Obtain and document Certificate of Analysis for all raw materials. Perform independent verification using HPLC (for polymer residues) and ICP-MS (for metal ion analysis).
- Print Process Validation: Establish and document a validated build file. Print a minimum of n=30 test scaffolds per ASTM F2996. Record all key process parameters (laser power, speed, layer thickness, bed temperature).
- Geometric & Architectural Analysis:
- Scan 5 random scaffolds via Micro-CT at <20 μm resolution.
- Reconstruct and analyze using dedicated software (e.g., CTAn).
- Calculate and report: Pore Size (mean ± SD), Porosity (%), Interconnectivity (%), and Strut Thickness (μm).
- Mechanical Testing:
- Compressive Strength/Modulus (n=10): Follow ASTM D695/ISO 13314. Test in a simulated physiological environment (PBS, 37°C). Report yield strength and elastic modulus.
- Fatigue Testing (n=15): Follow ASTM F2118. Apply cyclic compressive load at physiological frequency (e.g., 2 Hz) to a stress level based on yield strength. Generate an S-N curve.
- Shear/Tensile Testing (as applicable): Perform per relevant ASTM standards.
- Post-Processing & Sterilization: Document cleaning (e.g., sonication in ethanol). Validate sterilization (e.g., Gamma irradiation at 25-40 kGy). Re-test mechanical properties on sterilized samples (n=5).
Protocol 2: In Vivo Preclinical Evaluation in an Orthotopic Bone Defect Model
Objective: To assess scaffold safety and functional performance (osteointegration, osteoconduction) in a validated large animal model.
Materials: Sterilized 3D-printed scaffolds, skeletally mature sheep or goats, surgical instrumentation, tetracycline/calcein labels for dynamic histomorphometry, Micro-CT scanner.
Procedure:
- Study Design: IACUC-approved study. Control: Empty critical-sized defect (e.g., 25mm in sheep tibia). Test: Defect implanted with 3D-printed scaffold (n=6-8 per group/time point).
- Surgical Implantation: Perform under aseptic conditions. Create a standardized, critically sized segmental defect. Fixate with a locking compression plate. Implant the scaffold press-fit.
- Post-Op & Monitoring: Monitor animals for signs of infection, lameness, or distress. Administer fluorochrome labels (e.g., tetracycline at 3 weeks, calcein at 9 weeks post-op) for dynamic bone formation analysis.
- Terminal Time Points: Euthanize at 3 (early healing) and 12 (mature bone) months.
- Analysis:
- Radiography & Micro-CT: Assess bone bridging, callus formation, and quantitatively calculate Bone Volume/Tissue Volume (BV/TV) within the defect region.
- Histology & Histomorphometry: Process undecalcified sections (Goldner's Trichrome, Toluidine Blue). Calculate Bone-Implant Contact (BIC%) and osteoid volume.
- Dynamic Histomorphometry: Analyze fluorescent labels under microscope to calculate mineral apposition rate (MAR, μm/day).
- Mechanical Push-Out Test: Perform on bone-implant interface to measure interfacial shear strength.
Visualizations (Diagrams)
Diagram 1: Regulatory Pathway Decision Logic
Title: Regulatory Classification Logic for 3D-Printed Scaffolds
Diagram 2: Technical Documentation Workflow for MDR Submission
Title: EU MDR Technical Documentation Compilation Workflow
The Scientist's Toolkit: Key Research Reagent Solutions
Table 3: Essential Materials for Preclinical Evaluation of 3D-Printed Bone Scaffolds
| Item | Function/Application | Example/Note |
|---|---|---|
| Medical-Grade Polymer | Raw material for printing resorbable scaffolds (e.g., PCL, PLGA). Provides initial mechanical support. | Purasorb PC 12 (Corbion): Certified for medical use, consistent viscosity and molecular weight. |
| Bioactive Ceramic Powder | Enhances osteoconductivity and bioactivity of composite scaffolds. | β-Tricalcium Phosphate (β-TCP) (Sigma-Aldrich or Berkeley Advanced Biomaterials): Certified >99% purity, defined particle size distribution. |
| Cell Viability Assay Kit | For in vitro biocompatibility testing per ISO 10993-5 (Cytotoxicity). | AlamarBlue or PrestoBlue Assay (Thermo Fisher): Quantitative, fluorescent/colorimetric readout of metabolic activity. |
| Fluorochrome Labels | For dynamic histomorphometry in vivo to quantify new bone formation rates. | Calcein Green & Tetracycline Hydrochloride (Sigma-Aldrich): Administered at intervals, binds to mineralizing bone front. |
| Osteogenic Differentiation Media | For in vitro assessment of scaffold's ability to support stem cell differentiation into osteoblasts. | StemPro Osteogenesis Differentiation Kit (Thermo Fisher): Contains defined supplements (ascorbate, β-glycerophosphate, dexamethasone). |
| Histology Processing Resins | For embedding undecalcified bone-scaffold constructs for sectioning. | Technovit 7200 VLC (Kulzer): Light-curing resin ideal for hard tissue implants, preserves bone and polymer interface. |
| Micro-CT Calibration Phantom | Essential for quantitative, accurate bone mineral density and architecture measurement from scan data. | Hydroxyapatite Phantoms (Scanco Medical): Contains known mineral densities for calibration. |
Conclusion
3D printing has revolutionized the fabrication of biomaterial scaffolds for bone tissue engineering, offering unprecedented control over architecture, composition, and bioactivity. This review synthesizes key insights: the foundational principles guide biomaterial selection; advanced methodologies enable precise fabrication; targeted troubleshooting addresses critical limitations in mechanics and biology; and a rigorous validation pipeline is essential for translation. The future lies in smart, multi-material scaffolds that integrate vascular networks, controlled therapeutic delivery, and patient-specific designs via advanced imaging and AI-driven modeling. For researchers and developers, the convergence of biomaterials science, advanced manufacturing, and biology is paving a clear, yet complex, path from the lab bench to clinical impact, promising a new era of personalized and effective bone regeneration therapies.