Advanced PCR Optimization Strategies: Overcoming Inhibitors and Complexity in Biomaterial Sample Analysis
This comprehensive guide details the critical strategies for optimizing Polymerase Chain Reaction (PCR) for the analysis of complex biomaterial targets, including tissues, biofilms, and engineered materials.
Advanced PCR Optimization Strategies: Overcoming Inhibitors and Complexity in Biomaterial Sample Analysis
Abstract
This comprehensive guide details the critical strategies for optimizing Polymerase Chain Reaction (PCR) for the analysis of complex biomaterial targets, including tissues, biofilms, and engineered materials. Aimed at researchers, scientists, and drug development professionals, it covers foundational principles of inhibition, tailored methodological workflows, systematic troubleshooting for low yield or specificity, and robust validation techniques to ensure reliable, reproducible results in biomedical research and development.
Understanding the Challenge: Why Complex Biomaterials Hinder Conventional PCR
Technical Support Center: PCR Optimization for Complex Biomaterials
FAQs
Q1: Why does my PCR from tissue lysates consistently yield non-specific products or smears? A: Complex tissues contain inhibitors (e.g., collagen, heme, melanin) and abundant background DNA/RNA that interfere with amplification. The high complexity of the genomic target also increases primer mis-binding events.
Q2: My PCR from bacterial biofilms fails to amplify the target gene, despite good DNA concentration. What is the issue? A: Biofilm extracellular polymeric substances (EPS), primarily polysaccharides and eDNA, are potent PCR inhibitors. Standard quantification (e.g., Nanodrop) does not assess inhibition, leading to failed reactions.
Q3: I am working with decellularized ECM scaffolds. How do I handle the low yield and fragmented nature of the isolated nucleic acids? A: Decellularization processes often involve harsh physical/chemical treatments that shear and degrade nucleic acids. The resulting fragments may be too short for standard primer binding if the amplicon size is not optimized.
Q4: What is the most critical parameter to optimize first when developing a PCR assay for a new complex biomaterial? A: The sample preparation and nucleic acid purification step is paramount. No amount of PCR optimization can overcome a heavily inhibited or degraded template.
Q5: How can I verify that PCR failure is due to inhibition versus target absence? A: Always perform a spike-in control. Add a known quantity of a control template (e.g., from a different species) and its specific primers to the reaction. Failure to amplify this control indicates presence of inhibitors.
Troubleshooting Guides
Issue: Low Amplification Efficiency from Tissue Sections
- Check 1: Proteinase K Digestion. Ensure complete tissue lysis. Increase digestion time (overnight) and include a shaking incubation.
- Check 2: Inhibition Test. Dilute your template (1:5, 1:10). Improved amplification with dilution indicates carryover inhibitors.
- Check 3: Polymerase Choice. Switch to a polymerase engineered for robust performance through inhibitors (e.g., "high-yield" or "inhibitor-resistant" blends).
- Protocol: Enhanced Tissue DNA Extraction (Micro-scale)
- Digest 5-10 mg tissue or a scroll in 180µL lysis buffer + 20µL Proteinase K (≥20 mg/mL) at 56°C with shaking (800 rpm) for 12-18 hours.
- Incubate at 95°C for 10 min to inactivate Proteinase K.
- Centrifuge at 12,000 x g for 5 min. Transfer supernatant to a new tube.
- Add 2µL of RNase A (10 mg/mL), incubate at room temp for 2 min.
- Purify using a silica-column kit designed for difficult samples (see Toolkit). Elute in 30-50µL nuclease-free water.
- Quantify via fluorometry (e.g., Qubit) and run on a bioanalyzer/fragment analyzer to assess integrity.
Issue: No Product from Biofilm Samples
- Check 1: EPS Removal. Incorporate a pre-wash step with PBS or a mild dispersant (e.g., DTT) before cell lysis to remove the bulk EPS matrix.
- Check 2: Purification Method. Avoid simple boiling or chemical lysis. Use mechanical disruption (bead-beating) combined with a purification kit that includes inhibitor-removal resins.
- Check 3: Polymerase. Use a hot-start, inhibitor-tolerant polymerase.
- Protocol: Biofilm Nucleic Acid Isolation for PCR
- Gently wash biofilm twice with sterile PBS to remove loosely adhered cells.
- Resuspend biofilm scrapings in 500µL PBS. Transfer to a lysing matrix tube.
- Add 50µL of 1M DTT (optional, for polysulfide reduction). Vortex 10 sec.
- Add 500µL of a commercial lysis/binding solution. Bead-beat for 45 sec at 6 m/s.
- Centrifuge. Transfer supernatant to a column-based purification system with inhibitor removal technology.
- Complete wash and elution as per kit instructions. Elute in 30µL.
Issue: High Ct Variability in qPCR from Engineered Scaffold Cultures
- Check 1: Homogeneous Sampling. Ensure the scaffold is thoroughly homogenized. Use a rotor-stator homogenizer or vigorous bead-beating.
- Check 2: RNA Integrity. For gene expression, check RNA Integrity Number (RIN) >7.0. Scaffold digestion enzymes (collagenase) can release RNases.
- Check 3: cDNA Synthesis Priming. For scaffolds containing multiple cell types, use a mixture of random hexamers and oligo-dT for comprehensive cDNA generation.
Table 1: Comparison of PCR Success Rate from Different Complex Biomaterials Using Standard vs. Optimized Protocols
| Biomaterial Type | Standard Kit PCR Success Rate | Optimized Protocol PCR Success Rate | Key Inhibitor Addressed |
|---|---|---|---|
| Liver Tissue (Murine) | 45% | 98% | Hemes/Porphyrins |
| P. aeruginosa Biofilm | 20% | 95% | Polysaccharides |
| Alginate Hydrogel Scaffold | 60% | 97% | Polysaccharides (Alginate) |
| Decellularized Heart ECM | 30% | 85% | Collagen Fragments |
Table 2: Impact of Template Dilution on qPCR Efficiency (Ct shift)
| Sample Type | Undiluted Ct | 1:5 Dilution Ct | ∆Ct (Undiluted-1:5) | Interpretation |
|---|---|---|---|---|
| Tumor Tissue Lysate | 28.5 | 26.1 | +2.4 | Significant Inhibition |
| Planktonic Bacteria | 19.8 | 21.2 | -1.4 | Minimal Inhibition |
| Collagen Scaffold | 32.9 | 29.7 | +3.2 | Severe Inhibition |
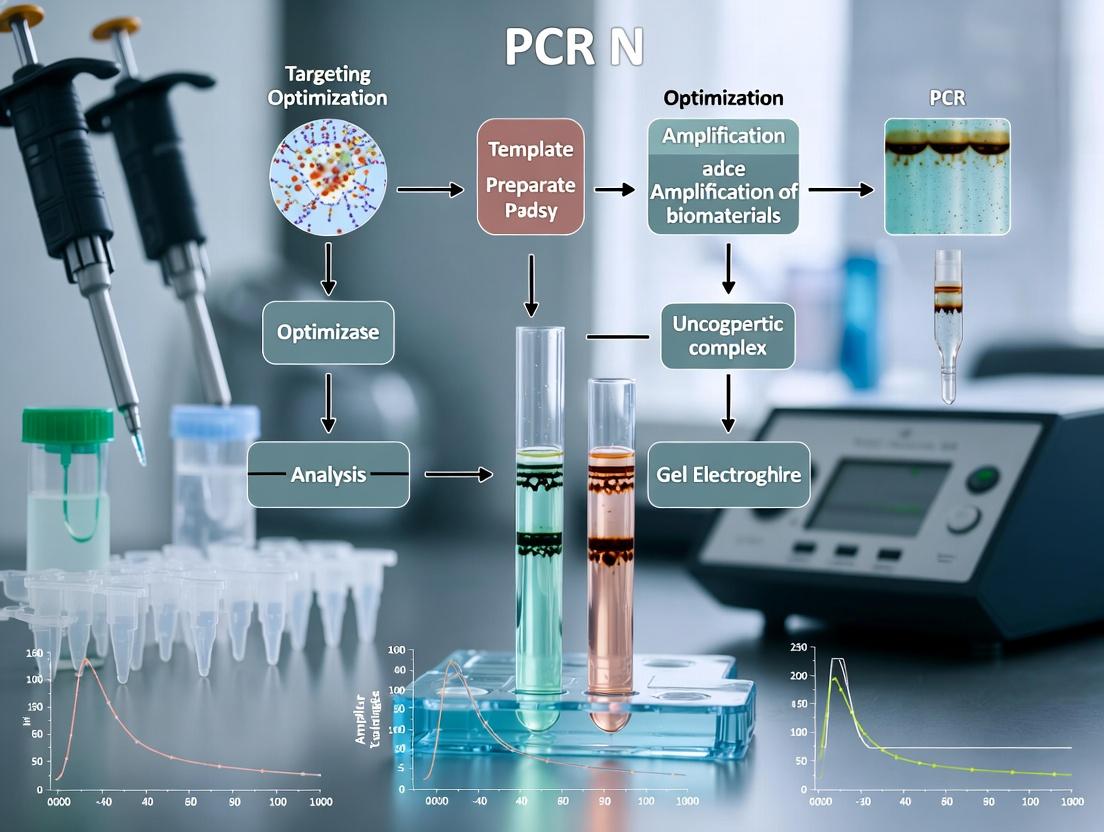
Diagrams
PCR Workflow for Complex Biomaterials
Common PCR Inhibitors and Their Mechanisms
The Scientist's Toolkit: Research Reagent Solutions
Table 3: Essential Reagents for PCR Analysis of Complex Biomaterials
| Reagent / Kit Category | Example Product(s) | Function & Rationale |
|---|---|---|
| Inhibitor-Resistant Polymerase | OneTaq Hot Start, Phusion Blood Direct | Engineered to maintain activity in presence of common biomaterial inhibitors. |
| High-Efficiency Purification Kits | QIAamp DNA Mini Kit (with inhibitor removal columns), PowerBiofilm DNA Kit | Silica-membrane technology with proprietary buffers to adsorb and remove inhibitors. |
| Bead-Based Homogenizers | Lysing Matrix B (0.1mm silica beads), Precellys tubes | Ensures complete mechanical disruption of tough matrices (biofilms, tissues). |
| Fluorometric Quantitation Assay | Qubit dsDNA HS Assay, PicoGreen | Specific dye-based quantitation unaffected by common contaminants (salts, protein). |
| Nucleic Acid Integrity Analyzer | Bioanalyzer (Agilent), Fragment Analyzer (Agilent) | Provides RIN/DIN scores to objectively assess template quality pre-PCR. |
| PCR Additives | Bovine Serum Albumin (BSA), Betaine, DMSO | Stabilizes polymerase, reduces secondary structure, competes with non-specific inhibitors. |
Technical Support & Troubleshooting Center
FAQs & Troubleshooting Guides
Q1: How do I identify if polysaccharides from plant or bacterial samples are inhibiting my PCR? A: Symptoms include complete PCR failure, faint smears on gels, or reduced yield despite high-quality nucleic acid spectrophotometry readings. Polysaccharides co-precipitate with DNA, often resulting in A260/A230 ratios below 1.8. A control experiment using a dilution series of your template (e.g., 1:1, 1:5, 1:10) often shows improved amplification at higher dilutions, as inhibitors are effectively diluted out.
Q2: My soil sample extracts consistently fail to amplify. Are humic acids the culprit, and how can I remove them? A: Humic acids are a common inhibitor in environmental samples. They absorb at 230 nm, lowering the A260/A230 ratio. Effective removal strategies include using polyvinylpyrrolidone (PVP) during cell lysis, employing silica-column based purification kits specifically designed for environmental samples, or incorporating bovine serum albumin (BSA) at 0.1-0.4 µg/µL in the PCR mix to bind the inhibitors.
Q3: We work with blood samples. Heparin is a known inhibitor, but our Taq polymerase seems unaffected. Is this possible? A: While heparin is a potent inhibitor of Taq polymerase, some modern, engineered polymerases have higher inhibitor tolerance. However, this tolerance is not absolute. Residual heparin can still cause intermittent failure or reduced efficiency. Best practice is to always use heparinase treatment or a dedicated nucleic acid purification kit validated for blood samples to ensure consistent results.
Q4: When extracting DNA from collagen-rich tissues (e.g., skin, tendon), our PCR yields are low. What specific steps can we take? A: Collagen can inhibit PCR by sequestering Mg2+ ions, a critical cofactor for polymerase activity. Solutions include: 1) Increasing MgCl2 concentration in the PCR master mix by 0.5-1.5 mM above standard levels, 2) Adding supplementary BSA (0.2 µg/µL) to compete for binding, and 3) Using a specialized tissue DNA extraction kit that includes proteinase K digestion and guanidine thiocyanate-based lysis to degrade and denature collagen thoroughly.
Q5: Are there any universal additives to overcome these diverse inhibitors in a single PCR? A: No single additive works universally, but a combination approach is often effective. For screening, a "rescue" PCR master mix containing a blend of BSA (0.2-0.4 µg/µL), Betaine (0.5-1 M), and a hot-start, inhibitor-tolerant polymerase is recommended. Note that optimal concentrations must be empirically determined for each sample type.
Quantitative Data on Common PCR Inhibitors
Table 1: Inhibitor Characteristics & Critical Thresholds
| Inhibitor | Common Source | Critical Inhibition Threshold (in PCR) | Primary Mechanism of Inhibition |
|---|---|---|---|
| Polysaccharides | Plant tissues, bacteria | > 0.4 µg/µL | Increased viscosity, interference with DNA polymerase activity |
| Humic Acids | Soil, sediment, peat | > 0.2 µg/µL | Binding to DNA/ polymerase, chelation of Mg2+ ions |
| Heparin | Blood, plasma | > 0.15 IU/µL | Binds to and denatures polymerase proteins |
| Collagen | Animal tissues, biopsies | > 1 µg/µL | Sequesters Mg2+ ions, co-purifies with DNA |
Table 2: Efficacy of Common Mitigation Strategies
| Mitigation Method | Polysaccharides | Humic Acids | Heparin | Collagen | Notes |
|---|---|---|---|---|---|
| Template Dilution (1:5-1:10) | High | Medium | Low | Medium | Simple first step; reduces target DNA. |
| Specialized Purification Kit | High | High | High | High | Most reliable; kit choice is sample-specific. |
| Additive: BSA (0.4 µg/µL) | Medium | High | Low | High | Binds inhibitors; standard first-line additive. |
| Additive: Betaine (1 M) | Medium | Low | Low | Medium | Reduces secondary structure; helps some inhibitors. |
| Increased Mg2+ (up to 6 mM) | Low | Low | Low | High | Specific for Mg2+ chelators like collagen. |
| Heparinase Treatment | None | None | High | None | Specific enzymatic degradation of heparin. |
Detailed Experimental Protocols
Protocol 1: Assessing Inhibition via Template Dilution Series Purpose: To diagnose the presence of PCR inhibitors in a nucleic acid extract.
- Prepare a standard PCR master mix sufficient for 5 reactions.
- Aliquot the mix into 5 tubes. Add your undiluted DNA template to the first tube (e.g., 5 µL of 10 ng/µL).
- Serially dilute the remaining template 1:5, 1:25, 1:125, and 1:625 in nuclease-free water.
- Add each dilution to a separate PCR tube. Include a no-template control (NTC).
- Run PCR. A pattern of increasing amplicon yield with higher template dilution is indicative of PCR inhibition in the original sample.
Protocol 2: Humic Acid Removal with PVP During Cell Lysis Purpose: To improve DNA purity from humic-rich samples (e.g., soil).
- To 500 mg of soil sample, add 1 mL of pre-warmed (60°C) CTAB lysis buffer (2% CTAB, 1.4 M NaCl, 20 mM EDTA, 100 mM Tris-HCl, pH 8.0).
- Add 50 mg of solid Polyvinylpyrrolidone (PVP-40). Vortex vigorously.
- Incubate at 65°C for 30 minutes with occasional mixing.
- Proceed with chloroform:isoamyl alcohol (24:1) extraction and subsequent alcohol precipitation or column purification. PVP complexes with polyphenolic humic acids, removing them during the organic phase separation.
Protocol 3: Heparin Removal via Heparinase I Digestion Purpose: To enzymatically degrade heparin in blood-derived nucleic acid extracts.
- After final elution of DNA/RNA in nuclease-free water, prepare a digestion mix: 10 µL DNA, 2 µL 10X Heparinase I Buffer, 1 µL Heparinase I (1 IU/µL), 7 µL nuclease-free water.
- Incubate at 25°C for 2 hours.
- Heat-inactivate the enzyme at 65°C for 15 minutes.
- Use 5-10 µL of the treated sample directly in a 25-50 µL PCR reaction.
The Scientist's Toolkit: Research Reagent Solutions
Table 3: Essential Reagents for Overcoming PCR Inhibition
| Reagent | Function & Mechanism | Typical Working Concentration |
|---|---|---|
| Bovine Serum Albumin (BSA) | Nonspecific competitor; binds to inhibitors like polysaccharides and humic acids, preventing them from interacting with DNA/polymerase. | 0.1 - 0.4 µg/µL in PCR mix |
| Betaine | Compatible solute; equalizes the melting temperatures of GC- and AT-rich regions, reduces secondary structure, and can mitigate some inhibitor effects. | 0.5 - 1.5 M in PCR mix |
| Polyvinylpyrrolidone (PVP-40) | Inhibitor binder; added during lysis to complex with polyphenolic compounds (humic acids, tannins) for removal in organic extraction. | 1-2% (w/v) in lysis buffer |
| Heparinase I | Degradative enzyme; specifically cleaves heparin into small, non-inhibitory saccharides. | 0.1 - 0.2 IU per reaction |
| Inhibitor-Tolerant Polymerase | Engineered enzyme; polymerases derived from Pyrococcus or chimeric designs with higher binding affinity for DNA, resisting displacement by inhibitors. | As per manufacturer's protocol |
| Guanidine Thiocyanate | Chaotropic salt; in lysis buffers, it denatures proteins (e.g., collagen) and nucleases, and aids in binding nucleic acids to silica membranes. | 4 - 5 M in lysis buffer |
Visualizations
The Impact of Sample Lysis and Nucleic Acid Extraction Efficiency on PCR Success
Technical Support Center: Troubleshooting PCR Failure from Pre-Analytical Steps
FAQs & Troubleshooting Guides
Q1: My PCR from complex plant tissue shows inconsistent results or total failure. Where should I start troubleshooting?
A: Begin with the lysis step. Incomplete cell wall disruption is the primary cause for variable nucleic acid yield and quality from complex biomaterials. Ensure your lysis buffer is compatible with your sample type (e.g., use CTAB-based buffers for polysaccharide-rich plants, bead-beating for fungal spores, or proteinase K digestion for animal tissues). Increase mechanical disruption time or intensity and verify lysis completeness under a microscope before proceeding.
Q2: I am getting low nucleic acid yield post-extraction. How can I improve efficiency?
A: Low yield often stems from suboptimal binding conditions during silica-column or magnetic bead-based purification. Review the following table for corrective actions:
Table 1: Troubleshooting Low Nucleic Acid Yield
| Possible Cause | Diagnostic Check | Recommended Solution |
|---|---|---|
| Incomplete Lysis | Visual inspection of lysate debris. | Increase mechanical disruption; optimize buffer-to-sample ratio; add appropriate lytic enzymes. |
| Nucleic Acid Degradation | Run lysate on gel; observe smearing. | Chill samples during processing; add RNase inhibitors (for RNA); use fresh, effective nuclease-inhibiting lysis buffers. |
| Suboptimal Binding Conditions | Measure pH of lysate-binding mixture. | Add correct volume of binding buffer/ethanol; ensure pH is conducive to silica binding (typically pH ≤7.5). |
| Column Overloading | Quantify input sample mass. | Reduce starting material to prevent column clogging and binding site saturation. |
| Inefficient Elution | Measure eluate volume and pH. | Pre-warm elution buffer (e.g., to 55°C); let it sit on membrane for 2-5 min; use low-salt elution buffer at optimal pH (8.0-9.0). |
Q3: My extracts have high A260/A230 ratios, but PCR fails. What does this indicate?
A: A low A260/A230 ratio (<1.8) suggests carryover of organic compounds (phenols, chaotropic salts) or carbohydrates that are potent PCR inhibitors. Even with "good" 260/280 ratios, these contaminants can co-purify and inhibit polymerase. Implement these washes:
- For silica columns: Perform an additional wash with 80% ethanol (containing 10mM Tris-HCl, pH 8.0) after the standard wash buffer.
- Precipitate again: For precipitated extracts, wash the pellet with cold 70% ethanol twice.
- Use inhibitor removal kits: Specifically designed for your sample type (e.g., soil, stool, plant).
- Dilute the template: A 1:5 or 1:10 dilution can reduce inhibitor concentration below the inhibition threshold.
Q4: How does extraction method choice quantitatively impact downstream PCR sensitivity (Ct value)?
A: Extraction efficiency directly correlates with the limit of detection (LoD) in qPCR. Inefficient recovery introduces stochastic sampling error, especially critical for low-abundance targets. The data below compares methods for bacterial DNA extraction from sputum:
Table 2: Impact of Extraction Method on qPCR Performance from Sputum
| Extraction Method | Mean DNA Yield (ng/µL) | Mean Purity (A260/280) | Mean Ct Value (for rpoB target) | Detection Rate at Low Titer (10^3 CFU/mL) |
|---|---|---|---|---|
| Simple Boiling | 15.2 ± 4.1 | 1.65 ± 0.12 | 32.8 ± 1.5 | 40% |
| Silica Spin Column (Kit A) | 45.7 ± 6.3 | 1.88 ± 0.05 | 28.1 ± 0.7 | 95% |
| Magnetic Bead (Kit B) | 52.1 ± 5.8 | 1.91 ± 0.03 | 27.5 ± 0.5 | 100% |
| Phenol-Chloroform | 60.3 ± 8.5 | 1.95 ± 0.08 | 27.0 ± 0.8 | 100% |
Data illustrates that robust lysis and purification (Kit B, Phenol-Chloroform) yield higher quantity/quality nucleic acid, resulting in earlier Ct and superior detection sensitivity.
Q5: For difficult samples (e.g., formalin-fixed, paraffin-embedded tissue), what specific protocol adjustments are critical for PCR success?
A: FFPE samples require reversal of cross-links and specialized handling. Detailed Protocol: Nucleic Acid Extraction from FFPE Tissue for PCR
- Deparaffinization: Cut 5-10 µm sections. Add 1 mL xylene, vortex, incubate at 55°C for 10 min. Centrifuge at full speed for 2 min. Discard supernatant.
- Rehydration: Wash pellet sequentially with 1 mL of 100%, 95%, and 70% ethanol. Air dry pellet for 10-15 min.
- Lysis & De-crosslinking: Resuspend in 200 µL lysis buffer (e.g., with 20 mM Tris-HCl, pH 8.0, 20 mM EDTA, 1% SDS, 2 mg/mL Proteinase K). Incubate at 56°C with shaking (750 rpm) for 3 hours, then at 90°C for 1 hour to reverse formalin crosslinks.
- Purification: Cool, add 200 µL binding buffer, and purify using a column or bead system designed for high-fragment recovery. Include an on-column RNase treatment if extracting DNA.
- Elution: Elute in 30-50 µL low-EDTA TE buffer or nuclease-free water.
Key Experimental Workflow Diagram
Title: Workflow of Lysis and Extraction Impact on PCR
The Scientist's Toolkit: Research Reagent Solutions
Table 3: Essential Materials for Optimized Nucleic Acid Extraction
| Item | Function & Rationale |
|---|---|
| Inhibitor-Resistant Polymerase Mixes | Polymerase blends with antibodies for hot-start, coupled with enhancers (BSA, trehalose) to tolerate common inhibitors, increasing PCR robustness from suboptimal extracts. |
| Magnetic Beads (Silica-Coated) | Provide high surface-area-to-volume ratio for efficient binding, enabling automation and reduced hands-on time, improving reproducibility for high-throughput applications. |
| Carrier RNA (e.g., Poly-A, MS2 RNA) | Added to lysis buffers during RNA extraction to non-specifically bind to silica surfaces, improving recovery of low-concentration RNA by mitigating losses to tube surfaces. |
| Lytic Enzymes (Lysozyme, Proteinase K, Metapenaezyme) | Target specific cell wall/components (bacterial, fungal, plant) to synergize with chemical lysis, ensuring complete disruption of complex biomaterials. |
| Inhibitor Removal Additives (PTB, PVPP, Chelex-100) | Added to lysis buffer to bind specific inhibitors (polyphenols, humic acids, divalent cations) at the source, preventing their co-purification. |
| RNase Inhibitors (e.g., Recombinant Ribolock) | Crucial for RNA work. Added immediately upon lysis to inactivate ubiquitous RNases, preserving RNA integrity for sensitive applications like RT-qPCR. |
| DNA/RNA Stabilization Tubes | Contain reagents that immediately lyse cells and stabilize nucleic acids at room temperature, preserving the in vivo state for field or clinical sampling. |
| Automated Nucleic Acid Extractors | Standardize the purification process, minimizing human error and variability, which is critical for reproducible quantitative studies in drug development. |
Technical Support Center: Troubleshooting Guides & FAQs
Q1: My PCR consistently fails when amplifying a high-GC (>70%) region. What are the primary causes and solutions? A: High GC content leads to inefficient denaturation and promotes nonspecific primer binding or secondary structure formation. Key solutions involve using specialized buffers and optimized cycling conditions.
| Approach | Key Component/Parameter | Typical Quantitative Range/Value | Mechanism of Action |
|---|---|---|---|
| PCR Additives | DMSO | 3-10% (v/v) | Reduces DNA melting temperature (Tm), disrupts secondary structure. |
| Betaine | 0.5-1.5 M | Equalizes base-stacking stability, promotes even melting. | |
| Glycerol | 5-10% (v/v) | Lowers DNA melting temperature, stabilizes enzyme. | |
| 7-deaza-dGTP | Substitute 50-100% of dGTP | Reduces hydrogen bonding, lowers Tm of GC-rich regions. | |
| Polymerase Choice | High-Fidelity/GC-Rich Enzymes | N/A | Engineered for robust performance on complex templates; often contain processivity enhancers. |
| Thermal Cycling | Initial Denaturation Temperature | 98°C | More complete strand separation. |
| Denaturation Temperature | 98°C for 5-20 sec | Higher than standard 95°C for better denaturation. | |
| Annealing Temperature Gradient | Often 3-5°C above calculated Tm | Determines optimal specificity. | |
| Extension Temperature | 68-72°C | Standard for most polymerases. | |
| Touchdown PCR | Annealing Temperature Decrement | 0.5-1°C per cycle for 10-20 cycles | Increases specificity early in reaction. |
Protocol: Optimized PCR for High-GC Targets
- Prepare a 25 µL reaction mix:
- 1X GC-Rich Reaction Buffer (commercial or with additives).
- 200 µM of each dNTP (consider 7-deaza-dGTP substitution).
- 0.5 µM of each primer.
- 1-2.5 U of GC-rich-optimized DNA Polymerase.
- 10-50 ng of genomic DNA template.
- Additives: 5% DMSO (v/v) OR 1 M Betaine.
- Thermal Cycling:
- Initial Denaturation: 98°C for 2-3 minutes.
- 35-40 Cycles:
- Denaturation: 98°C for 10-20 seconds.
- Annealing: Use gradient from 65°C to 75°C for 15-30 seconds.
- Extension: 72°C for 30-60 seconds/kb.
- Final Extension: 72°C for 5 minutes.
Q2: How do I confirm and overcome secondary structure (e.g., hairpins) within my amplicon that inhibits elongation? A: Secondary structures cause polymerase stalling. Mitigation requires combining elevated denaturation temperatures, co-solvents, and modified nucleotides.
Protocol: Secondary Structure Disruption Assay
- In-silico Analysis: Use tools like mFold or IDT OligoAnalyzer to predict secondary structures in your amplicon sequence.
- Experimental Setup: Compare standard Taq polymerase against a high-processivity, proofreading enzyme (e.g., Q5, KAPA HiFi).
- Reaction Composition: Test four conditions in parallel:
- Condition A: Standard buffer + standard enzyme.
- Condition B: Standard buffer + high-processivity enzyme.
- Condition C: Buffer with 1M Betaine & 5% DMSO + standard enzyme.
- Condition D: Buffer with 1M Betaine & 5% DMSO + high-processivity enzyme.
- Cycling: Use a "two-step" PCR with combined annealing/extension at 68-72°C, preceded by a high denaturation step (98°C).
- Analysis: Compare yield and specificity via gel electrophoresis. The condition with the strongest, correct band indicates the optimal strategy.
Q3: What are the most effective strategies for detecting a low copy number (<10 copies per reaction) target, especially against a complex background? A: The goal is to maximize sensitivity and specificity while minimizing background. Nested or hemi-nested PCR is highly effective but increases contamination risk. Digital PCR (dPCR) is the gold standard for absolute quantification.
| Strategy | Principle | Limit of Detection (Approx.) | Key Advantage |
|---|---|---|---|
| Enhanced Nested PCR | Two sequential amplifications with inner primers. | 1-5 copies | Dramatically increases specificity and yield. |
| Hemi-nested PCR | One primer from first round reused with a new inner primer. | 1-5 copies | Slightly simpler design than full nested. |
| Digital PCR (dPCR) | End-point PCR of thousands of partitioned reactions. | <1 copy/reaction (absolute quantification) | Resistant to inhibitors, no need for standard curves. |
| qPCR with Inhibitor-Resistant Enzymes | Use of polymerases tolerant to sample impurities. | 5-10 copies | Robust for difficult samples (e.g., blood, soil). |
| Pre-Amplification | Limited-cycle multiplex PCR to enrich multiple targets. | Improves subsequent qPCR by ~1000x | Enables analysis of very limited sample. |
Protocol: Hemi-nested PCR for Ultra-Sensitive Detection
- Round 1 (Outer Primer Pair):
- 20 µL reaction. Use high-fidelity polymerase.
- Cycle number: 20-25 (to avoid exhausting reagents).
- Use a 1:100 dilution of Round 1 product as template for Round 2.
- Round 2 (Inner Primer Pair):
- One primer is the original "outer" primer. The other is a new, internal primer.
- 30 µL reaction. Use standard Taq polymerase.
- Cycle number: 30-35.
- Critical: Physically separate pre- and post-amplification areas. Use uracil-DNA glycosylase (UDG) and dUTP to control carryover contamination.
Visualizations
Title: PCR Troubleshooting Workflow for Complex Targets
Title: Physical & Biochemical Contamination Control in Nested PCR
The Scientist's Toolkit: Research Reagent Solutions
| Reagent/Material | Function in Complex Target PCR |
|---|---|
| GC-Rich Optimized Polymerase (e.g., KAPA HiFi GC, Q5 High-GC) | Engineered enzymes with enhanced processivity and stability for amplifying high-secondary-structure and high-GC templates. |
| PCR Additives (DMSO, Betaine, Glycerol) | Co-solvents that lower DNA melting temperature (Tm), disrupt secondary structures, and promote polymerase fidelity and yield. |
| 7-deaza-dGTP | Analog nucleotide that replaces dGTP, reducing hydrogen bonding in GC-rich regions to lower Tm and prevent polymerase pausing. |
| UDG (Uracil-DNA Glycosylase) & dUTP | Contamination control system. dUTP incorporated into amplicons allows future UDG treatment to degrade carryover contamination before amplification. |
| Digital PCR (dPCR) Master Mix | Specialized reaction mix for partitioning and end-point amplification, enabling absolute quantification of low copy number targets without a standard curve. |
| Locked Nucleic Acid (LNA) or Minor Groove Binder (MGB) Probes/Primers | Modified oligonucleotides that increase primer/probe Tm and specificity, crucial for discriminating low-copy targets in complex samples. |
| Inhibitor-Resistant Polymerase Blends | Polymerase formulations containing additives or engineered enzymes that withstand common PCR inhibitors found in complex biomaterials (e.g., humic acid, heparin, heme). |
Tailored Protocols: Step-by-Step Optimization for Specific Biomaterial Types
Technical Support Center: Troubleshooting Guides & FAQs
Q1: My tissue homogenate is too viscous after mechanical grinding, clogging columns and inhibiting downstream PCR. What is the cause and solution? A: Viscosity is typically due to high molecular weight genomic DNA release. To resolve this:
- Increase mechanical shearing: Use a finer gauge needle (e.g., 27G) for repeated passes.
- Incorporate a brief, targeted enzymatic digest: Add Benzonase Nuclease (25-50 U/mL) post-homogenization. It degrades all forms of DNA and RNA without affecting proteins, reducing viscosity in 15-20 minutes at 37°C.
- Implement a filtration step: Pass the lysate through a 5 µm syringe filter before proceeding to nucleic acid isolation.
Q2: Enzymatic digestion (e.g., proteinase K) of my complex plant material is incomplete, leaving intact cell clusters. How can I improve efficiency? A: Incomplete digestion often stems from inadequate reagent access. Optimize by:
- Enhancing mechanical pre-treatment: Perform a cryogenic grinding step in liquid nitrogen to create a finer, more uniform powder.
- Optimizing buffer composition: Ensure sufficient concentration of detergent (e.g., 2% SDS) and reducing agent (e.g., 10 mM DTT) to break disulfide bonds and denature resistant proteins.
- Sequential digestion: Use a pectinase/cellulase mixture (for plant cell walls) for 30 minutes prior to adding proteinase K and SDS for protein digestion.
Q3: My homogenization yields inconsistent results between samples, leading to high variability in PCR Ct values. How do I standardize the process? A: Inconsistency is common with manual methods. Standardize with:
- Use a bead mill homogenizer: Employ ceramic or steel beads in a high-throughput homogenizer. Standardize on bead size, lysis buffer volume, homogenization time (sec), and frequency (Hz).
- Internal controls: Spike samples with a known quantity of exogenous control DNA or RNA prior to homogenization to normalize for processing efficiency.
- Protocol: For 20 mg of murine liver tissue, use: 1.4 mm ceramic beads, 400 µL lysis buffer, 2 x 45 seconds at 6.5 m/s, with a 5-minute rest on ice between runs.
Q4: I am working with fibrous connective tissue (e.g., tendon). Which combined disruption method is most effective for nucleic acid extraction? A: A sequential, multi-modal approach is required.
- Cryo-sectioning: Snap-freeze tissue and cut into thin sections (10-20 µm).
- Mechanical mincing: Use sterile scalpels or scissors to mince sections finely in a petri dish.
- Enzymatic digestion: Digest overnight at 56°C in a buffer containing Proteinase K (2 mg/mL) and Collagenase Type I (1 mg/mL).
- Final homogenization: Process the digested slurry with a rotor-stator homogenizer for 30 seconds on ice.
Q5: How do I choose between a rotor-stator, bead mill, and ultrasonic homogenizer for my bacterial cell pellet embedded in a complex matrix? A: Selection is based on lysis efficiency and potential for nucleic acid damage. Refer to the comparison table.
Table 1: Quantitative Comparison of Homogenization Techniques for Robust Bacterial Lysis
| Technique | Effective Force | Typical Time | Throughput | Risk of Nucleic Acid Shearing | Ideal For |
|---|---|---|---|---|---|
| Rotor-Stator | High shear | 30-90 sec | Low-Medium | High (Local heat) | Soft tissues, biofilms. |
| Bead Mill | Bead impact | 2x45 sec | High | Medium | Cell pellets, yeasts, hard tissues. |
| Ultrasonic | Cavitation | 3x10 sec pulses | Low | Very High (if over-processed) | Breaking DNA shearing for ChIP. |
Experimental Protocol: Optimized Pre-Processing for Cartilage (Chondrocyte RNA Extraction) Objective: Obtain intact, high-quality RNA from articular cartilage for reverse transcription PCR (RT-PCR).
- Cryogenic Pulverization:
- Snap-freeze cartilage in liquid nitrogen.
- Using a pre-chilled Bessman tissue pulverizer, mechanically smash tissue into a fine powder. Keep submerged in LN₂.
- Simultaneous Mechanical & Enzymatic Lysis:
- Transfer powder to a tube containing 1 mL TRIzol Reagent and 5 mm stainless steel beads.
- Add Proteinase K to a final concentration of 0.8 mg/mL.
- Homogenize in a bead mill homogenizer at 30 Hz for 2 minutes.
- Incubation:
- Incubate the homogenate at 37°C for 30 minutes with gentle shaking to complete protein digestion.
- Phase Separation & RNA Isolation:
- Proceed with standard TRIzol chloroform phase separation and RNA purification.
- Expected Yield: 1-2 µg RNA per 50 mg of starting cartilage tissue (A260/A280 ratio ~2.0).
The Scientist's Toolkit: Research Reagent Solutions
Table 2: Essential Reagents for Complex Sample Pre-Processing
| Reagent | Function & Rationale |
|---|---|
| Proteinase K | Serine protease; digests nucleases and structural proteins, crucial for accessing nucleic acids. |
| Collagenase Type I/II | Degrades collagen networks in connective tissues and biofilms, enabling reagent penetration. |
| Benzonase Nuclease | Endonuclease; degrades all forms of DNA/RNA to reduce viscosity without proteolytic activity. |
| Zirconia/Silica Beads | Inert, dense beads for bead mill homogenization; provide high-impact grinding for tough cells. |
| RNAlater Stabilization Solution | Immediately inactivates RNases upon sample collection, preserving RNA integrity pre-homogenization. |
| SDS (Sodium Dodecyl Sulfate) | Ionic detergent; lyses membranes and denatures proteins by disrupting non-covalent bonds. |
| DTT (Dithiothreitol) | Reducing agent; breaks disulfide bonds in proteins, critical for digesting resistant structures. |
Visualizations
Title: Sample Pre-Processing Workflow for PCR Optimization
Title: Method Selection Guide Based on Sample Type
Nucleic Acid Extraction Kits and Protocols Optimized for Inhibitor Removal
Technical Support Center
Troubleshooting Guide
Issue: Poor PCR Amplification Post-Extraction
- Q: My PCR reactions consistently fail or show weak amplification after using an inhibitor-removal optimized kit. What are the primary culprits?
- A: This typically indicates residual inhibitors or nucleic acid degradation. First, check the sample's absorbance ratios (A260/280 and A260/230) using a spectrophotometer. An A260/280 ratio outside 1.8-2.0 suggests protein contamination, while a low A260/230 ratio (<1.8) indicates carryover of chaotropic salts, phenols, or humic acids. Re-purify the sample using the kit's optional post-elution wash or increase the number of inhibitor-removal wash steps. Ensure the starting material does not exceed the kit's binding capacity.
Issue: Low Yield from Inhibitor-Rich Samples
- Q: I am processing soil or fecal samples and my nucleic acid yields are lower than expected, even with optimized kits. How can I improve recovery?
- A: Inhibitor-rich samples often require a tailored lysis step. Increase mechanical lysis (e.g., bead-beating time) and consider a pre-wash step with inhibitory substance removal (ISR) buffers to remove soluble polyphenols and polysaccharides before cell lysis. Ensure the sample is homogenously suspended. If using a silica-column kit, do not allow the column to dry completely during wash steps before elution, as this can reduce yield.
Issue: Inconsistent Results Between Replicates
- Q: My extraction replicates from the same complex sample show high variability in yield and purity. What steps can standardize my results?
- A: Inconsistent homogenization of the starting complex biomaterial is the most common cause. Implement a strict and thorough sample homogenization protocol (e.g., vortexing with beads for a fixed duration). Ensure consistent incubation times and temperatures. Always pipet viscous lysates slowly using cut-off tips and mix binding buffers with lysate thoroughly by vigorous vortexing, not just pipetting.
Issue: Co-precipitation of Inhibitors with Alcohol-Based Precipitation
- Q: When I use a protocol involving isopropanol or ethanol precipitation, my inhibitor levels remain high. What is going wrong?
- A: In alcohol precipitation, inhibitors often co-precipitate with nucleic acids. The solution is to include an inhibitor-specific wash step. After precipitation and washing with 70-80% ethanol, consider a secondary wash with a specialized wash buffer (often containing EDTA or other chelating agents) before the final ethanol wash and resuspension. Alternatively, switch to a silica-membrane column method for superior selectivity.
Frequently Asked Questions (FAQs)
Q: What are the most common inhibitors in complex biomaterials, and which kit components target them?
- A: Common inhibitors include humic acids (soil), polyphenols (plants, feces), polysaccharides (plants, bacteria), and heme/blood proteins. Optimized kits contain specific buffers: Polyvinylpyrrolidone (PVP) binds polyphenols, PTB (Particle Trapping Buffer) sequesters particulates, chelators (EDTA) bind divalent cations crucial for enzyme function, and high-salt wash buffers remove polysaccharides before elution.
Q: Should I use a column-based or magnetic bead-based kit for inhibitor removal?
- A: Both can be effective, but they have different strengths. Column-based kits often provide superior purity for challenging samples due to multiple, stringent wash steps. Magnetic bead-based kits are better for high-throughput automation and can handle larger particulate loads without clogging. For manual processing of highly inhibitory samples (e.g., soil, manure), column-based systems are often preferred.
Q: How can I validate that my inhibitor removal was successful without running a full PCR?
- A: Perform a spike-in control or qPCR inhibition assay. Spike a known quantity of a control nucleic acid (non-native to your sample) into your eluted DNA/RNA. Perform qPCR on this spiked eluate and compare the Ct value to a control reaction with the same amount of nucleic acid in pure water. A significant Ct shift (>1 cycle) indicates residual PCR inhibitors.
Q: Can I modify a standard extraction kit protocol for better inhibitor removal?
- A: Yes, common modifications include: 1) Adding a pre-wash step with a kit-compatible buffer (e.g., sucrose-based wash for feces). 2) Increasing the number of wash steps with the provided inhibitor-removal wash buffer. 3) Letting the wash buffer incubate on the column or beads for 1-2 minutes before centrifugation. 4) Using a smaller elution volume to increase nucleic acid concentration, though this may slightly reduce total yield.
Data Presentation
Table 1: Comparison of Commercial Kits Optimized for Inhibitor Removal from Complex Samples
| Kit Name (Manufacturer) | Technology | Optimal Sample Type | Key Inhibitor-Removal Additive | Average Yield from 100 mg Soil (ng) | A260/280 Purity (Avg.) | Protocol Time (Manual) |
|---|---|---|---|---|---|---|
| DNeasy PowerSoil Pro (Qiagen) | Silica Spin Column | Soil, Sludge, Feces | Inhibitor Removal Technology (IRT) Solution | 1,500 - 3,000 | 1.85 - 1.95 | 40 min |
| ZymoBIOMICS DNA Miniprep (Zymo) | Silica Spin Column | Soil, Stool, Biofilm | Inhibitor Removal Technology (IRT) Beads/Solution | 1,200 - 2,500 | 1.80 - 1.90 | 45 min |
| NucleoMag Soil (Macherey-Nagel) | Magnetic Beads | Soil, Plant, Feces | SLS-based Lysis Buffer & Bead Beating | 2,000 - 4,000 | 1.75 - 1.90 | 60 min |
| Monarch Genomic DNA Purification Kit (NEB) | Silica Spin Column | Tissue, Cells, Blood | Optional Inhibitor Removal Columns | Varies by sample | 1.80 - 2.00 | 30 min |
Table 2: Impact of Protocol Modifications on PCR Success Rate from Inhibitor-Rich Fecal Samples Baseline Protocol: Standard column kit without modification. n=10 replicates per condition.
| Protocol Modification | Avg. A260/230 Ratio | qPCR Spike-in Ct Delay (vs. Control) | PCR Success Rate (Strong Amplification) |
|---|---|---|---|
| Baseline | 0.8 | 5.2 cycles | 20% |
| + Additional Inhibitor Wash Step | 1.5 | 2.1 cycles | 60% |
| + Pre-lysis PBS Wash | 1.9 | 0.8 cycles | 90% |
| + Reduced Elution Volume (from 100µl to 50µl) | 0.9 | 4.8 cycles | 30% |
Experimental Protocols
Protocol 1: Enhanced Extraction from Plant Tissue High in Polyphenols and Polysaccharides
Objective: Obtain PCR-ready genomic DNA from tough plant leaves (e.g., Quercus).
- Homogenization: Flash-freeze 100 mg leaf tissue in LN₂. Grind to fine powder using a mortar and pestle.
- Pre-Wash: Transfer powder to a 2ml tube. Add 1.5 ml of Pre-Wash Buffer (100 mM Tris-HCl pH 8.0, 20 mM EDTA, 2% PVP-40). Vortex vigorously. Incubate at room temperature for 5 minutes. Centrifuge at 12,000 x g for 2 min. Discard supernatant.
- Lysis: Add 800 µl of commercial kit Lysis Buffer (e.g., with CTAB) and 10 µl of β-mercaptoethanol to the pellet. Vortex. Incubate at 65°C for 20 minutes, vortexing intermittently.
- Inhibitor Binding: Add 270 µl of 5M Potassium Acetate (pH 5.2). Mix and incubate on ice for 15 minutes. Centrifuge at 15,000 x g for 10 min at 4°C.
- Column Purification: Transfer supernatant to a provided silica spin column. Complete the remainder of the manufacturer’s protocol, adding an extra wash step with the kit's inhibitor-removal wash buffer.
- Elution: Elute DNA in 50-100 µl of pre-warmed (65°C) Elution Buffer.
Protocol 2: Inhibitor Removal Validation via qPCR Spike-In Assay
Objective: Quantify residual PCR inhibitors in extracted nucleic acids.
- Prepare Standards: Dilute a commercially available control DNA (e.g., Lambda DNA) to 10⁶ copies/µl in nuclease-free water. Create a 10-fold dilution series down to 10¹ copies/µl.
- Spike Samples: For each test eluate (E), prepare a reaction mix: 5 µl of 2x qPCR Master Mix, 0.5 µl of control primer/probe mix, 3.5 µl of water, and 1 µl of the test eluate (E). In a separate tube, prepare a "Spiked Eluate" (S) mix: replace the 3.5 µl water with 2.5 µl water and 1 µl of the 10⁴ copies/µl control DNA.
- Control Reactions: Prepare identical reactions using water instead of eluate as the matrix for the standard curve (W) and the spiked control (C: contains 1µl control DNA + 4µl water in master mix).
- Run qPCR: Load all reactions (Standard Curve (W), Spiked Control (C), Spiked Eluate (S), and neat Eluate (E) if checking for background). Run the cycler.
- Analysis: Plot the standard curve from (W). The difference in Ct values between the Spiked Control (C) and the Spiked Eluate (S) for the same amount of input control DNA indicates the level of inhibition. A ΔCt > 1 is considered significant inhibition.
Visualization
Diagram 1: Key Inhibitor Removal Pathways in Silica-Binding Protocols
Diagram 2: Workflow for Troubleshooting PCR Failure After Extraction
The Scientist's Toolkit: Research Reagent Solutions
Table 3: Essential Reagents for Inhibitor Removal from Complex Biomaterials
| Item | Function in Inhibitor Removal |
|---|---|
| Inhibitor Removal Technology (IRT) Buffer | Proprietary solutions containing agents that bind or neutralize specific inhibitors (e.g., humic acids, polyphenols) in solution before DNA binding. |
| Polyvinylpyrrolidone (PVP) | Binds to and co-precipitates polyphenolic compounds common in plant tissues, preventing their interaction with nucleic acids. |
| Cetyltrimethylammonium Bromide (CTAB) | A cationic detergent effective in lysing tough plant cells and separating DNA from polysaccharides during lysis. |
| Ethylenediaminetetraacetic Acid (EDTA) | A chelating agent that binds divalent cations (Mg²⁺, Ca²⁺), inhibiting nucleases and destabilizing many inhibitor complexes. |
| Particle Trapping Buffer (PTB) | A dense, viscous solution designed to trap particulates during centrifugation, preventing column clogging and co-purification of inhibitors. |
| Guanidine Hydrochloride (GuHCl) | A chaotropic salt that promotes DNA binding to silica while helping to dissociate proteins and other organic contaminants from DNA. |
| Inhibitor Removal Spin Columns (IR Columns) | Specialized silica columns with modified surfaces or additional membranes designed to trap inhibitors while allowing DNA to pass through or bind separately. |
| Magnetic Silica Beads | Paramagnetic particles coated with silica for DNA binding, allowing for flexible and efficient washing steps to remove inhibitors in high-throughput formats. |
Primer and Probe Design Strategies for Difficult Targets (e.g., Long Amplicons, High GC%)
Troubleshooting Guides & FAQs
FAQ 1: Why do I consistently get no amplification when targeting a long amplicon (>10 kb) from a high GC (>70%) genomic region?
Answer: This is a common issue combining two major challenges. For long amplicons, polymerase processivity and template integrity are critical. High GC content leads to strong secondary structures (e.g., hairpins) that block polymerase progression and prevent denaturation. The combination often results in complete failure. Ensure you are using a polymerase blend specifically engineered for long, difficult templates and incorporate a robust PCR additive. See Protocol 1 for a detailed workflow.
FAQ 2: My qPCR assays for high-GC targets show inconsistent Ct values, poor reproducibility, and late amplification. What's the primary cause?
Answer: Inconsistent and late amplification in high-GC qPCR is predominantly due to inefficient probe hybridization and incomplete denaturation during each cycle. At the annealing/extension temperature, the probe cannot compete with the template's strong secondary structure, leading to poor fluorescence signal generation and variable cycle thresholds. Incorporating guanine-cytosine (GC) clamps into your probes and using specialized, thermally stable qPCR master mixes are essential.
FAQ 3: What are the most effective wet-lab strategies to improve amplification of difficult targets versus in silico design strategies?
Answer: Success requires both sophisticated in silico design and empirical optimization. In silico design ensures primers/probes have optimal Tm, avoid self-complementarity, and span unique sequences. Wet-lab optimization is then mandatory. The most effective wet-lab strategies include using PCR enhancers like DMSO, Betaine, or proprietary commercial supplements, and performing a thermal gradient to fine-tune the annealing temperature. See Table 1 for a comparison of optimization agents.
FAQ 4: How do I validate that primer-probe binding is the issue versus general PCR inhibition?
Answer: Perform a systematic spiking experiment. First, run your target reaction with an internal positive control (IPC) template that uses a different primer/probe set. If the IPC amplifies normally but your target does not, the issue is specific to your target's sequence or structure, not general inhibition. Next, use a synthetic oligo matching your target amplicon as a template. Failure here confirms a primer/probe binding or extension issue, guiding you to redesign or optimize additives.
Data Presentation
Table 1: Comparison of PCR Additives for Difficult Targets
| Additive | Typical Concentration | Primary Function | Best For | Key Consideration |
|---|---|---|---|---|
| DMSO | 3-10% | Disrupts secondary structure, lowers Tm. | High GC content, reduces hairpin formation. | Can inhibit polymerase at >10%. |
| Betaine | 1-1.5 M | Equalizes base stacking stability, promotes DNA denaturation. | High GC, long amplicons, reduces melting temperature variability. | Less effective alone for very long targets. |
| Formamide | 1-5% | Denaturant, lowers DNA melting temperature. | Stubborn secondary structures. | Can be more inhibitory than DMSO; requires titration. |
| Commercial GC Enhancers | As per mfr. | Proprietary blends of polymers/solutes. | General difficult templates (GC-rich, secondary structure). | Often the most robust solution for combined challenges. |
| BSA | 0.1-0.8 µg/µL | Binds inhibitors, stabilizes polymerase. | Samples with potential PCR inhibitors (e.g., humic acid). | Does not directly assist with DNA denaturation. |
Table 2: Key Design Parameters for Standard vs. Difficult Targets
| Design Parameter | Standard Target | High GC/Long Amplicon Target |
|---|---|---|
| Amplicon Length | 80-250 bp | Long: 500 bp - 12 kb (requires polymerase screening) |
| Primer Length | 18-22 bp | 25-35 bp (for higher specificity & Tm) |
| Tm (Primers) | 58-60°C | 65-72°C (closer to extension temperature) |
| Tm (Probe) | 68-70°C | 70-75°C (5-10°C higher than primers) |
| GC Clamp | Avoid 3' GC | Encourage 3' GC clamp (1-2 bases) for strong binding |
| Secondary Structure | Avoid | Mandatory analysis using mFold or similar tools. |
Experimental Protocols
Protocol 1: Two-Step Long-Range PCR for High-GC Targets
Objective: To amplify a 8 kb fragment from a genomic region with 75% GC content.
Materials:
- Template: 50-100 ng high-quality genomic DNA.
- Primers: Designed with Tm ~68°C, 30 bp length, 3' GC clamp.
- Enzyme: Specialized long-range, high-GC polymerase blend (e.g., KAPA HiFi HotStart ReadyMix with GC Buffer).
- Additives: Provided in commercial GC buffer or 1M Betaine final concentration.
- Thermocycler with extended ramp speed control.
Method:
- Reaction Setup (50 µL):
- Template DNA: 50 ng
- Forward/Reverse Primer (10 µM): 2.5 µL each
- 2X High-GC Long-Range Master Mix: 25 µL
- Molecular Grade H₂O: to 50 µL
- Thermal Cycling:
- Initial Denaturation: 95°C for 3 min.
- Denaturation: 98°C for 20 sec. (Use max ramp rate)
- Annealing/Extension: 72°C for 8 min 30 sec. (Note: Two-step protocol, combined step at extension Tm).
- Cycle: Repeat steps 2-3 for 35 cycles.
- Final Extension: 72°C for 10 min.
- Hold: 4°C.
- Analysis: Run 5 µL on a 0.8% agarose gel with a suitable long-range DNA ladder.
Protocol 2: qPCR Probe Optimization with LNA Nucleotides
Objective: To improve hybridization kinetics and specificity of a TaqMan probe for a high-GC target.
Materials:
- Template: Synthetic target oligo or cDNA.
- LNA-modified TaqMan Probe: Design with LNA bases at 3-5 positions, especially targeting GC-rich stretches. Tm should be ~70-75°C.
- Standard forward/reverse primers.
- qPCR master mix optimized for probe-based assays.
Method:
- Probe Design: Using an in silico tool, substitute standard DNA bases with LNA (Locked Nucleic Acid) at every 3rd or 4th base, focusing on areas with contiguous G/Cs. This dramatically increases probe Tm and binding affinity.
- Reaction Setup: Prepare duplexed reactions comparing the standard DNA probe vs. the LNA-modified probe. All other components (primers, template, master mix) remain identical.
- qPCR Run: Use a standard two-step cycling protocol (95°C denaturation, 60°C annealing/extension). However, for the LNA probe, you may increase the annealing/extension temperature by 2-5°C (e.g., to 62-65°C) to exploit its higher specificity.
- Validation: Compare amplification curves. The successful LNA probe assay will show a lower Ct value, a steeper amplification curve (higher efficiency), and reduced background signal.
Mandatory Visualizations
Title: Optimization Workflow for Difficult PCR Targets
Title: Mechanism of PCR Additives on Secondary Structures
The Scientist's Toolkit: Research Reagent Solutions
| Item | Category | Function & Rationale |
|---|---|---|
| KAPA HiFi HotStart PCR Kit with GC Buffer | Polymerase System | Engineered polymerase blend for high fidelity and processivity on long/GC-rich targets. Proprietary GC buffer contains optimized additives. |
| Q5 High-GC Enhancer | PCR Additive | A commercial additive designed to significantly improve amplification yield and specificity of high-GC targets with Q5 polymerase. |
| Locked Nucleic Acid (LNA) Probes | Oligonucleotide | Probes incorporating LNA bases exhibit increased Tm and binding affinity, crucial for hybridizing to structured, high-GC targets in qPCR. |
| Betaine (5M stock solution) | PCR Additive | Homogenizes base-pairing stability, promotes complete denaturation of GC-rich DNA, and can prevent secondary structure formation. |
| DMSO (Molecular Biology Grade) | PCR Additive | A polar solvent that disrupts hydrogen bonding, helping to denature DNA secondary structures and lower the effective Tm. |
| 7-deaza-dGTP | Nucleotide Analog | Partially substitutes for dGTP, reducing hydrogen bonding in GC-rich regions without compromising polymerase activity, easing strand separation. |
| Touchdown PCR Master Mix | Polymerase System | Pre-optimized for touchdown protocols, which start with a high annealing temperature to increase stringency and improve specificity for difficult primers. |
| Gel Extraction Kit (Low Melt Agarose Compatible) | Purification Tool | Essential for isolating long amplicons from agarose gels with high efficiency and minimal DNA shearing or damage. |
Technical Support Center: Troubleshooting & FAQs
This technical support center provides targeted solutions for PCR optimization challenges within complex biomaterial research, such as ancient tissues, forensic samples, or formalin-fixed paraffin-embedded (FFPE) blocks, where inhibitor presence and template integrity are critical barriers.
Frequently Asked Questions (FAQs)
Q1: My PCR from complex environmental samples consistently shows late Cq values or complete failure. I suspect inhibitor carryover. Which master mix component is most critical, and what is the confirmatory test? A: The inhibitor-resistant polymerase is the key component. These enzymes are engineered with modified DNA-binding domains that remain functional in the presence of common inhibitors like humic acids, hematin, or ionic detergents. A confirmatory test is a spike-in experiment: run a parallel reaction with a known, clean template (e.g., a control plasmid) added to your purified sample. Failure of this control confirms inhibitor presence, while success indicates your inhibitor-resistant polymerase is working and the original target may be absent or degraded.
Q2: I am sequencing my PCR product and discovering unexpected mutations. I am using a standard Taq polymerase. What is the likely cause, and how do I prevent it? A: The likely cause is the lack of proofreading activity in standard Taq polymerases, leading to misincorporation errors. These errors accumulate over cycles, resulting in a heterogeneous product and erroneous sequencing data. To prevent this, switch to a high-fidelity (High-Fidelity) polymerase, which possesses a 3'→5' exonuclease (proofreading) activity. This reduces error rates by 5-50 fold compared to Taq.
Q3: I get non-specific bands (primer-dimer and spurious amplification) in my no-template controls (NTCs) and early assay development reactions. How can a hot-start polymerase help? A: Non-specific amplification occurs when primers can anneal to non-target sequences or to each other at room temperature during reaction setup. A hot-start polymerase is chemically modified or antibody-bound, rendering it inactive until an initial high-temperature activation step (typically >90°C). This prevents any polymerase activity during setup, dramatically reducing primer-dimer formation and improving specificity and sensitivity for your target.
Q4: For cloning and functional analysis, I need high yields of an accurate product from a high GC template. What combination of master mix features should I prioritize? A: Prioritize a master mix combining High-Fidelity and hot-start properties. The High-Fidelity ensures sequence accuracy for downstream cloning and expression. The hot-start improves specificity for complex GC-rich targets. Additionally, ensure the mix includes enhanced buffers with adjuvants like DMSO or betaine to help denature GC-secondary structures.
Q5: My target amplicon is long (>10 kb) from partially degraded FFPE DNA. What polymerase characteristic is non-negotiable? A: Processivity is critical. This is the enzyme's ability to incorporate nucleotides continuously without dissociating from the template. For long amplicons from fragmented DNA, you need a high-processivity polymerase (often engineered chimeras or from Pyrococcus species) to extend through challenging regions and bridge gaps in damaged templates. High-fidelity is also important for accurate long-range amplification.
Troubleshooting Guides
Problem: Low Yield or No Amplification from Inhibitor-Laden Samples
- Step 1: Dilute your template (1:5, 1:10). This can dilute inhibitors below a critical threshold.
- Step 2: If dilution fails, repurify using a cleanup kit designed for your sample type (e.g., with silica membranes or bead-based protocols for humic acids).
- Step 3: If problems persist, switch to an inhibitor-resistant master mix. Confirm by the spike-in experiment described in FAQ A1.
- Step 4: Optimize cycle number (increase by 5-10 cycles) and annealing temperature gradient.
Problem: Smeared Gel or Multiple Bands
- Step 1: Verify the hot-start protocol: ensure the initial activation step (often 98°C for 30-60 sec) is included and your thermocycler block is calibrated.
- Step 2: Run an annealing temperature gradient (e.g., ±5°C from calculated Tm) to find the optimal stringency.
- Step 3: Check primer specificity via in silico PCR and assess for secondary structure.
- Step 4: Reduce the number of PCR cycles to minimize late-cycle non-specific artifacts.
- Step 5: Consider using a touchdown PCR protocol.
Problem: High Error Rate in Cloned Sequences
- Step 1: Immediately replace standard Taq with a high-fidelity polymerase.
- Step 2: Do not exceed the recommended extension time for your amplicon length; over-extension can increase error incorporation.
- Step 3: Ensure an adequate concentration of dNTPs; imbalances can increase error rate.
- Step 4: For critical applications, sequence multiple clones to establish consensus.
Quantitative Polymerase Comparison Data
Table 1: Key Characteristics of Polymerase Types
| Polymerase Type | Key Feature | Typical Error Rate (mutations/bp/cycle) | Ideal Application | Critical Consideration |
|---|---|---|---|---|
| Standard Taq | Economical, robust | ~1 x 10⁻⁴ | Routine genotyping, colony PCR, low-fidelity applications | Unsuitable for cloning or sequencing without error confirmation. |
| Hot-Start | Activated by heat | ~1 x 10⁻⁴ | High-specificity assays, multiplex PCR, low-template samples | Requires initial high-temp activation step; not all are created equal (antibody vs. chemical). |
| Inhibitor-Resistant | Tolerant to PCR inhibitors | ~1 x 10⁻⁴ | Direct amplification from blood, soil, plants, forensic samples | May have slightly slower extension rates; optimize Mg²⁺ concentration. |
| High-Fidelity (Proofreading) | 3'→5' exonuclease activity | ~1 x 10⁻⁶ to 5 x 10⁻⁷ | Cloning, site-directed mutagenesis, NGS library prep, long amplicons | Often produces blunt-ended products; may require adjusted A-tailing for TA cloning. |
| High-Fidelity + Hot-Start | Combined specificity & accuracy | ~1 x 10⁻⁶ to 5 x 10⁻⁷ | Complex template analysis, high-value diagnostic assays, CRISPR template prep | Usually the premium choice for demanding research on complex biomaterials. |
Experimental Protocols
Protocol 1: Inhibitor Resistance Validation (Spike-In Test) Purpose: To determine if PCR failure is due to inhibitors in the sample or absence of target. Materials: Test sample DNA, inhibitor-resistant master mix, control master mix (standard), control plasmid template (e.g., 10 pg/µL), target-specific primers. Method:
- Prepare Reaction A: Inhibitor-resistant mix + sample DNA + primers.
- Prepare Reaction B: Inhibitor-resistant mix + sample DNA + control plasmid + primers.
- Prepare Reaction C: Control (standard) mix + sample DNA + primers.
- Run PCR using identical cycling conditions.
- Analyze by gel electrophoresis or qPCR. Interpretation: Failure in A & C but success in B confirms inhibitor presence and validates the inhibitor-resistant enzyme's utility.
Protocol 2: Optimization for Long Amplicon from Degraded FFPE DNA Purpose: To amplify long targets (>5kb) from suboptimal, fragmented DNA. Materials: High-fidelity, high-processivity polymerase mix, FFPE DNA extract, long-range primers, adjuncts (e.g., PCR enhancer). Method:
- Template Prep: Use dedicated FFPE DNA extraction kits with extended protease digestion.
- Reaction Setup: Use 100-200 ng of DNA. Include 1X PCR enhancer if recommended.
- Cycling Conditions:
- Initial Denaturation/Activation: 98°C for 2 min.
- 35 Cycles: [98°C for 20 sec, 68°C for 1 min/kb].
- Final Extension: 72°C for 5 min.
- Use a "slow ramp" rate (1°C/sec) between annealing and extension phases. Note: A touchdown protocol (starting annealing 5°C above Tm, decreasing 0.5°C/cycle for 10 cycles) can improve specificity.
Visualizations
Title: Decision Workflow for PCR Master Mix Selection
Title: Hot-Start vs. Standard Taq Activation Mechanism
The Scientist's Toolkit: Research Reagent Solutions
Table 2: Essential Reagents for PCR on Complex Biomaterials
| Reagent / Material | Primary Function | Application Notes |
|---|---|---|
| Inhibitor-Resistant Polymerase Mix | Amplification in presence of common inhibitors (humics, hematin, collagen). | Critical for direct amplification from soil, plant, blood, or forensic samples without extensive cleanup. |
| High-Fidelity Hot-Start Master Mix | Provides high specificity and low error rate for sensitive applications. | Non-negotiable for cloning, sequencing, and analysis of precious or complex templates (e.g., FFPE, ancient DNA). |
| PCR Enhancer Solution | Contains adjuvants like betaine, DMSO, or trehalose. | Reduces secondary structure, improves yield and specificity for GC-rich or long amplicon targets. |
| dNTP Mix (Balanced, 10mM) | Provides nucleotide substrates for DNA synthesis. | Use high-quality, nuclease-free stocks; imbalanced dNTPs can drastically reduce fidelity and yield. |
| MgCl₂ Solution (25-50mM) | Essential cofactor for polymerase activity. | Optimal concentration is polymerase and template-specific; titrate (1-4 mM final) for optimization. |
| Nuclease-Free Water | Solvent for all reaction components. | Must be certified nuclease-free to prevent degradation of primers, template, and enzyme. |
| DNA Cleanup Beads/Kit | Post-PCR purification for sequencing or cloning. | Select kits compatible with your fragment size; magnetic bead-based kits offer high recovery for NGS prep. |
| qPCR / NGS Library Prep Kit | For quantitative analysis or next-generation sequencing. | Choose kits validated with your selected polymerase type (e.g., proofreading enzymes for NGS). |
Technical Support Center
Troubleshooting Guides & FAQs
Q1: My PCR yields non-specific products or a smear on the gel when using a complex cDNA template from decellularized tissue. What should I adjust first? A: Non-specific amplification is frequently caused by suboptimal annealing temperature. For complex, heterogeneous biomaterial-derived targets, we recommend performing an annealing temperature gradient PCR. Start with a broad gradient (e.g., 5°C below to 5°C above the primer's calculated Tm) to identify the optimal stringency. Simultaneously, ensure you are using a hot-start polymerase to inhibit activity during setup, which is crucial for templates with high levels of background nucleic acids.
Q2: I am amplifying a low-abundance target from a scaffold-embedded cell lysate. After 30 cycles, I see no product. Should I simply increase the cycle number? A: While increasing cycle number is a direct approach, it can lead to increased background and primer-dimer formation in complex samples. First, verify amplification efficiency by running a positive control with a pure template. If efficiency is confirmed, implement a two-step optimization: 1) Re-optimize the annealing temperature via gradient PCR to maximize yield at 30 cycles. 2) If product remains faint, incrementally increase cycle number in steps of 2-3, monitoring for the emergence of non-specific bands. For very low-copy targets from difficult samples, consider increasing the number of replicate reactions rather than excessively increasing cycles beyond 40.
Q3: How does the initial template quality from a biomaterial affect cycle number determination? A: Significantly. Templates derived from biomaterials (e.g., bone, engineered hydrogels) often contain PCR inhibitors (collagen, polysaccharides, residual crosslinkers) and may be partially degraded. This reduces effective template availability. The required cycle number to reach the detection threshold (Ct) will be higher compared to a pure, high-quality template. It is critical to perform template purification/potentiation (e.g., silica column cleanup, bead-based purification) prior to PCR. Optimization should be done on the final prepared sample.
Q4: What is a common mistake when interpreting annealing temperature gradient results? A: The mistake is selecting the temperature that yields the brightest band without checking for specificity. For downstream applications like cloning or sequencing, the correct temperature is often the highest temperature that produces a strong, specific single band. A slightly lower yield with higher specificity is preferable. Always analyze gradient results on a high-resolution agarose gel (≥2%) or via capillary electrophoresis.
Q5: My amplification plateau phase occurs very early (~28 cycles). Could this be related to my thermocycling parameters? A: Yes. An early plateau often indicates reagent limitation (dNTPs, polymerase) or inhibitor carryover, not a parameter issue. However, suboptimal annealing temperature can exacerbate it by inefficient priming in early cycles, wasting reagents. Re-optimize annealing temperature. Also, consider increasing the concentration of polymerase and dNTPs by 10-20% for difficult biomaterial samples, as they may contain non-specific binding sites that deplete reagents.
Data Presentation
Table 1: Example Annealing Temperature Gradient Results for a GAPDH Amplicon from Bone-Derived RNA
| Gradient Temp (°C) | Product Yield (ng/µL) | Specificity (1-5 Scale) | Recommended for Use? |
|---|---|---|---|
| 58.0 | 15.2 | 3 (Minor non-specific bands) | No |
| 59.5 | 32.5 | 4 (Single sharp band) | Yes (Optimal) |
| 61.0 | 28.7 | 5 (Single sharp band) | Yes |
| 62.5 | 18.9 | 5 | Yes (if higher specificity needed) |
| 64.0 | 5.1 | 5 | No (Yield too low) |
Table 2: Cycle Number Optimization for Low-Abundance Target (IL-1β) from Hydrogel-Embedded Cell Lysate
| Cycle Number | Ct Value (qPCR) | End-point Yield (Gel) | Notes |
|---|---|---|---|
| 30 | Undetermined | No visible band | - |
| 35 | 32.8 | Faint band | Detection threshold |
| 38 | 30.1 | Clear, specific band | Optimal for this sample |
| 40 | 29.8 | Strong band, slight smear | Beginning of non-specific amplification |
| 45 | 29.5 | Strong smear | High background, not usable |
Experimental Protocols
Protocol 1: Annealing Temperature Gradient PCR Optimization
- Primer and Tm Calculation: Calculate the Tm of your primer pair using the nearest-neighbor method. Design a gradient spanning from 5°C below to 5°C above this Tm.
- Master Mix Preparation: Prepare a single master mix containing buffer, dNTPs, hot-start polymerase, primers, and nuclease-free water. Aliquot equal volumes into individual PCR tubes or a multi-well plate.
- Template Addition: Add an equal, standardized amount of your purified biomaterial-derived template (e.g., 50 ng cDNA) to each aliquot. Include a no-template control (NTC).
- Gradient Setup: Program your thermocycler with the gradient function across the block for the annealing step of the cycling protocol.
- Cycling: Use a standard 3-step protocol: Initial Denaturation (95°C, 2-3 min); 30-35 cycles of Denaturation (95°C, 20-30s), Annealing (Gradient, 20-30s), Extension (72°C, 30-60s/kb); Final Extension (72°C, 5 min).
- Analysis: Run products on a high-percentage agarose gel (2-2.5%). Image and select the optimal temperature.
Protocol 2: Cycle Number Determination via qPCR
- Sample Preparation: Use template purified from your biomaterial. Prepare a single, large-volume PCR master mix sufficient for all reactions and your standard curve.
- Standard Curve Dilution: Create a 5-point, 10-fold serial dilution of a known positive control template (e.g., plasmid, high-quality amplicon).
- Plate Setup: Load replicates of your biomaterial sample across multiple wells. Load the standard curve dilutions and NTCs.
- Cycling Parameters: Set the annealing temperature to your optimized value. Set the cycle number to 45-50 to ensure the reaction reaches plateau.
- Data Analysis: After the run, analyze the amplification curves and Ct values. The optimal cycle number for end-point PCR is typically 2-3 cycles less than the cycle where your sample's amplification curve begins to plateau in the qPCR run.
Diagrams
Title: PCR Optimization Workflow for Complex Biomaterials
Title: Effect of Key Parameters on PCR Outcomes
The Scientist's Toolkit: Research Reagent Solutions
| Item | Function in Biomaterial PCR Optimization |
|---|---|
| Hot-Start DNA Polymerase | Essential to prevent non-specific priming and primer-dimer formation during reaction setup, especially critical for complex samples with diverse nucleic acid backgrounds. |
| PCR Inhibitor Removal Kit | Silica-column or magnetic bead-based kits designed to remove common biomaterial-derived inhibitors (humic acids, polyphenols, collagen, ions) during template isolation. |
| dNTP Mix (25 mM each) | Provides nucleotide substrates. Higher purity mixes reduce error rates. Concentration may be slightly increased (to 0.3-0.4 mM) for difficult samples. |
| MgCl₂ Solution (25-50 mM) | Co-factor for polymerase. Optimal concentration (1.5-3.0 mM) is often determined empirically and interacts with annealing temperature. |
| PCR-Grade Bovine Serum Albumin (BSA) | Added to reactions (0.1-0.5 µg/µL) to bind non-specific inhibitors and stabilize the polymerase, improving yield from challenging samples. |
| Betaine (5M Solution) | A chemical additive that equalizes the melting temperatures of GC- and AT-rich regions, and can enhance specificity and yield from complex templates. |
| High-Resolution Agarose | (e.g., 2-4% gels) Necessary for accurately resolving specific products from non-specific amplification or primer-dimers during gradient and optimization analyses. |
| qPCR Master Mix with SYBR Green | Contains optimized buffer, polymerase, and dye for real-time quantification during cycle number optimization and efficiency determination. |
Diagnosing and Solving Common PCR Failures with Complex Samples
Troubleshooting Guides & FAQs
Q1: I observe no amplification (flat line) in my qPCR. What are the primary causes? A: No amplification typically indicates a complete failure of the reaction. Common causes include:
- Inactive or Incorrect Reagents: Degraded polymerase, incorrect buffer, or dNTPs.
- Inhibitors in the Template: Carryover of salts, phenols, ethanol, or heparin from the sample preparation process, especially challenging with complex biomaterials.
- Primer Design Flaw: Primers that do not bind to the target sequence due to mismatches or secondary structures.
- Incorrect Thermal Cycler Protocol: Wrong annealing/extension temperatures or times.
- Low Quality/Degraded Template: RNA degraded in RT-step or highly fragmented DNA.
Q2: My PCR yields a product, but the yield is consistently low. How can I improve it? A: Low yield suggests suboptimal reaction efficiency. Focus on:
- Template Quality & Quantity: Re-purity template to remove partial inhibitors; accurately quantify and optimize template input amount.
- Mg²⁺ Concentration Optimization: Mg²⁺ is a co-factor for Taq polymerase. Its concentration critically affects primer annealing and enzyme fidelity.
- Primer Concentration & Annealing Optimization: Titrate primer concentrations and perform a gradient PCR to find the optimal annealing temperature.
- Cycle Number: Increase cycle number within reasonable limits (generally not beyond 40 for qPCR to avoid background issues).
Q3: I see non-specific bands (primer-dimer or multiple bands) on my agarose gel. How do I increase specificity? A: Non-specific amplification competes with the target. Solutions involve:
- Increase Annealing Temperature: Use a thermal gradient to determine the highest possible annealing temperature that still yields the specific product.
- Touchdown PCR: Start with an annealing temperature higher than the primer Tm, then decrease it incrementally over cycles to favor specific binding early on.
- Use a Hot-Start Polymerase: Prevents polymerase activity at room temperature, reducing primer-dimer formation during reaction setup.
- Optimize Primer Design: Re-design primers with stricter parameters (length 18-25 bp, Tm 58-62°C, avoid 3' complementarity).
Q4: My qPCR results show consistently high Ct values (>35). What does this indicate and how can I address it? A: High Ct values indicate low initial target abundance or poor amplification efficiency.
- Check Amplification Efficiency: Perform a standard curve with a serial dilution of template. Efficiency should be 90-110% (slope of -3.1 to -3.6).
- Improve Sample Preparation: For complex biomaterial targets (e.g., from tissues, biofilms), enhance lysis and purification to increase nucleic acid yield and purity.
- Confirm Primer/Probe Specificity: Ensure no polymorphisms in the binding sites. Use a melting curve analysis (for SYBR Green) or BLAST check.
- Reduce Inhibition: Dilute the template sample to dilute potential inhibitors, or use a more robust polymerase blend designed for inhibitory samples.
Experimental Protocols
Protocol 1: Standard Curve for qPCR Efficiency Determination
- Prepare a 5- or 10-fold serial dilution of a known positive template (e.g., plasmid, purified amplicon), covering at least 5 orders of magnitude.
- Run qPCR on all dilutions in triplicate using your target assay.
- Plot the log of the initial template quantity against the mean Ct value for each dilution.
- Calculate the slope of the regression line. Amplification Efficiency (E) = [10^(-1/slope) - 1] * 100%. Target efficiency is 100% (slope = -3.32).
Protocol 2: Magnesium Ion (Mg²⁺) Concentration Optimization
- Prepare a master mix containing all components except MgCl₂.
- Aliquot the master mix into separate tubes.
- Add MgCl₂ to each tube to create a concentration series (e.g., 1.0 mM, 1.5 mM, 2.0 mM, 2.5 mM, 3.0 mM, 3.5 mM, 4.0 mM). Standard Taq buffer is typically 1.5 mM.
- Run the PCR with the same template and cycling conditions.
- Analyze products by agarose gel electrophoresis for yield and specificity. For qPCR, compare Ct values and fluorescence intensities.
Data Presentation
Table 1: Troubleshooting Summary for Common PCR Symptoms
| Symptom | Primary Causes | Recommended Diagnostic Tests | Typical Solutions |
|---|---|---|---|
| No Amplification | Inhibitors, inactive enzyme, wrong protocol | Positive control reaction, check template integrity on gel | Re-purity template, use fresh reagents, verify cycler block calibration |
| Low Yield | Suboptimal [Mg²⁺], low template, poor primer efficiency | Mg²⁺ titration, template re-quantification, standard curve | Optimize [Mg²⁺] (1.5-4.0 mM), increase template input, re-design primers |
| Non-Specific Bands | Low annealing temp, primer-dimer formation | Gradient PCR, melt curve analysis | Increase Ta by 2-5°C, use hot-start polymerase, employ touchdown protocol |
| High Ct Value | Low target abundance, inhibition, low efficiency | Standard curve analysis, template dilution series | Improve sample lysis/purity, dilute template 1:10, optimize primer/probe |
Table 2: Key Reagent Solutions for PCR Optimization with Complex Targets
| Reagent / Material | Function in Optimization | Example & Notes |
|---|---|---|
| Hot-Start High-Fidelity Polymerase | Reduces non-specific amplification & primer-dimers; improves accuracy for cloning. | KAPA HiFi HotStart, Q5 Hot Start. Essential for GC-rich or complex secondary structure targets. |
| Inhibitor-Resistant Polymerase Blends | Tolerates common impurities (phenols, humic acid, heparin) in samples from biomaterials. | OneTaq Quick-Load, Phusion Blood Direct. Critical for direct PCR from crude lysates. |
| PCR Additives (e.g., DMSO, Betaine) | Reduces secondary structure in template/primers; equalizes Tm for GC-rich regions. | Use 3-10% DMSO or 1-1.5 M Betaine. Requires empirical optimization. |
| Molecular Grade BSA | Binds to and neutralizes common inhibitors (e.g., polyphenols, polysaccharides). | Use at 0.1-0.5 µg/µL. Improves reliability for plant, forensic, and microbial community samples. |
| RNase Inhibitor (for RT-qPCR) | Protects RNA template from degradation during reverse transcription setup. | Recombinant RNasin. Vital for low-abundance or long mRNA targets. |
Mandatory Visualizations
Title: PCR Symptom Diagnosis Decision Tree
Title: PCR Optimization Protocol Workflow
Troubleshooting Guide & FAQs
Q1: My PCR with a GC-rich template consistently fails. Which additive should I try first and at what concentration?
A: For GC-rich templates (>65% GC), betaine is the recommended first-line additive. It acts as a chemical chaperone, destabilizing GC-pair hydrogen bonding and lowering the melting temperature (Tm) of DNA. Standard final concentration is 0.5 M to 1.5 M. Prepare a 5M stock solution in nuclease-free water, filter sterilize, and add to the master mix. Start with 1.0 M final concentration.
Q2: I am getting nonspecific secondary bands in my multiplex PCR. Would DMSO help, and could it interfere with my polymerase?
A: Yes, DMSO (1-10% v/v) can improve specificity by reducing secondary structure formation, especially in AT-rich regions. It can lower the template's Tm. However, DMSO can inhibit some polymerases. Do not exceed 10% concentration. For Taq polymerase, a final concentration of 3-5% is optimal. Always check your specific polymerase's datasheet. A standard troubleshooting protocol:
- Prepare a master mix without DMSO.
- Aliquot the master mix into separate tubes.
- Add DMSO to achieve final concentrations of 0%, 3%, 5%, and 8%.
- Run the PCR with identical cycling conditions.
- Compare band specificity and yield on a gel.
Q3: When amplifying from a complex background (e.g., plant extract), my PCR yield is very low. What additive can combat inhibitors?
A: Bovine Serum Albumin (BSA) is highly effective at sequestering common PCR inhibitors like polyphenols, humic acids, and ionic detergents present in complex biomaterials. Use a final concentration of 0.1 to 0.8 μg/μL (typically 0.2 μg/μL). Use molecular biology-grade, acetylated BSA. Add it directly to the PCR master mix before aliquoting.
Q4: I need to use formamide to lower my annealing temperature for primers with low Tm, but my product yield dropped. How do I optimize this?
A: Formamide is a strong denaturant. While it increases stringency and can reduce nonspecific binding, high concentrations can inhibit polymerase activity. Follow this optimization protocol:
- Titrate formamide from 1% to 5% (v/v) in 1% increments.
- Simultaneously, adjust your annealing temperature. Start 2°C below your calculated primer Tm and increase in 1°C increments.
- Use a thermal gradient cycler if available.
- The optimal combination will yield a single, bright band with minimal background.
Q5: Can I combine multiple additives in a single PCR reaction?
A: Caution is required. Additives can have synergistic or antagonistic effects. A common combination for difficult templates is 1M Betaine + 3% DMSO. However, combining formamide with other denaturants is not recommended. If combining, systematically test using a matrix approach:
- Keep one additive at its optimal concentration.
- Titrate the second additive across its typical range.
- Assess yield and specificity.
Table 1: Common PCR Additives: Functions & Optimal Concentrations
| Additive | Primary Function | Typical Final Concentration | Key Mechanism | Template Type Most Beneficial |
|---|---|---|---|---|
| BSA | Binds inhibitors | 0.1 - 0.8 μg/μL (often 0.2) | Sequesters phenols, proteases, etc. | Complex/impure samples (soil, blood, plant) |
| DMSO | Increases specificity | 3 - 10% (v/v) (often 5%) | Disrupts secondary structure, lowers Tm | AT-rich, high secondary structure |
| Betaine | Equalizes base stability | 0.5 - 1.5 M (often 1.0 M) | Destabilizes GC pairs, stabilizes AT pairs | GC-rich (>65%), prevents hairpins |
| Formamide | Increases stringency | 1 - 5% (v/v) | Lowers DNA Tm, destabilizes duplex | Allows lower annealing temps, improves specificity |
Table 2: Additive Compatibility & Cautions
| Additive | Compatible With | Potentially Incompatible With | Key Caution |
|---|---|---|---|
| Betaine | DMSO, BSA, most polymerases | High formamide concentrations | High viscosity at 5M stock. |
| DMSO | Betaine, BSA | Some proofreading polymerases (inhibit >10%) | Can reduce primer Tm by 5-6°C at 10%. |
| Formamide | Often used alone | DMSO, Betaine (enhanced denaturation) | Strong inhibitor above 5% for most polymerases. |
| BSA | All common additives | None known | Ensure it is nuclease-free, acetylated BSA. |
Experimental Protocols
Protocol 1: Systematic Optimization of Additives for a Novel Complex Target
Objective: Identify the optimal additive(s) and concentration for amplifying a target from a challenging biomaterial (e.g., fungal spore lysate). Materials: Template DNA, primers, PCR master mix, nuclease-free water, stock solutions of BSA (10 mg/mL), DMSO (100%), Betaine (5M), Formamide (100%). Method:
- Prepare a 2X concentrated "Additive Screen Master Mix" containing all PCR components except additives and template.
- For each additive, prepare a dilution series in nuclease-free water to create 2X working stocks.
- In a 96-well PCR plate, combine 10 μL of 2X additive working stock with 8 μL of 2X Master Mix and 2 μL of template.
- Include a no-additive control and a no-template control for each additive series.
- Run PCR with standardized cycling conditions.
- Analyze products via gel electrophoresis and qCT values if using SYBR Green.
- Plot yield/specificity vs. concentration for each additive to determine optimum.
Protocol 2: Titration of Combined Betaine and DMSO for a GC-Rich Amplicon
Objective: Find the optimal synergistic concentration of Betaine and DMSO. Method:
- Prepare a base master mix with all components except Betaine and DMSO.
- Create a matrix of reactions where Betaine is varied (0 M, 0.5 M, 1.0 M, 1.5 M) and DMSO is varied (0%, 3%, 5%, 8%).
- Perform 16 separate reactions covering all combinations.
- Use a consistent amount of GC-rich template and primers.
- Run PCR. Analyze results via gel electrophoresis for a single, intense band with minimal primer-dimer.
Diagrams
The Scientist's Toolkit: Research Reagent Solutions
Table 3: Essential Reagents for PCR Optimization with Additives
| Reagent | Specification / Grade | Primary Function in Optimization | Example Supplier Catalog # (Typical) |
|---|---|---|---|
| Molecular Biology Grade BSA | Acetylated, nuclease-free, protease-free. | Neutralizes inhibitors in complex samples without interfering with polymerase. | Thermo Fisher Scientific AM2618 |
| PCR Grade DMSO | Sterile-filtered, ≥99.9% purity, tested for PCR. | Reduces secondary structure, improves primer annealing specificity. | Sigma-Aldrich D8418 |
| Betaine Solution | 5M stock, molecular biology grade, in nuclease-free water. | Equalizes base-pair stability; essential for amplifying GC-rich regions. | MilliporeSigma B0300 |
| Ultra-Pure Formamide | Deionized, molecular biology grade, stable for PCR. | Increases stringency, allows lower annealing temperatures. | Invitrogen AM9342 |
| Hot-Start DNA Polymerase | High-fidelity or standard Taq, with robust buffer. | Provides a stable, flexible enzymatic foundation for additive testing. | NEB M0491S (Taq) |
| Nuclease-Free Water | PCR-certified, 0.1 μm filtered. | Solvent for additive stock solutions and reaction setup. | Thermo Fisher Scientific AM9937 |
| dNTP Mix | PCR-grade, neutral pH, 10mM each. | Balanced nucleotide supply critical when using destabilizing additives. | Thermo Fisher Scientific R0192 |
Troubleshooting Guide & FAQs
Q1: My spectrophotometer (NanoDrop) gives a 260/280 ratio below 1.8 for my DNA template, suggesting protein contamination, but my downstream PCR is successful. Should I be concerned? A: A low 260/280 ratio (<1.8 for DNA) is a common indicator of residual protein or phenol. However, for PCR optimization with complex biomaterials (e.g., tissue lysates), trace contaminants may not always inhibit amplification. First, confirm the ratio measurement by ensuring the instrument pedestal is clean and the sample is properly mixed. If PCR efficiency is unaffected, the contamination level may be tolerable. For critical applications like quantitative PCR, consider an additional purification step (e.g., column-based clean-up) or verify template quality with a fluorometric assay, which is more specific for nucleic acids.
Q2: My fluorometric Qubit assay shows a significantly lower DNA concentration than my NanoDrop. Which value should I trust for setting up my PCR? A: Trust the fluorometric (Qubit) value. Spectrophotometry (NanoDrop) detects all molecules that absorb at 260nm, including free nucleotides, RNA, and contaminants, leading to overestimation. Fluorometry uses DNA-binding dyes specific to double-stranded or single-stranded DNA, providing a more accurate measure of intact template. Use the Qubit concentration for calculating template input in PCR, especially for sensitive applications like detecting low-abundance targets in complex samples.
Q3: My genomic DNA appears intact on a gel, but my long-range PCR for large amplicons (>5 kb) consistently fails. What could be wrong? A: Standard gel electrophoresis confirms the absence of gross fragmentation but cannot detect single-stranded nicks or chemical damage that impede long-range PCR. Perform an analytical gel with tight loading (low voltage, minimal well distortion) alongside a high-molecular-weight ladder. Smearing below the main band indicates fragmentation. For complex biomaterial-derived DNA, consider using an Agilent TapeStation or Fragment Analyzer for a quantitative integrity number (e.g., DIN, DV200). A DNA Integrity Number (DIN) >7 is recommended for long-amplicon PCR. Also, optimize lysis and purification to avoid mechanical shearing and oxidative damage.
Q4: I am working with cDNA synthesized from RNA extracted from a fibrotic tissue sample. How do I assess its quality for quantitative reverse transcription PCR (qRT-PCR)? A: cDNA cannot be directly assessed for "integrity" like DNA/RNA. Quality is inferred from the input RNA. Ensure the RNA Integrity Number (RIN) from a Bioanalyzer was >7 before reverse transcription. For cDNA, use fluorometry (Qubit ssDNA assay) for accurate quantification. Perform a pilot qPCR with a control gene (e.g., GAPDH, β-actin) across a dilution series of the cDNA. A linear standard curve with high efficiency (90-105%) and low Cq variation indicates good cDNA quality for subsequent gene expression assays.
Q5: My fluorometer reports "out of range" for my sample. What are the immediate steps? A: This typically means the concentration is outside the linear range of the assay kit.
- If "Too High": Dilute the sample in the same buffer used for the standard curve (e.g., TE buffer, provided dilution buffer) and re-read. Use a kit with a higher range if necessary.
- If "Too Low" or "Not Detected): Concentrate the sample using a vacuum concentrator or precipitate the nucleic acid. Ensure you are using the correct assay type (e.g., dsDNA HS vs. BR). Re-prepare standards to confirm calibration. For trace templates from complex samples, consider using a more sensitive platform (e.g., QuantStudio with digital PCR capabilities).
Table 1: Comparison of Nucleic Acid Assessment Methods
| Method | Principle | Measures | Advantages | Limitations | Ideal Use Case |
|---|---|---|---|---|---|
| UV Spectrophotometry (NanoDrop) | UV light absorption | Concentration (ng/µl), Purity (A260/280, A260/230) | Fast, small volume, no reagents | Non-specific, sensitive to contaminants | Initial, crude sample check |
| Fluorometry (Qubit) | Fluorescent dye binding | Specific concentration (ng/µl) | Highly specific, sensitive, accurate | Requires standards, one assay type per sample | Accurate quantification for PCR setup |
| Capillary Electrophoresis (Bioanalyzer, TapeStation) | Electrokinetic separation | Concentration, Integrity Number (RIN, DIN), Fragment size | High-resolution sizing, quantitative integrity score | Higher cost, more sample input | Critical pre-PCR quality control for challenging samples |
Table 2: Acceptable Quality Metrics for PCR Templates from Complex Biomaterials
| Template Type | Optimal A260/280 | Optimal A260/230 | Fluorometric Conc. Preferred | Minimum Integrity Number | Recommended QC Workflow |
|---|---|---|---|---|---|
| Genomic DNA (gDNA) | 1.8-2.0 | 2.0-2.2 | Yes | DIN >7 (long amplicons) | Spectro → Fluorometry → CE if long PCR fails |
| Total RNA | 2.0-2.2 | 2.0-2.2 | Yes (RNA assay) | RIN >7 for qRT-PCR | Spectro → Fluorometry → CE (RIN) |
| Purified PCR Amplicon | 1.8-2.0 | 2.0-2.2 | Optional | N/A | Spectro (check for primer-dimer via CE if needed) |
Detailed Experimental Protocols
Protocol 1: Integrated QC Workflow for gDNA Prior to Long-Range PCR Objective: To comprehensively assess gDNA quantity, purity, and integrity for amplification of targets >5kb from complex tissue (e.g., formalin-fixed, paraffin-embedded (FFPE) or fibrous tissues).
- Spectrophotometric Scan:
- Use 1-2 µL of sample on a cleaned NanoDrop pedestal.
- Record concentration (ng/µL), A260/280, and A260/230 ratios.
- Dilute sample in elution buffer if concentration >1000 ng/µL for accurate ratios.
- Fluorometric Quantification:
- Prepare the Qubit dsDNA BR Assay working solution as per kit instructions.
- Use 10 µL of each standard and 2 µL of sample (diluted 1:10 in TE buffer if spectro reading >500 ng/µL) in separate assay tubes.
- Vortex, incubate 2 minutes at room temperature.
- Read on Qubit fluorometer using the appropriate assay setting. Use the standard curve to calculate the true concentration.
- Capillary Electrophoresis for Integrity:
- Load 1 µL of sample (at ~50 ng/µL) onto an Agilent Genomic DNA ScreenTape.
- Run on an Agilent 4200 TapeStation system.
- Analyze the electrophoretogram. The software will calculate the DNA Integrity Number (DIN). A sharp, high-molecular-weight peak indicates good integrity.
Protocol 2: Accurate Dilution of Template for qPCR Based on Fluorometric Data Objective: To prepare a standardized template input (e.g., 10 ng per reaction) for sensitive qPCR from a low-yield biomaterial sample.
- Calculate Dilution Factor: Dilution Factor = [Fluorometric Concentration (ng/µL)] / [Desired Working Concentration (ng/µL)].
- Example: [Qubit] = 85.6 ng/µL, desired = 10 ng/µL. DF = 85.6 / 10 = 8.56.
- Perform Serial Dilution:
- First Dilution: Add 11.7 µL of sample (85.6 ng/µL) to 88.3 µL of nuclease-free water or TE buffer (1:8.56 dilution). This yields ~10 ng/µL.
- Vortex thoroughly.
- Confirm Dilution (Optional but Recommended):
- Use the Qubit dsDNA HS Assay (more sensitive) to measure the new working solution. It should read approximately 10 ng/µL.
- Aliquot and Store: Aliquot the working solution to avoid freeze-thaw cycles and store at -20°C.
Visualizations
Title: Decision Workflow for Template QC Before PCR
Title: Specificity Difference: Spectrophotometry vs. Fluorometry
The Scientist's Toolkit: Research Reagent Solutions
| Item/Category | Function & Importance in Template QC |
|---|---|
| Fluorometric Assay Kits (Qubit dsDNA HS/BR, RNA HS) | Provide highly specific, sensitive quantification of nucleic acids using DNA/RNA-binding dyes. Essential for accurate template normalization in qPCR. |
| Capillary Electrophoresis Kits (Bioanalyzer RNA/DNA kits, TapeStation Genomic DNA Screens) | Provide high-resolution sizing and quantitative integrity scores (RIN, DIN). Critical for assessing template suitability for long-range or sensitive PCR from degraded samples. |
| Nuclease-Free Water & TE Buffer (pH 8.0) | Used for sample dilution and elution. Maintains pH and stability of nucleic acids; nuclease-free property prevents template degradation. |
| High-Molecular-Weight DNA Ladders | Essential for calibrating gel and capillary electrophoresis systems to accurately assess the size and integrity of genomic DNA templates. |
| RNA Stabilization Reagents (e.g., RNAlater) | Crucial for preserving RNA integrity in complex tissue samples immediately post-collection, ensuring high RIN numbers and reliable cDNA synthesis. |
| Solid-Phase Reversible Immobilization (SPRI) Beads | Used for automated, high-throughput sample purification and size selection, crucial for preparing sequencing libraries or cleaning up PCR products. |
Incorporating Internal Controls and Spike-Ins to Monitor Inhibition
Technical Support Center
Troubleshooting Guides & FAQs
Q1: Our PCR amplification curves for the target of interest appear normal, but the internal control curve shows a significant delay (higher Ct) or complete failure. What does this indicate and how should we proceed?
A: This is a classic sign of specific inhibition. The inhibitors in your sample are affecting the internal control more than your target, possibly due to amplicon length differences or sequence-specific effects.
- Action Steps:
- Dilute the Sample: Perform a 1:5 and 1:10 dilution of your template. If the internal control Ct improves disproportionately, inhibition is confirmed.
- Purify Again: Re-purify the sample using a silica-column or SPRI bead-based method optimized for your biomaterial (e.g., with pre-lyses steps for tissues).
- Add a Supplemental Reagent: Include 1-2% PEG 6000 or 0.1-1 mg/mL BSA to the reaction mix to sequester inhibitors.
- Switch Controls: Use an internal control amplicon with a length and GC content closer to your target.
Q2: The non-competitive spike-in (exogenous control) we added failed to amplify, but our target amplified. Can we trust our target's quantification?
A: No, you cannot. Failure of a well-designed non-competitive spike-in indicates severe global PCR inhibition or a master mix/pipetting error. The target signal may be from a subset of unaffected reactions or may be significantly underestimated.
- Action Steps:
- Check Pipetting & Reagents: Ensure the spike-in was added correctly and that master mix components are functional.
- Assess Inhibition: Use a droplet-based digital PCR system if available, as it is more resistant to inhibition and can provide absolute counts.
- Extract Again: The extraction failed for the spike-in nucleic acid. Repeat extraction with a validated protocol, adding the spike-in at the appropriate lysis step.
Q3: When using a competitive spike-in (mimic) for qPCR, how do we interpret results when both target and competitor amplify with similar efficiency but at low signal?
A: This suggests low template input rather than inhibition. The competitive spike-in is competing effectively for reagents, confirming the reaction itself is not inhibited.
- Action Steps:
- Increase Input: If possible, increase the amount of template nucleic acid added to the reaction (e.g., from 2 µL to 5 µL).
- Concentrate Template: Ethanol precipitate and resuspend your nucleic acid in a smaller volume.
- Re-assess Yield: Quantify your total nucleic acid yield pre-PCR; you may need to scale up the upstream extraction.
Q4: In multiplex assays with internal controls, we observe a drop in target sensitivity compared to singleplex. Is this inevitable?
A: Not inevitable, but common. It's often due to primer-dimer formation, competition for reagents, or suboptimal fluorescence channel crosstalk calibration.
- Action Steps:
- Re-optimize Primer/Probe Concentrations: Titrate primer and probe sets for each target. Use the minimal concentration that gives a robust Ct for the control.
- Check for Interactions: Run primer-check software for all sets to avoid cross-hybridization.
- Validate Channel Separation: Run single-target reactions in each channel to ensure no bleed-through into others.
Table 1: Performance of Common Internal Controls Under Inhibitory Conditions
| Control Type | Example | Ideal Use Case | Key Vulnerability | Response to Inhibition (ΔCt Shift)* |
|---|---|---|---|---|
| Endogenous | Housekeeping Gene (GAPDH, 18S rRNA) | Normalizing sample input | Co-regulation with target, variable expression | Variable (0 to >5) |
| Exogenous Non-Competitive | Alien DNA, SS-RNA (from another species) | Monitoring extraction & global inhibition | Degradation if added early; different chemistry | High (>5 or failure) |
| Exogenous Competitive | Mimic with same primer sites | Distinguishing inhibition from low input | Requires precise concentration; complex design | Low (~0-2, but both signals drop) |
*ΔCt shift compared to a clean, uninhibited reaction.
Table 2: Troubleshooting Matrix for Inhibition Patterns
| Observation (Target vs. Control) | Likely Cause | Recommended First-Line Solution | Verification Experiment |
|---|---|---|---|
| Target Ct ↑, Control Ct ↑↑ | Specific Inhibition | Template Dilution (1:5, 1:10) | Dilution restores control Ct proportionally |
| Target Ct ↑↑, Control Ct ↑↑ | Global Inhibition | Re-purification or Add BSA (0.5 mg/mL) | Spike-in recovery improves post-treatment |
| Target Ct Normal, Control Fails | Severe Specific Inhibition or Control Degradation | Check control integrity; use alternative control | Run control alone with fresh aliquot |
| Both Target & Control Amplify Late/Low | Low Template Input or Master Mix Issue | Increase template input; remake master mix | Standard curve with known copy number |
Experimental Protocols
Protocol 1: Standard Workflow for Implementing a Non-Competitive Spike-In Control
Purpose: To monitor the entire qPCR process from extraction to amplification for global inhibition. Materials: Purified nucleic acid sample, synthetic alien oligonucleotide or RNA (e.g., from Arabidopsis thaliana), qPCR master mix, target-specific primers/probe, spike-in-specific primers/probe. Procedure:
- Spike-In Addition: Add a known quantity (e.g., 10^4 copies) of the synthetic spike-in nucleic acid to your sample lysis buffer at the beginning of the extraction process.
- Co-Extraction: Carry out the standard extraction protocol (e.g., silica-column, phenol-chloroform) for your complex biomaterial. The spike-in will undergo the same chemical and physical stresses as the native target.
- Elution: Elute the total nucleic acid (sample + spike-in) in the recommended volume.
- Multiplex qPCR: Set up a multiplex qPCR reaction using:
- Primer/Probe set for your target of interest (e.g., FAM channel).
- Primer/Probe set for the spike-in control (e.g., HEX/VIC channel).
- Standard qPCR cycling conditions.
- Analysis: Calculate the percent recovery of the spike-in compared to a control reaction where the same spike-in amount was added to water and carried through PCR alone. <80% recovery indicates significant inhibition.
Protocol 2: Inhibition Challenge & Rescue Experiment
Purpose: To empirically determine the inhibition profile of a new biomatrix and test mitigation strategies. Materials: Clean control DNA (e.g., genomic), putative inhibitor (e.g., heparin, collagen, humic acid), rescue reagents (BSA, PEG, T4 Gene 32 Protein), qPCR reagents. Procedure:
- Prepare Inhibition Series: Create a 2-fold dilution series of your putative inhibitor in nuclease-free water.
- Setup Reactions: To each dilution, add a constant amount of clean control DNA and qPCR master mix. Include a no-inhibitor control.
- Rescue Arm: Replicate the series, adding a rescue reagent (e.g., 0.5 mg/mL BSA final concentration) to the master mix.
- Run qPCR: Perform qPCR with a target within the control DNA.
- Analyze: Plot Ct value vs. inhibitor concentration. Determine the concentration of inhibitor that causes a 1 Ct and 3 Ct delay. Note the effect of the rescue reagent.
Diagrams
Title: Spike-In Control Workflow for Inhibition Detection
Title: Common qPCR Inhibition Mechanisms
The Scientist's Toolkit: Research Reagent Solutions
| Item | Function & Rationale |
|---|---|
| Alien or Armored RNA/DNA | Synthetic, non-homologous nucleic acids used as non-competitive spike-ins. They monitor extraction efficiency and global PCR inhibition without competing for primers. |
| Competitive PCR Mimics | DNA fragments identical to the target in primer-binding regions but differing in internal sequence/probe site. They precisely control for amplification efficiency and identify inhibition vs. low input. |
| BSA (Bovine Serum Albumin) | A versatile rescue reagent (used at 0.1-1 mg/mL). It binds to inhibitors like polyphenols and humic acids, sequestering them away from polymerase and nucleic acids. |
| PEG 6000 | A crowding agent (used at 0.5-2%). It improves enzyme kinetics in suboptimal conditions and can help neutralize some ionic inhibitors. |
| T4 Gene 32 Protein | A single-stranded DNA binding protein. It stabilizes denatured DNA, prevents secondary structure, and can enhance amplification from inhibited or damaged templates. |
| dUTP / Uracil-DNA Glycosylase (UDG) | A carry-over contamination prevention system. Incorporating dUTP allows pre-PCR degradation of contaminating amplicons, critical when using sensitive controls. |
| Inhibitor-Resistant Polymerases | Engineered polymerase enzymes (e.g., from Thermus sp.) with enhanced tolerance to common inhibitors like blood components, heparin, or soil humics. |
| Digital PCR (dPCR) Reagents | Partitioning master mixes and chips/ droplets. dPCR provides absolute quantification and is inherently more resistant to inhibitors, serving as a gold-standard verification method. |
Nested, Semi-Nested, and Multiplex PCR Approaches to Increase Sensitivity and Specificity
Technical Support Center
Troubleshooting Guide & FAQs
Q1: My nested PCR produces a strong non-specific band after the first round, but the second round yields no product. What could be wrong?
A: This is a classic sign of primer depletion or carryover inhibition. The specific primers for the second round may be binding to non-specific first-round products. Ensure the first-round PCR uses a limited number of cycles (20-25) to prevent excessive amplicon accumulation that can inhibit the second round. Dilute the first-round product (1:50 to 1:1000) before using it as a template for the second round to reduce inhibitors and non-target DNA. Verify that your second-round primer binding sites are intact and unique to the desired target.
Q2: In multiplex PCR, some targets amplify efficiently while others are weak or absent. How can I balance amplification?
A: Multiplex PCR requires extensive primer optimization. The issue is often primer competition and differences in annealing temperatures (Tm).
- Primer Design: Re-design primers to have very similar Tm values (within 2°C). Use software to check for dimer formation between all primer pairs.
- Concentration Titration: Systematically titrate primer concentrations (typically between 0.1-1.0 µM). Weaker amplifiers may need higher primer concentrations.
- Buffer Optimization: Increase the magnesium chloride concentration (e.g., from 1.5 mM to 2.5-3.0 mM) and/or use a specialized multiplex PCR buffer containing additives like betaine or DMSO to reduce secondary structure and improve efficiency.
Q3: I am getting excessive primer-dimer formation in my semi-nested PCR, especially in the reaction using the outer and inner primer. How do I mitigate this?
A: Primer-dimer is common when one primer can act as a binding site for extension of the other. Redesign the inner primer to be located sufficiently far inside the first amplicon ( >50 bp from the outer primer site). Increase the annealing temperature stepwise by 1-2°C. Implement a hot-start PCR protocol to prevent polymerase activity during reaction setup. You can also use a touchdown PCR protocol for the first few cycles to increase specificity.
Q4: How do I prevent carryover contamination between rounds in nested PCR, which is a major risk for false positives?
A: Contamination prevention is critical. Employ strict physical separation: use different rooms or dedicated cabinets for pre- and post-PCR steps, with unidirectional workflow. Use dedicated equipment (pipettes, tips, racks). Always include negative controls (no-template and first-round product control for the second round). Consider using uracil-DNA glycosylase (UDG) carryover prevention. During setup, add the nested PCR mix to the tube first, then add the first-round product last, preferably in a separate area.
Experimental Protocols
Protocol 1: Standard Two-Round Nested PCR for Low-Abundance Targets
- First Round PCR:
- Prepare a 25 µL reaction: 1X PCR buffer, 2.0 mM MgCl₂, 0.2 mM each dNTP, 0.4 µM each outer primer (F1 & R1), 1.25 U of hot-start DNA polymerase, and up to 5 µL of template DNA.
- Cycling: Initial denaturation: 95°C for 5 min; 25 cycles of [95°C for 30s, 55-60°C for 30s, 72°C for 1 min/kb]; Final extension: 72°C for 5 min.
- Product Dilution: Dilute the first-round product 1:100 in nuclease-free water or TE buffer.
- Second Round PCR:
- Prepare a 50 µL reaction: 1X PCR buffer, 1.5-2.0 mM MgCl₂, 0.2 mM each dNTP, 0.2 µM each inner primer (F2 & R2), 1.25 U of hot-start DNA polymerase, and 2-5 µL of the diluted first-round product.
- Cycling: Initial denaturation: 95°C for 5 min; 30-35 cycles of [95°C for 30s, 60-65°C (often higher than round 1) for 30s, 72°C for 1 min/kb]; Final extension: 72°C for 5 min.
- Analysis: Analyze 5-10 µL of the second-round product by gel electrophoresis.
Protocol 2: Multiplex PCR Optimization via Primer Titration
- Primer Stock Solutions: Prepare individual primer stocks at 100 µM. Create a preliminary working primer mix where all primers are at 0.5 µM.
- Master Mix Setup: Prepare a master mix containing 1X specialized multiplex PCR buffer (with higher Mg²⁺ and additives), 0.2 mM dNTPs, 1.25 U of hot-start polymerase, and the preliminary primer mix.
- Titration Plate: Aliquot the master mix. Then, spike in varying concentrations (0.1, 0.3, 0.5, 0.7, 1.0 µM final) of the underperforming primer pair(s) into separate reactions. Keep template amount constant.
- Cycling: Use a touchdown program: Initial denat.: 95°C for 5 min; 10 cycles of [95°C for 30s, 60-55°C (decreasing 0.5°C/cycle) for 30s, 72°C for 1 min/kb]; followed by 25 cycles of [95°C for 30s, 55°C for 30s, 72°C for 1 min/kb]; Final extension: 72°C for 7 min.
- Analysis: Run products on a high-resolution agarose gel or capillary electrophoresis system to evaluate the balance of amplicon intensities.
Comparative Performance Data
Table 1: Characteristics of Advanced PCR Approaches for Complex Biomaterial Targets
| Approach | Theoretical Sensitivity Gain | Key Risk | Optimal Use Case | Typical Increase in Specificity vs. Standard PCR |
|---|---|---|---|---|
| Nested PCR | 10,000 to 1,000,000-fold | Carryover contamination | Ultra-low abundance targets (e.g., pathogen detection in host background) | Very High |
| Semi-Nested PCR | 1,000 to 10,000-fold | Primer-dimer with shared primer | Targets where one primer region is highly conserved/specific | High |
| Multiplex PCR | Varies (multitarget) | Imbalanced amplification, primer competition | Simultaneous detection of multiple targets (e.g., pathogen panels, gene expression markers) | Moderate to High (per primer pair) |
Table 2: Troubleshooting Common Issues: Symptoms and Solutions
| Symptom | Probable Cause | Recommended Solution |
|---|---|---|
| No product in second round (Nested) | Inhibitor carryover, primer binding site mismatch | Dilute first-round product 1:1000; Verify inner primer sequence. |
| Smear or multiple bands (Multiplex) | Non-specific priming, mis-priming | Increase annealing temperature; Titrate Mg²⁺ downward; Redesign primers. |
| Inconsistent replicates (Semi-nested) | Low template concentration, pipetting errors | Use a master mix for all reagents; Increase template input if possible; Include more replicates. |
| Reduced amplicon yield in later cycles | Polymerase or dNTP depletion | Increase polymerase units by 25%; Ensure fresh dNTPs; Reduce cycle number. |
Diagrams
Title: Nested PCR Two-Round Workflow
Title: Primer Binding Sites in Nested vs. Semi-Nested PCR
The Scientist's Toolkit: Research Reagent Solutions
- Hot-Start DNA Polymerase: An engineered polymerase inactive at room temperature, preventing non-specific priming and primer-dimer formation during reaction setup. Critical for all nested/multiplex protocols.
- Multiplex PCR Buffer (with Additives): A specialized buffer containing optimized MgCl₂ concentrations and additives like betaine, DMSO, or trehalose. Function: Equalizes primer annealing efficiency and reduces secondary structure in GC-rich targets.
- dNTP Mix (25 mM each): Deoxynucleotide triphosphates (dATP, dCTP, dGTP, dTTP) at neutral pH. Function: Provides the essential building blocks for DNA synthesis. Consistent quality is vital for high-sensitivity applications.
- Primer Dilution Buffer (TE buffer, pH 8.0): 10 mM Tris-HCl, 1 mM EDTA. Function: Stabilizes primer stocks and prevents degradation. EDTA chelates Mg²⁺, so use low concentration or nuclease-free water for working dilutions.
- UDG (Uracil-DNA Glycosylase) / dUTP System: An enzymatic carryover prevention system. Function: First-round PCR uses dUTP instead of dTTP. Second-round setup includes UDG, which degrades any uracil-containing contaminating amplicons before thermal cycling begins.
- High-Resolution Agarose (e.g., 3-4% Metaphor/Agarose 1000): Function: Provides superior separation of small PCR products and multiplex amplicons that differ by only tens of base pairs, essential for clear result interpretation.
- DNA Gel Stain (Next-Generation, e.g., SYBR Safe): A sensitive, non-mutagenic fluorescent nucleic acid gel stain. Function: Allows visualization of PCR products under blue light, with sensitivity suitable for detecting low-yield amplicons.
Ensuring Reliability: Validation, Benchmarking, and Alternative Assays
Establishing Analytical Specificity and Sensitivity (Limit of Detection) for Your Optimized Assay
Technical Support Center: Troubleshooting & FAQs
FAQ: Specificity and Sensitivity Issues
Q1: Our optimized qPCR assay for Mycobacterium tuberculosis complex in sputum is showing non-specific amplification in negative controls (No Template Control and Non-Target Genomic DNA). What are the most likely causes and how can we resolve this? A: Non-specific amplification typically stems from primer-dimers or mis-priming. First, perform a melt curve analysis to confirm the presence of a single, sharp peak at your expected Tm. If multiple peaks or a broad peak appear, consider the following troubleshooting steps:
- Increase Annealing Temperature: Raise the temperature in 0.5°C increments.
- Optimize MgCl₂ Concentration: Titrate MgCl₂ (e.g., from 1.5 mM to 3.5 mM in 0.5 mM steps), as excess Mg²⁺ can stabilize non-specific binding.
- Use a Hot-Start DNA Polymerase: This prevents primer extension during reaction setup, reducing primer-dimer formation.
- Re-evaluate Primer Design: Check for self-complementarity (especially at the 3' ends) and secondary structure using tools like OligoAnalyzer. Re-design if necessary.
Q2: We are developing a ddPCR assay for low-abundance oncogenic mutations in cell-free DNA. How do we empirically determine the Limit of Detection (LOD) and distinguish true low-level positives from background noise? A: For ddPCR, the LOD is a statistical determination of the lowest concentration at which you can detect the target with ≥95% confidence. Follow this protocol:
- Create a Dilution Series: Serially dilute a known positive sample into a wild-type (negative) background matrix (e.g., wild-type genomic DNA or healthy donor plasma cfDNA) to create samples at 1%, 0.5%, 0.1%, and 0.05% variant allele frequency (VAF).
- Replicate Testing: Run a minimum of 20 technical replicates for each concentration, including at least 60 replicates of the negative (0% VAF) sample.
- Calculate LOD: Use a probit or logistic regression model to find the concentration at which 95% of replicates test positive. The Limit of Blank (LOB) must first be established from the mean + 1.645*SD of copies/partition in your negative replicates.
Q3: When testing the analytical sensitivity of our multiplex PCR for wound biofilm pathogens, the signal for one target drops out at high template concentrations of the other targets. What could cause this? A: This is a classic symptom of amplification interference or assay imbalance in multiplex reactions. Causes and solutions include:
- Primer/Probe Competition: The primers for the dominant target out-compete others for polymerase and nucleotides. Re-balance primer concentrations (typically between 50-900 nM each) through systematic titration.
- PCR Inhibition at High Concentration: Excess template can carry over inhibitors or saturate the reaction. Dilute the sample and re-amplify.
- Spectral Crosstalk: If using fluorescent probes, ensure there is no bleed-through between channels. Adjust gain settings on your instrument and verify filter sets.
Q4: How many biological and technical replicates are sufficient for establishing a robust LOD and specificity claim in a regulatory context (e.g., for a diagnostic device)? A: For rigorous validation, follow statistical guidelines from bodies like CLSI (EP17-A2). A common framework is:
- Specificity: Test a panel of at least 30 independent, confirmed negative samples (from the intended sample matrix) to demonstrate ≥95% specificity.
- LOD: Test at least 3 concentrations near the expected LOD with a minimum of 20 replicates each. The concentration where ≥19/20 (95%) replicates are positive can be reported as the LOD.
Experimental Protocols
Protocol 1: Determination of Limit of Detection (LOD) via Probit Analysis
- Prepare Dilution Series: In the relevant biological matrix (e.g., serum, crushed biomaterial), prepare a dilution series from a quantified stock. Include concentrations expected to be near the LOD (e.g., 1x, 2x, 5x, 10x copies/µL).
- Replicate Amplification: For each concentration level, perform a minimum of 20 independent replicate assays. Include at least 60 replicate negative control (matrix-only) assays.
- Data Collection: Record the binary result (positive/negative) for each replicate.
- Statistical Analysis: Input the data (concentration vs. proportion of positives) into statistical software (e.g., R, SPSS). Fit a probit regression model. The LOD with 95% confidence is the concentration at which the model predicts a 95% positive rate.
Protocol 2: Analytical Specificity Testing (Cross-Reactivity)
- Panel Assembly: Assemble a panel of nucleic acid extracts from closely related non-target organisms, high-prevalence microbes likely found in the sample type, and the host genome (if applicable).
- High-Concentration Challenge: Test each potential interferent at a high concentration (e.g., 10^6 genomes/reaction) in triplicate using the optimized assay.
- Data Analysis: Any amplification signal above the pre-defined threshold (Ct value or fluorescence) in non-target wells indicates cross-reactivity. Note the Ct value and melt curve profile for any positive signals to distinguish non-specific amplification.
Table 1: Example LOD Probit Analysis Data for a Staphylococcus aureus ddPCR Assay in Synthetic Bone Matrix
| Target Concentration (CFU/mL) | Number of Replicates Tested | Number of Positive Replicates | Positive Rate (%) |
|---|---|---|---|
| 0 (Negative Control) | 60 | 3 | 5.0 |
| 10 | 24 | 18 | 75.0 |
| 20 | 24 | 22 | 91.7 |
| 50 | 24 | 24 | 100.0 |
Calculated LOD (95% CI): 18.5 CFU/mL (14.2 - 26.1 CFU/mL). LOB determined as 5 CFU/mL.
Table 2: Analytical Specificity (Cross-Reactivity) Panel Results
| Tested Organism / Material | Concentration Tested | Result (Ct Value or Copies/μL) | Specificity Call |
|---|---|---|---|
| Target: Pseudomonas aeruginosa | 10^3 genomes/rxn | 25.2 (Positive Control) | N/A |
| Staphylococcus aureus | 10^6 genomes/rxn | Undetected | No Cross-Reactivity |
| Escherichia coli | 10^6 genomes/rxn | Undetected | No Cross-Reactivity |
| Candida albicans | 10^6 genomes/rxn | Undetected | No Cross-Reactivity |
| Human Genomic DNA | 50 ng/rxn | Undetected | No Cross-Reactivity |
| Pseudomonas fluorescens (related) | 10^6 genomes/rxn | 38.5 (Late Ct) | Potential Cross-Reactivity |
Visualizations
Title: Workflow for Establishing Assay Sensitivity & Specificity
Title: Root Causes of Poor Sensitivity & Specificity
The Scientist's Toolkit: Research Reagent Solutions
| Item | Function & Rationale |
|---|---|
| Hot-Start DNA Polymerase | Reduces non-specific amplification and primer-dimer formation by requiring thermal activation, crucial for complex sample backgrounds. |
| Digital PCR (dPCR) Master Mix | Enables absolute quantification without a standard curve and is more tolerant of inhibitors, ideal for precise LOD determination in variable matrices. |
| Inhibitor Removal Beads/Columns | Specifically designed to remove common PCR inhibitors (e.g., humic acids, collagen, heparin) from complex biomaterial lysates prior to amplification. |
| Synthetic gBlocks or Armored RNA | Provides stable, quantifiable, non-infectious positive control material for creating precise standard curves and LOD dilution series. |
| Competitor DNA (e.g., Poly d(I-C), Salmon Sperm DNA) | Used as a carrier or background in specificity testing and LOD studies to mimic the complexity of a true sample and reduce non-specific binding. |
| Probe-Based Detection Chemistry (e.g., TaqMan, Molecular Beacons) | Increases specificity over intercalating dyes by requiring probe hybridization, essential for discriminating between closely related targets in multiplex assays. |
| Standard Reference Materials (NIST, ATCC) | Provides characterized, traceable materials for cross-laboratory comparison and validation of sensitivity/specificity claims. |
Troubleshooting Guides & FAQs
Q1: During nucleic acid extraction from a collagen-based scaffold, my standard PCR yields nonspecific products or fails entirely. What could be the issue? A: This is a common challenge due to biomaterial-induced inhibition. Collagen and other matrix components often co-purify with nucleic acids and inhibit polymerase activity. Troubleshooting Steps:
- Assess Inhibition: Perform a standard dilution series of your template. If amplification improves with dilution, inhibition is likely.
- Purify Further: Use a silica-column based clean-up kit after initial extraction. Ethanol precipitation with glycogen carrier can also help.
- Use a Robust Polymerase: Switch to a polymerase mix specifically formulated for inhibited samples (often labeled as "plant," "tissue," or "inhibitor-resistant" polymerases).
- Add Enhancers: Include PCR additives like bovine serum albumin (BSA, 0.1-0.5 µg/µL) or betaine (0.5-1.5 M) in your master mix to bind inhibitors and stabilize the polymerase.
Q2: My qPCR standard curve for a gene expression study in hydrogel-encapsulated cells has poor efficiency (<90% or >110%). How can I fix this? A: Poor efficiency compromises all quantitative data. It often stems from suboptimal reaction conditions or impure template.
- Re-optimize Primer Annealing: Perform a temperature gradient (e.g., 58°C to 65°C) to find the optimal annealing temperature for your primer set.
- Verify Primer Specificity: Check for primer-dimer formation using a melt curve analysis. A single, sharp peak is required. Redesign primers if necessary.
- Template Quality: Re-check RNA/cDNA purity (A260/A280 ~1.8-2.0, A260/A230 >2.0). Re-synthesize cDNA if degraded.
- Master Mix Calibration: Ensure the SYBR Green master mix is appropriate for your template length and concentration. Verify you are not under- or over-loading template (typically 1-100 ng cDNA per 20 µL reaction).
Q3: When switching from qPCR to ddPCR for absolute quantification of a viral vector copy number in a biomaterial delivery system, my results are inconsistent between replicates. What is the cause? A: ddPCR is highly precise, so inconsistency points to technical issues in droplet generation or handling.
- Droplet Generation: Ensure the droplet generator cartridges and gaskets are properly seated and not damaged. Inspect droplets under a microscope; they should be uniform, clear, and not merged.
- Pipetting Technique: Use reverse pipetting for adding oil and sample to the cartridge, as it is more accurate for viscous liquids. Always use fresh, filtered tips.
- Thermal Cycling: Ensure the PCR plate or ramp is fully sealed with a foil gasket rated for high temperatures. Any leak will cause droplet evaporation and coalescence.
- Threshold Setting: Manually review and set the fluorescence amplitude threshold for positive/negative droplets for each sample, as automated settings can sometimes be misled by background.
Q4: For my standard PCR of a low-abundance target from a decellularized tissue, I get weak or faint bands. How can I improve sensitivity? A: Standard PCR is less sensitive than qPCR/ddPCR. Optimization is key for rare targets.
- Increase Cycle Number: Carefully increase the number of amplification cycles (e.g., from 35 to 40). Monitor for increased background.
- Nested/Semi-nested PCR: Design a second set of primers internal to the first amplicon. Re-amplify a small amount of the first PCR product. This dramatically increases specificity and yield.
- Hot Start Polymerase: Use a hot-start enzyme to prevent non-specific priming during reaction setup, which improves specific product yield.
- Touchdown PCR: Start with an annealing temperature above the primer's calculated Tm and decrease it by 1°C every cycle for the first 10 cycles, then continue at the lower temperature. This enriches the specific target early on.
Data Presentation: Performance Comparison
Table 1: Key Performance Characteristics of PCR Technologies for Biomaterial Analysis
| Feature | Standard (Endpoint) PCR | Quantitative PCR (qPCR) | Digital PCR (ddPCR) |
|---|---|---|---|
| Quantitative Output | Semi-quantitative (band intensity) | Relative (Cq) or Absolute (with std curve) | Absolute (copies/µL) |
| Dynamic Range | ~2-3 logs | 7-8 logs | 5 logs (optimal: 1-100,000 copies) |
| Precision & Sensitivity | Low sensitivity, moderate precision | High sensitivity, good precision (CV ~5-15%) | Ultra-high precision, exceptional sensitivity (CV <5%) |
| Tolerance to Inhibitors | Low | Moderate | High (Partitioning mitigates effects) |
| Throughput & Speed | Low throughput, slow (gel analysis) | High throughput, fast (real-time) | Moderate throughput, slower (post-PCR reading) |
| Cost per Sample | Lowest | Moderate | Highest (consumables) |
| Primary Application in Biomaterials | Presence/Absence, cloning, qualification | Gene expression, microbial load, quantification relative to a reference | Absolute viral titer, rare variant detection, copy number variation in complex samples |
Experimental Protocols
Protocol 1: Optimized Nucleic Acid Extraction from Polysaccharide Hydrogels (e.g., Alginate) for qPCR
- Lysis: Dissolve 100 mg of hydrogel in 500 µL of pre-warmed (55°C) chelating buffer (50 mM EDTA, pH 8.0) to disrupt ionic crosslinks. Vortex vigorously.
- Digestion: Add 20 µL of Proteinase K (20 mg/mL) and 50 µL of 10% SDS. Incubate at 56°C for 1-2 hours with gentle agitation.
- Purification: Add an equal volume of phenol:chloroform:isoamyl alcohol (25:24:1). Mix thoroughly and centrifuge at 12,000 x g for 10 minutes at 4°C.
- Precipitation: Transfer the aqueous upper phase to a new tube. Add 0.1 volumes of 3M sodium acetate (pH 5.2) and 2 volumes of ice-cold 100% ethanol. Precipitate at -80°C for 30 minutes.
- Wash: Pellet DNA/RNA by centrifugation at 12,000 x g for 20 minutes at 4°C. Wash pellet with 70% ethanol. Air-dry and resuspend in nuclease-free water or TE buffer.
- DNase/RNase Treatment: Treat with DNase I (for RNA work) or RNase A (for DNA work) according to manufacturer protocols.
- Clean-up: Perform a final purification using a silica-membrane spin column kit. Elute in 30-50 µL elution buffer.
Protocol 2: Droplet Digital PCR (ddPCR) Protocol for Absolute Quantification of Lentiviral Vector Particles in a Polymer Composite
- Sample Preparation: Extract total DNA from the composite using Protocol 1, ensuring final elution in low-EDTA TE buffer or water.
- Reaction Mix Assembly (20 µL for droplet generation):
- ddPCR Supermix for Probes (no dUTP): 10 µL
- Forward & Reverse Primer (20 µM each): 0.9 µL each
- Target-specific FAM-labeled Probe (10 µM): 0.25 µL
- Reference Gene (e.g., RPP30) HEX-labeled Probe (10 µM): 0.25 µL
- DNA Template: 2-5 µL (containing ~100-1000 expected copies of target)
- Nuclease-free water: to 20 µL
- Droplet Generation: Load 20 µL of reaction mix and 70 µL of Droplet Generation Oil into the DG8 cartridge. Place in the droplet generator. Transfer the generated emulsion (~40 µL) to a 96-well PCR plate. Seal with a foil heat seal.
- Thermal Cycling:
- 95°C for 10 min (enzyme activation)
- 40 cycles of: 94°C for 30 sec, 60°C for 60 sec (annealing/extension; ramp rate 2°C/sec)
- 98°C for 10 min (enzyme deactivation)
- Hold at 4°C.
- Droplet Reading: Place plate in the droplet reader. The instrument will count fluorescent positive (FAM+, HEX+, or both) and negative droplets for each channel.
- Analysis: Use the instrument's software to set thresholds and calculate the absolute concentration (copies/µL) using Poisson statistics. Report as mean ± SD of technical replicates.
Visualization: Experimental Workflows
Diagram 1: PCR Method Selection Workflow for Biomaterial Analysis
Diagram 2: ddPCR Quantification Principle
The Scientist's Toolkit: Research Reagent Solutions
Table 2: Essential Reagents for PCR Analysis of Complex Biomaterials
| Reagent / Material | Function & Rationale |
|---|---|
| Inhibitor-Resistant Polymerase Mix | Polymerase formulated with compounds that bind common inhibitors (collagen, polysaccharides, humic acids) found in biomaterials, restoring amplification efficiency. |
| PCR Additives (BSA, Betaine) | BSA binds to inhibitors; betaine reduces secondary structure in GC-rich targets and stabilizes polymerase. Critical for difficult templates. |
| Silica-Membrane Cleanup Kits | For post-extraction purification to remove residual salts, organic solvents, and inhibitors that co-precipitate with nucleic acids. |
| RNase/DNase Inhibitors | Essential for working with easily degradable targets (e.g., mRNA from cells seeded on scaffolds) during extraction and reverse transcription. |
| Droplet Digital PCR (ddPCR) Supermix | Optimized chemical environment for robust amplification within water-in-oil emulsion droplets, crucial for partition-based absolute quantification. |
| Target-Specific Fluorescent Probes | Hydrolysis (TaqMan) probes for qPCR/ddPCR provide superior specificity over intercalating dyes, essential for complex biomaterial-derived samples with potential off-targets. |
| MS2 or Phage Carrier RNA | Added during RNA extraction from low-cell-number biomaterial samples (e.g., early-stage scaffolds) to improve yield by acting as a carrier during precipitation. |
| Certified Nuclease-Free Water & Tubes | Prevents sample degradation and false negatives, a critical baseline for all sensitive molecular biology work. |
Technical Support Center: Troubleshooting & FAQs for PCR Validation Studies
FAQs: Addressing Common Experimental Issues
Q1: Our qPCR data shows high variance in Cq values when amplifying from complex biomaterial lysates. Orthogonal Sanger sequencing confirms the target is present. What is the likely cause and how can we resolve it? A1: This discrepancy often stems from PCR inhibitors co-purified with the target. While the target is present (confirmed by sequencing), inhibitors cause inefficient amplification, leading to late and variable Cq values.
- Troubleshooting Protocol:
- Dilution Test: Perform a 1:5 and 1:10 dilution of your template. A decrease in Cq proportional to dilution suggests inhibition is being reduced.
- Internal Control (IC) Spike-in: Use an exogenous IC (e.g., from a different species) added to the sample post-lysis. A delayed or absent IC signal confirms presence of inhibitors.
- Purification Enhancement: Repeat nucleic acid extraction with an additional wash step or use a purification column designed for inhibitor removal (e.g., with silica membrane or bead-based clean-up).
- PCR Additive Optimization: Titrate PCR additives like BSA (0.1-1 µg/µL) or betaine (0.5-1.5 M) to counteract specific inhibitors.
Q2: When validating a gene expression panel via qPCR with orthogonal RNA-Seq, we find poor correlation (R² < 0.7) for low-abundance targets. What are the systematic factors to check? A2: This is a common challenge due to the different detection fundamentals and sensitivity limits of each method.
- Troubleshooting Guide:
- Primer Specificity Re-evaluation: Run a melt curve analysis and gel electrophoresis. Re-BLAST primer sequences against the most recent genome build. Non-specific products can inflate qPCR signals.
- RNA-Seq Mapping Stringency: Verify the alignment quality (MAPQ score) and read depth for the discrepant loci in your RNA-Seq data. Low or ambiguous mapping can lead to underestimation.
- Dynamic Range Alignment: Ensure your qPCR standard curve spans the entire range of target expression, especially the low end. Compare the Limit of Detection (LOD) for both techniques.
- Normalization Discrepancy: Re-examine your choice of reference genes (qPCR) and housekeeping genes/normalization strategy (RNA-Seq). Use a geometric mean of at least three validated reference genes.
Q3: For digital PCR (dPCR) absolute quantification validated by a hybridization-based method (e.g., Northern Blot), the dPCR count is consistently higher. What could explain this? A3: dPCR is more sensitive and less susceptible to amplification efficiency biases than bulk qPCR, often yielding higher absolute counts.
- Systematic Check Protocol:
- Northern Blot Probe Specificity: Confirm the probe used for hybridization does not span splice variants or homologous sequences absent in your target. Re-validate probe specificity via a BLAST check.
- dPCR Partitionation Inspection: Review the amplitude or fluorescence plots of your dPCR run. Check for rain (intermediate clusters) between positive and negative partitions, which may indicate template degradation or sub-optimal thermal cycling.
- Sample Integrity for Hybridization: Ensure the RNA integrity number (RIN) is >7 for Northern Blot. Degradation can significantly reduce hybridization signal independent of actual copy number.
- Calibration with Synthetic Standard: Use a synthetic, sequence-matched RNA transcript of known concentration as a universal calibrator for both methods to identify which platform deviates.
Quantitative Data Summary: Typical Performance Metrics of Orthogonal Methods
Table 1: Comparison of Validation Methods for PCR-Based Assays
| Method | Typical Sensitivity | Key Advantage for Validation | Primary Limitation | Typular Time-to-Result |
|---|---|---|---|---|
| Sanger Sequencing | ~15-20% variant allele frequency | Direct nucleotide sequence confirmation; gold standard for identity. | Low sensitivity; poor for mixed/low-abundance targets. | 1-2 days |
| NGS (e.g., RNA-Seq) | Can detect 1 transcript per cell | Unbiased, genome-wide profiling; discovers novel isoforms/sequences. | High cost, complex bioinformatics; indirect quantification. | 3-7 days |
| Microarray Hybridization | High (depends on probe design) | High-throughput, multiplexed detection of known targets. | Limited dynamic range; cross-hybridization risks. | 2-3 days |
| Digital PCR (dPCR) | Can detect <0.001% MAF | Absolute quantification without standard curves; high precision. | Limited multiplexing; higher cost per target than qPCR. | 4-6 hours |
| Immunoassay (e.g., Wes) | ~pg-ng/mL (protein) | Direct protein-level validation; measures functional product. | Depends on antibody quality/availability; different analyte (protein). | 1 day |
Experimental Protocols for Key Validation Experiments
Protocol 1: Spike-In Internal Control for Inhibition Detection in qPCR
- Reagent Prep: Obtain a non-competitive synthetic DNA or RNA control fragment (e.g., from Arabidopsis thaliana) that is absent in your sample.
- Spike-in: Add a fixed amount (e.g., 10⁴ copies) of this control to your sample lysate after the lysis step but before nucleic acid purification.
- Co-extraction: Proceed with the standard extraction protocol. The control will undergo the same purification process.
- Co-amplification: In a separate well/assay from your target, amplify the spike-in control using its specific primers/probe.
- Analysis: Compare the Cq of the spike-in recovered from the sample to the Cq of the spike-in in a neat buffer. A ΔCq > 2 indicates significant inhibition.
Protocol 2: Target-Specific ddPCR for Absolute Quantification Prior to NGS
- Assay Design: Design primer/probe sets for your target(s) per dPCR guidelines (amplicon size 70-150 bp).
- Partition Generation: Use 20-40 ng of input DNA/cDNA to prepare the droplet reaction mix. Generate 20,000 droplets per sample using an automated droplet generator.
- Amplification: Run PCR with a standard thermal profile, ensuring the ramp rate is ≤2°C/sec for optimal droplet integrity.
- Droplet Reading: Measure endpoint fluorescence in each droplet using a droplet reader.
- Threshold Analysis: Set fluorescence thresholds to distinguish positive from negative droplet populations using the manufacturer's software. Apply Poisson statistics to calculate the absolute copy number per microliter of input.
The Scientist's Toolkit: Research Reagent Solutions
Table 2: Essential Reagents for PCR & Orthogonal Validation Workflows
| Reagent / Material | Function in Validation Context |
|---|---|
| Inhibitor-Resistant DNA Polymerase | Ensures robust amplification from complex biomaterials (e.g., soil, tissue, blood) where inhibitors are present. |
| Synthetic Spike-in Control (RNA/DNA) | Provides an internal reference for extraction efficiency, inhibition monitoring, and normalization across platforms. |
| Digital PCR Supermix (for Probes) | Optimized chemistry for precise partitioning and endpoint fluorescence detection in absolute quantification assays. |
| High-Sensitivity DNA/RNA Assay Kit | Accurately quantifies low-yield nucleic acid extracts prior to downstream validation methods like NGS. |
| NGS Library Prep Kit with Dual Indexes | Enables multiplexed, high-complexity sequencing runs for transcriptome-wide correlation with PCR data. |
| Validated Reference Gene Assay Panel | A pre-validated set of human/mouse/rat reference gene assays for reliable qPCR normalization. |
| Nucleic Acid Clean-up Beads (SPRI) | Size-selective purification for removing primer dimers, enzymes, and salts before sequencing or re-amplification. |
Workflow & Relationship Diagrams
Title: PCR Assay Validation via Orthogonal Methods Workflow
Title: Troubleshooting PCR Inhibition from Complex Samples
Technical Support Center: Troubleshooting PCR Variability for Complex Biomaterials
FAQs & Troubleshooting Guides
Q1: Our intra-assay CV for target quantification from decellularized extracellular matrix (dECM) samples is unacceptably high (>25%). What are the primary suspects? A: High intra-assay variability with complex biomaterials often points to issues of sample heterogeneity or inefficient reverse transcription.
- Troubleshooting Steps:
- Homogenization: Ensure the dECM or biomaterial is uniformly homogenized prior to RNA/DNA extraction. Use mechanical disruption (bead beating) consistent across all samples.
- Inhibition Check: Perform a 1:2 and 1:5 dilution of your cDNA/qPCR reaction. If the CT value decreases with dilution, PCR inhibitors co-purified from the biomaterial are present.
- RT Consistency: Use the same master mix for all reverse transcription reactions within an assay. Ensure the thermocycler block is calibrated; uneven heating can cause significant well-to-well variation.
- Protocol: Inhibition Test.
- Prepare a qPCR master mix with your target assay.
- Aliquot into three tubes. Add undiluted cDNA (1X), 1:2 diluted cDNA, and nuclease-free water (no-template control, NTC).
- Run qPCR. A decrease in CT value in the diluted sample confirms inhibition. Re-purify nucleic acids or dilute samples prior to RT/qPCR.
Q2: Inter-assay variability is hindering our ability to compare gene expression data from 3D bioprinted constructs across different experimental days. How can we normalize this? A: Inter-assay (run-to-run) variability requires rigorous normalization and reference standards.
- Troubleshooting Steps:
- Inter-Plate Calibrator (IPC): Include a well-characterized, stable cDNA sample (e.g., from a control cell line) on every plate. Use its CT values to apply a plate-to-plate correction factor.
- Multiple Reference Genes: Use a panel of at least 3 validated reference genes (e.g., GAPDH, HPRT1, 18S rRNA) and employ software (e.g., NormFinder, geNorm) to determine the most stable ones for your specific biomaterial system. Do not rely on a single housekeeping gene.
- Master Mix Batch: Use the same manufacturer's lot of qPCR master mix for a contiguous study to reduce reagent-based drift.
Q3: When analyzing low-abundance targets from single-cell-laden hydrogels, we sometimes get non-reproducible amplification (late CT, inconsistent replicates). What optimizations are critical? A: This targets the assay's limit of detection and requires optimization of sensitivity and specificity.
- Troubleshooting Steps:
- Primer Design/Selection: Redesign primers to have a melting temperature (Tm) of 58-62°C, amplicon length of 80-150 bp, and avoid secondary structures. BLAST for specificity.
- Annealing Temperature Optimization: Perform a thermal gradient qPCR (e.g., 55°C to 65°C) to identify the temperature yielding the lowest CT and highest amplification efficiency.
- Touchdown PCR: Implement a touchdown protocol (start 3-5°C above calculated Tm, decrease 1°C per cycle for 5-10 cycles) to increase early-cycle specificity for rare targets.
- Protocol: Annealing Temperature Gradient.
- Prepare a single qPCR master mix with primer set and template.
- Aliquot into wells. Set the thermocycler's annealing/extension step to a gradient spanning at least 55°C to 65°C.
- Analyze the amplification curves and melt curves. The optimal temperature provides the lowest CT, highest RFU, and a single, sharp melt peak.
Q4: How do we systematically document and report intra- and inter-assay variability for publication in studies involving patient-derived xenograft (PDX) biomaterial analysis? A: Adhere to the MIQE guidelines. Report the following as a minimum:
- Intra-assay Precision: Mean CT, Standard Deviation (SD), and Coefficient of Variation (%CV) for technical replicates (n≥3) for a high, medium, and low-expressing sample.
- Inter-assay Precision: Same metrics across at least three independent runs performed on different days.
- Amplification Efficiency: For each assay, derived from a standard curve (5-point, 1:10 dilutions, R² > 0.99, efficiency 90-110%).
Quantitative Data Summary
Table 1: Example Variability Metrics from an Optimized vs. Non-Optimized PCR Assay for Collagen Type I (COL1A1) in dECM Samples
| Parameter | Non-Optimized Assay | Optimized Assay | Acceptance Threshold |
|---|---|---|---|
| Intra-assay CV (n=6) | 28.5% | 4.2% | < 15% |
| Inter-assay CV (n=3 runs) | 22.1% | 8.7% | < 20% |
| Amplification Efficiency | 78% | 98% | 90–110% |
| Standard Curve R² | 0.985 | 0.999 | > 0.990 |
Table 2: Key Research Reagent Solutions for PCR of Complex Biomaterials
| Reagent / Material | Function & Importance |
|---|---|
| Bead-based Homogenizer | Provides consistent mechanical lysis of fibrous biomaterials (e.g., dECM, hydrogels) for uniform nucleic acid extraction. |
| Inhibitor-Removal Columns | Specialized silica membranes or beads that remove polysaccharides, polyphenols, and salts common in biomaterials that inhibit PCR. |
| Reverse Transcriptase w/ RNase H- | High-efficiency enzyme for consistent cDNA synthesis from often-degraded RNA in processed biomaterials. |
| Hot-Start DNA Polymerase | Prevents non-specific amplification and primer-dimer formation during reaction setup, crucial for low-abundance targets. |
| Dual-Labeled Probe (e.g., TaqMan) | Increases specificity over SYBR Green for homologous gene families or samples with potential contaminating DNA. |
| Synthetic cDNA Spike-in (e.g., SPIKE RNA) | Exogenous control added pre-extraction to monitor and normalize for extraction efficiency and RT variability across samples. |
Experimental Protocol: Standard Curve Generation for Efficiency Calculation
- Template Preparation: Use a plasmid containing the target sequence or a high-expression cDNA sample. Quantify accurately via spectrophotometry (NanoDrop).
- Serial Dilution: Perform a 1:10 serial dilution in nuclease-free water to create at least 5 data points covering the expected CT range (e.g., from 10 to 10^5 copies). Use low-bind tubes.
- qPCR Setup: Run each dilution in triplicate using your optimized qPCR master mix and cycling conditions. Include NTCs.
- Analysis: Plot the mean CT value (Y-axis) against the log of the starting quantity (X-axis). Perform linear regression. Efficiency = (10^(-1/slope) - 1) * 100%.
Visualizations
Title: Workflow for PCR Variability Assessment in Biomaterials
Title: Root Causes of Intra vs. Inter Assay Variability
Technical Support Center: Troubleshooting PCR for Complex Biomaterials
Context: This support content is derived from research conducted for a thesis on PCR optimization for complex biomaterial targets, focusing on overcoming inhibition and access challenges in structured samples like biofilms and fibrotic tissues.
FAQs & Troubleshooting Guides
Q1: In biofilm microbial detection, my qPCR shows delayed Ct values and reduced amplification efficiency compared to planktonic cell assays. What is the primary cause and solution?
A: The primary cause is the combined effect of polysaccharide-mediated PCR inhibition and inefficient cell lysis within the biofilm matrix.
- Solution: Implement a dual pre-treatment protocol:
- Physical Disruption: Homogenize the biofilm sample using bead beating (0.1mm glass/zirconia beads) for 45 seconds at 4°C.
- Inhibitor Removal: Purify nucleic acids using a kit designed for complex samples (e.g., with polyvinylpyrrolidone or activated charcoal columns). See Table 1 for data.
Q2: When analyzing gene expression in fibrotic tissue, my reverse transcription (RT) efficiency is inconsistent, leading to high variability in downstream qPCR. How can I stabilize this?
A: Inconsistency often stems from co-purified collagen and other extracellular matrix (ECM) components interfering with the RT enzyme.
- Solution:
- Modified RNA Cleanup: After standard extraction, add a precipitation step with 2M LiCl (incubate at -20°C for 30 min). LiCl preferentially precipitates RNA, leaving more contaminating polysaccharides and proteins in solution.
- RT Optimization: Use a robust reverse transcriptase (e.g., a thermostable group II intron reverse transcriptase) and include 5% trehalose in the RT reaction mix to enhance enzyme stability. Increase RT reaction time to 60 minutes at 50°C.
Q3: For duplex PCR targeting a pathogen and a host gene in an infected biofilm, I observe failure in one channel. How do I rebalance the assay?
A: This indicates severe competition for resources, often due to extreme differences in target abundance or probe-binding efficiencies.
- Solution: Perform an asymmetric primer redesign and concentration titration.
- Redesign the primer for the failed target to have a higher Tm (e.g., 65-68°C) than the successful primer pair (60-63°C).
- Titrate primer concentrations. Start with a 10:1 ratio of Limiting Primer : Excess Primer for the low-abundance target. See Table 2 for a sample experimental setup.
Q4: My extraction yield from fibrous tissue is high, but my qPCR shows partial inhibition (confirmed by spike-in control). What additive can I include in the PCR mix?
A: Add PCR enhancers that counteract specific inhibitors.
- Solution: Supplement your master mix with a combination of:
- BSA (0.4 μg/μL): Binds to phenolic compounds and humic acids.
- TMA Oxalate (5 mM): Effective against polysaccharides and collagen remnants.
- Note: Avoid overuse of enhancers as they can reduce specificity. Always run an inhibition test (spike-in control) with the new formulation.
Data Presentation
Table 1: Impact of Pre-Treatment on qPCR Efficiency from Pseudomonas aeruginosa Biofilms
| Pre-Treatment Method | Mean Ct (16S rRNA gene) | Calculated Efficiency (E) | Yield (ng DNA/μL) | Inhibition Test (ΔCt) |
|---|---|---|---|---|
| Direct Lysis (Kit only) | 28.5 ± 1.2 | 78% | 15.3 ± 2.1 | 3.8 (High) |
| Bead Beating + Kit | 24.1 ± 0.4 | 95% | 42.7 ± 5.6 | 0.5 (Low) |
| Enzymatic Digestion (DNase I) + Kit | 26.8 ± 0.9 | 85% | 21.4 ± 3.8 | 2.1 (Medium) |
ΔCt = Ct (sample with spike) - Ct (pure spike). ΔCt > 1 indicates inhibition.
Table 2: Primer Rebalancing for Duplex PCR in Candida albicans Biofilm/Host Model
| Target (Abundance) | Standard Conc. (nM) | Optimized Conc. (nM) | Result at Opt. Conc. |
|---|---|---|---|
| C. albicans ACT1 (High) | 500 | 200 (Limiting) | Clear, separated peaks |
| Human GAPDH (Low) | 500 | 600 (Excess) | Robust detection in duplex |
Experimental Protocols
Protocol: Optimized Nucleic Acid Extraction from Fibrotic Tissue for qPCR
- Homogenization: Snap-freeze 20-30 mg tissue in LN₂. Pulverize using a cryomill. Transfer powder to a tube with 600μL RLT Plus buffer (with β-mercaptoethanol).
- Disruption: Homogenize further using a rotor-stator homogenizer for 30 seconds on ice.
- Digestion: Add Proteinase K (20 mg/mL) to a final concentration of 1.2 mg/mL. Incubate at 56°C with shaking (900 rpm) for 60 minutes.
- RNA Isolation: Follow manufacturer's protocol for silica-membrane column kits. Include an on-column DNase I digestion step (15 min).
- Post-Elution Cleanup: Add 0.1 volume 2M LiCl and 2.5 volumes 100% ethanol to the eluted RNA. Precipitate at -80°C for 30 min. Centrifuge at 12,000g for 20 min at 4°C. Wash pellet with 80% ethanol. Resuspend in nuclease-free water.
- Quality Control: Assess RNA Integrity Number (RIN) via Bioanalyzer. Accept samples with RIN > 7.0 for gene expression studies.
Protocol: Inhibition Testing via Exogenous Spike-in Control
- Spike Preparation: Use a commercially available synthetic DNA or RNA vector with a unique sequence not found in your sample (e.g., from Arabidopsis thaliana).
- Spiking: Aliquot your purified sample DNA/RNA. Add a known amount of spike (e.g., 10⁴ copies) to one aliquot. Keep a second aliquot unspiked. Set up a control reaction with the spike alone in water.
- qPCR: Run all samples with primers/probes specific for the spike target.
- Calculation: Calculate ΔCt = Ct (spiked sample) - Ct (spike alone control). A ΔCt > 1.0 indicates the presence of PCR inhibitors in your sample extract.
Visualizations
Workflow for Complex Biomaterial Nucleic Acid Analysis
PCR Inhibition Pathways and Neutralization Strategies
The Scientist's Toolkit: Research Reagent Solutions
| Item | Function in Complex Sample PCR |
|---|---|
| Zirconia/Silica Beads (0.1mm) | Physical disruption of tough matrices (biofilms, tissue) for cell lysis. |
| Inhibitor Removal Columns (e.g., with PVP) | Selective binding of polyphenolic, polysaccharide, and humic acid inhibitors. |
| LiCl (2M Solution) | High-salt precipitation for selective RNA isolation, leaving contaminants in supernatant. |
| Trehalose | Stabilizes reverse transcriptase and DNA polymerase against inhibitors and high temps. |
| BSA (Molecular Biology Grade) | Non-specific binding agent that sequesters common PCR inhibitors. |
| Tetramethylammonium (TMA) Oxalate | PCR enhancer that chelates metal ions and neutralizes polysaccharide inhibitors. |
| Synthetic Spike-in Control | Exogenous sequence used to accurately test for and quantify PCR inhibition. |
| Thermostable Group II Intron RT | Robust reverse transcriptase with high tolerance to inhibitors and temperature. |
Conclusion
Optimizing PCR for complex biomaterials is a systematic, iterative process that requires a deep understanding of both the sample's inhibitory properties and the molecular assay's parameters. Success hinges on integrated strategies: rigorous sample pre-processing, judicious use of specialized reagents and additives, and meticulous validation against robust benchmarks. The advancements in inhibitor-resistant polymerases and digital PCR technologies are particularly promising for pushing detection limits. Mastering these techniques is paramount for researchers in drug development and biomedical science, enabling accurate genetic analysis from challenging but clinically relevant samples, thereby accelerating discoveries in personalized medicine, pathogen detection, and biomaterial engineering. Future directions will likely involve greater automation of optimization workflows and the integration of machine learning to predict optimal conditions based on sample metadata.